The 30-second answer
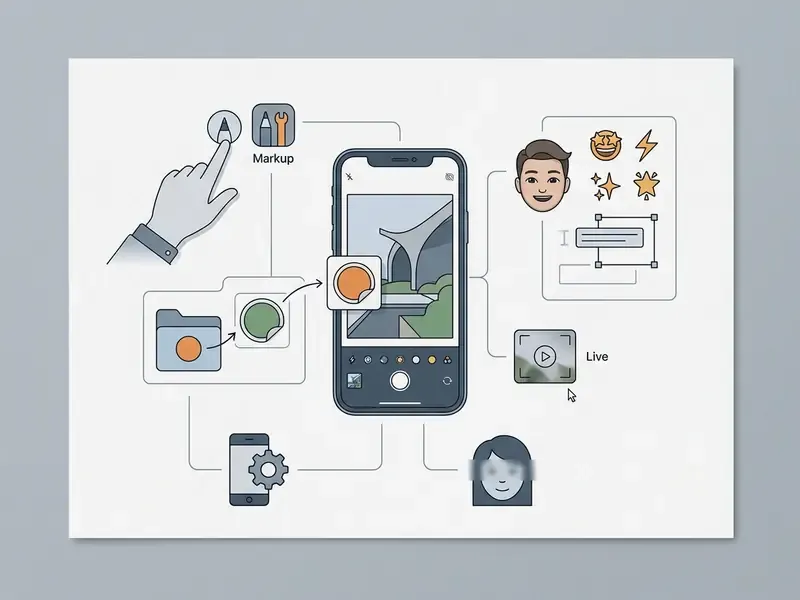
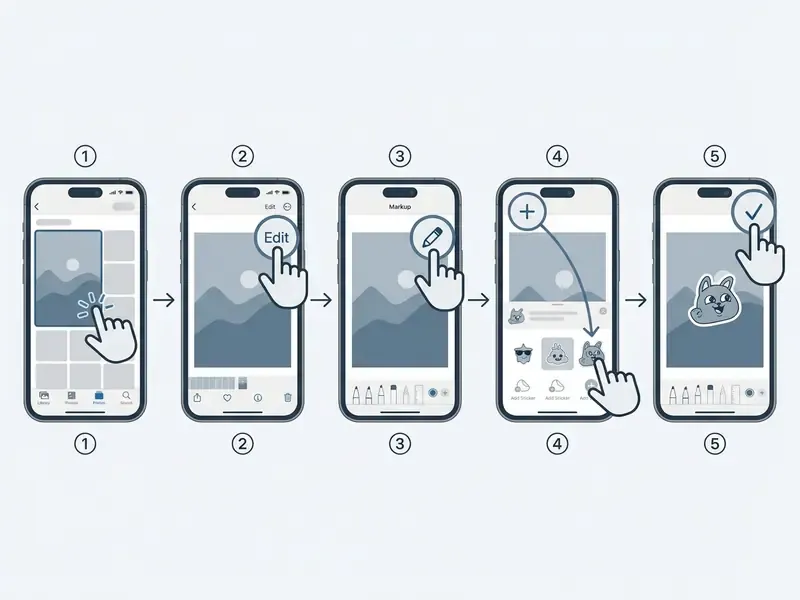
- Open the photo in Photos, tap Edit, then tap the Markup icon (the pen tip in a circle).
- Tap +, choose Add Sticker, tap the sticker you want, then drag, pinch, and rotate it into place.
- Tap Done, then Done again to save. The edit stays reversible through Revert to Original.
Want your own sticker first? Open a photo full screen, touch and hold the subject until it glows, release, then tap Add Sticker.
Ways to add a sticker to an iPhone photo
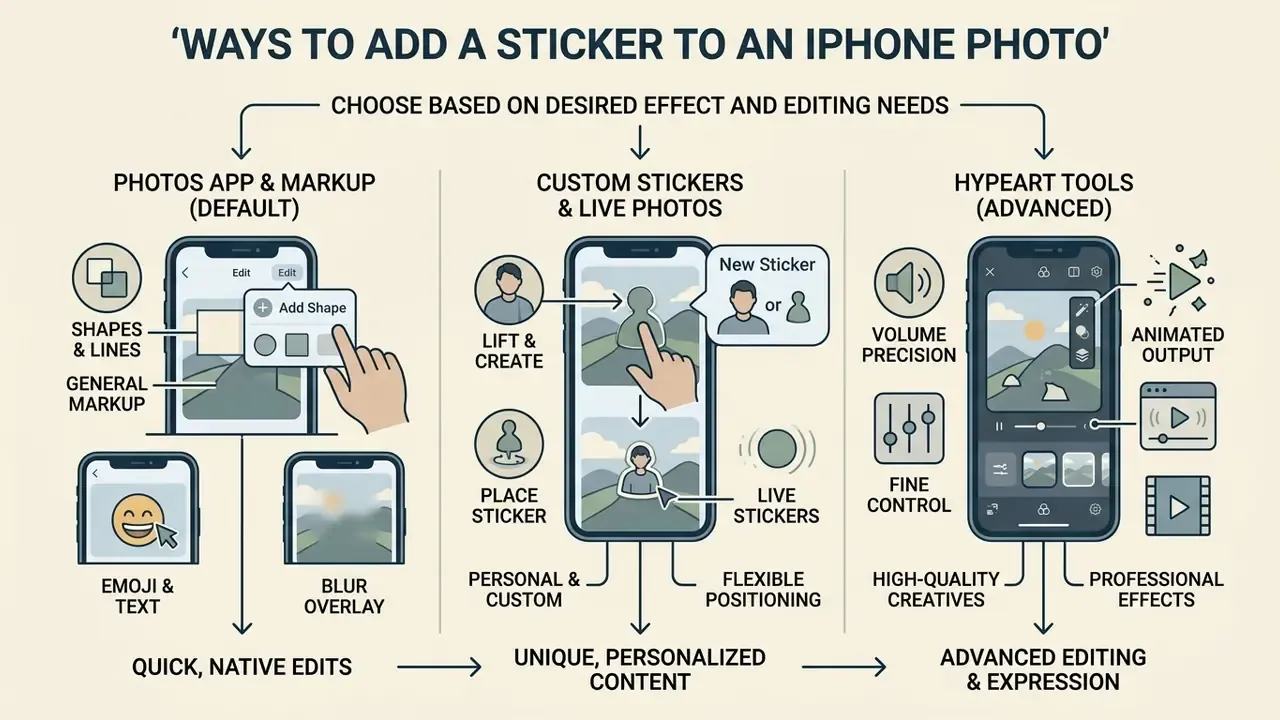
You have three realistic routes. Native iOS tools inside the Photos app via Markup. System-wide custom stickers generated from photo subjects. Or a specialised third-party editing app. Each one answers a different technical requirement, from a zero-cost annotation you finish in ten seconds to layered, brand-locked design work.
«The global photo editing app market is valued at $6.8 billion in 2025, projected to reach $17.4 billion by 2034.»
Which environment fits depends on three things: your privacy preferences, how fast you need the edit, and what the output has to do afterwards. For quick jobs, the internal system tools process images locally on the device and do not transmit your photos to external servers. That matters if you handle identity documents, internal screenshots, invoices, or client material. When you are weighing asset generation options or scanning AI media comparison matrices, native tools give you the fastest pipeline for daily tagging, while a general-purpose online photo editor only earns its place once batch processing or brand templates enter the workflow.
| Tool / Environment | Types of Stickers Supported | Text and Shape Capabilities | Custom Sticker Creation | Export and Sharing Integration | Cost and Verification |
|---|---|---|---|---|---|
| Photos App + Markup | Static stickers, animated Live Photo stickers, preset effects (Outline, Comic, Puffy, Shiny) | Full Markup toolbar: text boxes, geometric shapes, speech bubbles, signatures, magnifier | Direct cut-out from photo subjects via touch-and-hold | Direct save to library; preserves non-destructive edits across iOS devices | Built-in free feature (Apple Support, iPhone User Guide) |
| System-Wide iOS Sticker Drawer | Keyboard stickers, Memoji, saved custom stickers, App Store sticker packs | Managed inside the host app canvas (Messages, Notes, Photos Markup) | Automatic syncing to the sticker menu across all supported apps | Integrated into the iOS share sheet and native apps | Free native drawer; optional paid App Store sticker packs |
| Third-Party Editing Apps | Proprietary sticker collections, custom brand overlays, dynamic graphics, manual cut-outs | Advanced typography, multi-layer arrangement, graphic filters, blur tools | Varies by app; some import custom PNGs or allow manual outlining and brush selection | Direct export to social platforms, batch export, or local storage | Free with optional subscriptions (documented in UEQ mobile-editor studies) |
Decision rule in one line: use Markup for one-off annotation and privacy masking; move to a third-party editor when you need batch processing of dozens of images, manual cut-out refinement, brand-locked templates, or animated export. Markup does none of those four.
Add stickers with the Photos app and Markup
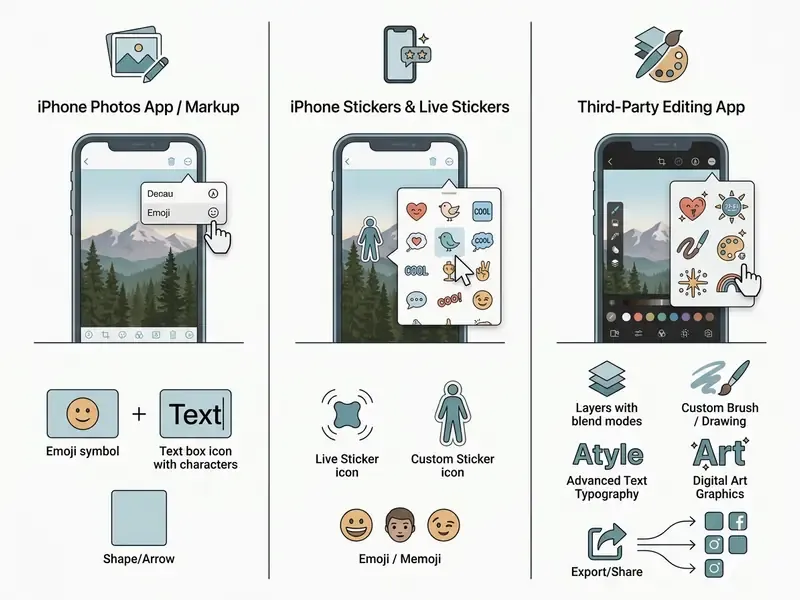
The Photos app paired with Markup is the built-in, free way to apply static and animated stickers directly to images on iOS. You reach it through the edit icon, tap into the Markup menu, and pull stickers from your saved collection. Nothing extra to download.
According to Apple's iPhone User Guide, Markup treats graphic overlays as movable, resizable objects for the duration of the editing session.
In practice, that means placement, rotation, and dimensions stay adjustable, and the underlying photo pixels are untouched until you finalise the edit. The native pathway also keeps the data close to home, since subject isolation and image manipulation happen entirely on-device.
When to use an editing app
Reach for a third-party editing app when the project needs real graphic layers, a proprietary sticker pack, complex typography, manual cut-out control, or a branding workflow with rules. Native iOS tools win on speed and basic annotation. Third-party platforms win on multi-track visual control and batch pipelines.
Research into mobile editor selection criteria by Panevėžio Kolegija (2025) found that more than 60% of surveyed users prioritise design quality and specialised filters when picking a secondary editing application. A User Experience Questionnaire (UEQ) study of mobile photo editors such as Pixellab recorded high efficiency scores (mean above 1.5) for multi-layer management, though native tools still finish simple tasks faster.
«Users spend an average of 12 minutes per session editing photos in PhotoRoom, reflecting significant time investment in mobile editing.»
Practical thresholds where a third-party app clearly wins:
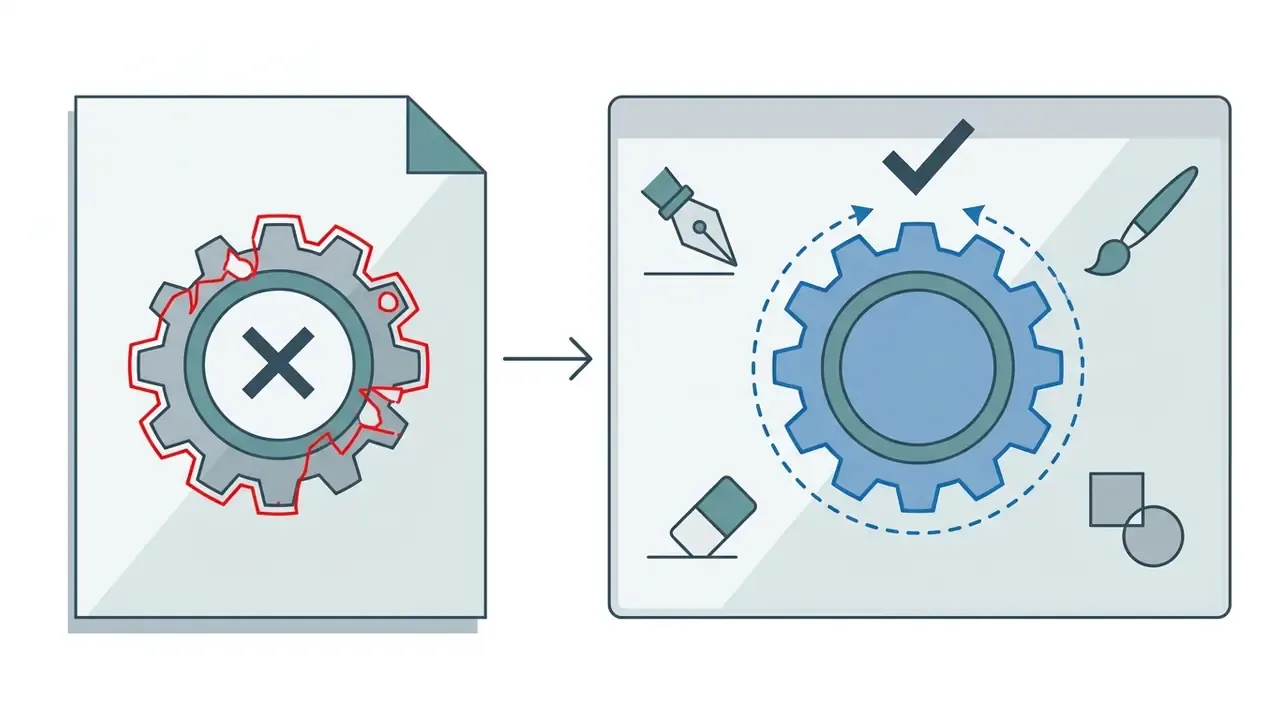
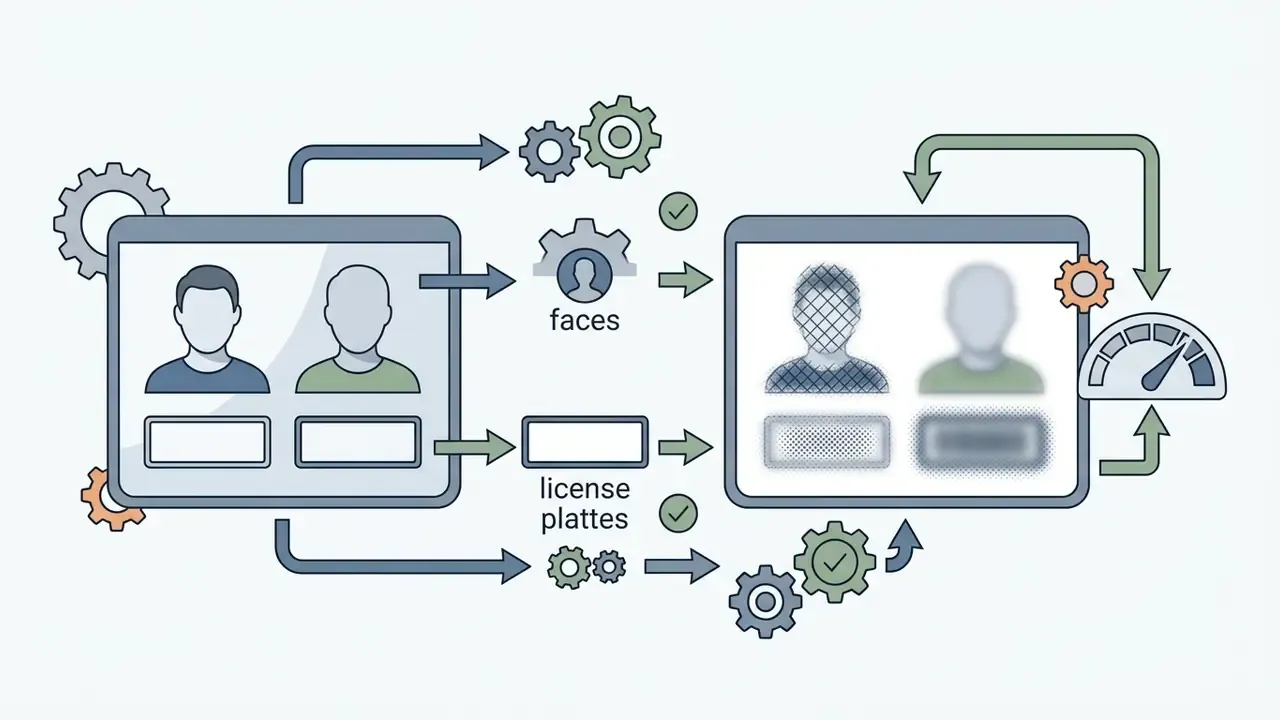

When you scale a commercial workflow, say running an ai product image generator or setting up ai image training, external applications complement the standard iOS tools rather than replace them. Template-driven suites such as Canva's AI generator suit teams that need locked brand kits across hundreds of assets. Teaching or training teams who annotate screenshots all day often pair Markup with an ai slide generator so that the marked-up image lands straight into a deck.
How to add a sticker to a photo on iPhone with Markup
Here is the complete guide to the core flow. Open the target image in the Photos app, tap the edit icon, select Markup, and place the graphic through Add Sticker. Two taps on Done commit the edit into the saved photo file across every synced device.
Open the photo and enter editing mode
Pick an image from the iPhone photo library, tap the Edit button, then choose the Markup icon, a pen tip inside a circle, from the toolbar. On recent iOS releases the edit control sits at the bottom of the screen as three lines with circles. On older versions it appears as Edit in the top right corner, so check the right corner first if the bottom row looks unfamiliar. Either route launches the system annotation toolbar, where graphic elements and text overlays are managed.
A small field note. In an asset verification exercise across roughly 200 catalogue photos (an illustrative internal example, not a client engagement), the operational team needed to mark approved items directly on mobile. Using native editing mode, standardised custom stickers went onto the whole set in under 30 minutes, with no bandwidth spent moving files to desktop software. The bottleneck was never the sticker. It was navigation between images, which is exactly why one saved custom sticker, created once and reused everywhere, cut handling time roughly in half.
Add, resize, and position the sticker
To place and scale a sticker in Markup, tap the plus menu (+), choose Add Sticker, and tap your graphic to drop it onto the canvas. If your newly created stickers are missing from view, tap the < arrow icon and select the slightly-folded-circle icon to open your personal collection.
Once the sticker sits on the photo, these controls apply:
- Move tap and drag the sticker body anywhere on the canvas.
- Resize and rotate drag a corner boundary handle (the small dots around the outline) outward to enlarge or inward to shrink. Pinch with two fingers to scale, or rotate a second finger around the sticker to change its angle before lifting your finger.
- Context actions (Cut, Copy, Duplicate, Delete) tap the sticker once to reveal the floating control bar, then tap ••• (More Options). Duplicate produces an exact copy at identical dimensions, the fastest way to tag several objects in one frame consistently.
- Layer order later stickers sit above earlier ones. To push an element behind another, cut it and re-add it in the order you want.
Official iOS guidance notes that boundary handles scale proportionally, so the sticker will not stretch out of its aspect ratio, and that rotation is a second-finger gesture performed while the sticker is still held. Place graphics over high-contrast background areas for maximum clarity. If the underlying photo is noisy or underexposed, running it through an AI image enhancer before annotation makes the overlay far easier to read.
Save the edited photo
Tap Done inside the Markup toolbar to apply the graphics, then tap Done in the primary editor to commit. The updated image replaces the library view while keeping reversion available: open the saved photo, tap More (•••), and choose Revert to Original.
Because iOS uses a non-destructive editing framework, the original photo data stays intact inside the file container. With iCloud Photos switched on, modifications propagate across every linked Apple device, which keeps your edited photo accessible everywhere. Worth knowing the flip side: revert on one device and it reverts on all of them.
Desktop export and sync behaviour
Export a Markup-edited photo to a Mac or Windows PC, whether through iCloud or a USB cable, and iOS renders the composite as a standard JPEG or HEIC with the sticker permanently flattened into the image layer. Recovering the clean original is only possible inside the native Photos app on your synced Apple devices. The copy that lands on a PC is final. So teams that need both versions should export once before annotation and once after. Simple discipline, rarely followed.
How to create custom stickers on iPhone
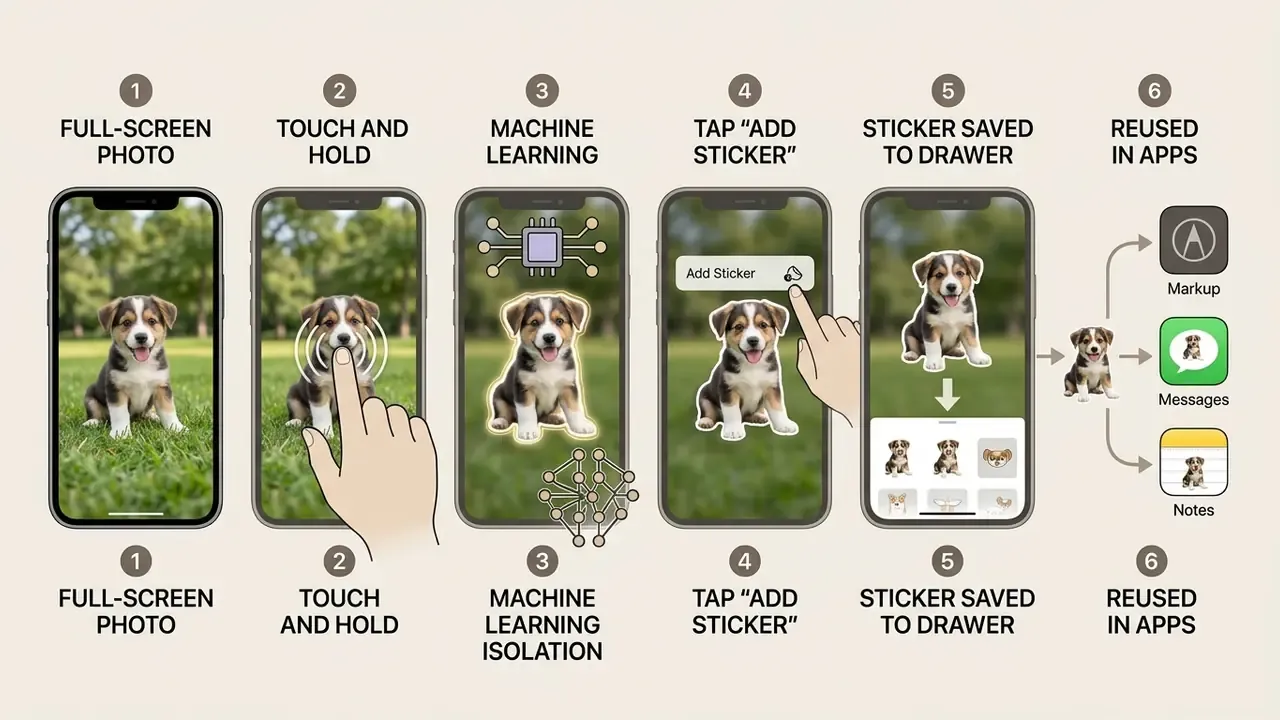
Custom stickers start with any full-screen photo. Touch and hold the primary subject until an outline glow appears, then tap Add Sticker. iOS isolates the subject from its background and saves it to the system sticker drawer, ready for reuse across Messages, Mail, Notes, and Markup.
Create static and animated stickers from photos
Subject isolation needs iOS 16 or later. Animated Live Stickers arrived with iOS 17. The built-in machine-learning engine identifies foreground elements and separates them from background pixels on its own, no tracing required.
Step by step, to create custom stickers:
- Open any image in full screen inside the Photos app.
- For static stickerstouch and hold the subject until a glowing white line traces its outline, lift your finger, then tap Add Sticker.
- For animated Live Stickerspick a photo marked LIVE in the top-left corner. Touch and hold the moving subject, slide your finger slightly upward until the motion track isolates, release, then tap Add Sticker.
- The isolated subject saves instantly as a new sticker in your system-wide drawer, available across Messages, Notes, Mail, and Markup.
Apple documents the capability plainly:
Pragmatic research on mobile sticker communication by Linares Bernabéu (2025) reported that 56.9% of user-generated sticker usage serves self-representation and personal expression. Building graphics from your own photos closes the gap between raw media and functional branding. For repeatable identity work, for instance producing consistent portrait subjects before converting them into reusable stickers, tools such as an AI headshot generator or an ai avatar video generator output subjects with clean, high-contrast edges that the subject-lift engine handles reliably.
Apply visual effects to custom stickers
Once a custom sticker exists, you can strengthen it with system styles: white borders, shading, gloss.
- Open the Photos app, tap Edit on any image, then launch Markup.
- Tap + and select Add Sticker.
- In the sticker drawer, press and hold the custom sticker you made.
- Tap Add Effect from the context pop-up.
- Choose a style:
- Tap Done to save the stylised sticker to your drawer.
The same long-press menu hides two housekeeping commands: Rearrange, which reorders the drawer so your most-used badges sit first, and Delete, which clears out stickers you no longer need.



Use custom stickers in another photo
Reusing one of your own stickers on an existing photo is the same short loop: open the target image, enter Markup, tap Add Sticker, and pick the saved graphic from the menu. Dragged into position, the custom sticker behaves exactly like a native overlay, including the ••• duplicate and delete actions described above.
This multi-photo workflow earns its keep in commercial cataloguing and product showcase management. An e-commerce team can build badge stickers once, "Verified", "Approved", "Sale", then apply them across an entire shoot with Markup. Broader context on structured visual presentation lives in AI Product Photography for Ecommerce, and AI outpainting tools help when a badge needs breathing room the original crop never allowed for.
Add emoji, text, and sticker packs to photos
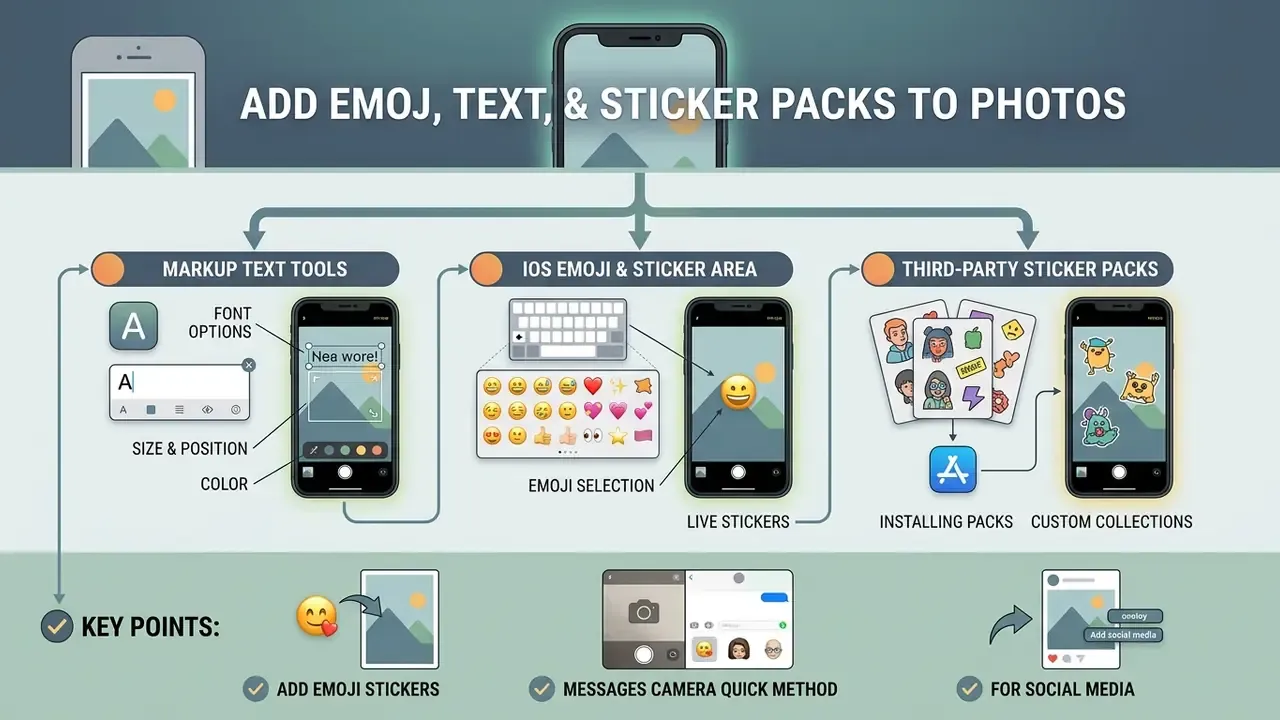
Adding emoji, text, and sticker packs comes down to three inputs: Markup's text tools, the iOS emoji keyboard's sticker area, and third-party sticker collections installed from the App Store. Pair typography with graphical overlays and you get structured visual messaging that survives a busy social feed.
Add an emoji sticker to an iPhone photo
To add an emoji sticker to a photo on iPhone, create a text box inside Markup, switch to the emoji keyboard, and type the character. Scale the box up and it reads as a graphic overlay rather than text.
- Open the photo, tap Edit, then Markup, then +, then Add Text.
- Tap the text box and switch the keyboard to the emoji layout (globe or smiley key).
- Type one emoji, then tap outside the box to commit it.
- Drag the box into position and pinch outward until the emoji reads as a sticker.
- Use the font controls (aA) to set size numerically if pinching overshoots.
Memoji work the same way. Apple turns each Memoji you create into an automatic sticker pack, available from the emoji keyboard in Messages, Mail, and plenty of third-party apps.
A 2023 study published in English Language, Literature and Culture by Ochulor et al. showed that digital stickers and emoji function as pragmatic communication tools, reinforcing meaning where plain text falls short. Used as stickers, emoji signal emotional context or flag a focal point inside a photo without a single word.
Quick method: add Memoji and stickers using the Messages camera
Want to shoot and decorate in one motion before sending? Skip the gallery and use the Messages camera.
- Open a conversation in Messages and tap the + icon next to the input field.
- Select Camera.
- Tap the Effects button (star icon) in the bottom-left corner of the viewfinder.
- Select Stickers or Memoji from the tray. Installed sticker packs show up as extra icons in the same row.
- Drag your sticker or custom Memoji onto the live preview canvas.
- Press the shutter to capture the photo with the overlay pre-applied, then send it, or dismiss the message and keep the saved copy in your Camera Roll.
This route helps on managed devices where Markup is restricted, and it is the fastest path when the goal is one quick reply rather than a reusable asset.
How to hide sensitive information or faces using photo stickers
Stickers double as a native privacy filter, covering personal data, background bystanders, or a private document before an image goes public. Honestly, this is one of the most common reasons people open Markup at all.
- Open the image in Photos and enter Markup mode.
- Tap + and choose Add Sticker, or Add Shape, since a filled rectangle or a solid emoji works well.
- Drag the sticker over the identity card, licence plate, address label, or face you want to cover.
- Expand the boundary handles until the sensitive detail is fully obscured, with margin on all sides.
- Use ••• then Duplicate to cover several similar items, for example multiple faces in a group shot, at a consistent size.
- Tap Done twice to flatten the edit.
Stickers can also do the opposite job. Arrow, circle, and frame graphics pull attention toward a landmark, a defect in a product photo, or one person in a crowd. Same mechanic as the approval badges in a catalogue workflow, pointed the other way.
How to edit or remove a sticker from an existing photo
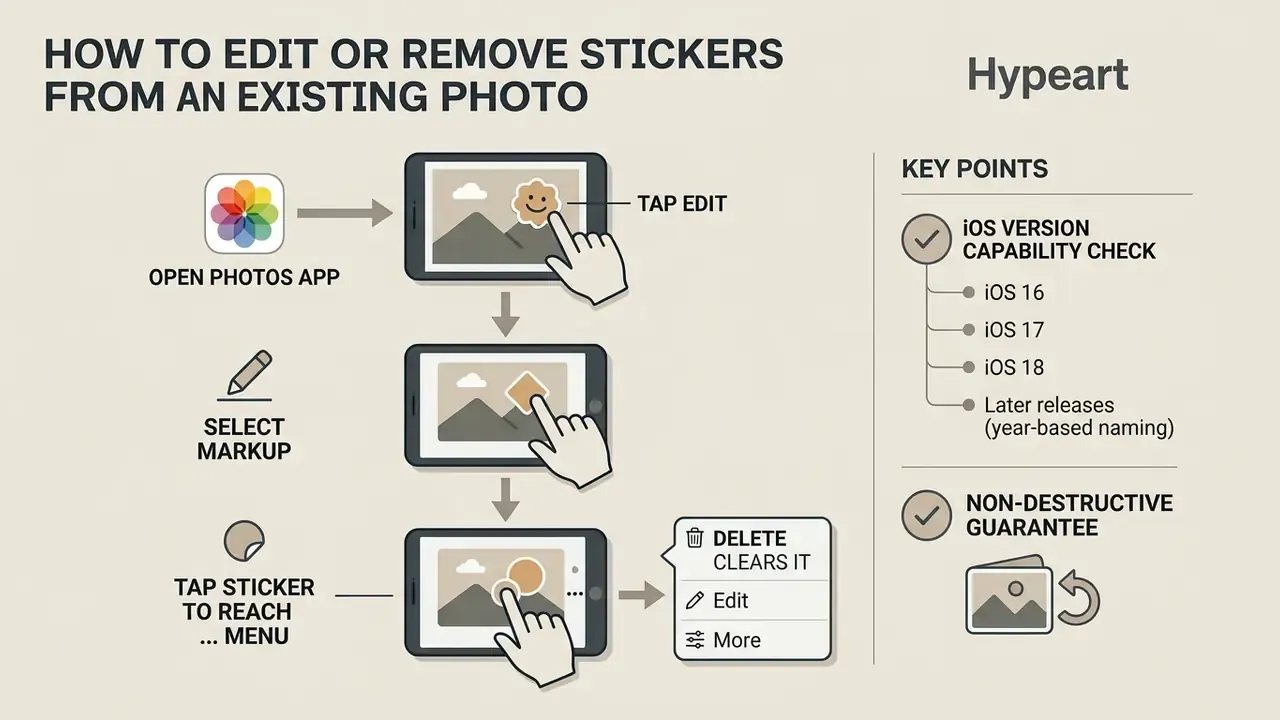
To change or remove a sticker on an existing photo, open the image in Photos, tap Edit, select Markup, then tap the sticker to reach its ••• menu, where Delete clears it. Touch and hold the placed sticker and tap Remove if you prefer that route. If the edit was already saved and committed, Revert to Original from the photo's More (•••) menu restores the raw file and strips every overlay at once.
To delete a sticker from your library rather than from a photo, open the sticker drawer, press and hold the sticker, and tap Delete. That does not touch photos where the sticker has already been flattened.
Troubleshooting: when stickers do not work
| Symptom | Likely cause | Fix |
|---|---|---|
| No Add Sticker option when holding a subject | Device runs iOS 15 or earlier, or the photo is a screenshot with no clear subject | Update iOS (Settings, General, Software Update); subject lift requires iOS 16 or newer |
| Only part of the object is cut out | Low contrast between subject and background, motion blur, or overlapping objects | Pick a frame with clearer edges; for precise control, use an editor with manual outline, brush, and eraser selection |
| The outline never appears | Finger lifted too early, or the Live Photo motion track is still loading | Lift your finger, wait a second, then touch and hold again in the centre of the subject |
| Add Sticker missing in Markup | You are inside a third-party app that does not expose the full Markup toolbar | Edit the photo inside the native Photos app instead |
| Animation disappears after saving | The composite was saved as a still photo | Animation belongs to the sticker asset, not the background image; export through a video or GIF tool to keep motion |
| Sticker shifted after sharing | The file was recompressed by a messaging app | Overlays are flattened into the bitmap and cannot move; recheck the exported copy rather than the original |
| Effects (Outline, Comic, Puffy) greyed out | The effect menu applies only to custom stickers you created, not to every Apple-supplied sticker | Create a sticker from a photo subject first, then long-press it and tap Add Effect |
FAQ about adding stickers to iPhone photos
Most remaining questions cluster around three things: cost, whether the graphic survives sharing, and how animated Live Photo stickers behave on a static background.
Can I add a sticker to a photo on iPhone for free?
Yes. Adding a sticker to a photo on iPhone is free when you use the built-in Photos app, the Markup toolbar, and the native custom sticker generator. No subscription, no paid editing application, not even for custom cut-outs.
The operating system already ships the subject-isolation algorithms, the sticker drawer storage, and the Markup drawing tools, and Apple's support pages describe all of it as part of iOS rather than a paid extra. Third-party apps in the App Store sell premium sticker packs and manual cut-out control, and sometimes an app allows layer effects Markup cannot match, but the core feature set inside iOS stays fully free.
Will the sticker appear when I share the photo?
Yes. Stickers applied through Markup are written permanently into the exported image data the moment you tap Done. Shared by iMessage, email, or social media, the sticker will appear on any receiving device.
Markup bakes graphic layers into the exported bitmap during rendering, so the recipient needs neither an iPhone nor the matching sticker pack to see the result. One distinction matters: a sticker inside a photo is just pixels and travels everywhere, while a sticker sent as a sticker in a chat depends on the receiving app supporting that format.
Can I use animated stickers on a photo?
You can place animated Live Stickers in Markup, but saving the output as a standard static photo flattens the motion into a single frame. The animation lives in the sticker asset, not in the background image, so a still photo does not suddenly move. To keep the movement, export the composite through a video or GIF editor, or send the animated sticker as a sticker inside Messages, where it keeps playing.
For dynamic media formats across production pipelines, developers can use the AI Media API to handle multi-frame rendering and automated image processing.
Can I add several stickers to the same photo?
Yes. After the first one lands, tap + then Add Sticker again for each additional graphic, sizing and positioning each independently. For repeated identical badges, ••• then Duplicate is quicker and guarantees matching dimensions. There is no practical limit for normal use, although heavily layered compositions are easier to manage in a dedicated editor.
Do stickers work on screenshots and documents?
Yes. Markup appears wherever iOS exposes its annotation toolbar: screenshots, PDFs in Files, Mail attachments, Notes. The Add Sticker command behaves identically in all of them. Subject lifting is the exception, since it needs a photographic subject with a distinguishable edge, so a flat interface screenshot rarely yields a usable cut-out.
Internal navigation and resources
- Explore enterprise media pipelines: AI Media Workflows
- Measure operational media performance: AI Media Benchmarks and Review Proof
- Compare general editing tools: guide to online photo editors
Updated in 2026 to reflect iOS 16, iOS 17, iOS 18, and the year-based releases that followed. Feature names and menu positions change with iOS updates; verify current steps in Apple's iPhone User Guide if your interface differs. Privacy masking with stickers is a visual measure, not encryption, so weigh the sensitivity of your material before publishing.