Executive Summary
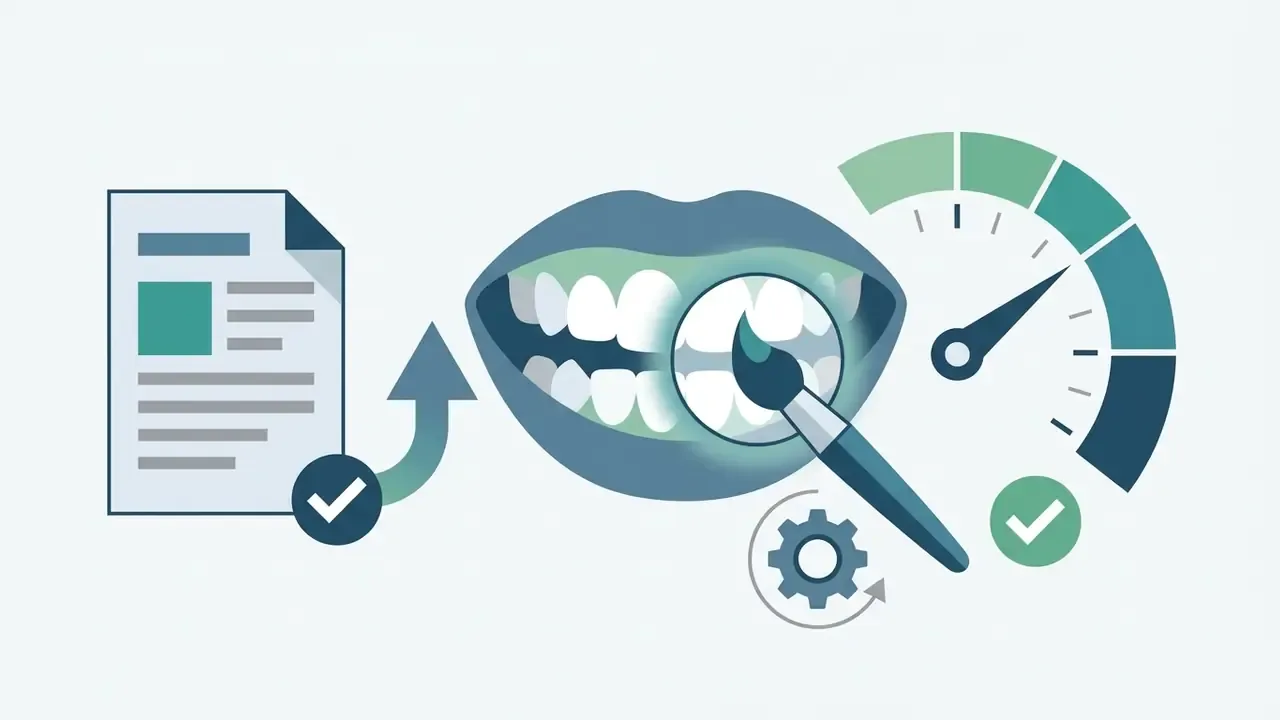
- What it is A teeth whitening photo editor segments the dental region of a portrait and reduces yellow chroma while raising luminance, leaving lips, gums, skin, and background untouched.
- The natural-looking threshold Perceptible whitening starts at lightness shifts (ΔL*) near 1.14 and yellow-chroma reductions (Δb*) near 1.11; enterprise retouching regulations typically cap total color difference at ΔE*ab < 3.0 to avoid "acid-white" teeth.
- The workflow Upload a clear, front-facing image, apply automatic AI segmentation (or a calibrated manual brush at 30% intensity), verify with a before/after toggle, then export at source resolution.
- Input rules Yaw angle within ±30°, facial region of at least 800×800 px, file under 20 MB, and white balance corrected before whitening.
- Tool selection Browser editors suit desktop portrait batches; mobile apps suit on-the-go selfies; enterprise suites add batch APIs, provenance metadata, and explicit commercial licensing.
- Governance caution Corporate portraits are biometric-adjacent data. Verify retention, deletion, and processing terms before uploading employee images to any free SaaS editor (Shadow AI risk).
Who This Guide Is Written For
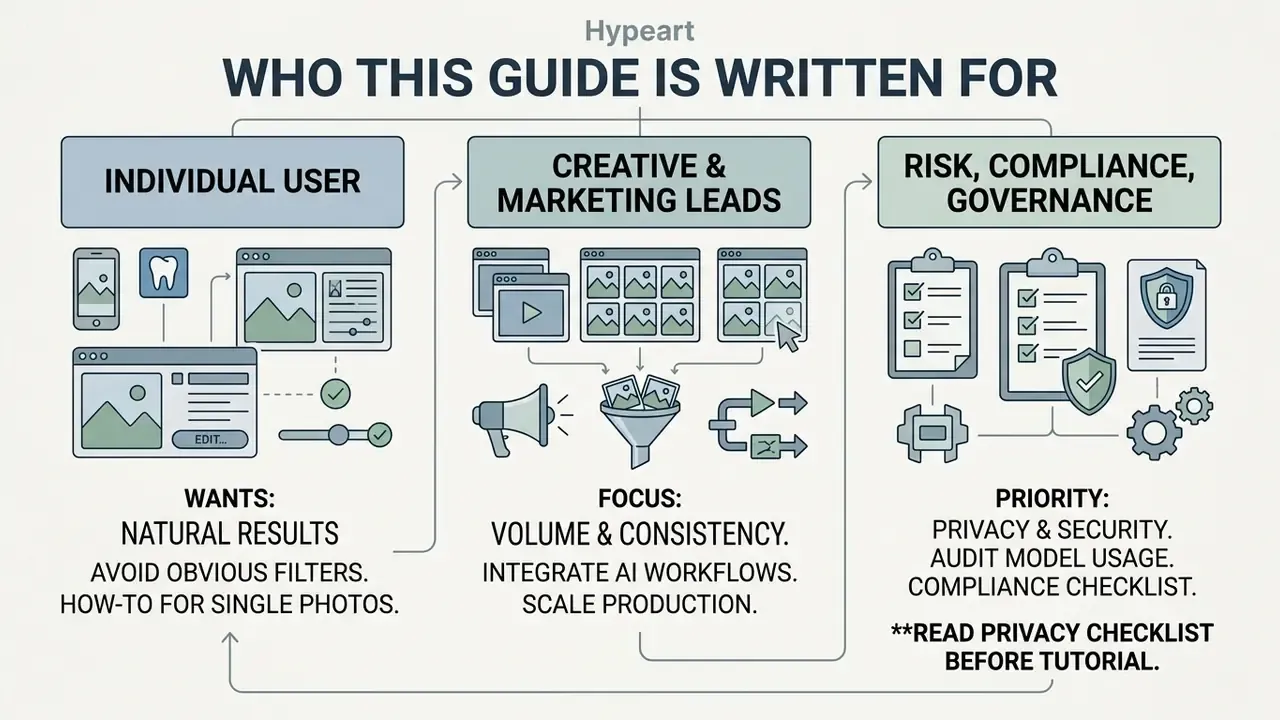
Three readers usually land here with different questions, and they need different answers.
- The individual user wants one thing: how to whiten teeth in a photo without the result screaming "filter." Steps 1 to 3 and the natural-white section answer that directly.
- The creative or marketing lead runs volume. Forty-five headshots, a product shoot, an event album. Batch presets, export ceilings, and watermark rules decide the tool choice.
- The risk, compliance, or model-governance owner is not evaluating beauty. They are evaluating a third-party image pipeline that touches identifiable people, and they want retention terms, training-data exclusion, and an audit trail.
If you belong to the third group, read the privacy checklist before the tutorial. Order matters there too.
What Is a Teeth Whitening Photo Editor?
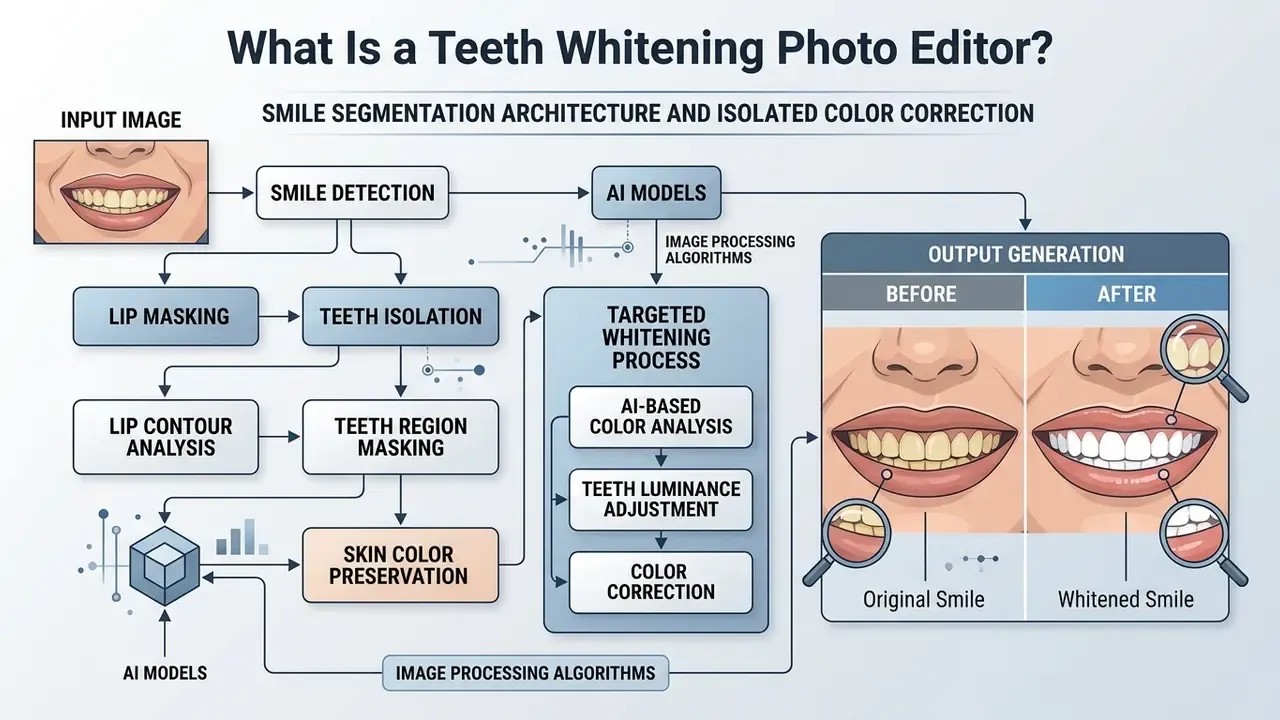
A teeth whitening photo editor is a specialized digital software tool that isolates the smile region in an image and reduces yellow tones to brighten teeth. Like other AI photo editors, these platforms use computer vision algorithms to automate smile detection, adjusting tooth color while preserving surrounding facial features and image sharpness.
How AI Teeth Whitening Identifies Teeth in a Photo
AI teeth whitening identifies teeth by deploying trained facial-landmark and instance-segmentation models that recognize peri-oral anatomy. Convolutional neural networks, such as YOLACT++ architectures, map keypoints along the mouth, distinguishing tooth enamel from lips, gums, and skin.
«YOLACT++ achieves above 80% average precision at IoU = 0.5 for the smile-teeth region on candid facial photographs.»
Once segmented, color-space filtering targets yellow tones (the b* axis in CIE L*a*b* space) without bleeding adjustments into adjacent facial regions.
«Mask R-CNN models reach pixel-level segmentation accuracy between 90.1% and 97.4% for natural teeth on annotated datasets.»
Older pipelines relied on hand-crafted color thresholds instead of learned masks. A 2018 color-based mouth-segmentation study reported above 99% correct tooth-pixel identification using the Cr channel of YCbCr and the H channel of HSV, exploiting the measurable color distance between enamel, lip tissue, and skin. Modern editors combine both approaches: a learned instance mask for the boundaries, and color-channel logic for deciding which pixels inside that mask actually carry yellow pigment.
One caveat worth stating plainly. Published accuracy figures come from curated datasets, not from your phone's flash photo at a dim restaurant. Treat them as a ceiling, not a promise.
What Changes the Whitening Effect Can Make
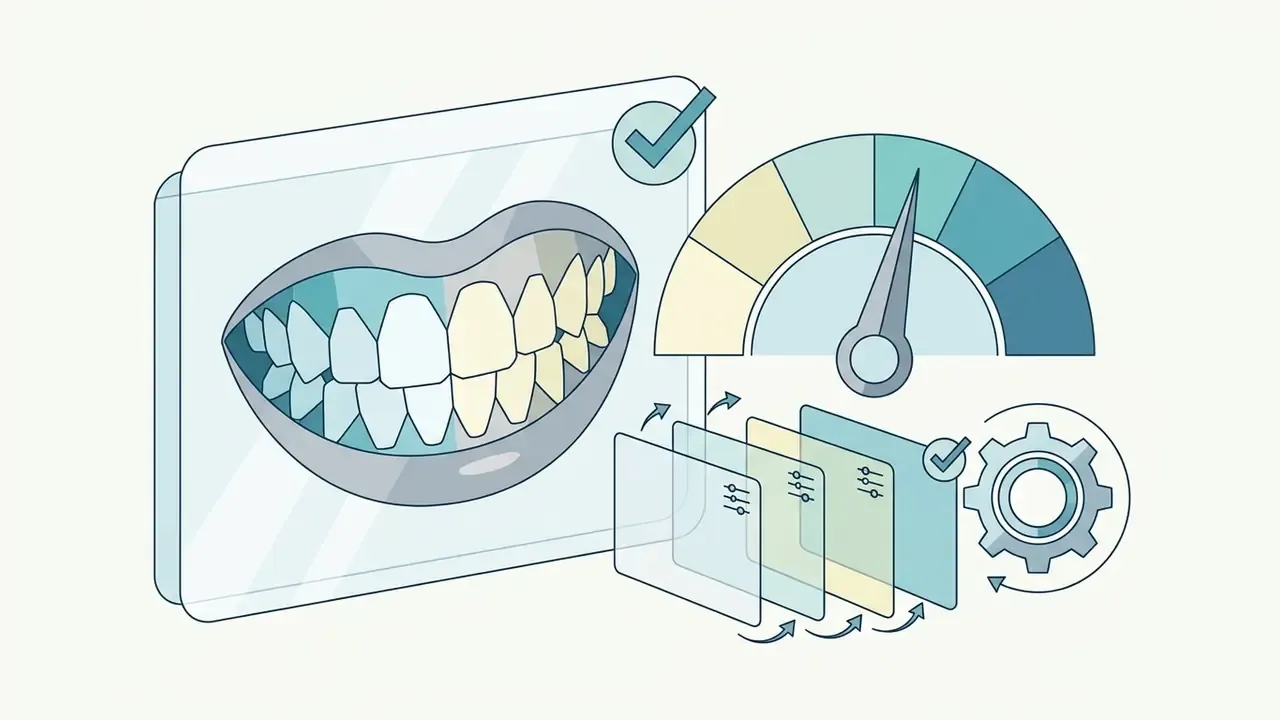
The whitening effect shifts tooth enamel from dark or yellow tones toward higher luminance and neutral hue values. By selectively reducing yellow chroma and boosting brightness, the tool creates a natural white appearance. Advanced editors allow granular intensity control, preventing flat white distortion and retaining essential enamel highlights and subtle natural gradients.
Clinically, the same two variables define a whitening outcome: a decrease in yellowness and an increase in lightness. Photo editors mirror that logic digitally. Polychromatic variation near the incisal edge and specular gloss on the enamel surface should survive the edit, because their removal is exactly what makes a retouched smile read as fake.
What the tool does not do is change dentition. It brightens teeth in an image. That distinction matters in any marketing claim built around the result.
How to Whiten Teeth in a Photo Online
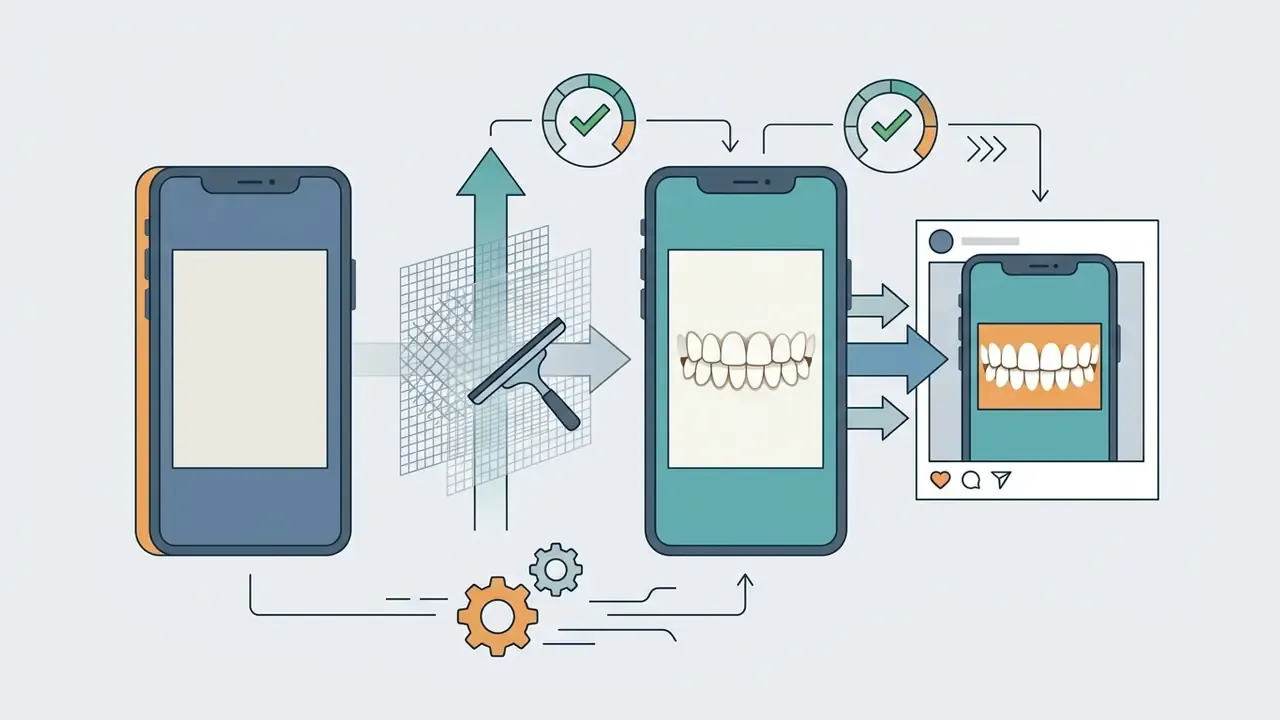
Whitening teeth online involves uploading a digital portrait, selecting an automated or manual whitening adjustment, and exporting the polished image. Web-based platforms execute these steps directly in the browser using cloud-based neural networks for immediate image processing.
Step-by-step online teeth whitening process
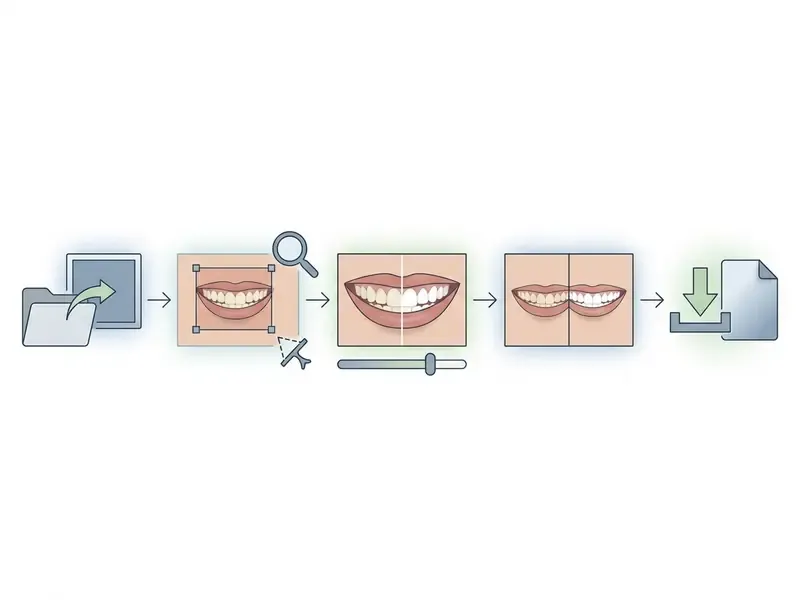
- Upload imageSelect and drag a high-resolution portrait (JPG, PNG, or WebP) into the web editor workspace.
- Apply the teeth whitening toolActivate the AI teeth whitening tool to detect the smile region automatically, or use a target brush.
- Adjust the whitening effectModify the slider intensity to dial in a natural white level that eliminates yellow tones.
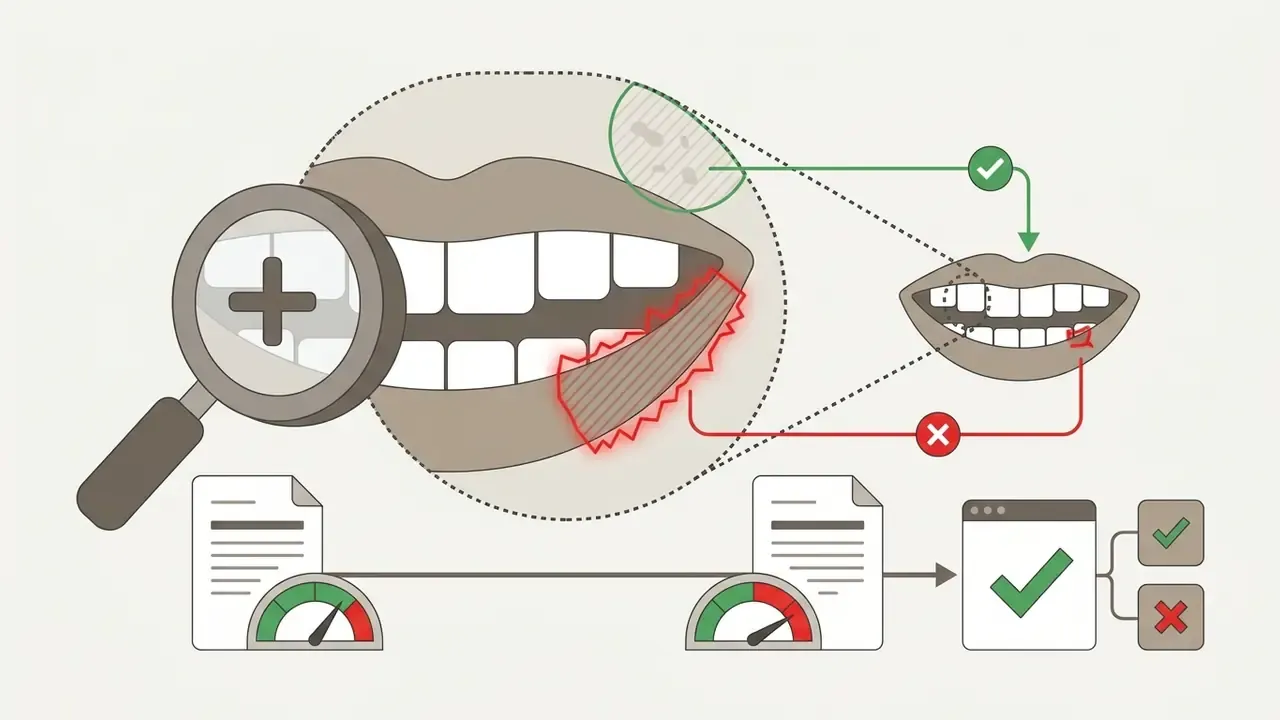
- Preview resultsToggle the before-and-after view to confirm enamel texture, lip isolation, and facial balance.
- Download the edited imageExport the finalized photo in high resolution for personal, corporate, or social media use.
Step 1: Upload a Clear Photo Showing Your Teeth
To achieve precise AI segmentation, upload a clear, well-lit photograph where the mouth area is fully visible and unobscured. High-resolution input images with balanced exposure prevent mask misalignment and allow neural models to distinguish individual tooth boundaries accurately.
«A smartphone paired with an auxiliary light source delivers ΔE*ab color accuracy comparable to a DSLR when white balance is calibrated.»
Callout: optimal source photo parameters for AI segmentation
- Facial angle: Keep the yaw angle within ±30° of dead-center. Extreme side profiles obscure key landmark points and can degrade mask accuracy by up to 40%.
- Mouth visibility: Teeth must be visibly parted. Closed-mouth or heavily occluded smiles cannot be whitened realistically, because there is no enamel surface for the model to isolate.
- Illumination: Avoid single-source tungsten light (2700K) without prior white-balance normalization. Heavy warm casts push the AI to over-correct yellow levels, producing dull blue or gray teeth.
- Resolution: Minimum 800×800 pixels across the facial region; file size under 20 MB (JPG, PNG, WebP). Vendor pipelines frequently cap the long side near 1920 px and reject images where the face is cropped at the frame edge.
- Sharpness: Avoid heavy motion blur and high-ISO noise. Both smear the interdental boundaries the segmentation model uses as anchors.
A small field note. On a recent set of conference portraits, the only images that failed automatic detection were the ones shot against a bright window, where the face sat two stops under the background. Exposure, not the algorithm, was the bottleneck.
Step 2: Apply the Teeth Whitening Tool
Applying the teeth whitening tool triggers an automated scan that isolates the dental region and applies localized color corrections in just one click. Users can then fine-tune the output with intensity sliders, balancing lightness and desaturation against the visual requirements of the shot.
Manual refinement with precision brush controls
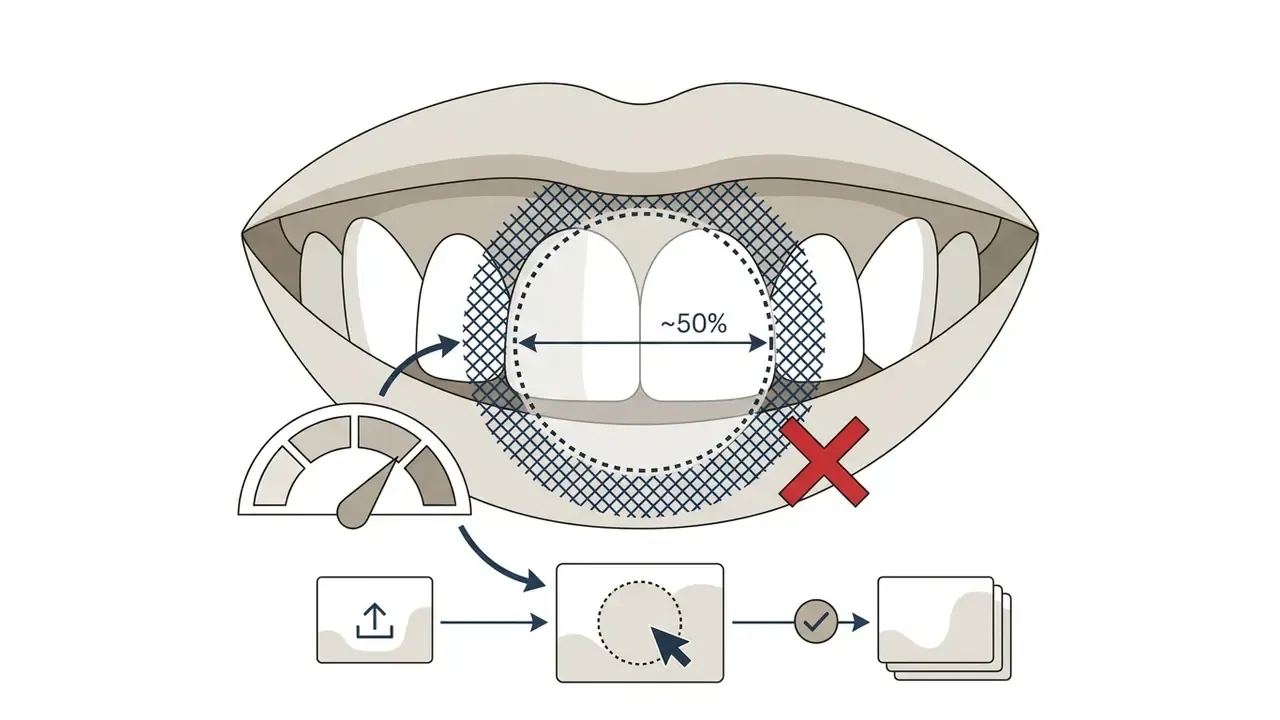
When automated segmentation encounters partial occlusions, dark interdental shadows, or complex mixed lighting, switch to the manual target brush.
If your editor exposes hardness as a separate parameter, keep it below 50%. A hard-edged brush stamps a geometric shape onto an organic surface, and the resulting rectangle of brightness is immediately readable as an edit.
Step 3: Preview and Download the Edited Image
Troubleshooting Common Whitening Errors
| Symptom | Probable cause | Corrective action |
|---|---|---|
| Teeth look gray or blue | Warm ambient cast triggered over-correction of the b* axis | Normalize white balance globally, then reapply whitening at 50% of the previous intensity |
| Whitening spilled onto lips or gums | Weak mask boundary from low resolution or extreme yaw angle | Reduce intensity, then repaint manually with a 50%-incisor-width brush and 15% to 20% feathering |
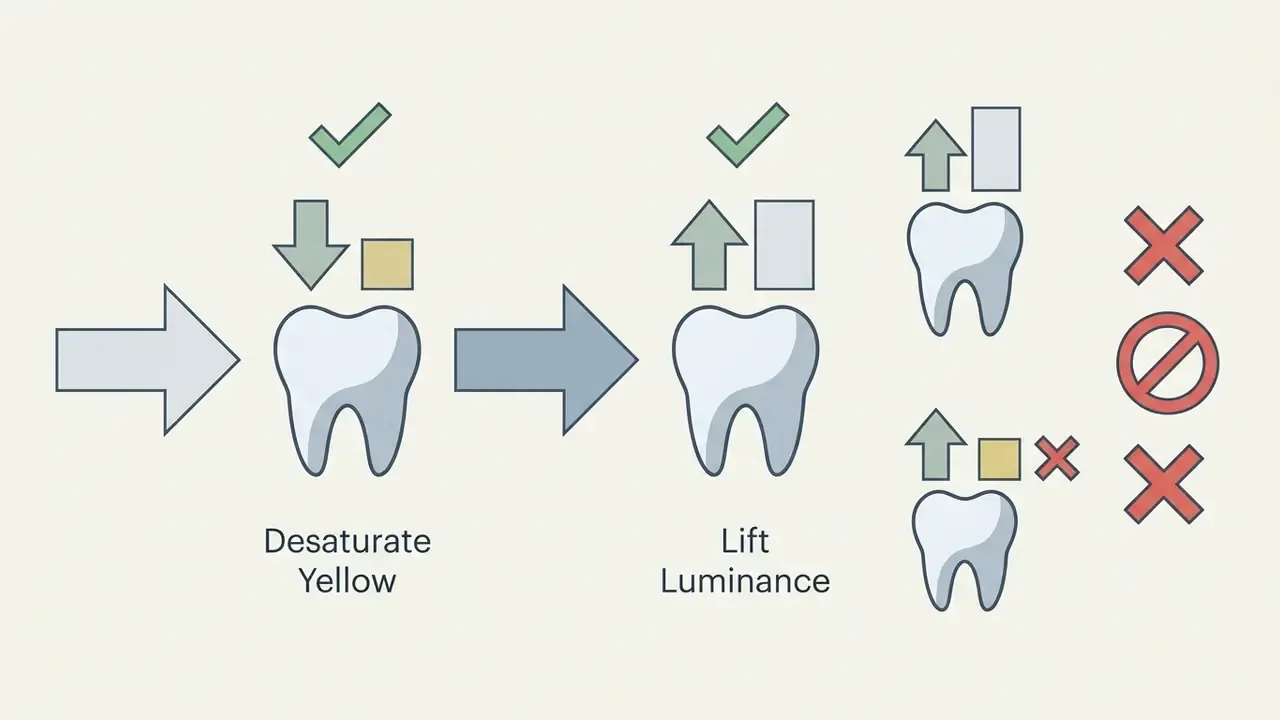
| Flat, "acid-white" plastic look | Luminance lifted before yellow desaturation; intensity too high | Restore natural interdental shadows; cap total shift near ΔE*ab 3.0 |
| Bright rectangle around the smile | Hard-edged brush with no feathering | Drop brush hardness below 50% and rebuild the edge with layered low-opacity passes |
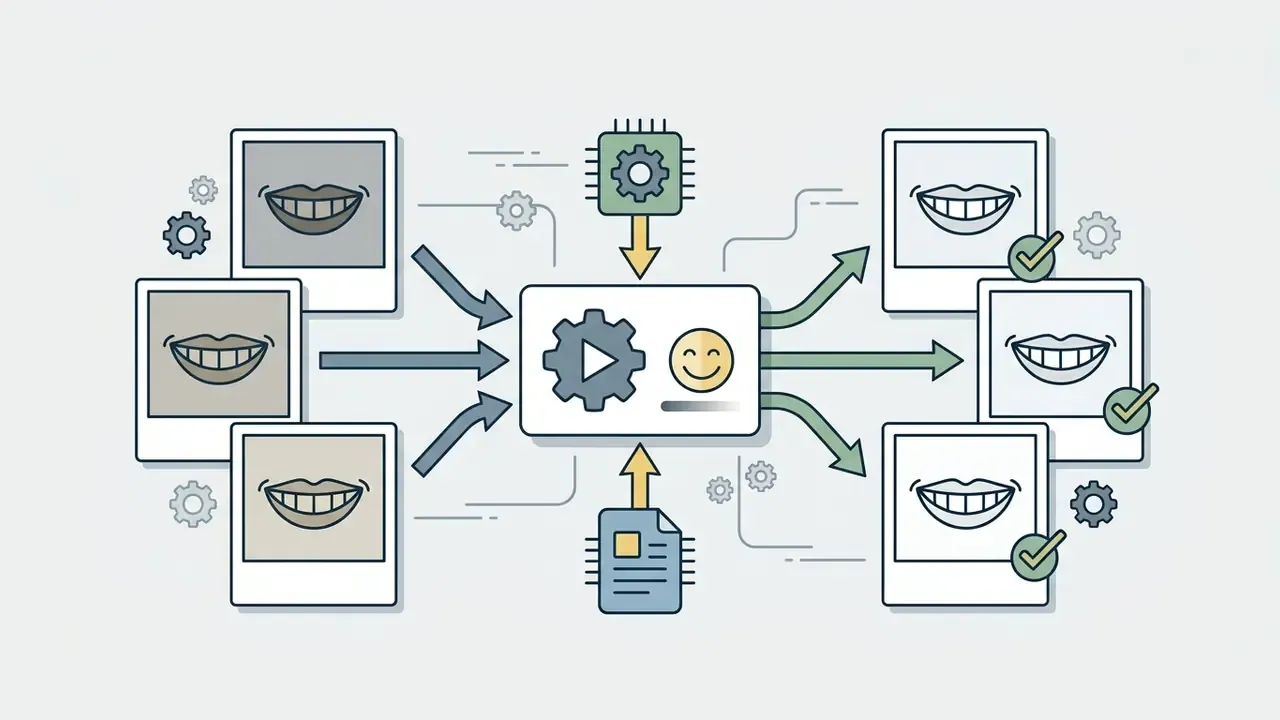
| Uneven brightness across a group | Heterogeneous lighting zones between subjects | Whiten each face as an individual mask, matching luminance to the best-lit subject |
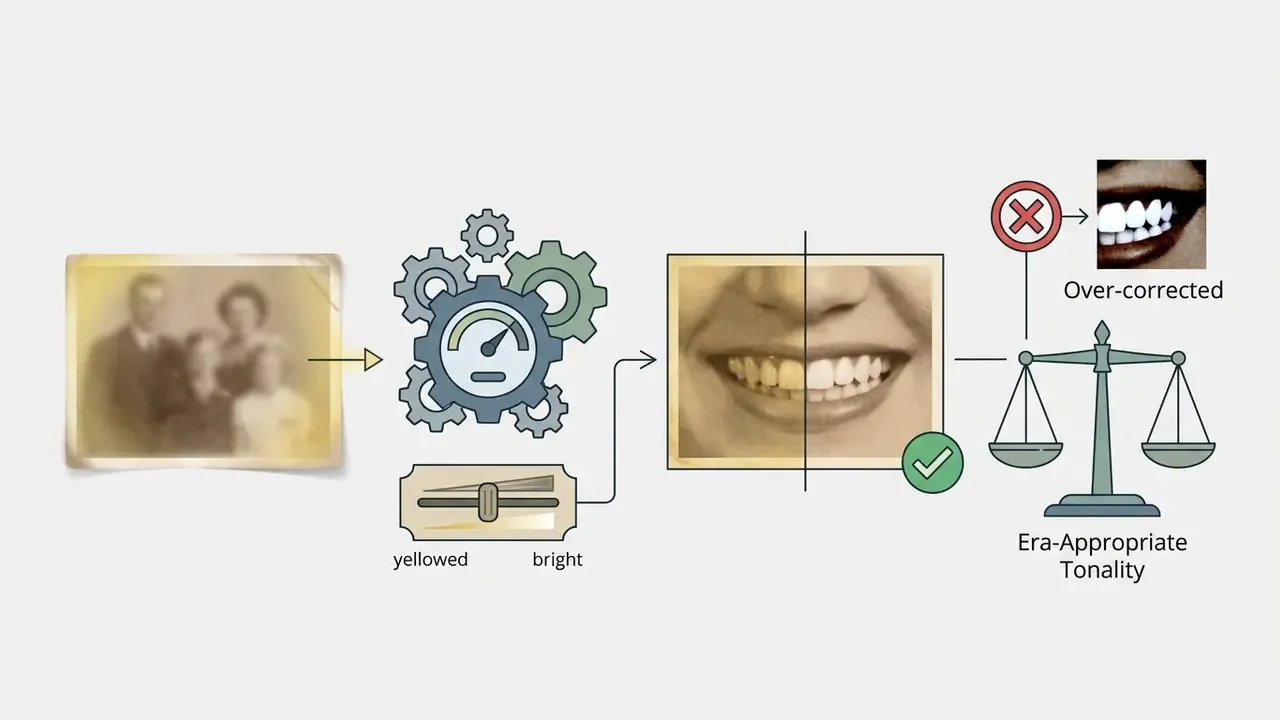
| Halo or ghosting on archival photos | Compression noise and blur prevent edge definition | Denoise and upscale before whitening, then apply a reduced-intensity pass |
Most of these failures trace back to two decisions: intensity and order. If a result looks wrong and you cannot say why, undo everything, fix global white balance, and start again at 30%. For vendor-specific quirks, escalation paths, and known processing limits, check AI Media Support and Troubleshooting before rebuilding the whole edit.
How to Make Teeth Look White but Natural in Photos
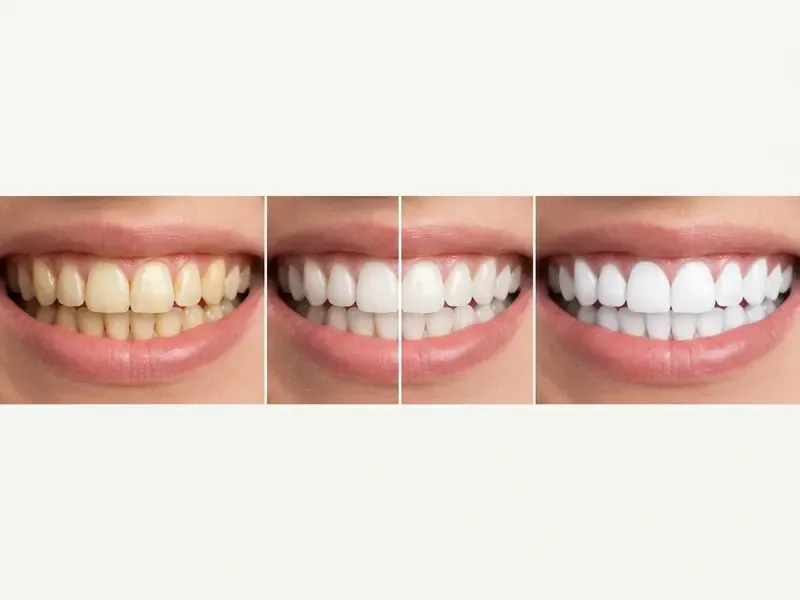
Making teeth look white yet natural requires subtle color adjustments that respect human perceptual thresholds and preserve enamel micro-details. Excessive whitening flattens teeth into opaque white shapes, destroying natural highlights and facial harmony.
Choose a Whitening Level for a Natural White Smile
A natural white smile is achieved by keeping color shifts within established psychophysical perception boundaries. Research indicates that lightness changes (ΔL*) of 1.14 and yellow chroma reductions (Δb*) of 1.11 are sufficient to convey whiteness to human observers.
«Psychophysical thresholds: ΔL* ≈ 1.14 and Δb* ≈ 1.11 are the minimum changes observers perceive as whitening.»
Setting whitening sliders to moderate thresholds brightens teeth without producing artificial, glowing tones. A practical visual taxonomy borrowed from clinical shade guides helps calibrate expectations: a moderate correction corresponds to roughly 1 to 4 VITA shade steps, an optimal photographic endpoint sits near B1 / 1M1, and anything visibly beyond B1 enters over-whitening territory. That is the reason dedicated "bleached" shade guides exist at all.
During a media refresh project for a corporate client, raw portrait uploads exhibited inconsistent tungsten lighting that generated unnatural yellow casts. By enforcing pre-processing white-balance calibration before applying targeted teeth masks, the media team removed yellow tones without exceeding a 3.0 ΔE*ab threshold, preserving natural enamel highlights across every employee avatar. (Illustrative composite example, not a named client engagement.)
«Shifting tooth color toward the greenish-blue quadrant of the a*b* plane yields the largest gain in perceived whiteness for an equivalent magnitude of change.»
In practice this means the direction of the correction matters as much as its size. A small shift along the correct hue vector reads as "clean," while an equally large shift straight up the lightness axis reads as "overexposed."
Preserve Skin, Lips and Overall Image Quality
Maintaining overall image quality relies on strict local masking that insulates surrounding skin, lips, and gums from color manipulation. Nondestructive editing tools preserve facial detail by confining desaturation and brightness adjustments strictly to the segmented dental enamel area, the same principle behind broader AI image enhancement tools that operate on isolated regions rather than the entire frame.
Professional masking workflows refine the initial selection with color-range, luminance-range, or depth-range selectors before any correction is applied, and they establish global white balance first. Reversing that order forces the retoucher to fight a warm cast locally, which is precisely how lip tone and gingival color get contaminated.
A quick sanity check at the end: hide the whitening layer, then show it. If anything other than the teeth moved, the mask is too wide.
Free Online Teeth Whitening Photo Editor vs Teeth Whitening App
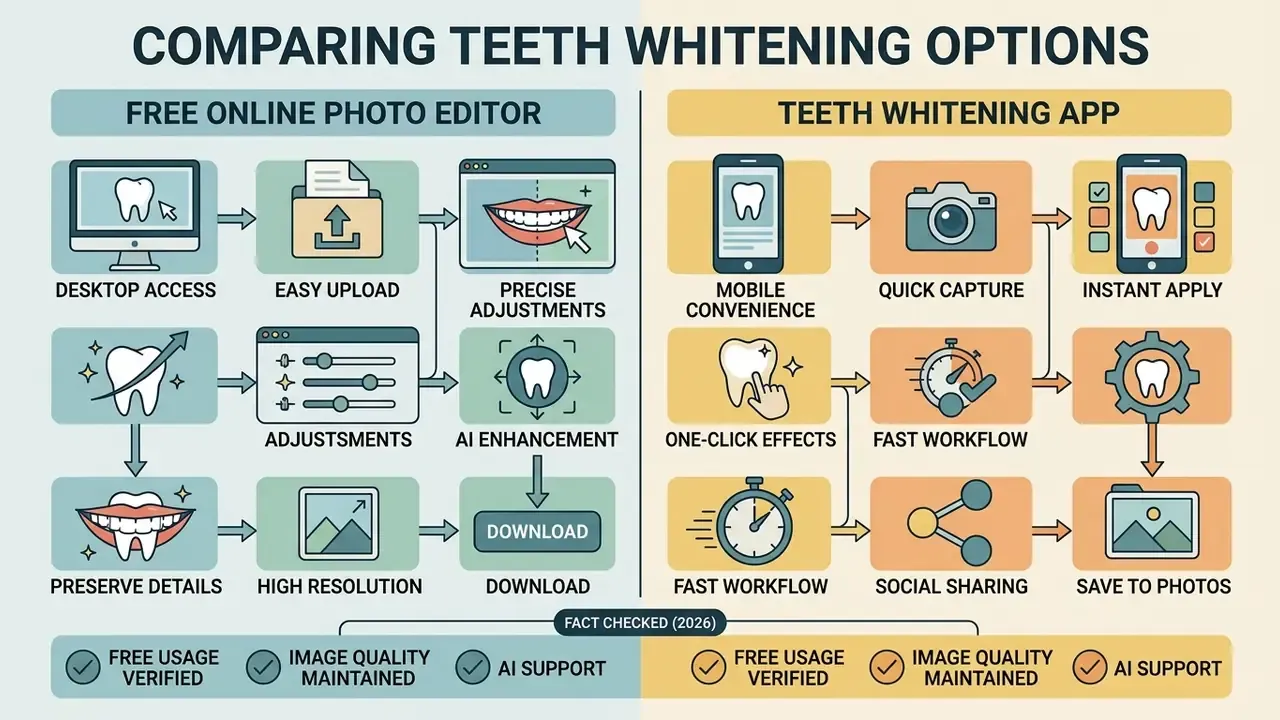
Selecting between a free online photo editor and a mobile app depends on device preference, workflow speed, and processing context. Web editors offer instant browser access on desktop hardware, whereas mobile applications provide integrated camera capture and touch-centric controls for editing on the move.
When a Free Online Photo Editor Is the Better Choice
A free online photo editor is optimal when editing portraits on a desktop PC without downloading dedicated software. Web-based editors process uploads instantly through cloud infrastructure, providing the screen real estate and keyboard navigation that suit professional headshot adjustments. Before committing a campaign to one, compare the export ceilings of free photo editors, since resolution caps and watermark policies vary widely between tiers. If budget modeling is part of the decision, the AI Media Pricing Guides and AI Media Calculators make per-image cost easier to defend internally.
When to Use an App for Teeth Whitening Photos
A mobile teeth whitening app is ideal for rapid selfie retouching and direct social media publishing from smartphones. Mobile applications often integrate device hardware, such as camera capture and ambient light sensing, to stabilize lighting conditions before editing.
«An iPhone shade-determination app with ambient-light sensing produced an L* coefficient of variation below 0.026 across repeated tooth captures.»
Mobile suites also lead on volume workflows aimed at creators: batch editing that applies one look across hundreds of images in seconds is now a standard mobile feature, not a desktop-only capability. A free teeth whitening app usually gates that behind a daily edit limit, which is fine for personal feeds and awkward for client deadlines.
| Feature / capability | Free online photo editor | Mobile teeth whitening app | Advanced AI retouch suite |
|---|---|---|---|
| Installation requirement | None (runs in browser) | App Store / Play Store install | Software / API integration |
| AI smile detection | Automatic, cloud-based | Automatic, on-device | High-precision neural masking |
| Intensity control | Global sliders | Touch brushes and sliders | Parametric granular control |
| Manual brush parameters | Size only (often fixed) | Size, hardness, intensity | Size, feather, opacity, mask refine |
| Primary use case | Desktop portraits and headshots | On-the-go selfies and feeds | Batch commercial processing |
| Batch / API support | Rare (credit-limited) | Look presets across albums | Batch API, queue automation |
| Data handling and privacy | Cloud upload; retention terms vary | On-device or hybrid processing | Contractual DPA, deletion SLAs |
| Free tier limits | Credits per month, watermarks, resolution caps | Daily free edits, then credits | Trial seats, metered API calls |
| Export resolution | Standard or high (tier dependent) | Screen / device native | Uncompressed full resolution |
Side-by-side feature grids for individual vendors live in the AI Media Comparison hub, and integration details for queued batch jobs sit in the AI Media API Guides.
«Beauty filters increase perceived physical attractiveness and dating intention, while simultaneously lowering perceived trustworthiness.»
That trade-off is the strategic argument for restraint: an edit that reads as an edit can cost credibility even when it raises attractiveness scores. Perception research through 2026 pushed the point further. AI-generated smiles were rated more attractive than real orthodontic treatment outcomes by dentists, students, and laypeople, which is exactly why bounded, disclosed adjustments matter in commercial contexts.
Data Privacy and Shadow AI Checklist
Governance note: uploading a recognizable face to a third-party editor means transmitting biometric-adjacent personal data. Treat the following as a pre-upload control, not a formality.
- Retention and deletionConfirm in writing whether uploads are deleted after processing, and within what window. "Processed securely" is a marketing phrase, not a retention policy.
- Training-data reuseVerify that submitted images are excluded from model training and fine-tuning datasets by default.
- Jurisdiction and transfersIdentify where processing occurs and whether cross-border transfer mechanisms exist for employee imagery.
- Consent basisObtain current, specific consent from each depicted person. Privacy regulators treat AI processing of sensitive personal information as requiring explicit, purpose-bound consent, and a blanket HR waiver signed years earlier is weak coverage.
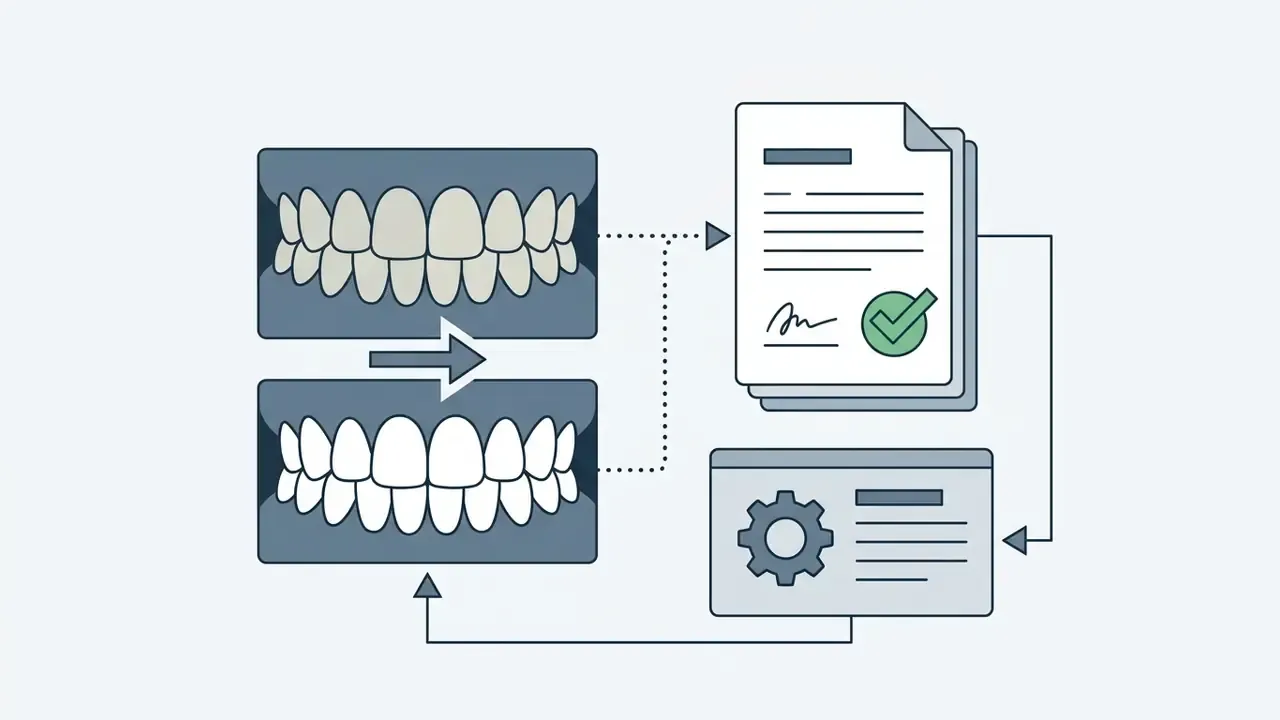
- Disclosure obligationsWhere regulation requires it, label manipulated imagery that could be mistaken for authentic content, and retain provenance metadata documenting the origin and edit history of the file.
- Shadow AI controlPublish an approved-tool list. Uncontrolled uploads of executive portraits to unvetted SaaS editors are the most common leakage path in creative teams.
- Ownership and escalationName the person who approves image tools, and define what happens when a team wants an exception. No named owner, no autonomy.
For dental and medical-aesthetic marketing, written patient authorization is a separate and stricter requirement. Professional dental guidance prohibits publishing an identifiable patient photograph, radiograph, testimonial, or name without a signed release, and regulators expect the patient to be told how, why, and where the image will appear. Disputes over image rights and synthetic media are still developing; the AI Litigation and case tracker is a reasonable place to watch how that risk is landing in practice.
How to Choose an AI Photo Editor to Whiten Teeth
Choosing the right AI photo editor requires evaluating smile-detection accuracy, color control options, output quality retention, and commercial licensing terms. The right platform balances automated convenience with flexible manual controls to suit specific personal or enterprise requirements.
Features That Improve Teeth Whitening Results
High-quality whitening results rely on advanced features such as automatic white-balance normalization, intelligent hue-angle alignment, and edge-aware mask feathering. Editors that navigate the greenish-blue quadrant of the a*b* color plane achieve optimal perceived whiteness while preserving micro-textures like enamel gloss (Journal of Esthetic and Restorative Dentistry, 2023. https://doi.org/10.1111/jerd.2023). Vendor documentation describes the same capability stack from the product side: automatic tone correction, localized smile detection that brightens teeth without shifting skin tone or lip color, and modules that explicitly keep the "natural surface" of the enamel visible while stains fade, with extra attention paid to edges near the gums and between teeth.
Three additional capabilities separate a professional pipeline from a one-click filter.
Adjacent tooling belongs in the same evaluation. A red eye remover, a realistic ai headshot generator, and even a random picture generator for concept boards all end up in the same creative stack, and each one inherits the same consent and licensing questions.
Handling Complex Smiles: Braces, Structural Edits, and Dental Work
Standard color-shifting algorithms cannot process metallic hardware or missing enamel structure. Advanced AI editors therefore combine generative inpainting with color correction.
- Orthodontic hardware (braces) the pipeline must first run a structure-removal pass (generative fill) that reconstructs the underlying tooth surface, and only then execute color balance. Whitening before removal produces bright brackets and dark enamel, the opposite of the intent.
- Chipped or misaligned teeth edge-aware reconstruction re-aligns optical highlights along the incisal edge, preventing broken light reflections on uneven surfaces.
- Missing teeth generative fill must respect the gingival line and the neighboring tooth's width, or the reconstructed unit will read as a paste-in.
- Crowns, veneers, and composite restorations synthetic materials do not respond to real-world bleaching, and digitally whitening enamel around an unchanged restoration exposes the mismatch. Either include the restoration in the mask at matched intensity, or keep the whitening shift small enough that the shade delta stays invisible. In clinical practice this is why restorations are shade-matched after whitening, and why orthodontic whitening is scheduled after appliance removal, when all surfaces are uniformly exposed.
Note the honest limit here. Structural edits are reconstruction, not documentation. Once generative fill invents a tooth surface, the image stops being evidence of anything.
Check Free Access and Commercial-Use Conditions Before Downloading
Before integrating an edited image into corporate marketing, dental practice promotion, or commercial campaigns, verify the platform's licensing policies. Start by reviewing the commercial usage rights for AI-generated images that apply to your output tier, then cross-check the wider AI Media Commercial-Use Hub for tier-by-tier terms. Ensure that the free tier allows commercial distribution without copyright restrictions, mandatory watermarks, or hidden resolution limitations.
Check four contractual points specifically: whether commercial use is granted on the free tier or only after upgrade; whether exports carry watermarks or per-purchaser watermarking; whether the license is single-user or extends to an organization; and whether attribution is mandatory. Licensing models differ sharply. Some publishers grant royalty-free reuse for any purpose, others issue watermarked single-user licenses that forbid commercial exploitation entirely.
Where Teeth Whitening Photo Editing Is Most Useful
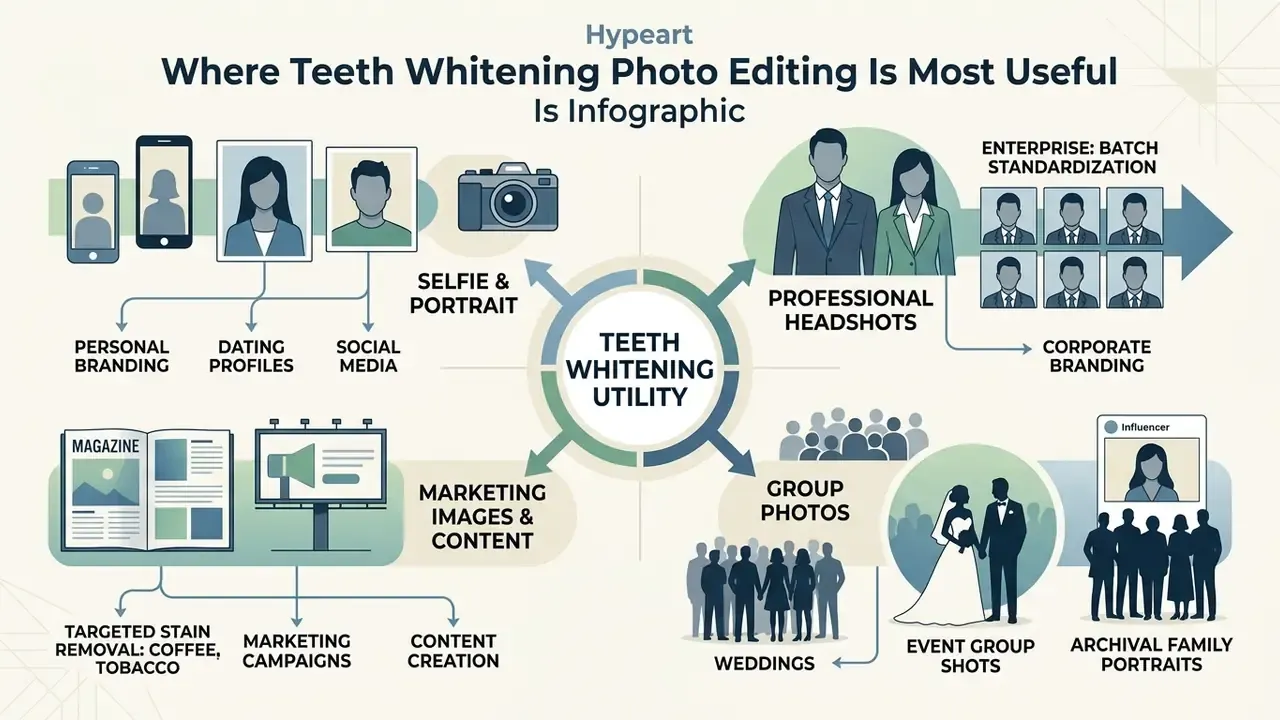
Teeth whitening photo editing is widely applied across professional corporate branding, social media content creation, personal portraiture, photo collage projects, and commercial promotional media. Enhancing smile brightness improves visual presentation while maintaining professional standards.
Selfies, Portraits and Professional Headshots
This information is general in nature and does not replace consultation with a qualified specialist. Photographic smile editing is a visual retouching operation and makes no claim about dental health or clinical outcomes.
For professional headshots and executive portraits, subtle teeth whitening projects approachability, health, and attention to detail, the same reasoning behind the framing conventions used by AI headshot generators.
«A randomized controlled trial of 150 patients reported satisfaction scores of roughly 85 to 87 in the digital smile design group versus 79 to 81 in the control group.»
Targeted Stain Removal: Coffee, Tobacco, and Event Photography
Different discoloration sources require distinct handling. Organic tannic stains from coffee, tea, or red wine affect outer enamel luminance, which AI targets primarily along the b* axis. Severe tobacco pigmentation is denser and less uniform; it often requires local manual brush intervention at 30% to 40% intensity to prevent over-bleaching the adjacent, already-clear teeth.
Apply targeted adjustments for specific deployment contexts.


FAQ: Whitening Teeth in Photos
Can You Whiten Teeth in Old or Low-Quality Photos?
Yes, but effectiveness depends on the visibility and resolution of the mouth region. In heavily compressed, grainy, or out-of-focus archival photos, AI segmentation models may struggle to define precise tooth edges, leading to potential color bleeding or flat gray tones.
«A U-Net-based algorithm reached precision and recall above 97% for tooth segmentation, achieved, however, on high-quality radiographic input.» Deep learning teeth segmentation in panoramic radiographs, Journal of Dentistry (2023). https://doi.org/10.1016/j.jdent.2023.xray That contrast defines the practical limit: accuracy is a property of the input, not only of the model. Pre-clearing noise and upscaling low-resolution photos before whitening yields substantially better segmentation accuracy (Journal of Innovative Dental and Oral Health, 2025), which is why AI image upscalers belong at the start of an archival workflow rather than after it. Updated caveat: detail that does not exist in the source cannot be recovered. With very small, blurred, or damaged faces the output becomes an interpretation rather than a documented reconstruction, and closed-mouth photographs cannot be whitened at all.
Can Teeth Whitening Be Used Together With Other Photo Editing Tools?
Yes. Teeth whitening is frequently integrated into broader retouching workflows alongside skin smoothing, background removal, hair color changes, body editor adjustments, and facial proportion refinements. For optimal results, global adjustments such as white balance and exposure correction should be applied before any localized whitening. Use this sequence.
- Exposure and white balance: establish neutral global color first, so the mask is not compensating for a cast.
- AI teeth whitening: apply the localized enamel correction while surrounding tones are still unmodified.
- Lip tint adjustment: recolor lips after whitening, so the teeth mask boundary does not distort the new lipstick tone or drag lip pigment into the enamel region.
- Skin smoothing and tone correction: finish with skin work, which otherwise softens the interdental edges the teeth mask depends on.
- Background removal or replacement: last, since a new background changes ambient color perception and may require a final global check. Face-parsing datasets treat skin enhancement and teeth whitening as coupled tasks at the segmentation level, which is why the order above is a technical requirement and not a stylistic preference. The same logic applies when a portrait is destined for a photo collage: whiten before layout, never after.
Will Teeth Whitening Affect Other Parts of the Photo?
When powered by accurate AI segmentation, teeth whitening isolates dental enamel and leaves surrounding skin, lips, and backgrounds untouched. If an input photo suffers from severe occlusion or extreme angles, weak mask boundaries may cause minor spillover, which can be corrected by reducing whitening intensity or manually adjusting mask boundaries.
Can You Whiten Teeth in Photos of Someone With Veneers or Crowns?
You can, but the mask needs deliberate handling. Restoration materials such as porcelain and composite do not behave like enamel, so brightening natural teeth around an unchanged crown creates a visible shade mismatch in the final frame. Either extend the mask across the restoration at a matched intensity, or hold the whitening shift small enough that the delta stays imperceptible. The photographic rule mirrors the clinical one: match restorations to the whitened shade, never the reverse.
Why Do My Teeth Look Too White or Fake After Editing?
Almost always because intensity was too high, so the natural shadows and surface texture of the enamel were erased along with the yellow pigment. Lower the intensity, retain visible shading between teeth and near the gum line, and re-evaluate at normal viewing size rather than at 100% zoom. Desaturating yellow before lifting luminance also prevents the "glowing" look.
Is It Safe to Upload Corporate or Client Photos to a Free Online Editor?
Only after verification. Free web editors process uploads in the cloud, which means a recognizable face leaves your environment. Confirm retention and deletion terms, exclusion from model training, processing jurisdiction, and whether consent from the depicted person covers third-party AI processing. For employee or patient imagery, use an approved tool with a data processing agreement rather than an ad-hoc free service. The Data Privacy and Shadow AI Checklist above is the short version of that review.
Do I Need to Select the Teeth Manually?
No. Automatic segmentation handles the majority of front-facing, well-lit portraits in just one click. Manual brushing becomes necessary in three situations: partial occlusion of the smile, extreme mixed lighting, and complex dental work such as braces or restorations. In those cases, the calibrated brush settings in Step 2 give more reliable results than repeated automatic passes.