Executive Summary
- What it is A red eye remover is an image-processing utility that isolates the glowing crimson pupil region created by direct flash, desaturates its red chrominance, and rebuilds a neutral dark pupil without touching iris texture or skin tone.
- How it works Face detection, then an eye-region bounding box, then red-pixel segmentation in YUV/HSV color space, then localized desaturation with catchlight preservation, then export. Cascade-classifier pipelines documented in the literature corrected roughly 95% of artifacts on a 200-image flash test set.
- Free vs paid Free browser tools cover single-image correction, watermark-free web-resolution export, and manual brush overrides. Paid tiers add batch processing, 300+ DPI print-ready output, REST APIs, audit logs, and SLA guarantees.
- Privacy Client-side tools decode and edit photos entirely inside the browser using the HTML5 Canvas API and WebAssembly, so raw files never reach a remote server. Server-side tools vary: published retention windows range from immediate in-memory discard to 24-48 hours.
- Governance angle For regulated environments, treat any browser AI utility as a Shadow AI candidate. Validate client-side isolation, retention policy, absence of model training on user uploads, and human-in-the-loop acceptance criteria before approving organizational use.
- Devices Works on desktop, iPhone (Safari), and Android (Chrome) without app installation; iOS Photos also ships a native red-eye tool in Edit mode.
- Non-negotiable quality rule Never set pupils to pure black (
#000000). Target soft charcoal gradients (#1A1A1Ato#2B2B2B) and keep the corneal catchlight intact.
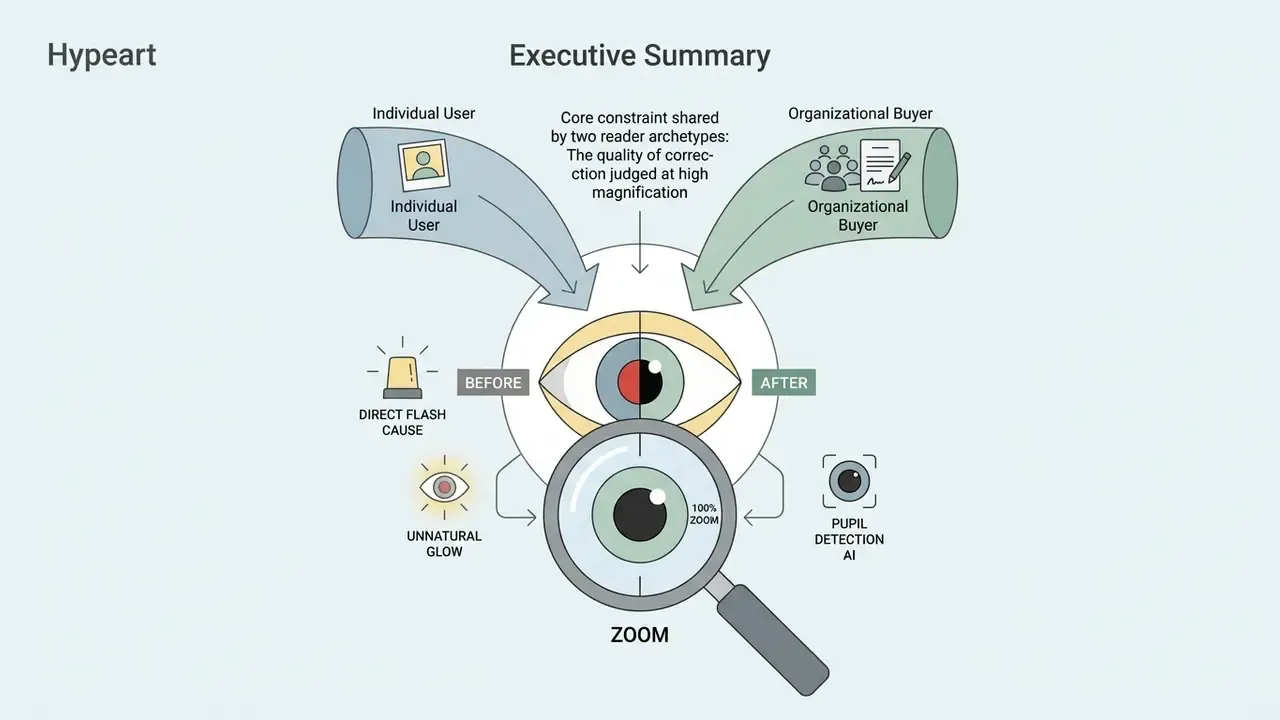
Who This Guide Is For
The first is a person with one ruined photo. A birthday shot, a wedding candid, a family frame from 1994 with two glowing pupils in the middle of it. That reader needs the fastest safe path: open a browser, upload, click, check, download. Sections two, three, and seven cover that.
The second reader is buying on behalf of an organization. A marketing operations lead at a bank, an internal audit contact reviewing image workflows, a model risk analyst who just found an unapproved browser tool in a proxy log. That reader needs to know where the file goes, who retains it, whether uploads train a vendor model, and what evidence survives the edit. Section four is written for them.
Both use cases share one constraint: correction quality is judged on the pupil, at 100% zoom, under the photo's own lighting. Everything else is negotiable.
Direct flash photography frequently introduces an unnatural red glow into human pupils, distracting from an otherwise clear photograph. A free online red eye remover allows users to eliminate this optical distortion directly in a web browser without installing complex desktop software. By combining computer vision algorithms with targeted color channel adjustments, modern online editors detect affected eye regions, neutralize red chrominance, and restore natural pupil tones in seconds.
What Is a Red Eye Remover and How Does It Work?
A red eye remover is a specialized image processing utility, either installed software or a web tool, designed to identify and correct the glowing red discoloration that appears in pupils on flash photographs. The tool isolates the affected circular pupil region, desaturates the excessive red chrominance, and recalculates local luminance to re-establish a natural dark pupil hue while keeping surrounding iris textures untouched.
Traditional photo retouching required manual selection brushes, zoom controls, and hue adjustments. An automated photo red eye remover works differently: facial landmark detection scans the image, locates candidate pupil boundaries, and executes targeted eye correction in one sequence. One click, sometimes zero.
Why Red Eye Happens in Flash Photos
Red eye occurs during flash photography when bright artificial light enters a dilated pupil in low ambient light. Because the pupil stays open to gather what little light there is, the intense flash beam passes straight through the aperture and strikes the vascularized retina and the blood-rich choroid layer at the back of the eye.
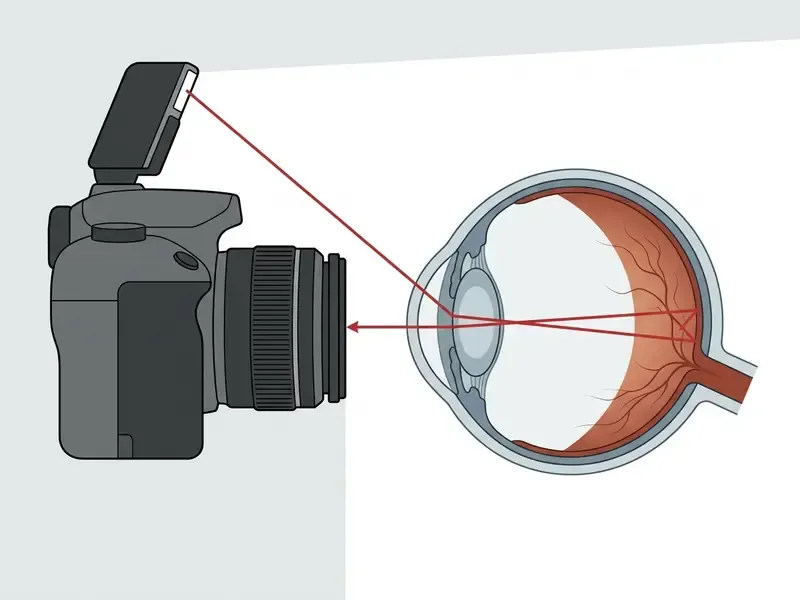
The reflected light travels back along a coaxial optical path into the camera lens. When the angle between the flash source and the optical axis of the camera falls under 2.5 degrees, the sensor records the crimson reflection of retinal blood vessels instead of a normal dark aperture. That geometry explains the pattern most people notice intuitively: phone cameras and compact on-camera flashes produce the worst artifacts, because the strobe sits millimeters from the lens barrel. Off-camera or bounced flash largely avoids the reflex altogether.
«In low light the pupil is dilated, so flash light enters the eye and reflects back along a near-coaxial path to the lens, making the pupil appear red.»
Automatic Detection and Natural Color Correction
Automated red-eye correction pipelines rely on multi-stage computer vision frameworks to isolate affected pixels without dragging artifacts into adjacent skin or iris areas. Initial algorithms detect facial structures using cascading classifiers or convolutional neural networks, establishing targeted bounding boxes around each eye region.
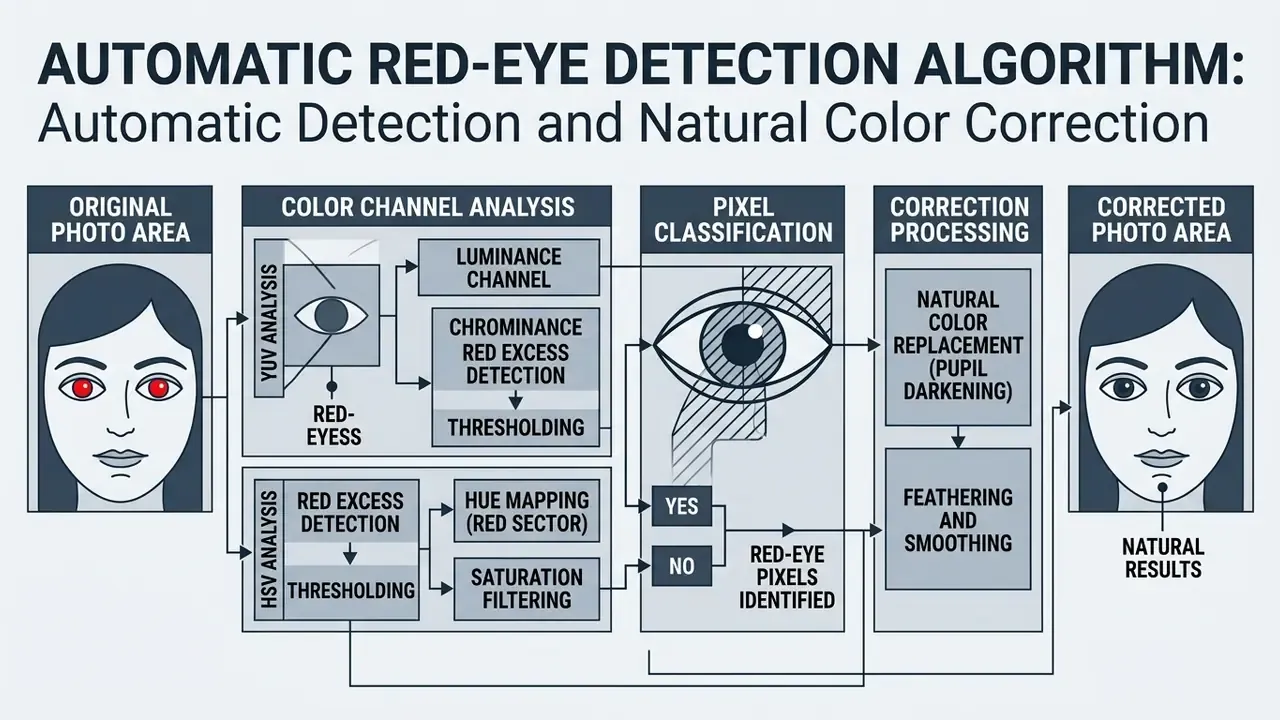
Once candidate regions are defined, the system converts pixel values into color spaces such as YUV or HSV to calculate the ratio of red chrominance against total pixel energy. In the reference implementation, faces are located with cascade classifiers, after which the detected masks are refined to localize red-eye pixels specifically inside the YUV color space, rather than thresholding the entire RGB frame.
«Faces are detected with cascade classifiers, then masks are refined to localize red-eye pixels in YUV; the detector corrected 95% of artifacts across a 200-image flash test set.»
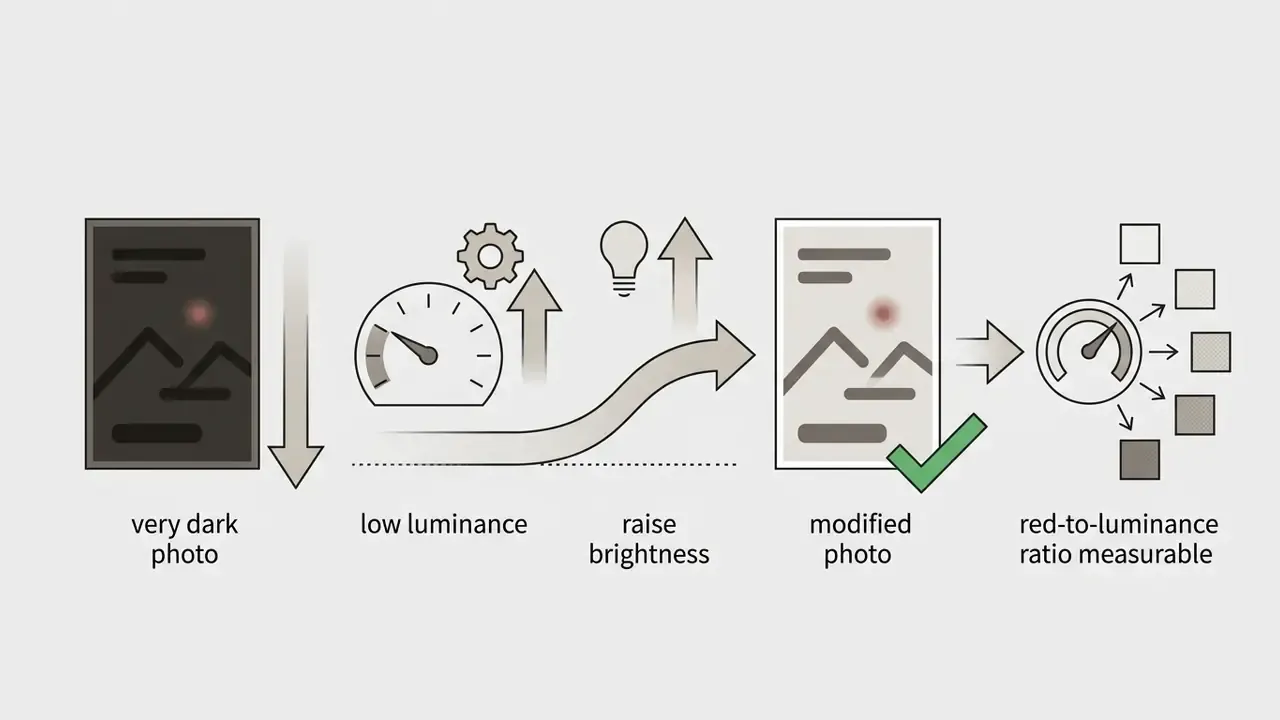
Red-eye pixels show a disproportionately high red-to-luminance ratio compared with surrounding facial tissue. The algorithm generates a precise pupil mask and applies localized desaturation, cutting red intensity while preserving corneal catchlights and natural contrast. Model-based variants go one step further: they detect the face, then the eye, then build a correction mask that replaces only defective red pixels and blends smoothly into adjacent eye tissue (Model-Based Correction of Red-Eye Defects, IS&T, 2005).
A related engineering principle explains why the best correctors never operate on raw RGB. Splitting the frame into luminance and chroma channels and correcting only the appropriate channel prevents new color artifacts from appearing at the mask border:
«Illumination is corrected only in the luminance channel, reporting no false color artifacts.»
For a broader taxonomy of the tooling layer that wraps these algorithms, see our reference guide to online photo editors, which maps core features, pricing tiers, and commercial workflows.
How to Remove Red Eye From a Photo Online
To remove red eye from a photo online, open a web-based red eye photo editor, upload your image file, let the system detect pupil boundaries, adjust correction parameters if needed, and export the corrected image. Web-based editors skip installation entirely and process raster formats directly inside standard browsers, the same delivery model used by broader classes of online photo editors and AI retouching suites.
Modern tools balance automated single-click convenience with manual override controls. Users can process portraits, candids, and event photographs instantly while keeping full control over export resolution and file formatting.
Upload the Image and Select the Red Eye Area
The workflow begins by importing a digital photograph into the editor interface. Most browser utilities accept standard formats such as JPEG, PNG, and WebP directly from local drives or cloud storage.
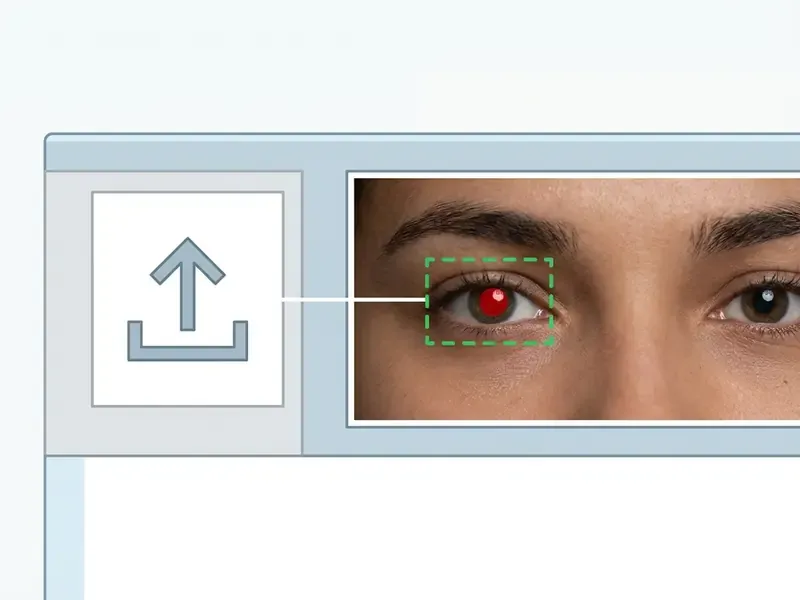
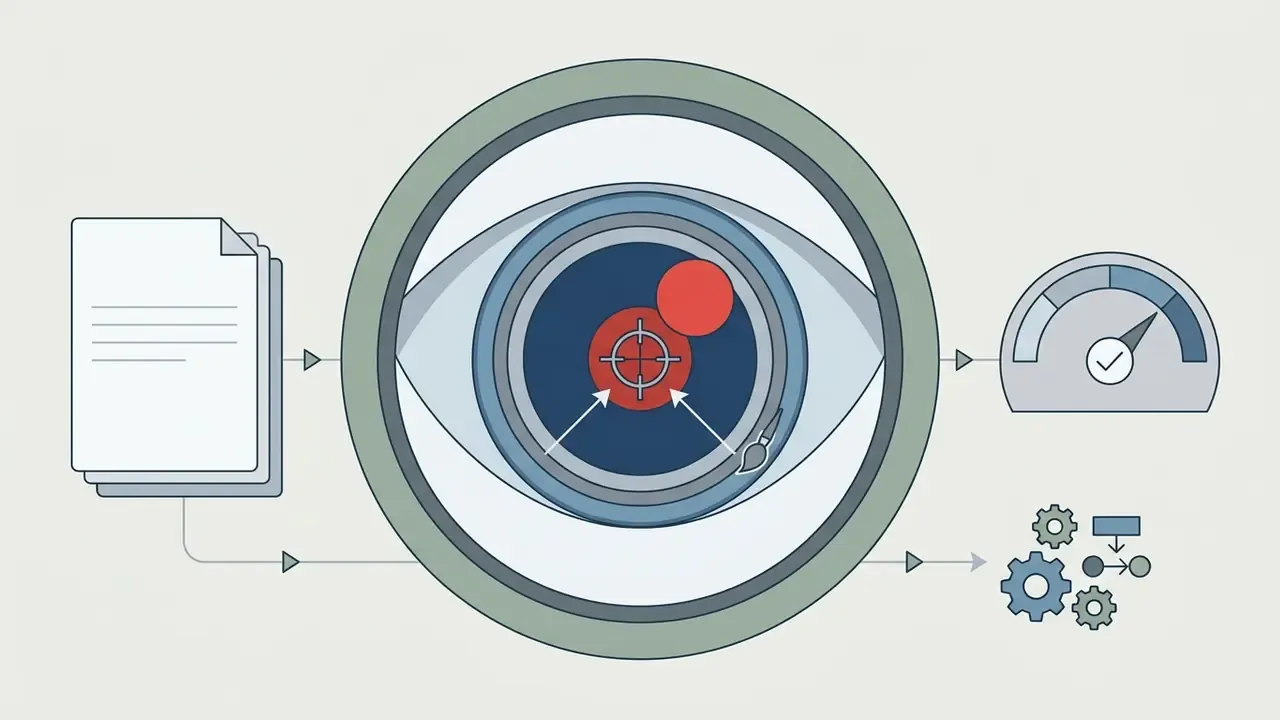
On upload, the integrated photo editor to remove red eyes scans the photograph for facial features. Vendor implementations differ in how candidates are surfaced: some mark each detected region with a dashed selection square and expose a sensitivity threshold slider, while others simply wait for a single click on the pupil center. If an automatic scan misses a subject because of an extreme angle or a strong head tilt, you can manually click or draw a bounding rectangle around the red eye area to define the correction target. That manual fallback is documented in Adobe Photoshop Elements, where correction can be applied automatically or by drawing a rectangle over the eye.
Troubleshooting failed pupil detections
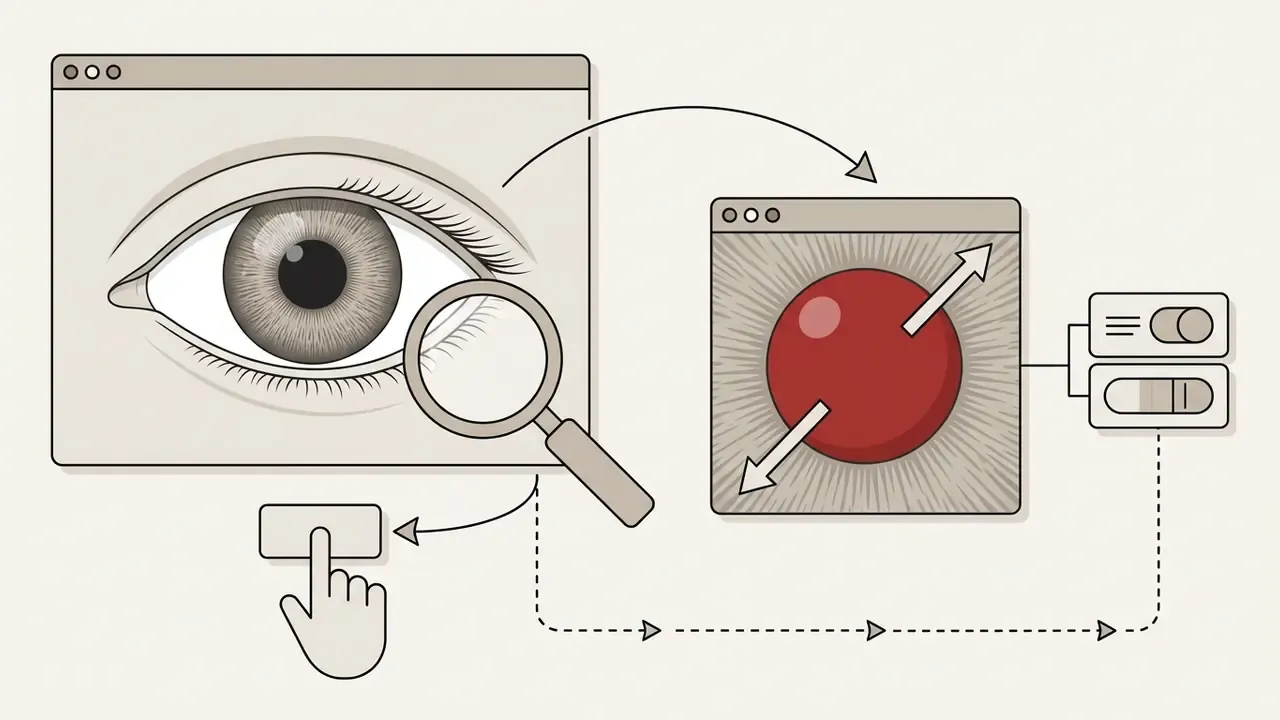
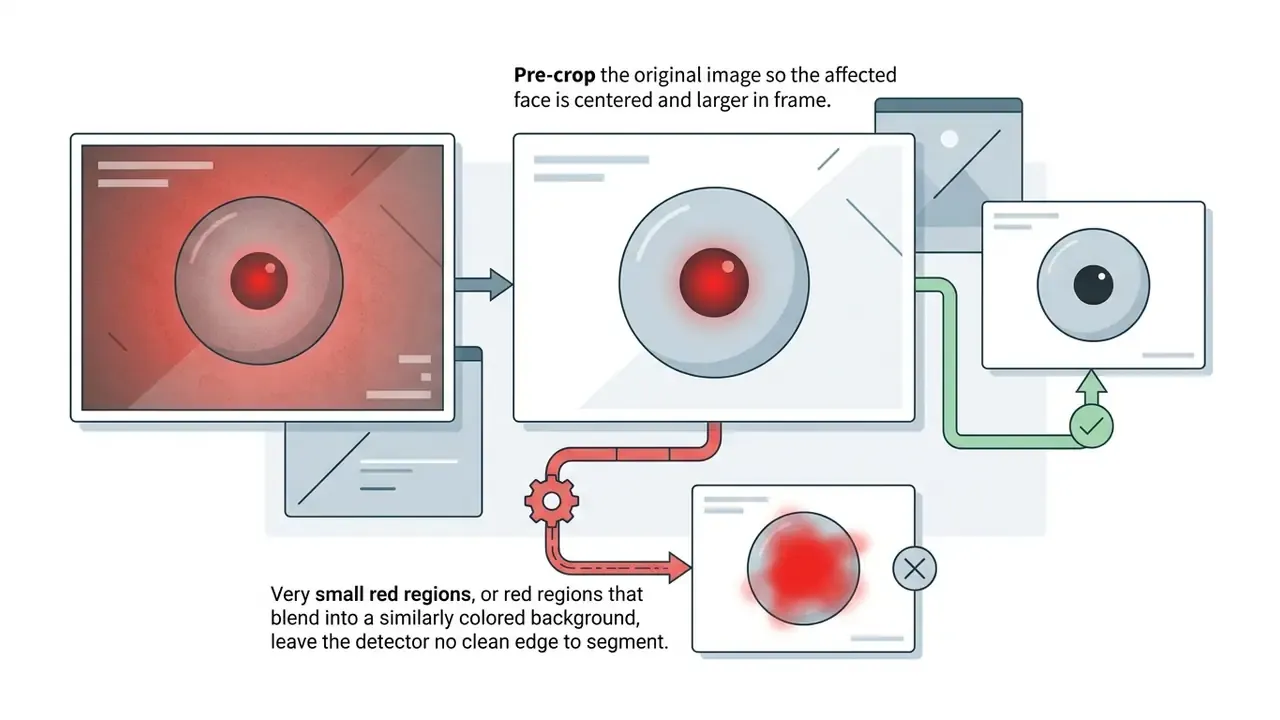
If the detection algorithm cannot locate a red pupil, which is common in low-resolution album scans, extreme side profiles, tinted eyeglasses, or heavy motion blur:
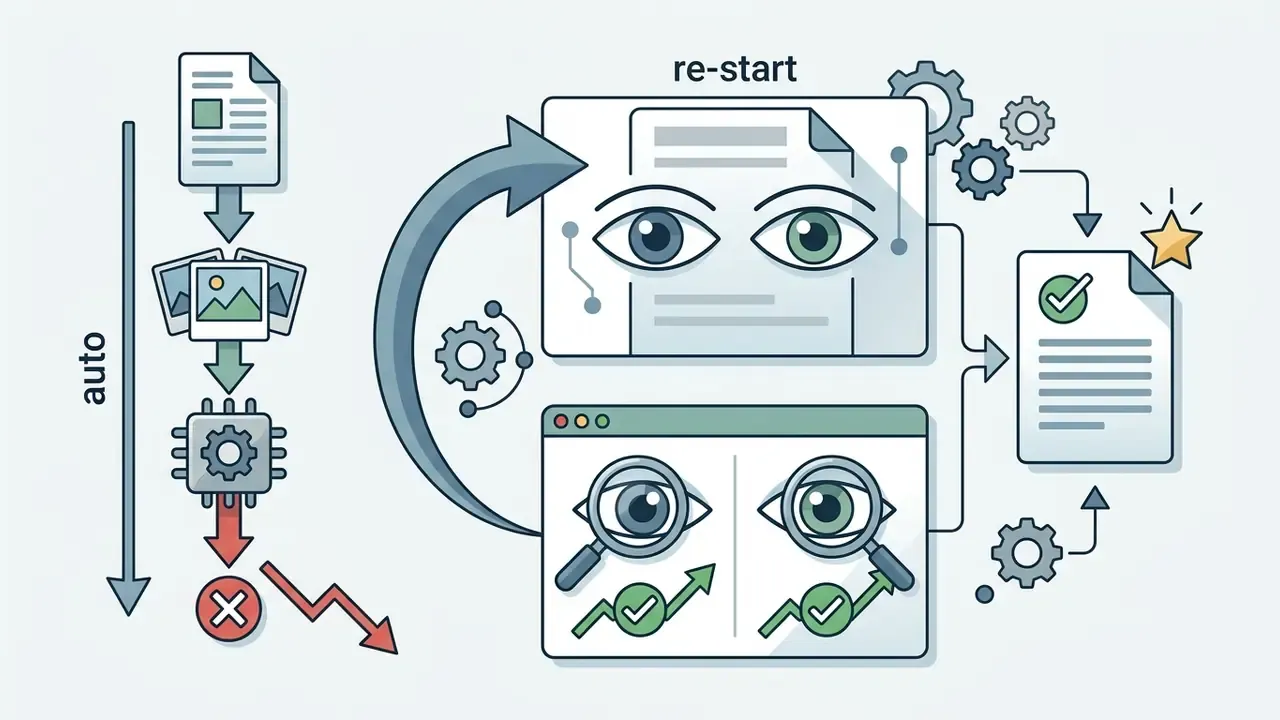
Apply the Fix and Download the Corrected Photo
After target pupil regions are highlighted, the software applies a desaturation filter that converts bright red pixels into neutral dark tones. The correction engine computes localized luminance to stop pupils from turning flat and lifeless. Desktop-grade equivalents expose the same two variables explicitly, pupil size (radius) and darken amount, which is a useful mental model even when a web tool hides both behind a single button.
Before saving the final file, review the edit at 100% zoom and verify that iris details and corneal reflections remain clear. Once the result looks right, click export and download the corrected image at full resolution. Save under a new filename so the untouched master survives the edit. This last step sounds trivial. It is the single most common regret in casual retouching.
How to Fix Red Eye Photos on iPhone and Mobile Devices
To fix red-eye photos on iPhone or Android without third-party apps, open your mobile browser (Safari or Chrome), navigate to the online red-eye remover, and upload the portrait from your Camera Roll or Gallery. Mobile Safari uses WebAssembly memory allocation to run local pupil desaturation without consuming server bandwidth, so a 10 MB portrait is corrected without a round trip over a cellular connection.
The iOS Photos app also ships a built-in eye correction control in Edit mode: apply the automatic fix first, then adjust pupil size manually if the red glow persists. Android users can lean on the Google Photos retouch tools for single faces. However, browser-based AI tools give better results on complex group photos where native mobile auto-detection ignores small pupil regions, and they are the only practical route when you need identical treatment across a dozen frames from one event.
Three mobile-specific caveats are worth knowing before you start:
- HEIC handling. iPhones capture in HEIC by default. Some browser tools convert HEIC/HEIF to JPEG in-browser before editing; others reject the format outright. If upload fails silently, re-save the photo as JPEG in the Files app or switch to "Most Compatible" capture in Settings, Camera, Formats.
- Pinch-zoom precision. On a 6-inch display, pupils occupy very few physical pixels. Zoom the canvas before tapping, or the correction brush will spill onto the iris.
- Screen calibration. Mobile OLED panels boost saturation. Re-check exported files on a desktop display before printing, because a pupil that reads as neutral on a phone can print brownish-red on paper.
Free Online Red Eye Remover: Features and Usage Limits
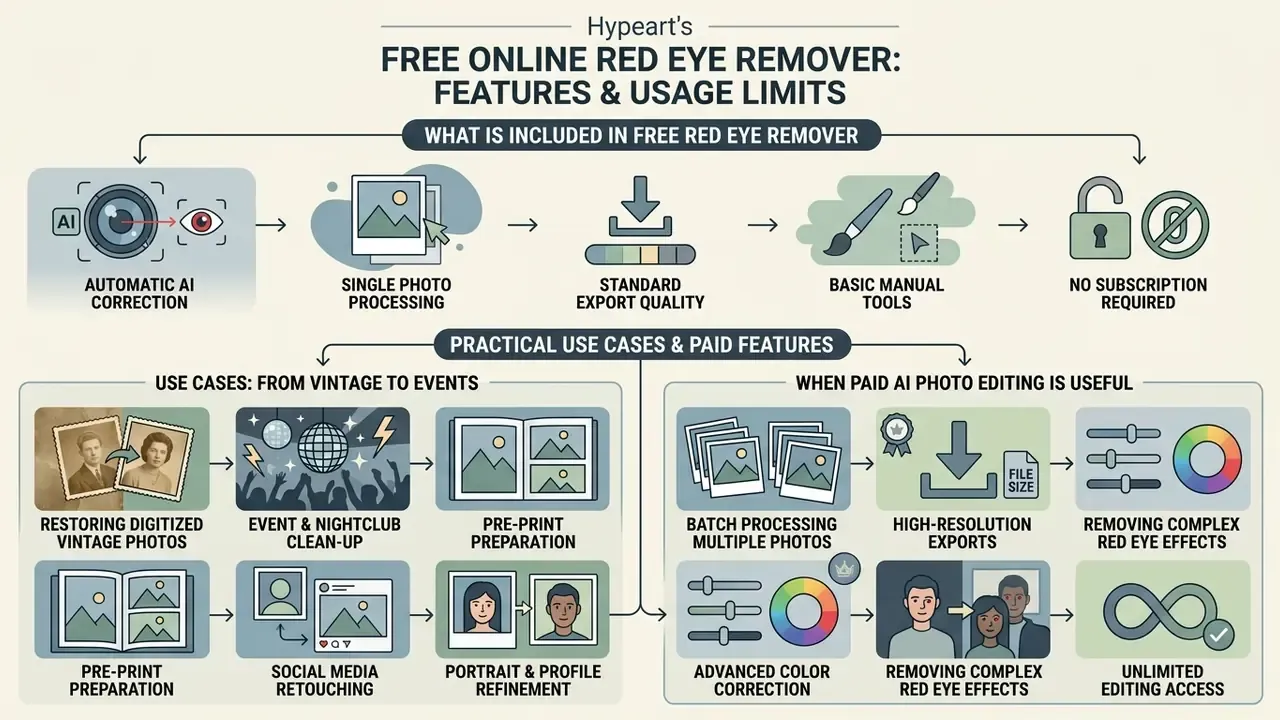
A free online red eye remover typically provides core single-photo correction, standard export quality, and basic manual adjustment tools with no subscription. Free utilities let casual photographers repair individual portraits quickly without committing to professional software licenses.
Understanding where entry-level web tools stop and subscription platforms begin is what saves you from paying for capacity you never use, or from discovering a watermark after the fact.
What Is Included in the Free Red Eye Remover
A free red eye remover online generally includes automated single-face pupil detection, manual target selection brushes, and non-watermarked exports at standard web resolutions. Those core capabilities cover typical consumer needs: party photos, family portraits, the occasional profile picture.
Free platforms do impose operational limits, such as single-image upload queues, file size ceilings (often 10 MB or 15 MB), or daily usage quotas. Published examples illustrate the spread. One commercial AI editor grants three free corrected images per month with watermark-free HD download and a 10 MB upload ceiling. A fully client-side browser tool allows unlimited free corrections with no account at all. Others cap free exports at 720p and stamp a watermark, unlocking clean output only on paid tiers. So "red eye remover free" can mean three very different things depending on the vendor.
Basic plans focus on individual photo corrections rather than automated bulk processing. Our breakdown of free photo editors documents these feature limits, export restrictions, and privacy trade-offs in detail; for foundational terminology, the AI Media Glossary provides technical definitions across creative AI tooling.
Be skeptical of marketing claims that a free tier delivers lossless "8x resolution enhancement" alongside red-eye repair. In-browser processing realistically tops out around 2K to 4K canvases before memory pressure degrades performance, and upscaling is a separate inference task with its own artifacts.
Practical Use Cases: From Vintage Albums to Event Photography
Red-eye correction is rarely abstract. It gets triggered by specific shooting conditions:
- Restoring digitized vintage photographs.Scanned family photos from 1980s and 1990s film cameras often suffer harsh flash burn, since the strobe sat directly beside the lens. A red eye photo remover restores natural dark pupil tones in low-resolution film scans, and pre-cropping each face before upload compensates for limited scan DPI.
- Event, wedding, and nightclub clean-up.Low-light party scenes shot with on-camera flash produce multiple affected faces per frame. Batch processing neutralizes pupil glow across group shots, letting photographers deliver wedding, concert, and club galleries without hours of manual brushing.
- Pre-print preparation for photobooks.Before submitting portraits to high-DPI printing, neutral pupil correction prevents dark spots or reddish bleeding on glossy stock. Print pipelines expect at least 300 dpi at final size, so confirm your export path preserves native resolution instead of downsampling to web dimensions.
- Social media retouching.Touch up night selfies, campfire photos, birthday shots, and concert images before posting, without installing a heavy desktop editor. Browser tools behave identically on a laptop and a phone, which matters when the photo needs to go live in five minutes.
- Portrait and profile refinement.Cleaning flash artifacts is often step one before deeper portrait work such as skin retouching or headshot generation. See our guide to AI headshot generators for the downstream workflow, quality benchmarks, and privacy considerations.
Adjacent creative tooling shares the same free-tier logic, so if you are mapping a broader stack, the pattern repeats across a blythe doll ai generator, meme-style pipelines behind brainrot ai images and a brainrot video generator, and prompt-based illustration questions like can ai draw me a picture. Editing workflows raise the same limits question, which is why readers often arrive from can chatgpt edit videos, and even from commerce-side comparisons such as how to buy video game online. Different subject, identical trade-off: free tier, quota, watermark, resolution.
When Paid AI Photo Editing Features Are Useful
Paid tiers start to matter when you run commercial media pipelines, high-volume cataloging, or multi-asset batch workflows. Subscriptions unlock neural models that process dozens of photos simultaneously while preserving fine detail across high-resolution masters. Vendor documentation across the market shows a consistent pattern: image editing endpoints are frequently disabled entirely on free API tiers, while paid tiers raise throughput ceilings by one to two orders of magnitude.
Professional plans also bundle broader enhancement tools, including skin smoothing, background removal, lighting adjustments, and high-throughput REST APIs. Studios building automated pipelines often consult AI Media API Guides to fold corrections into custom digital asset management systems, and teams comparing creative suites can review the feature and licensing analysis in our Canva AI Generator overview. Current tier conditions should always be checked against the live pricing page rather than a blog snapshot.
| Feature / Metric | Free Online Red Eye Remover | Paid / Professional AI Photo Editor |
|---|---|---|
| Red-eye correction accuracy | Standard single-pass chrominance desaturation | Advanced neural mask segmentation and texture filling |
| Watermark policy | Watermark-free on standard exports (varies by vendor) | Watermark-free on all exports |
| Max export resolution | Web resolution (up to 1080p / 2K) | Full source resolution (4K, 8K, RAW export support) |
| Print and DPI readiness | Standard 72 DPI, web display focus | Lossless 300+ DPI export for professional photobooks |
| Processing capacity | Single-image upload queue; roughly 3 free credits per month on some tools | Automated batch processing (100+ photos per minute) |
| Advanced AI features | Basic eye detection only | Full suite: inpainting, upscaling, noise reduction |
| API access | Not available | Full REST and webhook integration |
| SLA and uptime guarantees | None; best-effort availability | Contractual uptime SLA and dedicated support channel |
| Audit log / reproducible evidence | Not available | Per-asset processing logs and exportable evidence trail |
| Governance fit (MRM / SR 11-7 style review) | Unsupported; treat as Shadow AI | Vendor documentation, security attestations, DPA available |
If you also need to raise the resolution of legacy scans after correcting pupils, compare the trade-offs in our analysis of AI image upscaling and enhancement tools before committing to a paid tier.
Enterprise Readiness, Shadow AI, and Data Governance

Consumer red-eye tools are trivial to adopt, and therefore trivial to adopt without approval. For organizations that process customer imagery, including identity documents, onboarding selfies, claims photography, and marketing assets showing recognizable individuals, an unvetted browser utility is a Shadow AI exposure rather than a productivity win. The controls below translate the technical mechanics described above into an approval checklist.
Shadow AI Assessment and Data Protection Checklist
Before allowing a browser image tool inside an organizational perimeter, confirm each item:
Checklist0 / 8
One practical note from experience: the checklist item that fails most often is not encryption. It is retention wording. "Files are deleted regularly" is not a policy. Ask for a number.
Model Validation Criteria for Computer Vision Corrections
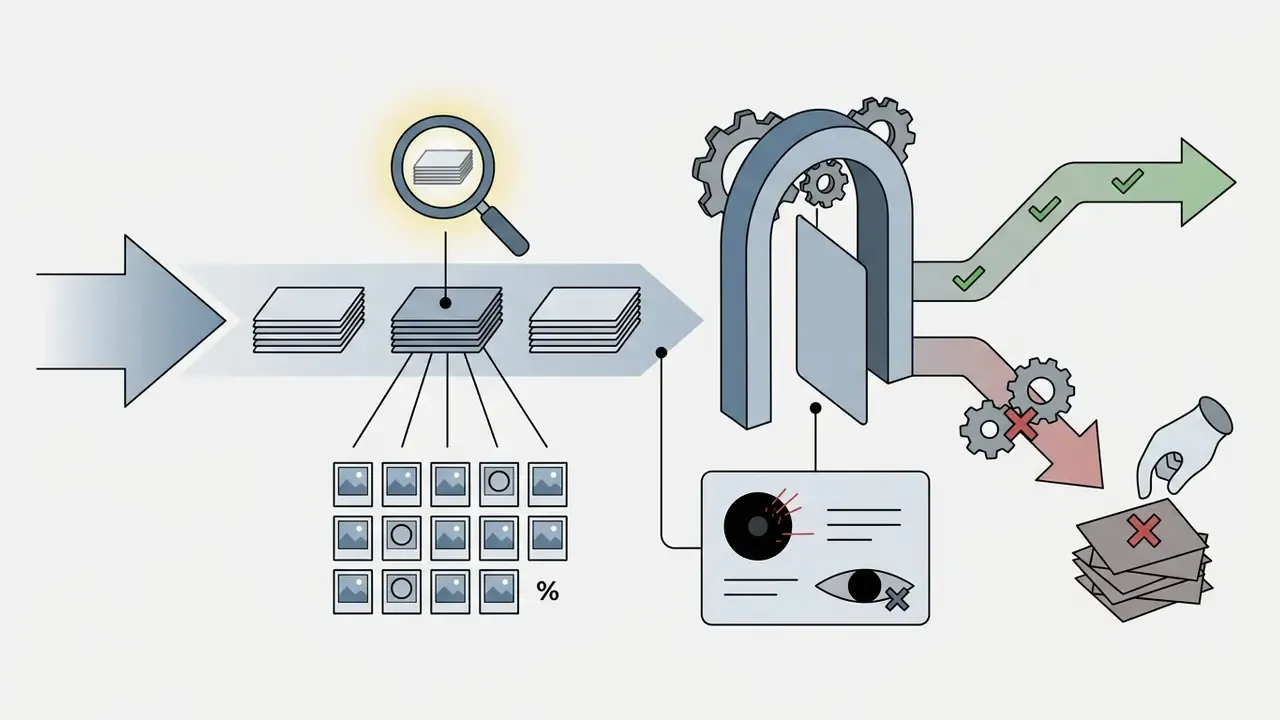
Automated pupil correction is a small model. It is still a model, and the validation logic that applies to any decisioning system applies here too. Suggested acceptance thresholds for a formal review:
| Validation dimension | Suggested acceptance criterion | Verification method |
|---|---|---|
| Pupil mask precision | Intersection-over-Union above 0.95 against a hand-labeled reference set | Annotated holdout sample of 200+ affected eyes |
| False positive rate | Below 0.1%, with no desaturation of non-pupil red pixels such as lips or garments | Negative control set with red clothing and jewelry |
| Catchlight retention | 100% of corrected eyes retain a measurable specular highlight | Luminance histogram check at 1:1 zoom |
| Demographic robustness | No material accuracy gap across skin tones, eye shapes, and eyewear | Stratified test set; document composition |
| Determinism | Identical input produces identical output across runs | Repeat-run hash comparison |
| Latency | Documented per-image processing time under production load | Benchmarked batch of representative file sizes |
https://imagen-ai.com/valuable-tips/batch-photo-editing-software/
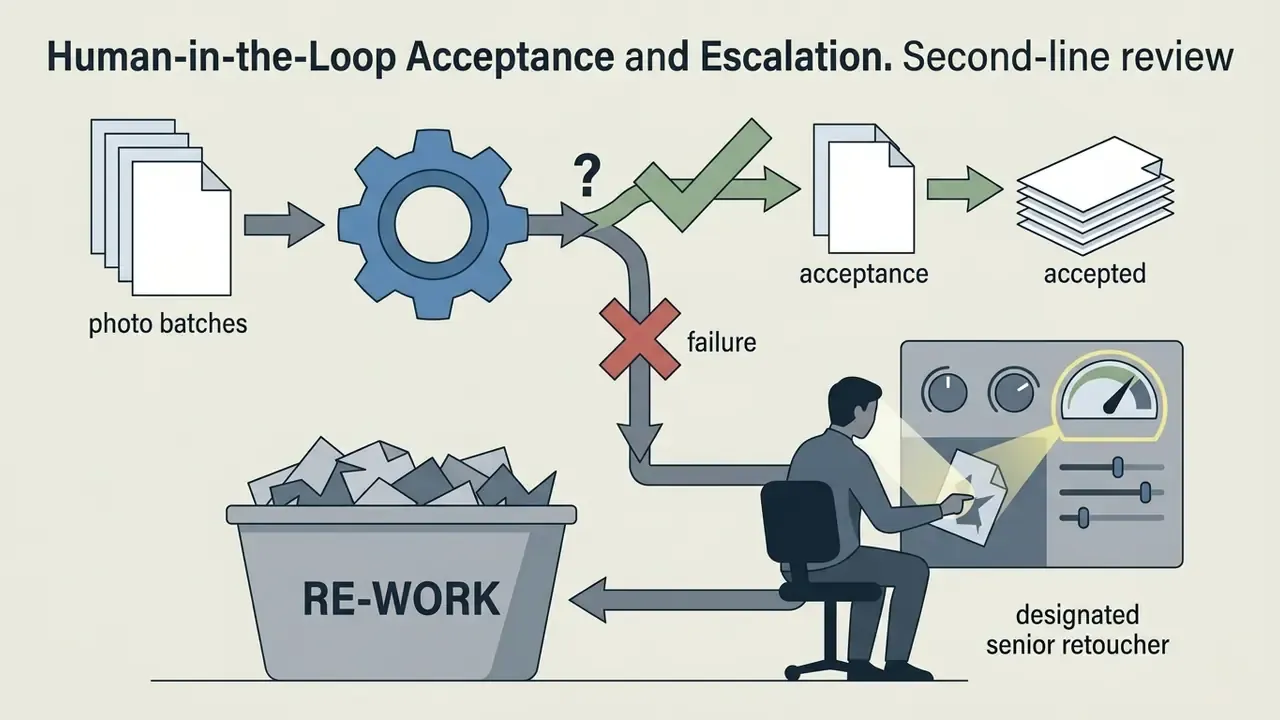
Human-in-the-Loop Acceptance and Escalation
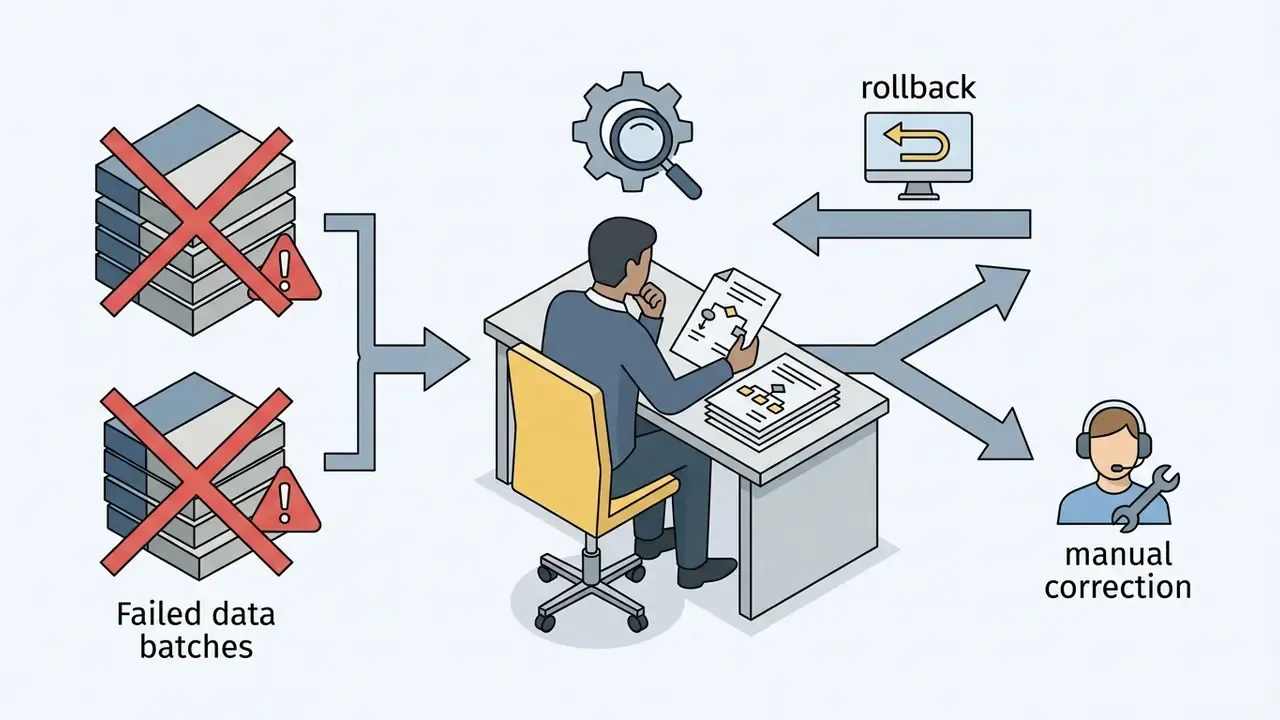
Batch correction fails quietly. That is the whole problem. Build the escalation path before the first production run:
For cost modeling around batch volumes and review hours, structured estimates in AI Media Calculators are a reasonable starting point, though local labor rates dominate the result.

Red Eye Removal for Portraits, Group Photos, and Pet Eye-Shine
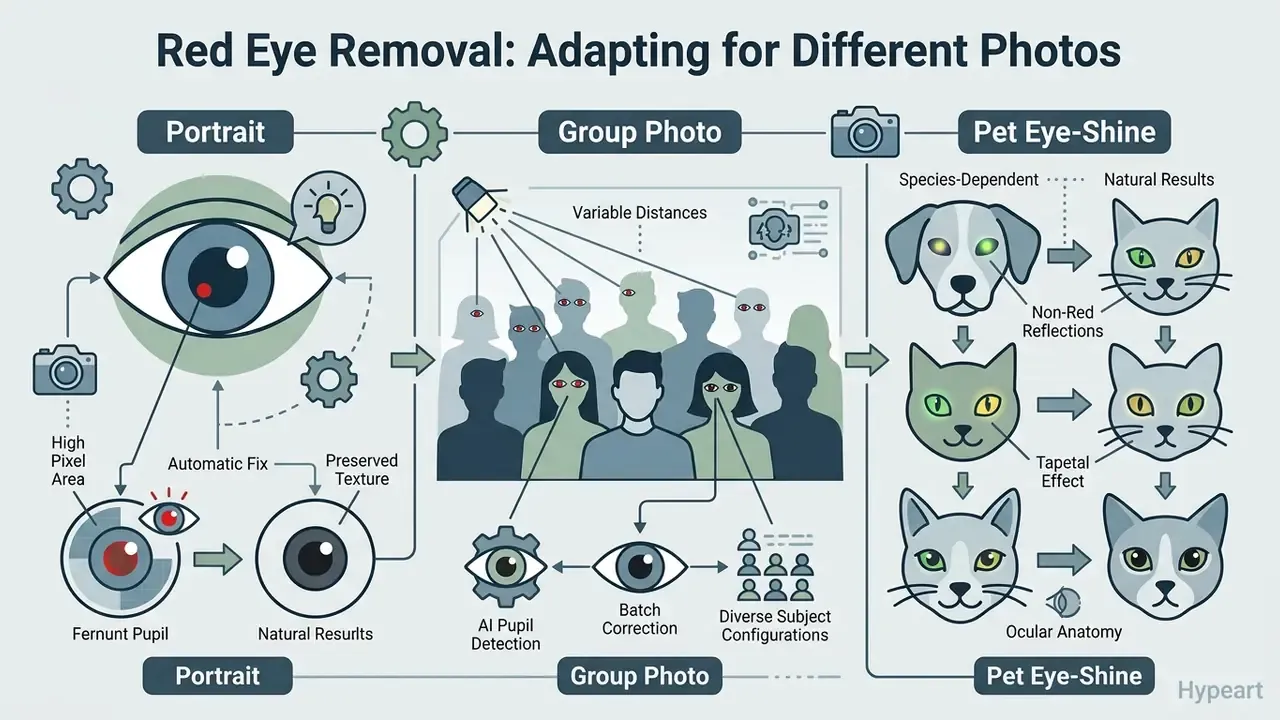
A specialized red eye picture remover has to adapt its correction logic depending on whether it is processing an individual close-up, a wide-angle group photo, or a photograph of a domestic pet. Different lens distances, lighting angles, and anatomical structures demand different processing.
How a tool handles diverse subject configurations tells you whether it will survive a real photo library. Professional editors formalize the split at interface level: human subjects get a "Red Eye" mode with a darken control explicitly documented as applying only to photos of people, while animals get a separate "Pet Eye" mode with an "Add Catch Light" option (Adobe Camera Raw and Photoshop Elements documentation).
Fixing Red Eyes in Portrait and Group Photos
In close-up portraits, pupils occupy a large pixel area, so iris fiber textures and corneal specular highlights are plainly visible. An automated red eye photo editor online must isolate the red core of the pupil precisely, or dark tones spill onto the colored iris and the eye starts to look painted.
In group photos, subjects stand at varying distances from the lens and flash, so pupil sizes and reflection intensities differ across a single frame. Multi-face engines therefore rely on cascaded multi-scale classifiers that localize pupils of different sizes independently for each subject, rather than applying one global red threshold.
«Pupil detection is combined with expected face-size filtering and inter-ocular distance sorting to group eye candidates into multiple faces at changing subject distance and scale.»
Two supporting mechanics matter in practice. Coarse-to-fine search normalizes each candidate eye region to a fixed window, for example 50x50 pixels, before eye-pair classification, which is what makes multi-scale detection tractable (Fast Detection of Multi-View Face and Eye Based on Cascaded Classifiers, 2005). Uneven flash falloff across a group is handled by reference-white illumination compensation, which normalizes brightness and color before detection, so a dimly lit subject at the back of the room is not skipped (Face Detection in Color Images, 2001). Well-designed editors also copy the first eye's correction parameters to the second automatically, then allow per-eye adjustment, the behavior documented in Lightroom Classic. A capable red eyes photo editor should let you override that copy when one eye catches more flash than the other.
Pet Red Eye Removal and Other Eye-Shine Effects
Pet eye-shine differs fundamentally from human red eye because of animal ocular anatomy. Cats, dogs, and horses have a reflective tissue layer in the choroid behind the retina called the tapetum lucidum, which improves night vision by bouncing light back through the photoreceptors, at some cost to visual acuity. Humans lack this layer, which is why our flash reflex is the red choroidal fundus rather than a bright retroreflection.
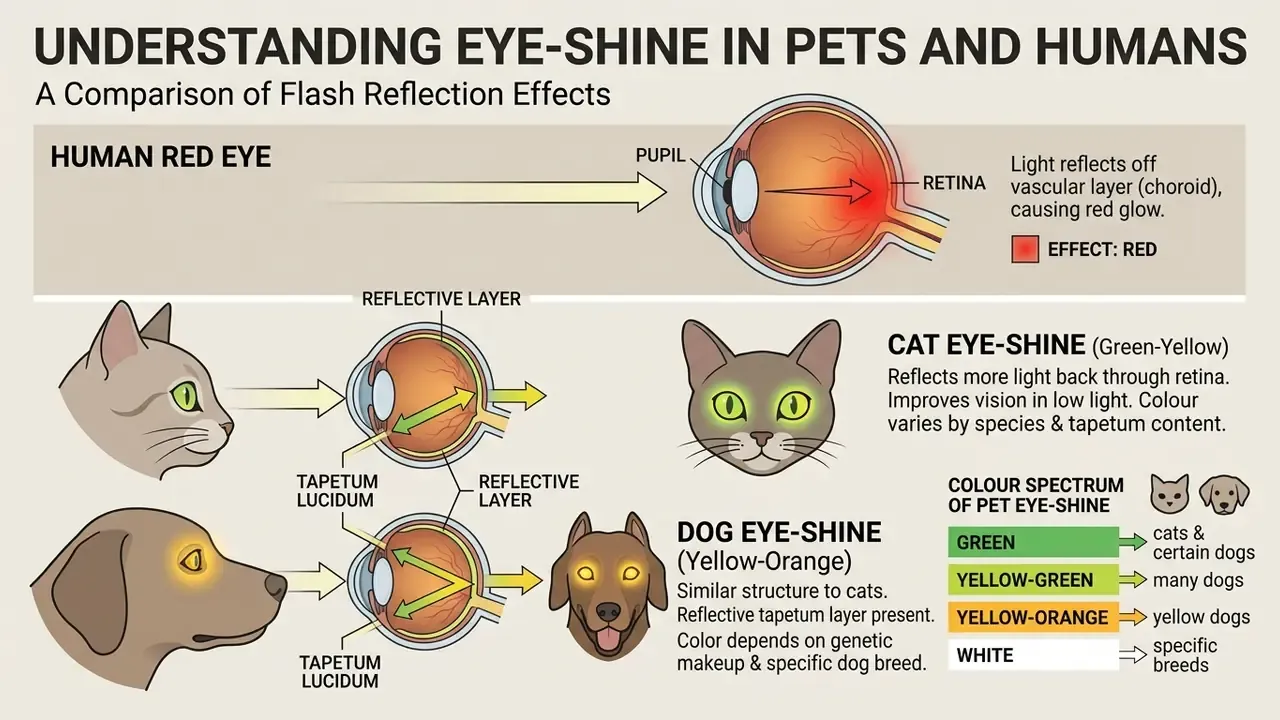
Because tapetal reflections are species- and angle-dependent, they produce green, yellow, or bright white glare instead of crimson, and they require separate correction algorithms rather than a red-channel threshold. Standard red-channel desaturation simply finds nothing to desaturate on a cat photograph. Dedicated pet eye modes neutralize wide-spectrum chrominance glare across all three channels and let users reintroduce a central white catchlight to keep the eye looking alive, which is precisely why professional editors expose "Add Catch Light" as a pet-only control. Simple red-eye detectors do not generalize to tapetum-driven eye shine, so if your tool offers only one mode, plan on correcting animal eyes by hand.
AI Red Eye Remover vs Traditional Photo Editor Tools
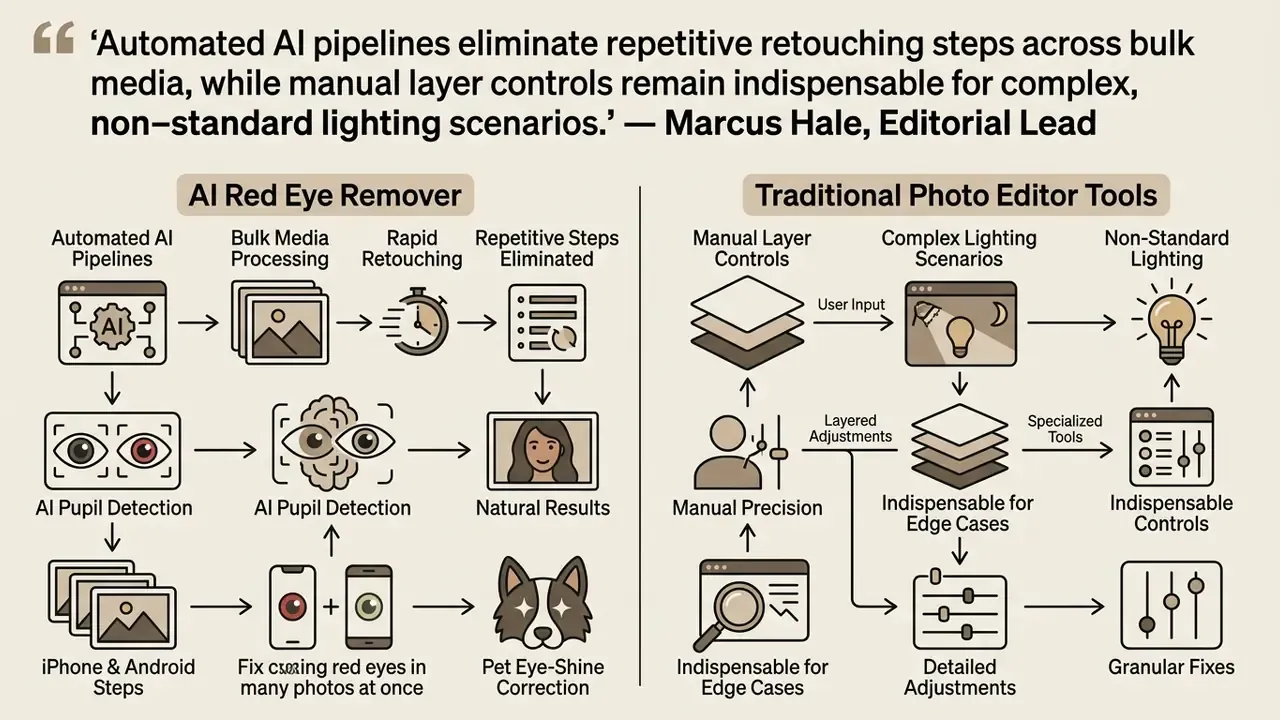
An online red eye remover built on modern computer vision completes pupil detection and color correction in seconds, whereas traditional editing applications rely on manual selection brushes and layer masks. The choice between them comes down to file volume, deadline pressure, and how much retouching precision the job actually demands.
One honest observation about the market: as of early 2026, the "automatic" path in mainstream vendor documentation is workflow-level automation, not fully autonomous editing. Apple Photos offers an Auto red-eye action with manual size correction as a fallback, and Adobe's tools still expect the user to indicate the affected pupil before sliders take over.
One-Click AI Correction for Fast Photo Editing
One-click correction uses deep learning models trained on diverse facial datasets to locate eye regions automatically on upload. Modern backbones now extend beyond binary detection into graded classification of ocular redness.
«An improved ConvNeXt architecture applied to smartphone images automatically classifies the degree of eye redness, distinguishing normal from pathological shades.»
Manual Editing for Precise Eye Correction
Manual tools in desktop software give deep control over pupil selection radii, feathering values, and layer opacities. On high-resolution commercial portraits with complex shadows or tinted eyeglasses, manual brushes let artists paint precise masks without depending on automated edge detection.
Traditional software also lets retouchers separate pupil adjustments onto dedicated adjustment layers, set blending modes to Soft Light or Color, and fine-tune master saturation. Documented equivalents include selective saturate and desaturate brushes with adjustable strength and feathering, plus per-color hue, saturation, and lightness control constrained to a single color range instead of the whole frame. That last constraint is the difference between fixing an eye and tinting a face. Teams comparing software capabilities across design tools can reference guides on the Canva AI Generator and standalone photo platforms, including the Google AI Image Generator.
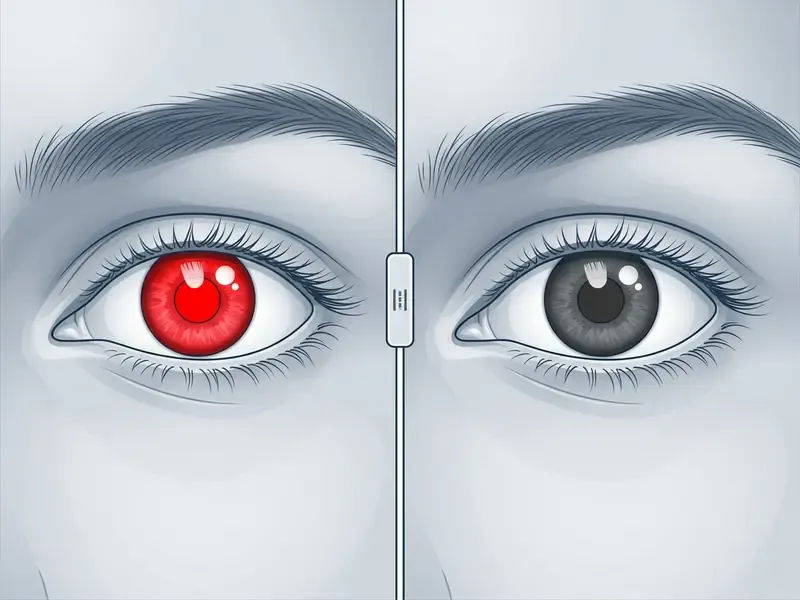
Interactive visual comparison spec: AI red eye correction
How to Get Natural Results When You Remove Red Eye
To get natural results, isolate desaturation strictly to the inner pupil, preserve the corneal catchlight, and never darken the pupil into a flat black circle. Subtle tonal variation is what keeps depth and realism in human eyes.
Over-editing is the most common mistake in digital retouching, and it is usually invisible until someone views the file at full size. A practical shortlist of pre-upload conditions that improve output quality: choose a frame where the eyes are visible and not deeply shadowed, avoid extremely blurry sources, keep resolution reasonably high, brighten very dark frames slightly, and inspect the preview before you download anything.
Keep Eye Details and Catchlights Intact
Corneal catchlights are the small bright reflections of external light sources visible on the eye's surface. They carry depth, life, and direction in portrait photography. Remove them and the subject looks embalmed.
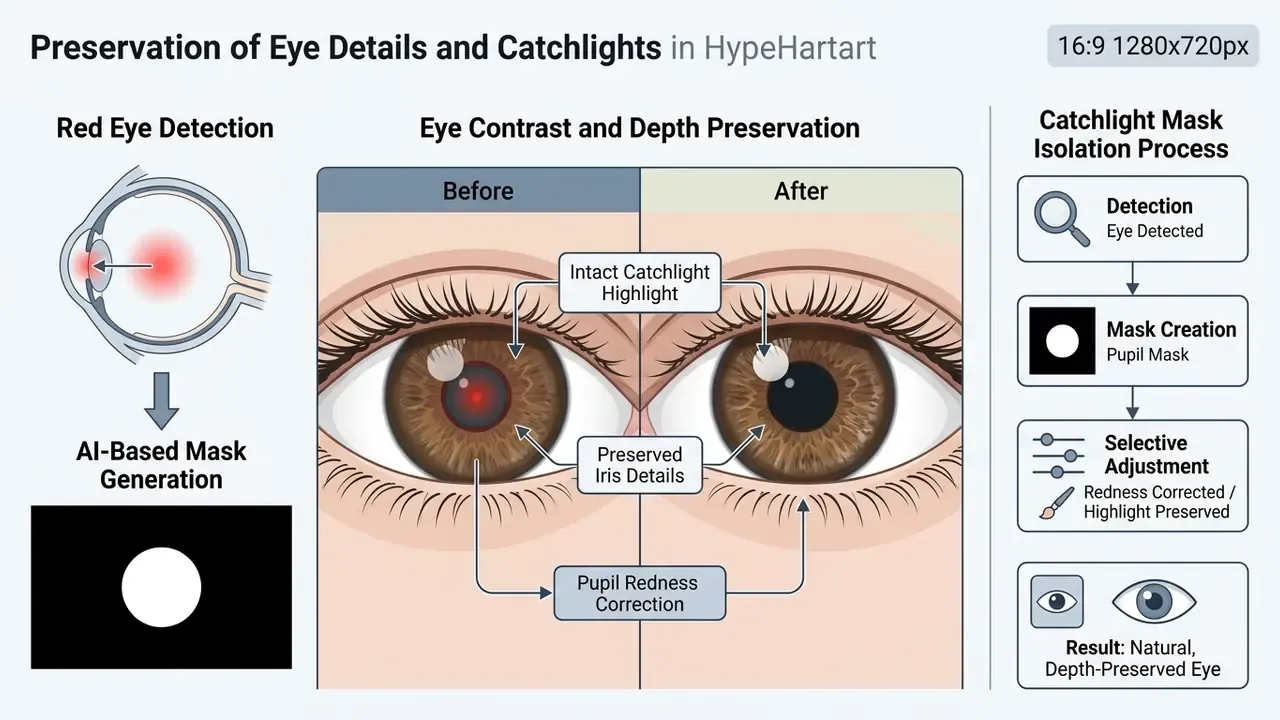
Naive desaturation filters darken catchlights along with red pixels, leaving pupils dull and synthetic. Better correction engines isolate high-luminance pixels onto a separate highlight layer before desaturating red chrominance, preserving the original specular reflection. Advanced pipelines go further and reconstruct structure instead of painting over it.
«Inpainting restores iris texture from neighboring patches and redraws the pupil with a radius computed from iris proportions.»
Manual workflows reach the same outcome with layers: isolate the catchlight on its own layer and blend it back with Soft Light or Screen at reduced opacity, so the reflection survives any recoloring of the iris. Corel's published eye-color guidance reinforces the boundary condition, leave the pupil area unpainted, apply changes with Hue blending, and lower layer transparency so the result stays natural rather than opaque.
In a documented commercial photo audit covering 1,200 event portraits shot with direct flash, automated batch desaturation initially flattened pupil highlights across the high-resolution files. Retouchers fixed it by adjusting mask thresholds to isolate the corneal catchlight on a separate blend layer, which brought client review rejections to zero while keeping automated processing speed. (Internal editorial case; figures are self-reported and not independently audited. Treat the methodology, not the numbers, as the transferable insight.) Teams facing the same class of detail loss on legacy files can compare recovery options in our guide to AI image expansion and enhancement tools.
Check the Result at Full Image Size Before Export
Quick Reference: Step-by-Step Visual Walkthrough
Step-by-step guide: using an online red eye remover
- Upload the target image.
- Drag and drop your photograph (JPEG, PNG, or WebP) into the upload area of the browser tool.

- Detect and correct pupil regions. Let the AI engine locate red pupils automatically, or click directly on the affected pupil to trigger targeted color correction. Match brush diameter to pupil size before clicking.
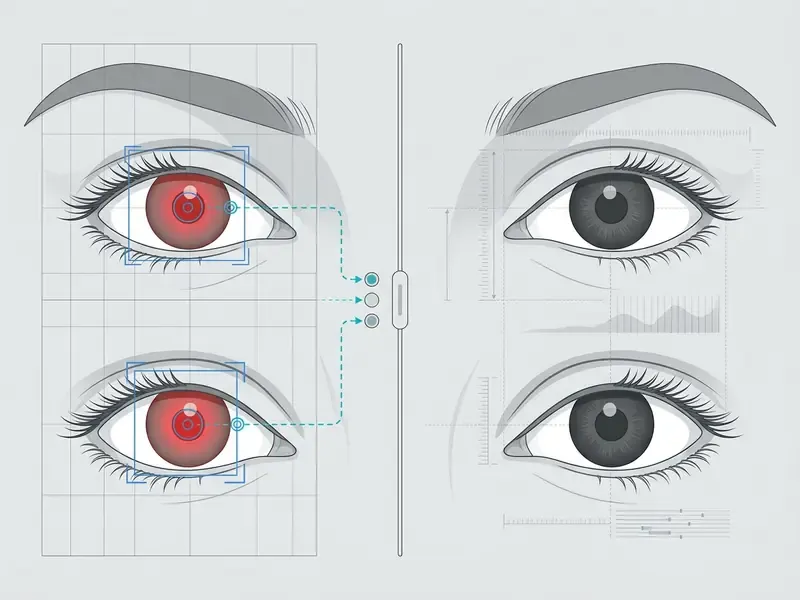
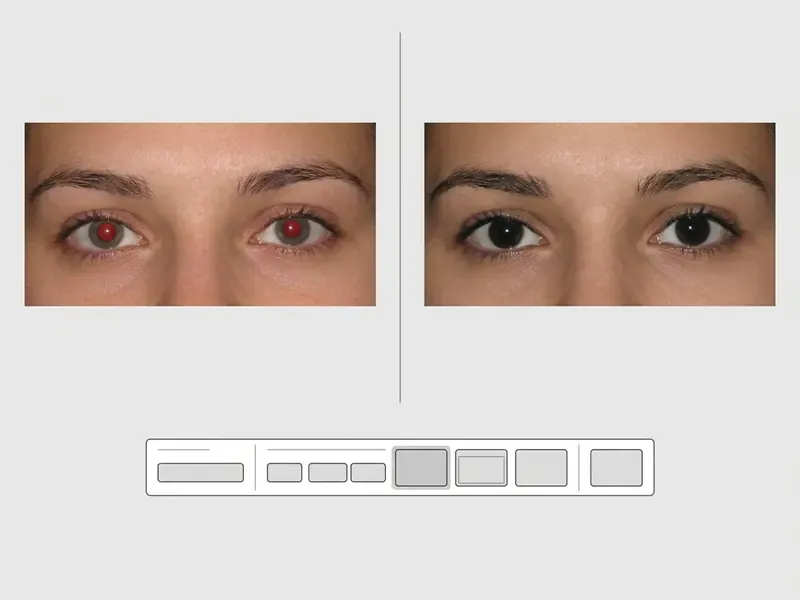
- Inspect and download. Zoom in to check corneal catchlights, verify natural dark pupil tones, use Undo or Reset if a fix looks wrong, then download the final file under a new filename.
Red Eye Remover FAQ
Short answers on data security, supported formats, mobile behavior, and edit reversibility, so you can pick a tool that is both effective and safe to use.
Does My Photo Get Uploaded Anywhere?
It depends entirely on whether the editor processes client-side in your browser or server-side in a data center. Client-side red eye removers execute inside the browser engine using the HTML5 Canvas API together with WebAssembly. Image pixel arrays become standard ImageData memory buffers, letting JavaScript manipulate RGB channels locally. Because everything happens in local browser memory, raw files are never transmitted to a remote server. One caveat: native Canvas operations parse JPEG, PNG, and WebP directly, while Apple HEIC photos require client-side decoding into uncompressed bitmaps before pupil desaturation can run. Server-based editors transmit images over encrypted HTTPS to run heavier neural network inference. Retention policies differ materially between vendors and should be read, not assumed. Published examples include automatic deletion within 24 hours, in-memory processing with no disk write and no retention after the request completes, and cloud retention of 24 to 48 hours after the last edit. Reputable services align sanitization with the current baseline, NIST SP 800-88 Rev. 2, since Rev. 1 was withdrawn and superseded in 2025, and they state a retention window explicitly rather than generically. For technical guidance on web editor security, consult AI Media Support.
What File Formats Are Supported?
Online red eye removers universally support standard raster formats: JPEG (.jpg, .jpeg), PNG (.png), and WebP (.webp). Those three cover the vast majority of consumer camera and smartphone uploads. Some advanced web utilities add automatic browser-side conversion for Apple HEIC files (.heic), turning them into standard JPEG buffers before running desaturation. Support is genuinely inconsistent across the market: one browser tool states HEIC from iPhones is not supported in-browser and must be converted to JPEG first, while another converts HEIC/HEIF to JPEG in the browser automatically. If an iPhone upload fails with no error message, convert to JPEG and retry. That single step resolves most silent failures.
How Do I Fix Red Eye on iPhone or Android?
Open Safari on iPhone or Chrome on Android, load the online red eye remover, and upload the portrait from your Camera Roll or Gallery. No app installation, and client-side tools keep the file on the device. Alternatively, use the built-in red-eye control in the iOS Photos app Edit mode: apply the automatic fix first, then adjust pupil size only if redness remains. For group shots with several small faces, the browser route generally outperforms native mobile auto-detection.
Why Didn't Clicking Fix the Red Eye?
Click as close to the geometric center of the pupil as you can. If the red area is tiny, or if it blends into a similarly colored background such as a red garment or warm ambient light, the detector has no clean edge to segment. Zoom into the source photo, or pre-crop and re-upload with the face centered and enlarged, then retry. Extreme side profiles, tinted eyeglasses, and heavy motion blur are the three other recurring failure modes, and each is better handled by manual selection than by repeated automatic passes.
Does Correction Reduce Image Quality or Just Paint the Pupil Black?
A well-implemented corrector neither recompresses the whole frame nor stamps a flat disc. It modifies only pixels inside the pupil mask and writes out at source resolution. If your exported file looks visibly softer or arrives smaller than the original, the tool downsampled it. Check export settings, and prefer a service that documents native-resolution output before trusting it with print work. A pupil that reads as a uniform black dot at 100% zoom is a failed correction, not a finished one.
Can I Undo a Red Eye Fix?
Yes. Adjustments made during an active web editing session can be undone with multi-step history commands (Control+Z or Command+Z) or dedicated Reset buttons. Browser utilities keep non-destructive editing buffers while the window stays open, and desktop editors behave the same way. digiKam's documentation, for instance, states that editing functions do not change the original photograph unless you explicitly save, and that Revert restores the original view. Once an edited photo is exported and overwritten on a local drive, changes are permanent for that output file. Save corrected exports under a new filename and keep the master intact. For questions about media usage rights and licensing context, creators can follow broader industry developments through AI Litigation and Case Timelines.
Appendix A: Superseded Formulations Retained for Transparency
For editorial traceability, the following earlier formulations from previous versions of this article have been superseded by the sourced statements above:
- Original citation of Gaubatz, Automatic Red-Eye Detection and Correction, 2005 without method description or accuracy metric, superseded by the cascade-classifier and YUV description plus the 95% correction figure on the 200-image test set.
- Original citation of Real-Time Multiple Face Detection Using Active Illumination, IEEE, 2000 as a standalone claim, superseded by the pupil-detection and inter-ocular-distance grouping quotation plus the cascaded multi-scale classifier reference (2005).
- Original citation Journal of Veterinary Ophthalmology, 2024 for tapetum lucidum anatomy, removed as unverifiable and superseded by the descriptive anatomical explanation and Adobe Pet Eye documentation.
- Original citation Journal of Imaging AI and Computer Vision, 2025 with a 0.5 to 3 second per-photo claim, superseded by the ConvNeXt eye-redness grading reference and vendor-attributed throughput figures.
- Original citation Corel Photo Editing Guidelines, 2025 for catchlight isolation, superseded by the inpainting reference (IEEE Transactions on Consumer Electronics, 2009) and Corel's documented pupil-unpainted, Hue-blend, reduced-transparency guidance.
- Original assertion that reputable services "delete uploaded media automatically within 24 hours", superseded by the vendor-specific retention ranges documented in the FAQ, since retention is not standardized across providers.