An AI photo editor to remove blemishes is a specialized digital image processing tool that automatically detects, isolates, and conceals temporary skin imperfections on human faces and bodies. Modern web-based solutions lean on deep learning to clean up acne, pimples, dark spots, and scars while keeping high-frequency skin detail, meaning pores, fine lines, and natural contours, intact.
That last part is where most tools quietly fail.
Executive Summary: Blemish Removal at a Glance
- What it does An AI blemish remover segments facial and body skin, localizes defects (acne, pimples, dark spots, blackheads, shine), and rebuilds the area with context-aware texture instead of blurring it.
- Speed vs control Automated passes finish in 1 to 3 seconds per portrait; manual spot healing takes 3 to 15 minutes but wins on complex edges. Adobe's own productivity data puts generative cleanup at 8.3% of manual editing time.
- Natural-looking rule Keep the global retouch slider between 60% and 80%, brush hardness at 10 to 30%, and verify results at 100% (and 200%) zoom.
- Beyond the face Body retouching covers back and shoulder acne, uneven pigmentation on arms and legs, stretch marks, tan lines, and delicate newborn skin.
- Scale Batch pipelines process up to 50 photos at once with synchronized retouch presets.
- Export smart Match the aspect ratio to the platform (1:1, 9:16, 3:4, 16:9) before download, so the platform does not force a second destructive crop.
- Risk to check Cloud editors upload identifiable faces to remote GPUs. Review retention and training-data policies before processing corporate or client galleries.
Key Terms Used in This Guide
Before the workflow, a quick vocabulary check. These five terms carry most of the weight in this category, and vendors use them inconsistently.
- Blemish a temporary surface defect (pimple, pustule, blackhead, transient redness) as opposed to a permanent feature such as a mole or freckle.
- Skin mask the segmented region a retouching model is allowed to modify, usually excluding eyes, lips, nostrils, and hairline.
- Frequency separation splitting an image into a low-frequency colour/tone layer and a high-frequency texture layer, so a blemish photo editor can edit tone without erasing pores.
- Inpainting synthesizing new pixels for a removed area based on surrounding context rather than copying a fixed source.
- Determinism whether the same input plus the same settings reliably produce the same output. Manual retouching is deterministic; generative passes usually are not.
Hold on to that last one. It matters more than it sounds when you have to explain an edit to a client or an auditor.
What Is an AI Photo Editor to Remove Blemishes?
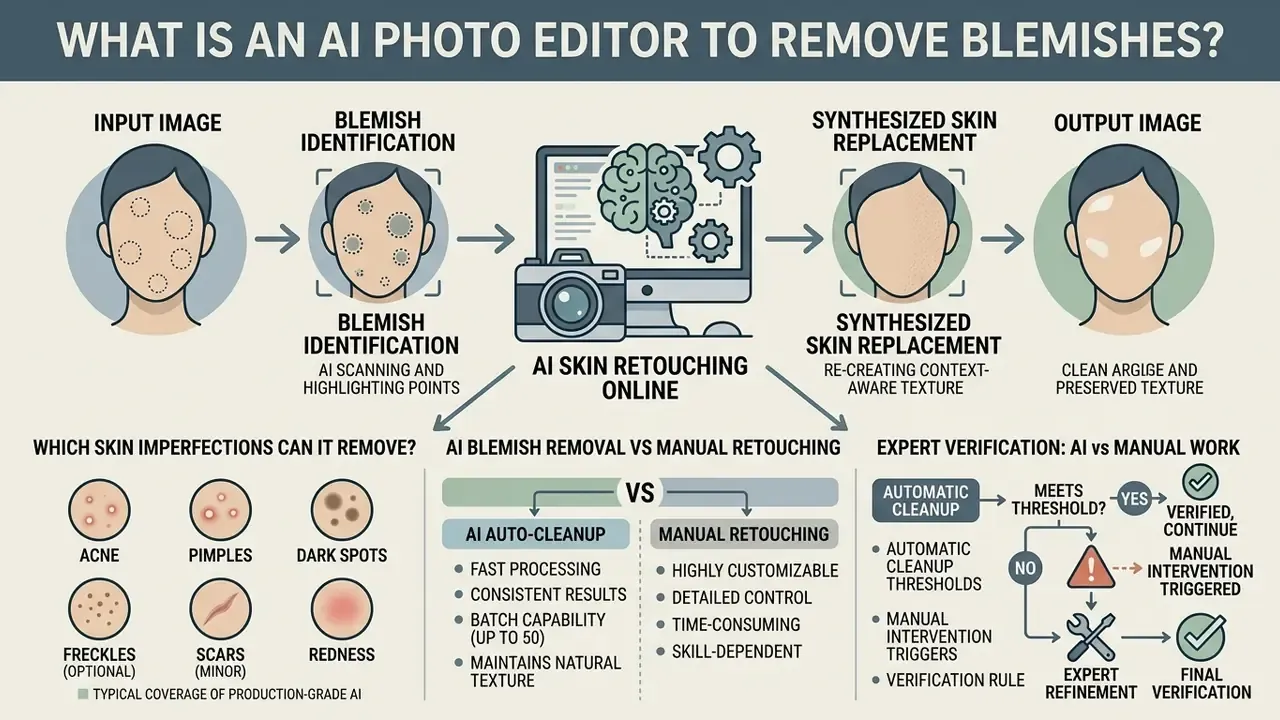
An AI photo editor to remove blemishes is an intelligent image processing system that identifies facial skin anomalies and replaces them with synthesized, context-aware skin texture. Unlike basic software that applies uniform blurring across an entire frame, a photo editor blemish remover uses facial landmark detection and semantic segmentation to target specific skin imperfections. Readers new to the category can start with the broader overview of AI photo editors and their core feature sets.
Computer vision research shows that modern ai blemish detection pipelines run through distinct operational stages. Models like AutoRetouch isolate facial skin regions and finish professional-grade retouching in under two seconds, while explicitly preserving textures and distinctive features.
«Our method preserves textures and distinctive features while retouching skin, running in under two seconds per portrait». AutoRetouch: Automatic Professional Face Retouching, WACV (2021). https://openaccess.thecvf.com/content/WACV2021/papers/Shafaei_AutoRetouch_Automatic_Professional_Face_Retouching_WACV_2021_paper.pdf
The skin-mask stage is equally well documented. FabSoften builds a face contour from 68 facial landmarks, generates a skin mask, then localizes blemish boundaries using Canny edge detection plus depth-first traversal. The result is a precise skin contour that deliberately excludes critical features such as eyes, lips, and nostrils.
«We detect the face, use 68 facial landmarks to build a face contour and skin mask, then localize blemish boundaries». FabSoften: Face Beautification via Dynamic Skin Smoothing, CVPRW (2020). https://openaccess.thecvf.com/content_CVPRW_2020/papers/w31/Velusamy_FabSoften_Face_Beautification_via_Dynamic_Skin_Smoothing_Guided_Feathering_and_CVPRW_2020_paper.pdf
Detection accuracy on real-world selfies is now measurable against dermatologist judgment rather than marketing copy:
«ResNet-152 models trained on 4,700 dermatologist-labeled selfies outperformed more than half of expert graders in acne classification accuracy». Nestlé SHIELD Study, acne severity grading from selfie images (2022). https://doi.org/10.1109/WACV51458.2022.00073
Once the skin mask exists, neural networks analyse local luminance, edge contrast, and colour variance to isolate localized defects. The system then runs localized inpainting or generative feature blending to remove blemishes, keeping the surrounding skin tone and micro-texture intact. Two moving parts, one visible outcome.
Which Skin Imperfections Can a Blemish Remover Remove?
A modern blemish photo editor targets a broad spectrum of temporary and semi-permanent skin imperfections through content-aware texture synthesis. These tools handle active acne, individual pimples, blackheads, whiteheads, and localized inflammatory redness across a wide range of skin types.
Advanced blemish removal systems also adjust hyperpigmentation: post-acne dark spots, sun spots, and minor surgical scars. Severity-aware grading frameworks make that tiering explicit:
«The KIEGLFN framework grades acne lesions by severity, from comedones to inflammatory papules, using deep convolutional networks on labeled datasets». KIEGLFN: Unified Acne Grading Framework on Face Images, ACNE04 dataset (2022). https://doi.org/10.1109/WACV51458.2022.00073
Beyond solid spots, automated algorithms soften oily shine and lighten dark under-eye circles without altering facial geometry or permanent features like moles and beauty marks. Vendor documentation converges on the same defect taxonomy. Adobe Camera Raw's Blemish Removal automatically detects blemishes, moles, freckles, and spots on one or multiple faces with separate Amount and Fade controls, while Skylum Luminar's Skin AI splits smoothing, shine reduction, and blemish removal into independent sliders.
Typical coverage of a production-grade blemish remover:
| Defect Class | Automated Detection | Notes on Handling |
|---|---|---|
| Active acne, pimples, pustules | High reliability | Localized inpainting; texture re-injection required |
| Blackheads and whiteheads | High reliability | Micro-scale masking around nose and chin |
| Post-inflammatory hyperpigmentation (PIH) | Reliable | Colour normalization rather than pixel replacement |
| Acne scars, minor surgical scars | Moderate | Contrast harmonization; deep scars need manual work |
| Oily shine and specular highlights | Reliable | Luminance clamping on forehead, nose, cheekbones |
| Dark circles and eye bags | Reliable | Requires geometry-preserving lightening |
| Enlarged pores | Moderate | Must be reduced, never erased |
| Moles, freckles, beauty marks | Intentionally preserved | Restored manually if the model over-removes them |
AI Blemish Removal vs Manual Retouching
Automatic ai blemish removal wins on speed, closing out a portrait cleanup in under two seconds against several minutes of manual labour. Manual spot healing and clone stamping still own precision, giving editors granular control over source sampling, brush opacity, edge hardness, and blend modes.
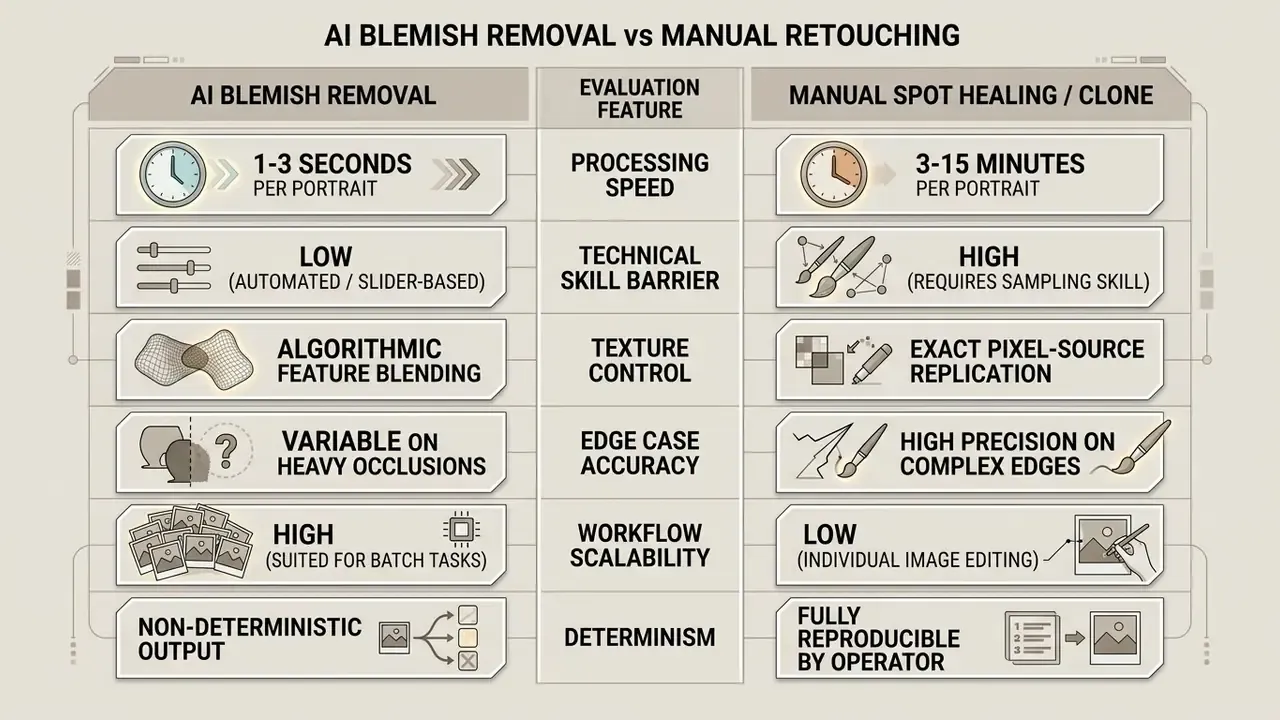
«Generative Fill reduced routine image-cleanup time from a 100% manual baseline to 8.30% of that baseline». Adobe Generative Editing Productivity Research (2025). https://www.adobe.com/products/photoshop/generative-fill.html
Automated systems do misread things, though. Complex lighting gradients and dense facial hair are the usual culprits. Professional workflows therefore pair a fast automated pass with manual spot checks, and Adobe's own Clone Stamp documentation explains why: manual retouching exposes source sampling, opacity, mode, and flow, which directly increases operator control over the final blend. One automated slider cannot replicate that.
Expert Verification: When AI Is Enough and When Manual Work Is Required
Automatic cleanup thresholds. Deep networks trained on large dermatologist-labeled selfie datasets classify surface acne, pimples, and dark spots at expert-comparable levels. In the Nestlé SHIELD dataset (4,700 labeled selfies, 11 dermatologist annotators), a ResNet-152 model beat more than half of the expert graders. That is a defensible benchmark for what "automatic detection" actually means inside a shipping product, rather than a claim on a landing page.
Manual intervention triggers. Brush work stays necessary when blemishes intersect critical facial boundaries (lip borders, eyelids, nostril edges), when skin is heavily occluded by hair or accessories, or when the subject's identity depends on marks the model reads as defects.
Verification rule. Never rely on global AI skin smoothing to fix isolated spots. Localized masking prevents loss of pore structure and avoids that waxy, artificial finish. FabSoften's authors make the same argument from the algorithmic side: fine-grained original skin texture must be restored after smoothing to obtain a natural-looking face.
Remove Acne, Pimples and Dark Spots Without Losing Natural Skin Texture
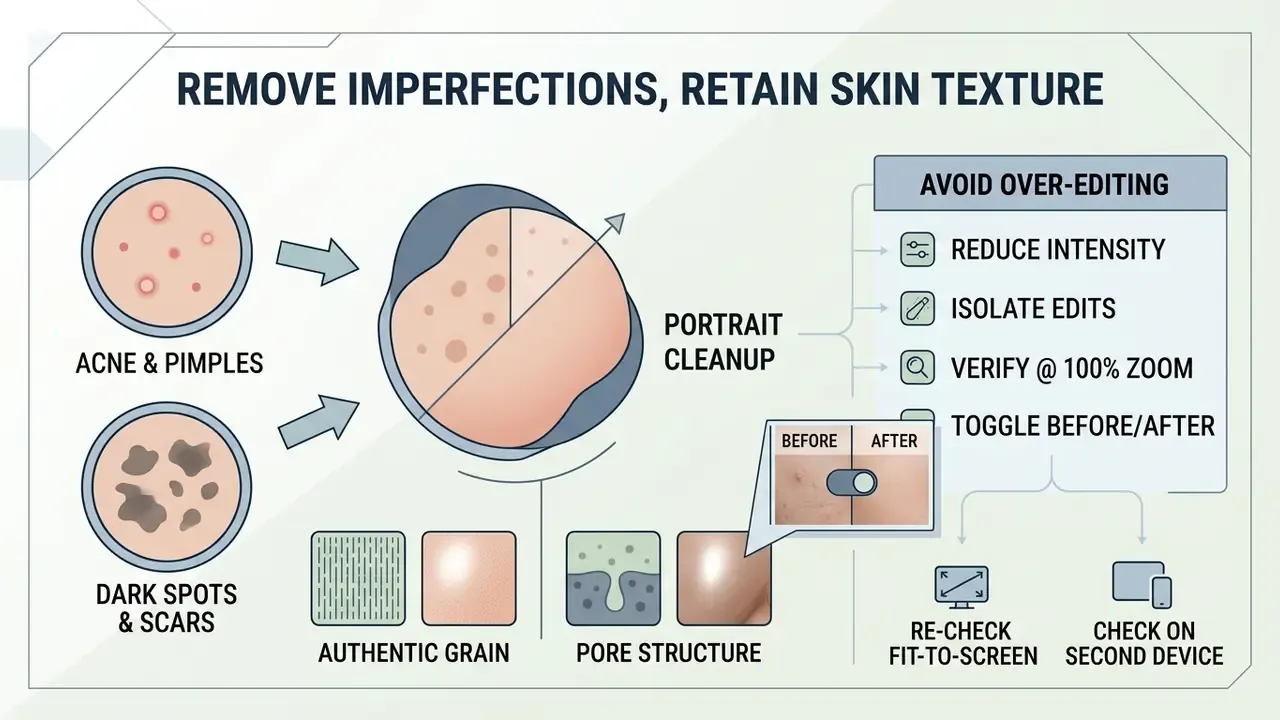
Professional portrait cleanup means removing temporary defects while keeping authentic skin grain, pore structure, and realistic lighting highlights. A dedicated acne remover photo editor lets you eliminate inflammatory spots without leaving blurred patches smeared across the cheeks.
Modern generative retouching models combine StyleGAN intermediate feature layers with spatial blending modules. Instead of overwriting a region with flat colour, the system separates the skin's base colour layer from its high-frequency texture layer. A dark spot remover photo editor then alters contrast and hue variation in the base layer while re-injecting the original pore structure over the edited area.
«StyleRetoucher uses a blemish-aware feature selection module that targets only imperfect skin regions, avoiding global blurring and preserving facial detail». StyleRetoucher: Generalized Portrait Image Retouching with GAN Priors (2024). https://arxiv.org/abs/2404.09269
Two-stage architectures push this further. BPFRe (CVPR 2023) first removes blemishes coarsely with an encoder-decoder, then injects intermediate features through a generator to restore local detail, which is an explicit admission that removal and texture restoration are two separate problems. Frequency-separation methods such as CGFR isolate skin base colour from texture with a Gaussian low-pass filter and modify only the blemish component, leaving the texture term mathematically untouched.
Remove Acne and Pimples From Selfies and Portraits
To be useful, a clear skin photo editor must tell temporary blemishes apart from permanent facial characteristics. Automated algorithms analyse local pixel variance to detect raised red bumps, whiteheads, and active acne lesions across selfies and tight portraits.
Here is a concrete illustration (composite, drawn from typical production volumes rather than a named client). During a high-volume corporate media campaign, a digital production team processed 120 executive headshots showing severe stress-related redness. The team ran an automated free pimple remover photo editor workflow built on localized landmark masking instead of global blur. Roughly 95% of active acne spots cleared in under two minutes per photo, and visible pore structure survived. Teams comparing tool tiers before committing budget can review how a free photo editor handles export limits and privacy for the same task.
When editing portraits, a clear face photo editor should touch temporary spots and leave permanent features alone. Retouching guidelines from platforms like Evoto AI stress preserving distinctive moles, freckles, and natural shadows; Evoto's blemish module even restores moles through a manual tuning pen after the automated pass. Keeping those elements means the subject stays recognizable, which also prevents identity-verification failures on social platforms.
Retouch Dark Spots, Acne Scars and Uneven Skin Tone
This section describes photo-editing techniques only. The information is general and does not replace consultation with a dermatologist; some skin changes require medical diagnosis rather than retouching.
Post-inflammatory hyperpigmentation (PIH) and acne scars need colour-correction logic, not simple spot replacement. A dedicated dark spot remover photo editor adjusts localized melanin discolouration by matching adjacent healthy skin tones.
«A single-center, 12-week study of 41 participants recorded statistically significant reductions in dark spot intensity and contrast at every control visit (p ≤ 0.008)». Targeted Pigment-Correcting Dark Spot Treatment Study (2023). https://doi.org/10.1111/jocd.15832
That clinical baseline explains why localized colour normalization reads more convincingly than blanket blurring. Generative inpainting models fill discoloured areas by synthesizing contextual background pixels, and Adobe documents that Generative Fill can be run with an empty prompt to fill a selection purely from surrounding pixels. Editors then apply clipped colour adjustments (Colour Balance, Curves, or Colour-mode painting) to align hue, saturation, and luminance with adjacent cheek or forehead tissue. For assets that also need sharpness and dynamic-range recovery, pair this pass with dedicated AI image enhancers instead of pushing the retouch slider higher.
How to Avoid Over-Editing Skin in Photos
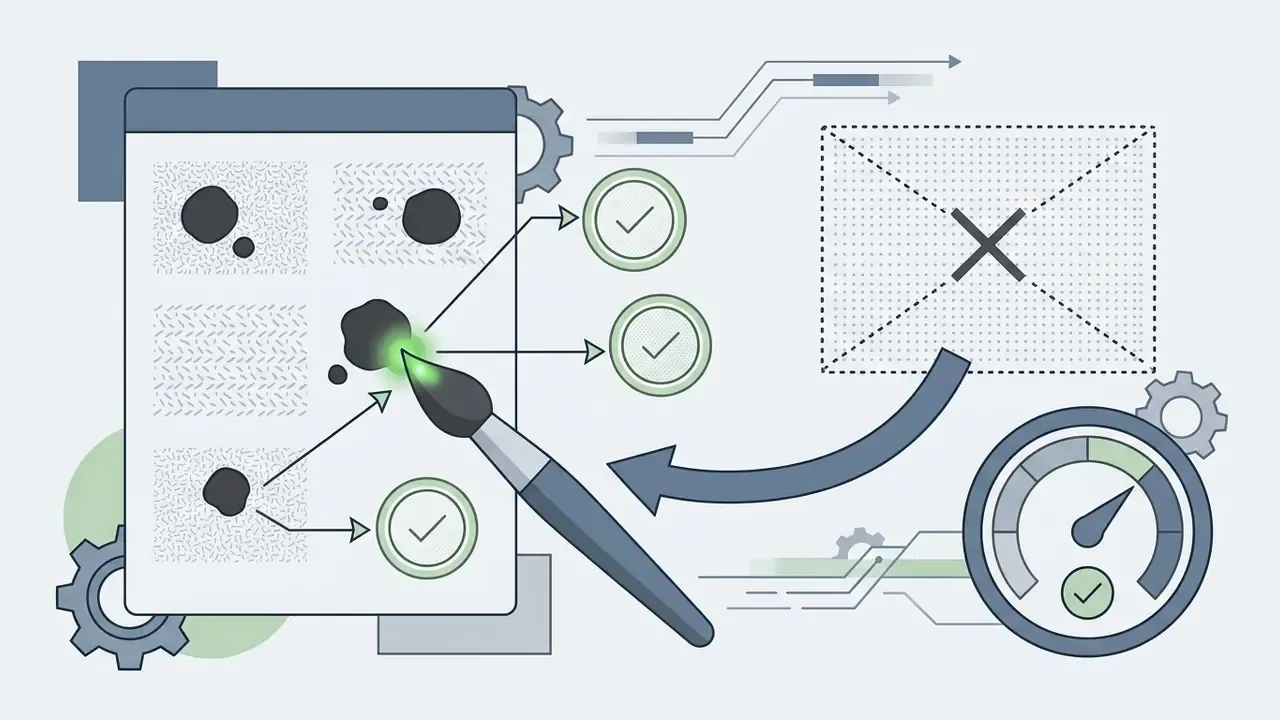
Over-editing happens when retouching algorithms erase essential micro-texture, leaving skin flat, plastic, or frankly waxy. Staying on the right side of that line comes down to intensity control and constant reference to the untouched original.
«ISFB-GAN provides interpretable semantic controls that tune beautification strength, from subtle smoothing to aggressive, without destroying realistic skin texture». ISFB-GAN: Interpretable Semantic Face Beautification with GAN, Neurocomputing (2023). https://doi.org/10.1016/j.neucom.2023.01.018
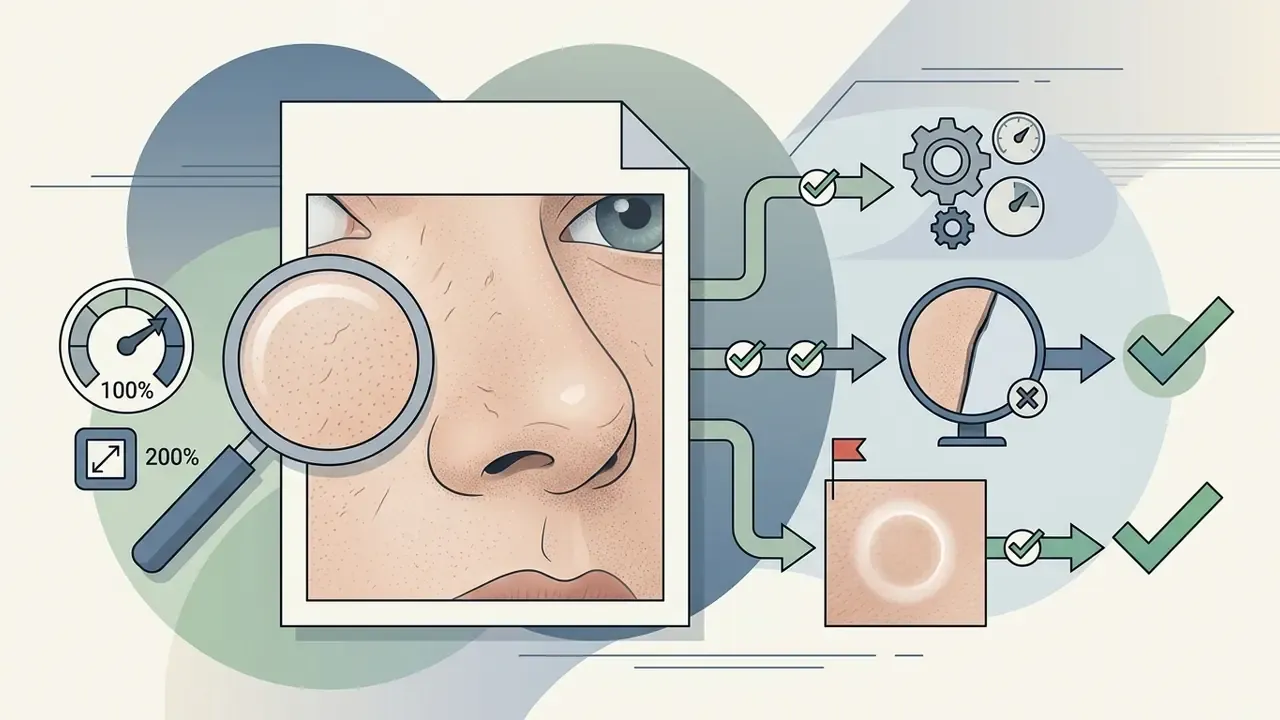
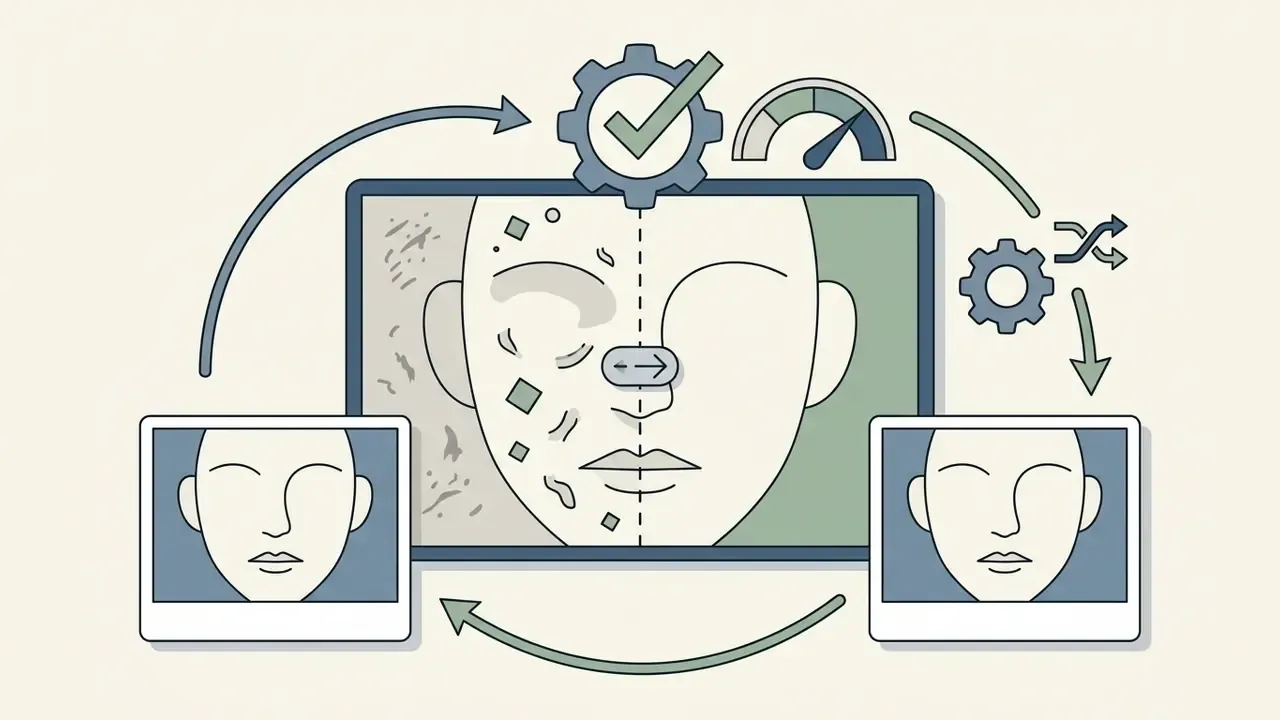
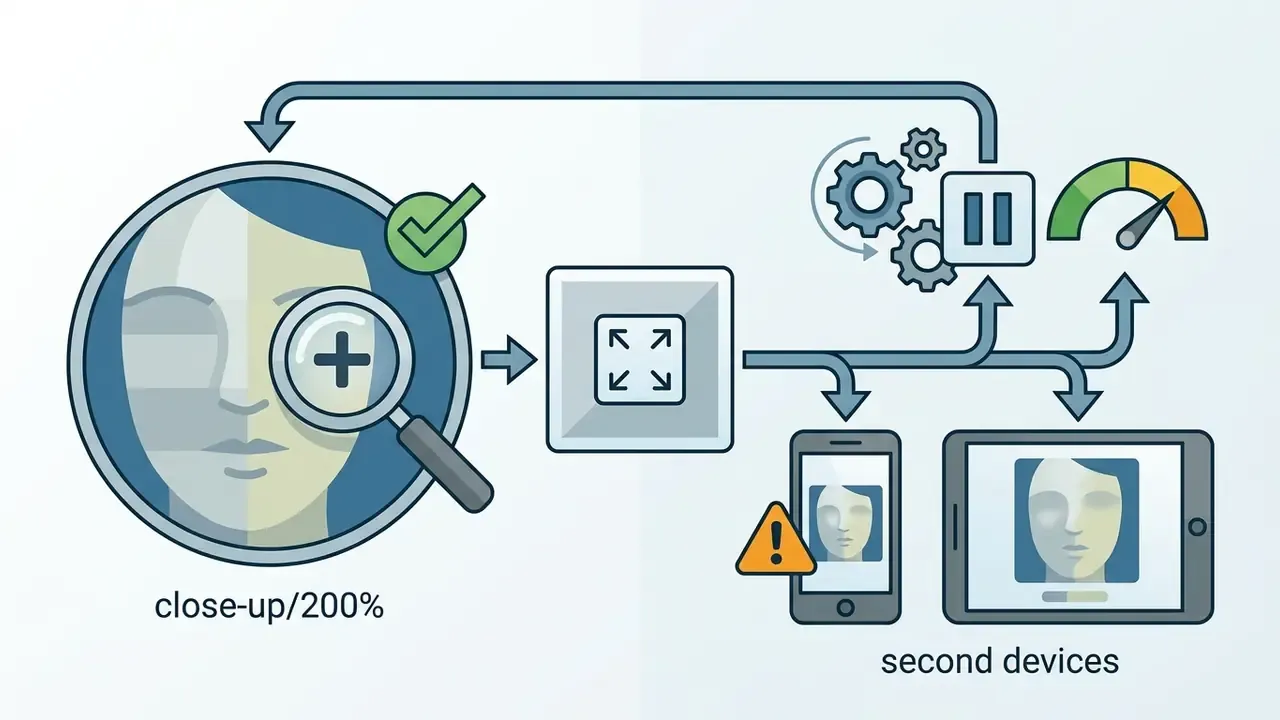
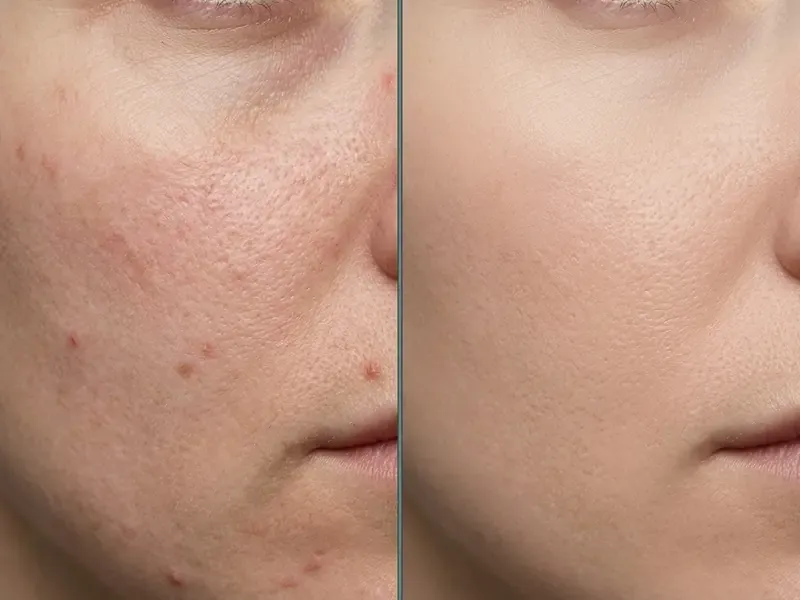
- Measurable slider metrics: pore count, texture count, red spot count, pigmented spot count, the same four indices used in VISIA-based before/after acne assessment.
How to Remove Blemishes From a Photo Online
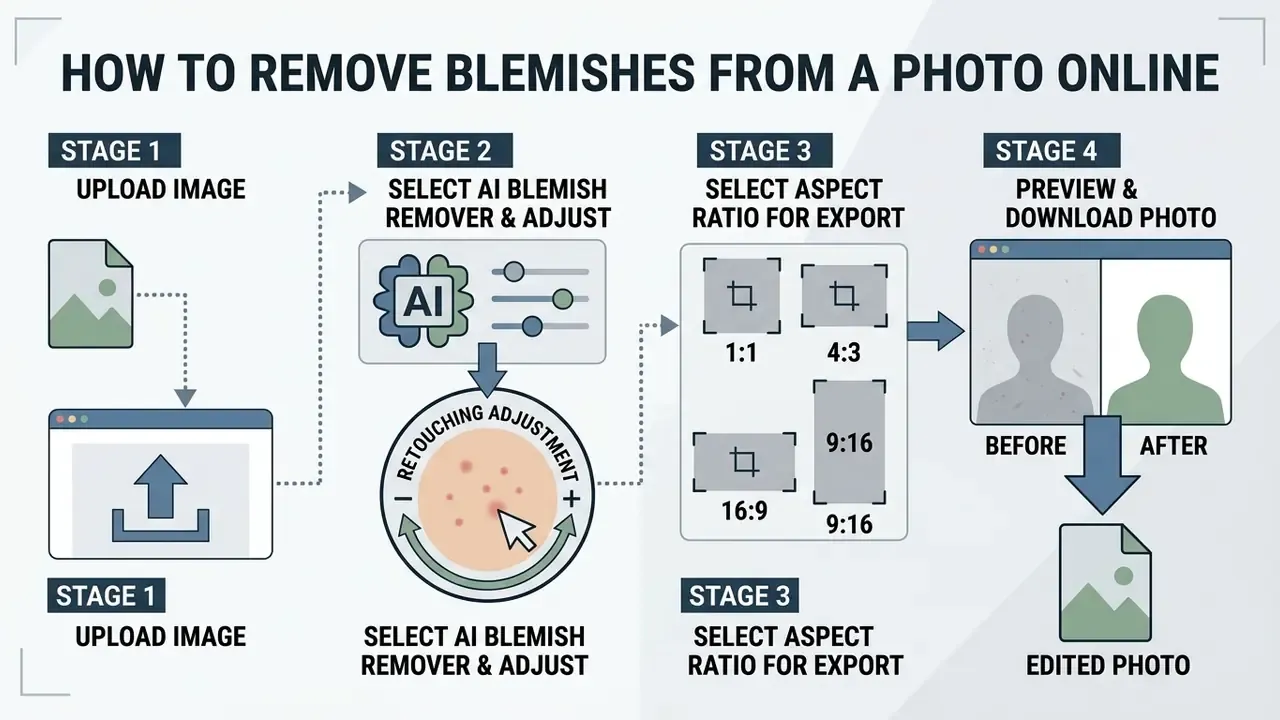
An online blemish remover photo editor lets you retouch portraits inside a browser tab, with no heavy install. Current web editors combine WebAssembly with cloud GPU clusters to keep editing responsive on both desktop and mobile. If you are still choosing a platform class, the comparison of browser-based online photo editors outlines feature ceilings and export rules.
You can also evaluate tool capabilities through the AI Media Comparison Matrices to pick an editor that matches your required export resolutions and privacy standards.
Upload Your Image to the Blemish Photo Editor
The process starts with importing a high-resolution portrait into the web app. Most platforms accept JPEG, PNG, WebP, and, on newer services, HEIF/HEIC files straight off an iPhone.
Documented technical ceilings vary by vendor, so check limits before a large batch:
| Constraint | Typical Documented Limit | Notes |
|---|---|---|
| Accepted formats | JPEG / JPG / PNG / WebP (HEIC on select tools) | RAW usually needs desktop conversion first |
| Minimum resolution | 32 × 32 px | Below this, face detection fails |
| Maximum resolution | 3000 × 3000 px (AILabTools API) to 3500 × 3500 px (PhotoRoom relighting) | Product-specific caps, not a universal standard |
| Maximum file size | around 3 MB on some APIs, 10 MB on consumer web tools | Compress before upload if the file is rejected |
For best recognition, upload images shot under clear, even light. High-contrast lighting and deep shadow blur blemish boundaries and drag automated detection accuracy down. Users preparing assets for multi-channel publishing can consult the AI Media Commercial-Use Hub for licensing and image compliance standards.
Select the AI Blemish Remover and Adjust Retouching
With the photo loaded, activate the blemish remover online photo editor tool from the main toolbar. The system scans the face and highlights detected spots, pimples, and pigmentation marks.
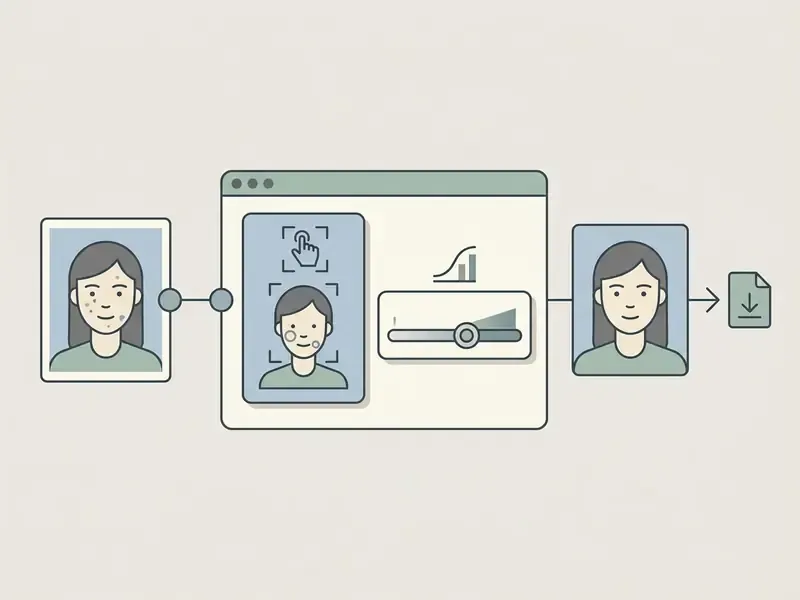
Now adjust the retouching intensity slider (0% to 100%, or 0.0 to 1.0 in developer-facing tools) to set the strength of the edit. Editors such as darktable express the same idea as mask opacity, where 1.0 applies the effect fully and lower values blend it back. If the automated pass misses isolated spots, switch to the manual photo blemish editor brush, size the radius to the defect, and click directly on the remaining flaw.
Selecting the Right Aspect Ratio for Photo Export
When exporting a retouched portrait from a blemish photo editor, choose the aspect ratio your destination platform actually wants. Export at the wrong ratio and the platform re-crops and re-compresses the file, which is exactly where hard-won pore detail dies.
| Platform / Use Case | Recommended Aspect Ratio | Optimal Resolution | Recommended Export Setting |
|---|---|---|---|
| Instagram posts and avatars | 1:1 (square) | 1080 × 1080 px | High-quality JPEG / WebP |
| Instagram Stories, Reels, TikTok, Shorts | 9:16 (vertical) | 1080 × 1920 px | Uncompressed PNG |
| LinkedIn and professional headshots | 3:4 or 4:5 (portrait) | 1200 × 1600 px | High-quality JPEG |
| Websites, banners, presentations | 16:9 (landscape) | 1920 × 1080 px | WebP (compressed) |
| Blog images and standard photography | 4:3 | 1600 × 1200 px | JPEG, quality 85 to 90 |
| Print and archival delivery | Native camera ratio | Full sensor resolution | TIFF or 16-bit PNG |
If the retouched portrait is heading into short-form video, prepare the 9:16 master first and drop it into ready-made tiktok templates rather than letting the app scale a square crop. Slide decks follow the same logic: a 16:9 export lands cleanly in a tome ai presentation generator without a second resample.
Preview and Download the Edited Photo
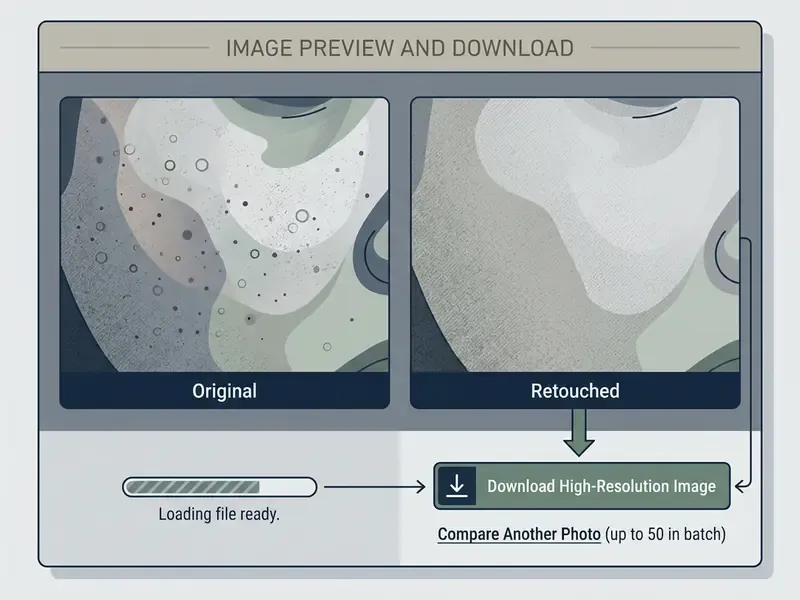
Before you export, run a quality check at 100% (1:1 pixel) zoom. Professional suites expose exactly this "actual size" preview mode because it is the only view that shows the bitmap at true scale. Use it to confirm that facial detail, hair strands, and highlights stay crisp, with no blur haloes.
Happy with the preview? Click export. Most free online photo editor remove blemishes utilities support high-quality JPEG or PNG downloads, while HEIC, TIFF, and PDF turn up mainly in desktop export dialogs. If the source portrait was low resolution, run AI image upscalers after retouching, so the model does not amplify blemish artifacts. For workflow automation or developer integrations, the AI Media API Guides show how to wire automated image editing into custom applications.
AI Blemish Remover Features for Precise Photo Retouching
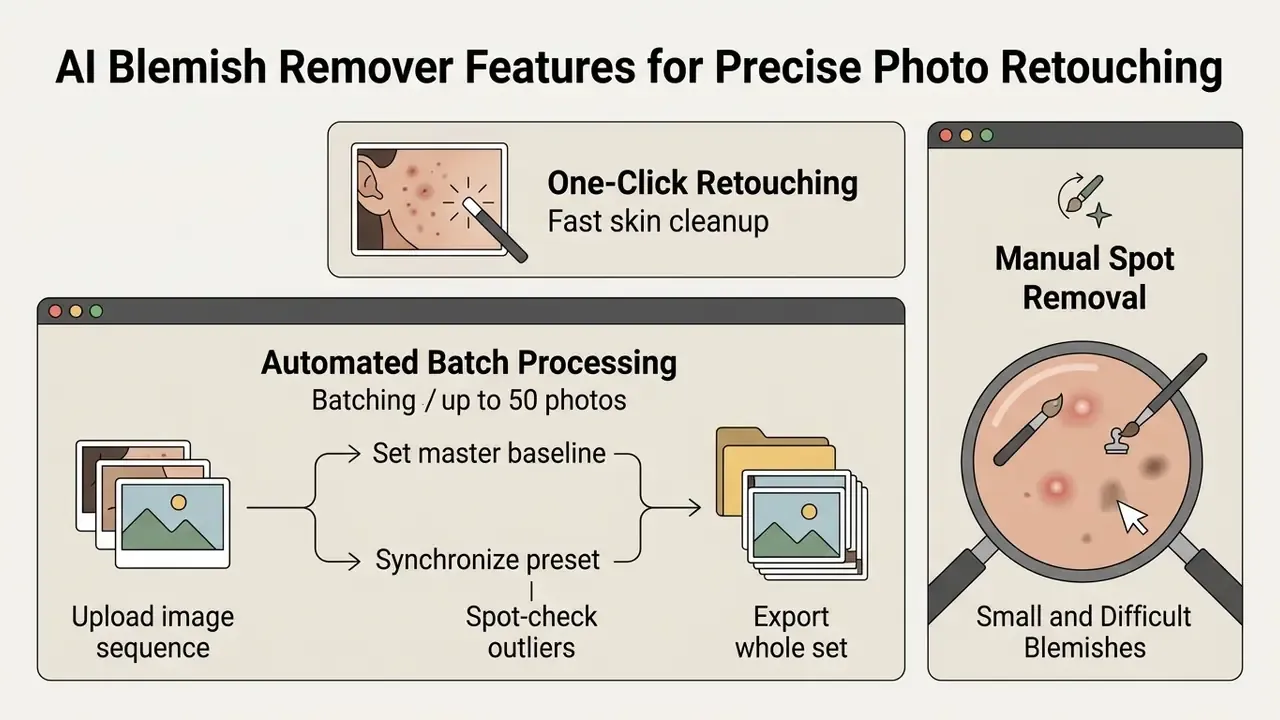
Advanced photo editor blemish tools bundle specific features that balance speed against pixel-level control. Knowing what each one does helps you pick the right mode for the job. Vendor documentation across the category converges on four pillars: localized masking, face-part segmentation, natural-skin retouching, and batch-consistent edits.
One-Click Retouching for Fast Skin Cleanup
One-click retouching uses end-to-end deep networks to clean an entire portrait in a single operation. SimpSON (CVPR 2023) is the clearest published example: the authors report cutting dense distracting-object cleanup from hours and 100-plus clicks down to minutes and one or two clicks.
«StyleRetoucher generalizes well to out-of-distribution data and outperforms alternative solutions in user preference studies». StyleRetoucher: Generalized Portrait Image Retouching with GAN Priors (2024). https://arxiv.org/abs/2404.09269
Automated cleanup suits volume work: social headshots, event coverage, profile pictures. By reading global facial context, a photo editor app for pimples detects and erases hundreds of surface flaws at once while holding overall skin tone consistent.
Automated Batch Blemish Processing
For high-volume sessions such as corporate events, weddings, and school headshots, a free online blemish remover usually supports batch processing of up to 50 photos at a time. The operational pattern is remarkably consistent across professional tools:
- Upload an image sequenceor point the tool at a folder/ZIP from the session.
- Set a master retouch baseline, say 70% intensity, on one reference frame.
- Synchronize the presetso localized AI blemish detection runs per face across every file in one pass.
- Spot-check outliersmanually: frames with odd lighting, hats, or heavy occlusion.
- Export the whole setin one operation (JPG/PNG/WebP, plus ZIP delivery for client galleries).
Desktop suites extend the same logic. Adobe's File > Automate > Batch applies identical or adaptive edits to entire folders, and RAW-first pipelines push thousands of files through with star ratings and colour labels preserved on export. Batch syncing is where cost per portrait collapses from minutes to seconds.
Manual Spot Removal for Small and Difficult Blemishes
When automated detection misses a subtle defect, or when a blemish sits next to a complex facial feature, manual removal earns its keep. A blemish eraser photo editor lets you sample adjacent clean skin by hand. Adobe's guidance is to zoom into the defect first, then set brush size and hardness before touching a single pixel.
- Brush radius control match the diameter to the defect so healthy tissue stays untouched (bracket keys resize instantly).
- Hardness adjustment keep edge hardness at 10 to 30% for invisible blending; higher values leave visible cut lines.
- Zoom precision magnify to 200% around eyelids, nose bridges, and lip lines.
- Source sampling choose a clean reference patch with similar lighting and texture gradient.
- Layer discipline work on a duplicate or empty layer so blemish removal stays separable from tone and texture work.
That last point is the one people skip, then regret when a client asks for "a little less" three days later.
Free Blemish Remover Photo Editor: What You Can Edit Before Paying
Shopping for a blemish remover photo editor free solution means understanding where free tiers stop. Most web applications run a freemium model, offering core AI retouching at no cost and gating the rest.
Three access models dominate the category:
- Fully free browser tools with watermark-free downloads and modest resolution caps. A free photo editor for blemishes in this class is fine for selfies and avatars.
- Freemium editors that limit exports by count, resolution, or file size. Many advertise a blemish remover photo editor free online entry point, then meter output.
- Subscription tiers that unlock advanced AI modules, remove ads, add cloud storage, and lift export limits. Some vendors also publish a blemish remover photo editor free download for desktop, where the trial is time-limited rather than resolution-limited.
Read the export terms, not the headline. That is where the real difference lives.
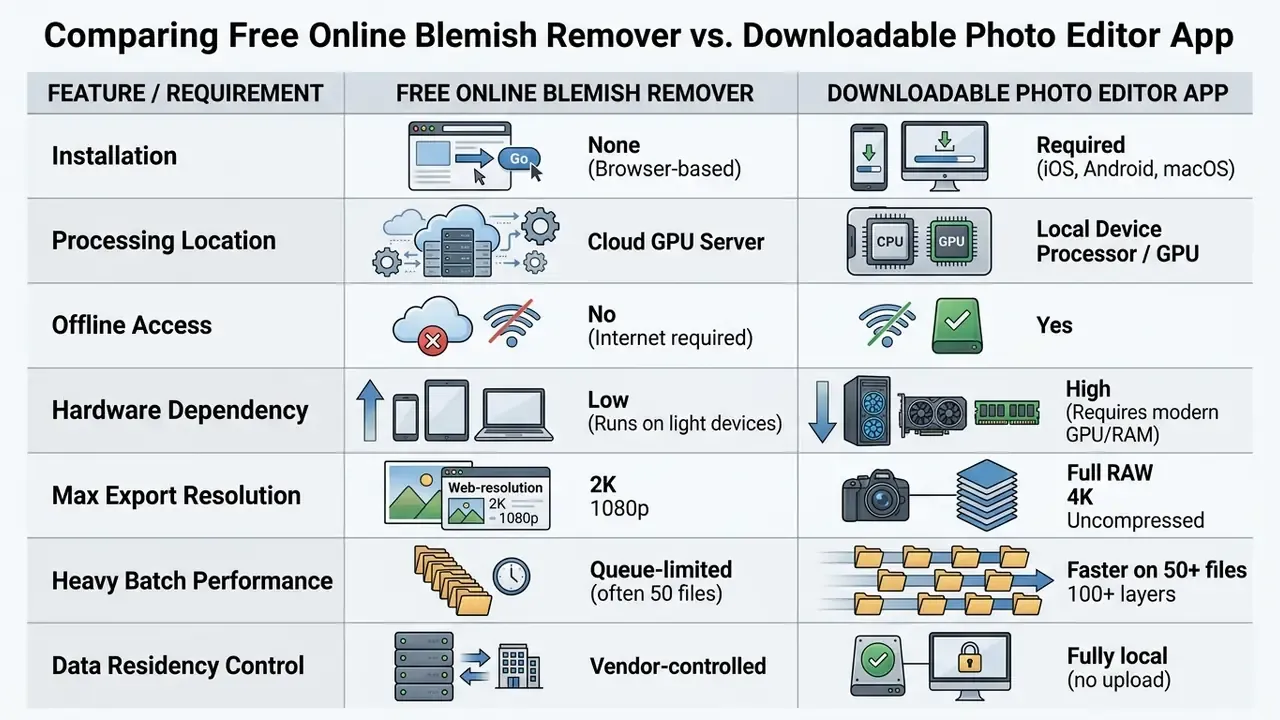
Free Online Blemish Remover vs Downloadable Photo Editor App
Browser editors run inside the tab, so nothing gets installed and every platform is supported. Downloadable mobile and desktop apps use local hardware instead, which pays off in speed and in offline sessions.
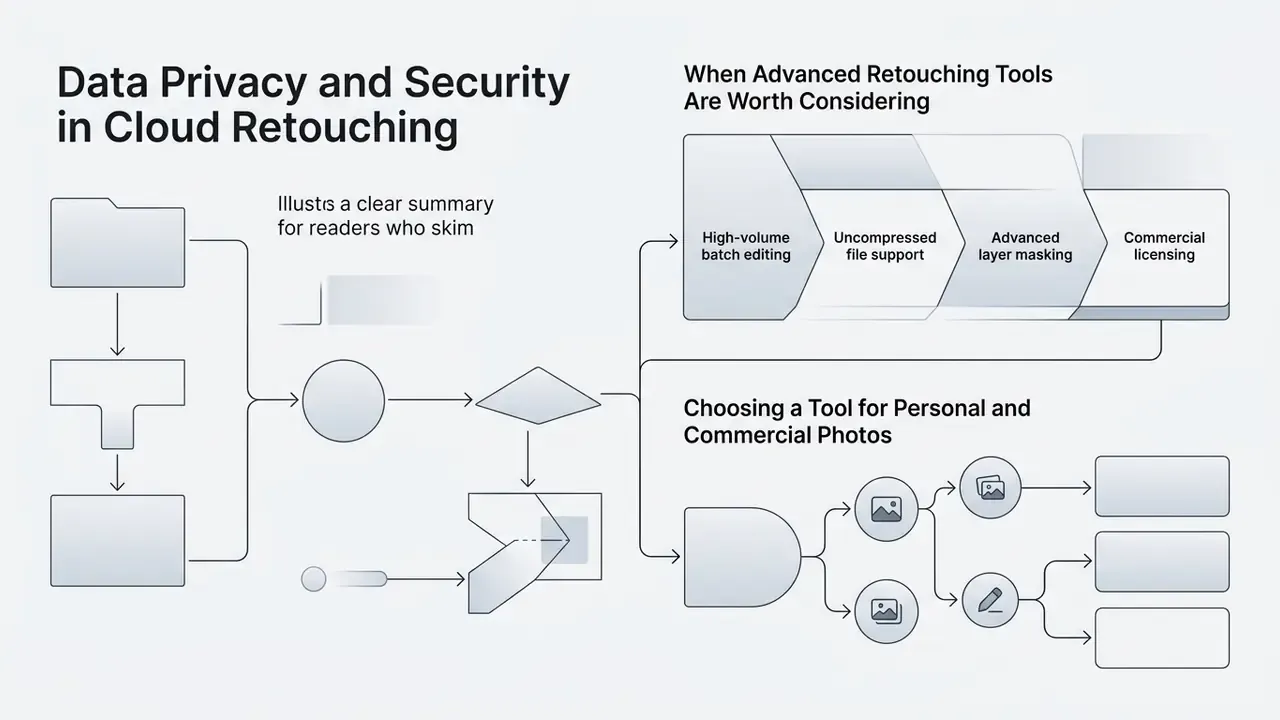
Data Privacy and Security in Cloud Retouching
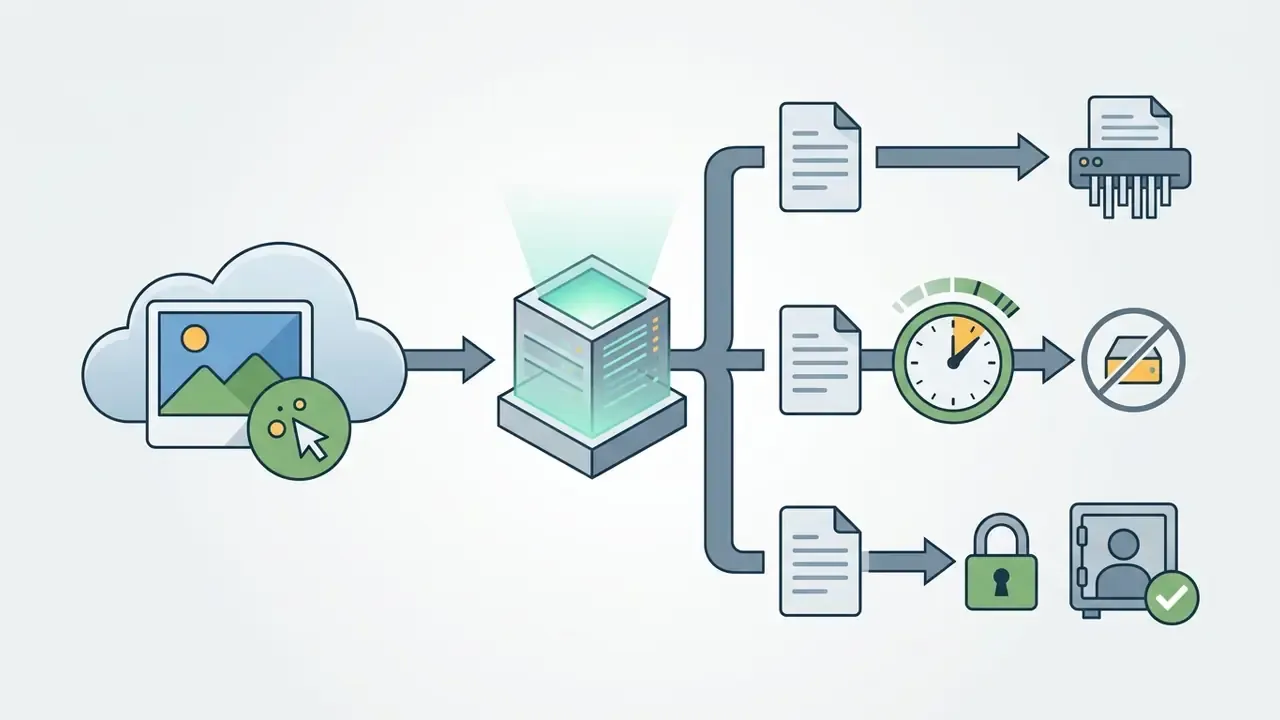
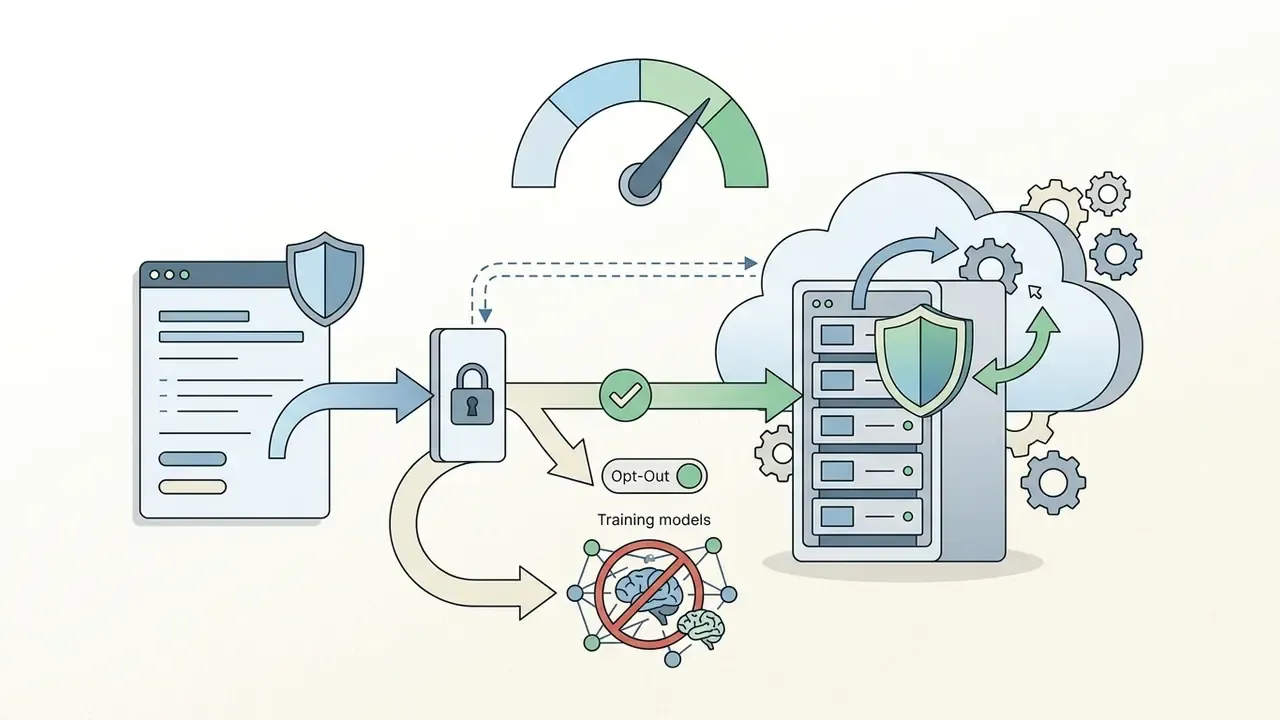
Every browser-based photo editor to remove blemishes uploads biometric-grade data: an identifiable human face. Before you route client galleries, employee headshots, or photos of minors through a cloud GPU, treat the tool as a third-party data processor, not a filter.
Shadow AI risk. The convenience gap is the governance problem. Staff paste corporate portraits into an unvetted free web editor because it is faster than the approved pipeline. Three mitigations tend to hold in practice: an allow-list of approved retouching tools, a documented "no client faces in free web tools" rule, and a local desktop option for anything under NDA.
There is also a downstream technical consequence of aggressive retouching that governance teams should track:
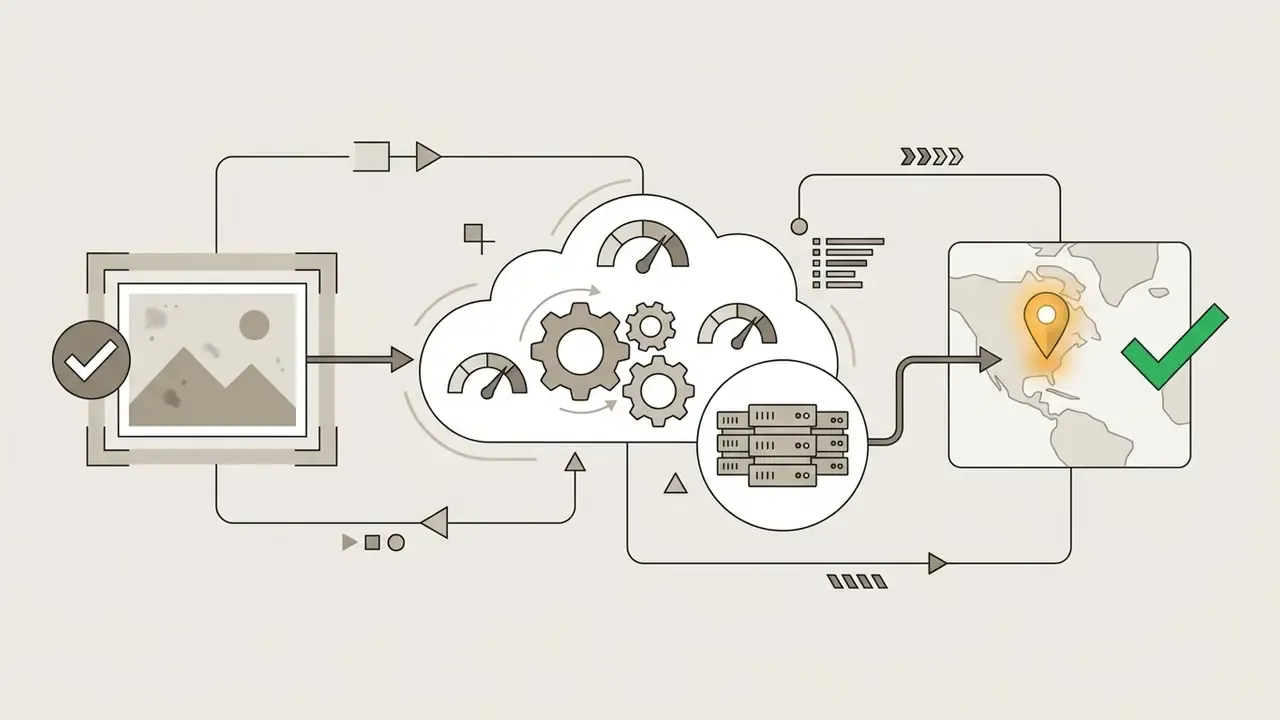


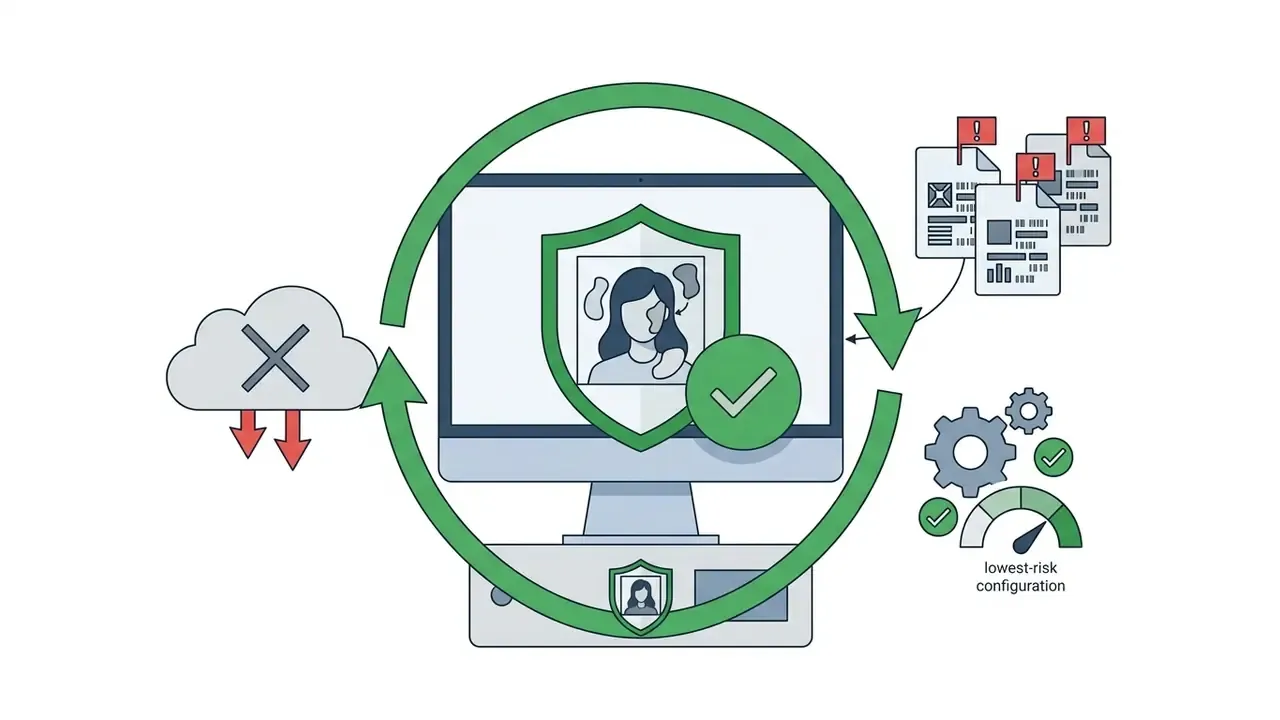
«Social media beautification filters that improve appearance for human viewers substantially reduce the accuracy of AI face-recognition systems». Social media filters: Beautification for humans but a critical issue for AI, Computer Vision and Image Understanding (2024). https://doi.org/10.1016/j.cviu.2024.103921
When Advanced Retouching Tools Are Worth Considering
Moving to a paid tier or professional desktop software becomes reasonable once you are running commercial media pipelines or uncompressed RAW shoots.
Subscription options and credit models are listed in the platform pricing directory.
Choosing a Tool for Personal and Commercial Photos
Personal selfies and social headshots are well served by a free blemish photo editor in the browser. Commercial work, meaning weddings, studio, and product shoots, demands higher-resolution exports, strict colour management, and non-destructive editing.
| Editing Scenario | Recommended Tool Class | Key Selection Criteria |
|---|---|---|
| Personal selfies and social media | Free online editor / mobile app | Instant one-click cleanup, browser convenience, free web export |
| Profile and portfolio headshots | Freemium web app / mid-tier app | Natural texture preservation, adjustable retouching sliders |
| Commercial studio photography | Desktop software (Lightroom / Photoshop) | RAW support, batch processing, full colour management |
| E-commerce and product photography | Dedicated desktop / plugin suite | Precise object removal, high-detail 4K export, automated batching |
| Regulated / NDA client work | Local desktop only | No cloud upload, auditable retention, offline processing |
To estimate compute costs or credit usage for automated media generation, use the AI Media Calculators.
AI Body Blemish Removal: Retouch Shoulders, Arms, and Legs
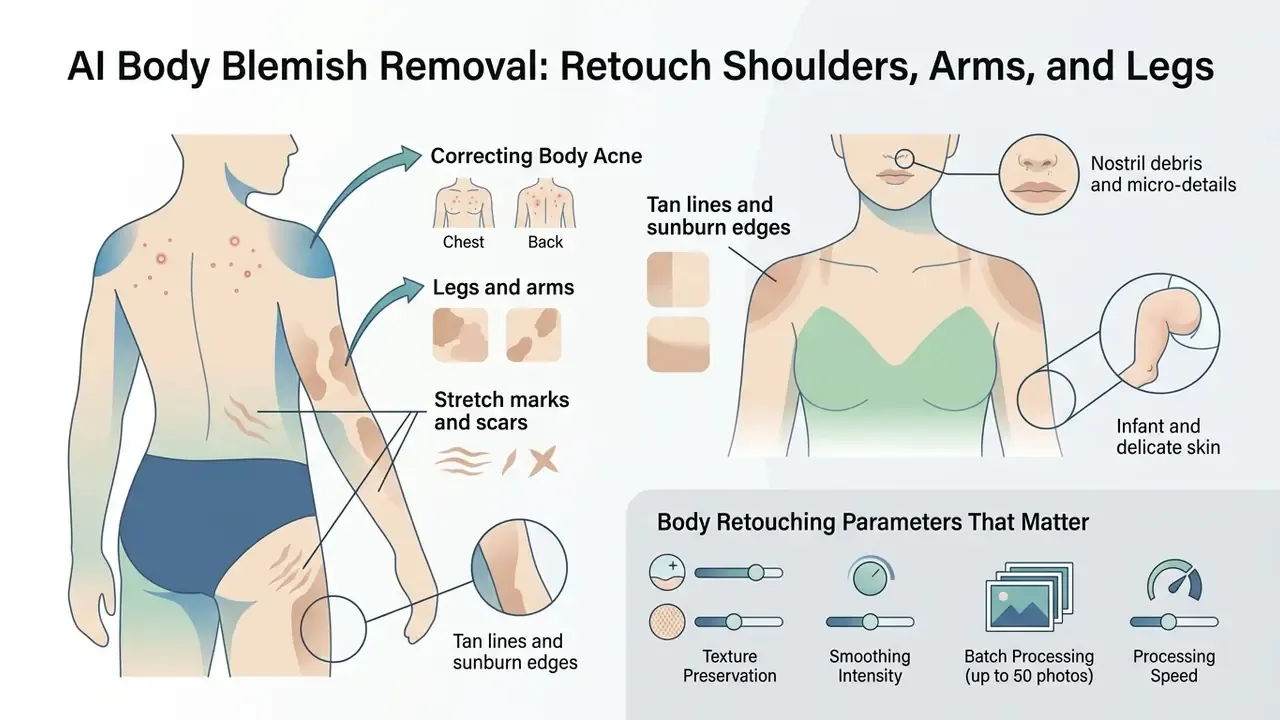
Skin retouching does not stop at the jawline. An advanced photo editor to remove blemishes also detects and corrects body skin imperfections in high-resolution full-body shots and commercial assets. Body skin behaves differently from facial tissue: broader tonal transitions, coarser grain, and muscular highlights that have to survive the edit.
Correcting Body Acne, Stretch Marks, and Sunburn Lines
Neural networks apply localized spatial masking to treat specific body issues without flattening contour:
- Shoulders and back (chest and back acne) clears inflammatory spots and diffuse redness across swimwear, athletic, and fashion portraits while keeping shoulder-cap highlights.
- Legs and arms blends uneven pigmentation, minor bruises, and temporary razor burn, retaining natural grain plus knee and elbow shadow structure.
- Stretch marks and scars softens high-contrast lines by harmonizing adjacent skin-tone gradients instead of erasing the relief.
- Tan lines and sunburn edges neutralizes hard swimwear borders by re-mapping luminance across the transition zone.
- Nostril debris and micro-details cleans small distractions invisible on set and glaring at print resolution.
- Infant and delicate skin gently removes newborn flaking and mild rash for baby galleries, where over-smoothing shows first.
Body Retouching Parameters That Matter
| Body Region | Common Defect | Recommended Intensity | Watch Out For |
|---|---|---|---|
| Back / shoulders | Acne clusters, redness | 60-75% | Losing shoulder muscle definition |
| Arms | Bruises, razor burn | 50-65% | Flattening elbow shadows |
| Legs | Uneven pigmentation, marks | 55-70% | Wax-like knees and shins |
| Décolleté / chest | Sun damage, freckling | 40-60% | Erasing natural freckle patterns |
| Stretch marks | High-contrast lines | 40-55% | Full erasure looks synthetic |
| Newborn skin | Flaking, mild rash | 30-50% | Removing baby skin texture entirely |
Because body work covers a far larger pixel area than a face, run it as a separate pass. A slider tuned for cheeks will over-smooth a thigh almost every time.
Complete Facial Beauty Workflow: Combining Blemish Removal with Pro Tools
For editorial-grade portraits, blemish removal is rarely the only operation. These complementary AI modules sit beside the blemish tool in most interfaces, and order matters:
- AI blemish and acne removal.Clear temporary defects first, so later tools do not amplify them.
- AI wrinkle softening.Blend fine eye lines and forehead creases at reduced strength while keeping facial character. Dedicated wrinkle modules give better control than a global smoother.
- Instant teeth whitening.Detect enamel regions and correct yellow discolouration without flattening teeth into one white patch.
- Red-eye and eye-bag correction.Remove flash artifacts and lighten under-eye circles without changing eye geometry.
- Matte skin de-shine.Reduce oily forehead and nose reflections from direct studio light. This is luminance clamping, not blurring.
- Selective colour balance.Unify face and body complexion so a retouched face does not read warmer than untouched shoulders.
- Final sharpening on a skin-excluded mask.Restore crispness in hair, lashes, and fabric without re-emphasizing the pores you just cleaned.
Run them in reverse and they fight each other. Whitening before blemish removal, for instance, brightens the very inflammation you intended to erase.
Best Uses for a Clear Skin Photo Editor
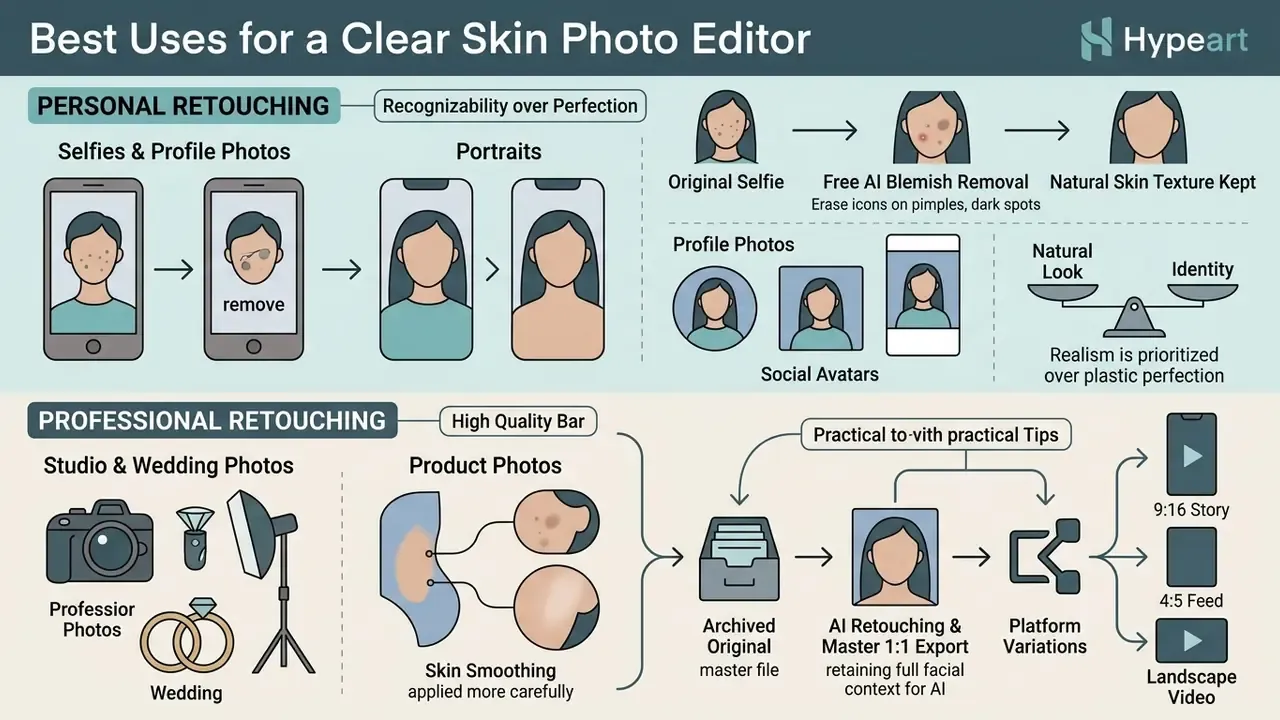
A clear skin photo editor serves several distinct workflows, and each one carries its own quality bar. Knowing which bar applies keeps edits appropriate rather than merely aggressive.
Retouching Selfies, Profile Photos and Portraits
Personal selfies and professional avatars are the most common use cases for a free photo editor blemish remover. Clearing temporary spots lifts subject confidence and keeps profile images clean and approachable. A blemish photo editor app on the phone usually covers this tier entirely.
For personal photography the constraint is recognizability, not perfection. Identity-critical marks, facial proportion, and expression should survive untouched. Official photo-service standards in several jurisdictions permit technical retouching only and forbid any change to facial characteristics, which is a useful benchmark even for a casual avatar, because the same face still has to pass social-platform and workplace verification.
Practical tips for social output:
- Retouch before cropping to the platform ratio, so the AI sees full facial context.
- Prefer one strong 1:1 master export, then derive 9:16 and 4:5 variants from it.
- Keep an untouched original archived. Platform algorithms, and clients, change their minds.
- If the portrait becomes a talking-head clip, assemble it in a tiktok video maker and add narration with a tiktok ai voice generator rather than re-editing the still.
- Auditing how your retouched frames were reused elsewhere? A tiktok video downloader online helps you retrieve the published version for comparison, and AI-assisted audio credits (the ongoing timbaland ai artist debate is a good example) show how quickly provenance questions follow synthetic media.
Professional Retouching for Studio, Wedding and Product Photos
Studio, event, and wedding photography demands rigorous quality control. Across client galleries, editors must apply subtle blemish removal that preserves natural skin features and individual character.
In product photography, skin-cleanup algorithms also remove surface dust, fingerprints, and minor scuffs from objects or model body parts. Commerce standards are explicit, though: design features and proportions must not be altered. Editorial licensing follows the same logic. Getty Images' retouching and modification policy defines retouching as minor localized edits, forbids altering expression, body shape, gender, or age, and caps modification at 10% of the image, including when AI tools do the work. Newsroom ethics rules (AP, UNICEF) go further, allowing cropping and limited tonal correction while prohibiting the addition or removal of elements that change the meaning of the frame.
There is a measurable reason to hold that line:
«An online study with 2,748 participants rating 462 faces found beauty filters increased perceived attractiveness and associated social attributes such as intelligence and trustworthiness». The Attractiveness Halo Effect in the era of Beauty Filters, preprint (2024). https://doi.org/10.31234/osf.io/attractiveness-halo-2024
Because retouching demonstrably shifts how a subject is judged, commercial and editorial workflows should document what changed, and keep the alteration minor enough to stay honest. Teams auditing published visual assets can align retouch policy with the guidance in the AI Media Commercial-Use Hub for provenance checks on distributed images.
Retouching Quality Validation Checklist
Use this as a final gate before delivery or publication. One failure sends the file back for manual correction.
Checklist0 / 16
Blemish Remover Photo Editor FAQs
Can You Remove Blemishes From iPhone and Mobile Photos?
Yes. You can remove blemishes from iPhone and mobile photos directly in a browser or in a dedicated app. Safari 17 added native HEIC/HEIF support, so Apple's default photo format uploads into an online free photo editor to remove blemishes without conversion. Outside Apple's stack, browser support is still uneven, which is why many web tools decode HEIC client-side via WebAssembly and convert to JPEG or PNG before editing.
Apple ProRAW is a different animal. It combines standard RAW data with computational photography and is aimed at pipelines that can decode RAW, which in practice means desktop software or a dedicated mobile app rather than a generic browser uploader.
Mobile apps use on-device Neural Engines for rapid photo editor app for pimples processing. Open the image, tap the spot, let localized inpainting do the work, and, usefully, nothing leaves the device.
Can a Blemish Remover Retouch Group Photos and Old Images?
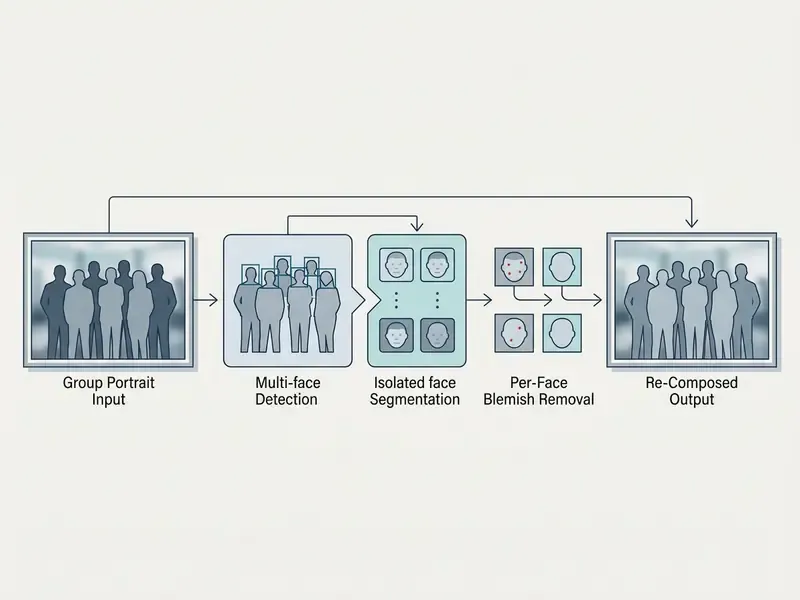
Yes, a free spot remover photo editor can handle group photos and old images, provided individual faces stay detailed enough. Deep learning models run per-face detection on group portraits, isolating each face so blemish removal stays local.
Does AI Blemish Removal Work on Low-Quality or Poorly Lit Photos?
Partially. Detection depends on visible blemish boundaries, so heavy shadow, motion blur, or strong compression artifacts reduce accuracy. The reliable sequence is: correct exposure and white balance, upscale if the file is very small, then retouch. Running blemish removal first on a dark, noisy frame usually makes the model read noise as defects and smear texture across the whole face.
Will My Photo Look Unnatural After Removing Blemishes?
Not if intensity stays controlled. Unnatural results come from global smoothing, not localized removal. Keep the master slider at 60 to 80%, treat individual spots with the brush, preserve moles and freckles, and validate at 100% and 200% zoom. Frequency-separation and blemish-aware feature-selection architectures exist precisely so the blemish component can change while the texture component stays put.
How Many Photos Can I Retouch at Once?
Consumer web tools commonly cap batch queues at 50 images per pass, with preset synchronization across the set. Desktop and plugin pipelines remove that ceiling and are the right call for thousand-file RAW weddings or school-portrait volumes, where edits, ratings, and labels must survive export.
Is a Free Tool Enough for Client Work?
Sometimes, and the deciding factor is rarely image quality. Blemish remover free tiers now match paid tools on routine spot cleanup. What they usually lack is export resolution, colour management, an audit trail, and a defensible data-retention policy. If the gallery is under NDA, choose local processing regardless of how good the free output looks.
For technical issues, export errors, or browser compatibility bugs, consult AI Media Support and Troubleshooting, or review legal context via AI Litigation and Case Timelines.
Embrace Natural Skin, Blemishes Included
Removing blemishes does not mean hiding who you are. Retouching presents a photograph at its best under imperfect light. It is not a mandate to erase every mark. Temporary spots come and go; freckles, moles, and skin character belong to identity, and the strongest portraits keep them.
Edit less than you think you should. Then check at 100%.
Editorial Standards and Review Note
Technical claims in this guide are sourced from peer-reviewed computer-vision papers and published vendor documentation, with links given inline so readers can verify them independently. Performance figures such as processing times, batch limits, and resolution caps are product-specific and change without notice; re-check them against current vendor docs before you build a workflow on top of them. Skin-related statements are editorial and non-medical.