Last updated: 2026. Interface wording, menu labels, and action names were re-checked this year inside the Apple Photos and Shortcuts apps (iOS 17/18 generation and macOS Sonoma/Sequoia labels).
The fastest path to a video file
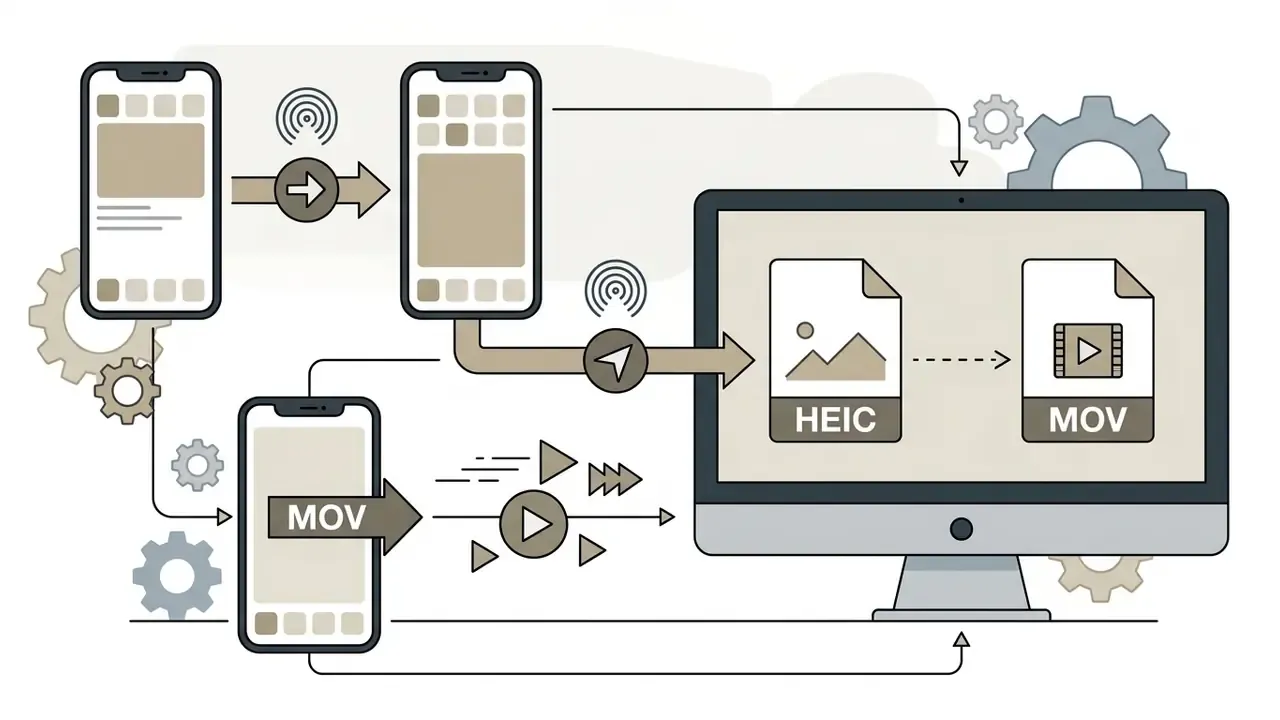
- iPhone (one file) open the Live Photo in Photos → More (•••) → Save as Video. A new
.MOVlands in Recents; the original Live Photo stays untouched. - iPhone (many files) build a Shortcut:
Select Photos(Select Multiple ON) →Convert Media(format: Video) →Save to Photo Album. One tap, one batch. - Mac select the asset in Photos, then File → Export → Export Unmodified Original. You receive two files: a still (HEIC/JPEG) and a standalone
.MOV. - Windows / Android / browser extract the
.MOVfirst, then use a web editor such as Flixier. Raw Live Photo bundles cannot be uploaded through standard browser forms. - Before publishing re-encode to H.264 MP4 for universal playback, crop to 9:16, and make sure the clip runs longer than 3.0 seconds or Instagram Feed will reject it.
- Privacy note Live Photos carry ambient audio and location metadata, so prefer on-device conversion for confidential or corporate assets.
That is the whole job in six lines. The rest of this guide explains why each step matters, and where the workflow quietly breaks.
What happens when you convert a Live Photo to a video
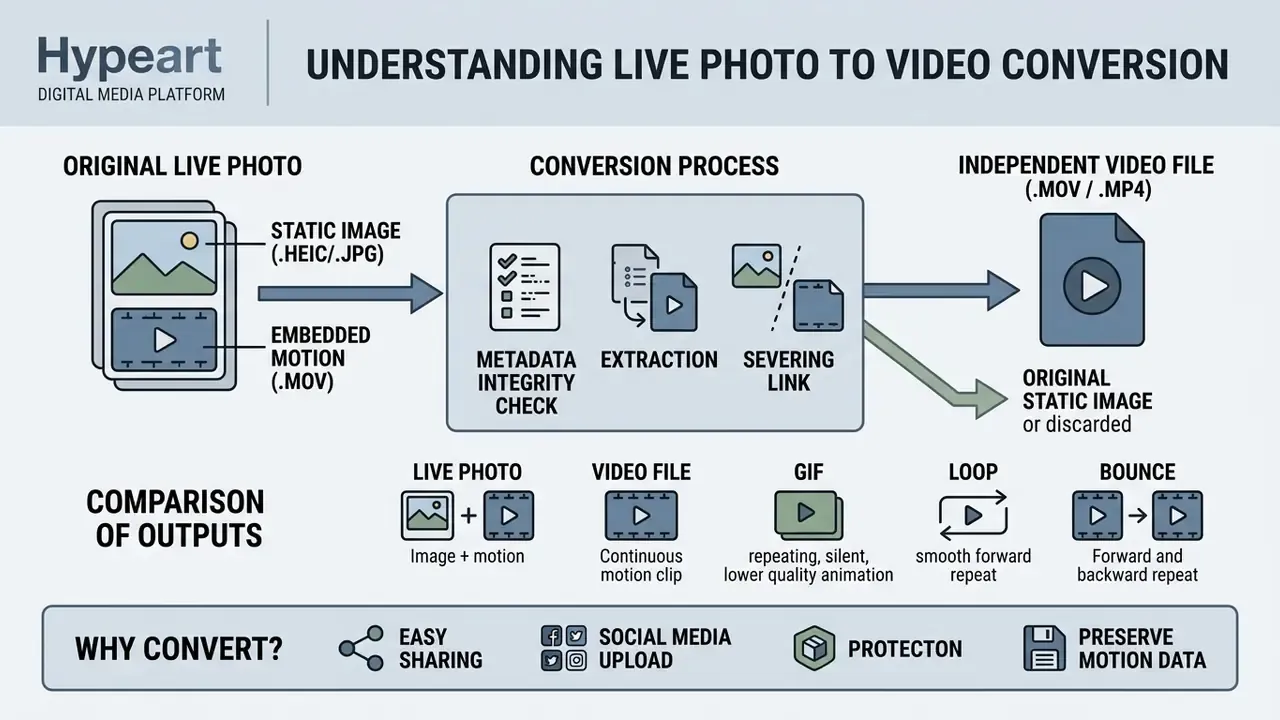
Converting a Live Photo to a video extracts the embedded .mov motion clip into an independent video file and severs its link to the static image. That structural change turns a dual-asset bundle into a standardized video clip that plays natively on non-Apple devices.
An original Live Photo captured on Apple devices consists of two distinct components joined by matching UUID metadata. The iPhone camera records a still image in HEIC or JPEG format alongside a short HEVC video container covering 1.5 seconds before and 1.5 seconds after the shutter press. Photos capture sound too, which surprises people more often than it should.
When shared outside the Apple ecosystem, messaging platforms and email servers routinely strip that pairing metadata. Converting the original live file into a video file keeps the motion and the ambient audio track intact regardless of the recipient's operating system.
Metadata integrity check. Native conversion is non-destructive to the library asset, yet exported containers do not always carry the same metadata payload as the source. After exporting, inspect the output in Photos → Info (ⓘ) or a desktop metadata viewer: confirm whether capture date, device model, and GPS coordinates survived the render. If the workflow requires stripping location data before distribution, use Share → Options → Location: Off on iOS, or export the unmodified original on Mac and clear EXIF fields with a desktop utility before handing the file to any third party. Two minutes of checking, no regrets later.
Live Photo, video file, GIF, Loop and Bounce: what is the difference?
A Live Photo is a dual-file Apple format. A video file is a continuous media container that supports high-efficiency video plus audio encoding on every mainstream platform.
"Live Photos automatically record ambient sound before and after the shutter, producing a sound- and motion-rich experience instead of a silent still."
Animated GIFs rely on older frame-based compression with no audio support. The result: larger files for equivalent visual quality and visibly jerkier motion.
Loop and Bounce are not separate file formats, a detail that trips up plenty of people. They are playback effects rendered inside the Photos app, repeating or reversing the motion sequence before export. Loop plays the three-second window continuously; Bounce runs it forward, then backward. Both can be swapped or removed at any time by reopening the Live menu and choosing a different effect.
Why turn a Live Photo into a video?
Turning a Live Photo into a video eliminates playback errors on non-Apple devices such as Android phones and Windows PCs. Standard video containers are also what short-video platforms (Instagram Reels, TikTok, YouTube Shorts) accept and index reliably, whereas Live Photo bundles get collapsed into stills on ingest. Convert the asset, and both movement and sound survive without a specialized gallery viewer.
"Tweets with video are six times more likely to be retweeted than photos and three times more than GIFs; images drive 313% more engagement than text."
Once the clip exists as a standard file, any mainstream editing pipeline accepts it, from a mobile trimmer to a desktop video editing workflow for YouTube. For storage and transformation steps in more depth, see our technical guide on how to save live media assets. And yes, the search query many people type is "convert life photo to video" or "live image to video"; it is the same task described here.
Table 1. Technical comparison of live media formats and effects
| Format / Mode | Motion Duration | Audio Track | Compression & Codec | Cross-Platform Support |
|---|---|---|---|---|
| Live Photo | 3.0 seconds (1.5s pre/post) | Yes (Ambient AAC) | HEIC still + HEVC .mov | Apple ecosystem only |
| Video File (.mov/.mp4) | Arbitrary duration | Yes (Multi-channel) | H.264 / HEVC | Universal (iOS, Android, Web, Windows) |
| Animated GIF | Finite frame loop | No audio | GIF89a (Indexed color) | Universal (Web browsers, messaging) |
| Loop Effect | Continuous forward loop | No (audio stripped during native render) | Rendered HEVC / GIF | Export dependent |
| Bounce Effect | Forward-reverse loop | No (audio stripped during native render) | Rendered HEVC / GIF | Export dependent |
Summary: standard video files give you the widest compatibility and the best compression efficiency, while Live Photos and their native effects stay locked to Apple platforms until converted. Note the trade-off buried in the table: Loop or Bounce buys looping motion but costs you the ambient soundtrack, because iOS mutes the AAC track when it bakes the effect into an exported clip.
How to convert a Live Photo to video on iPhone using the Photos app
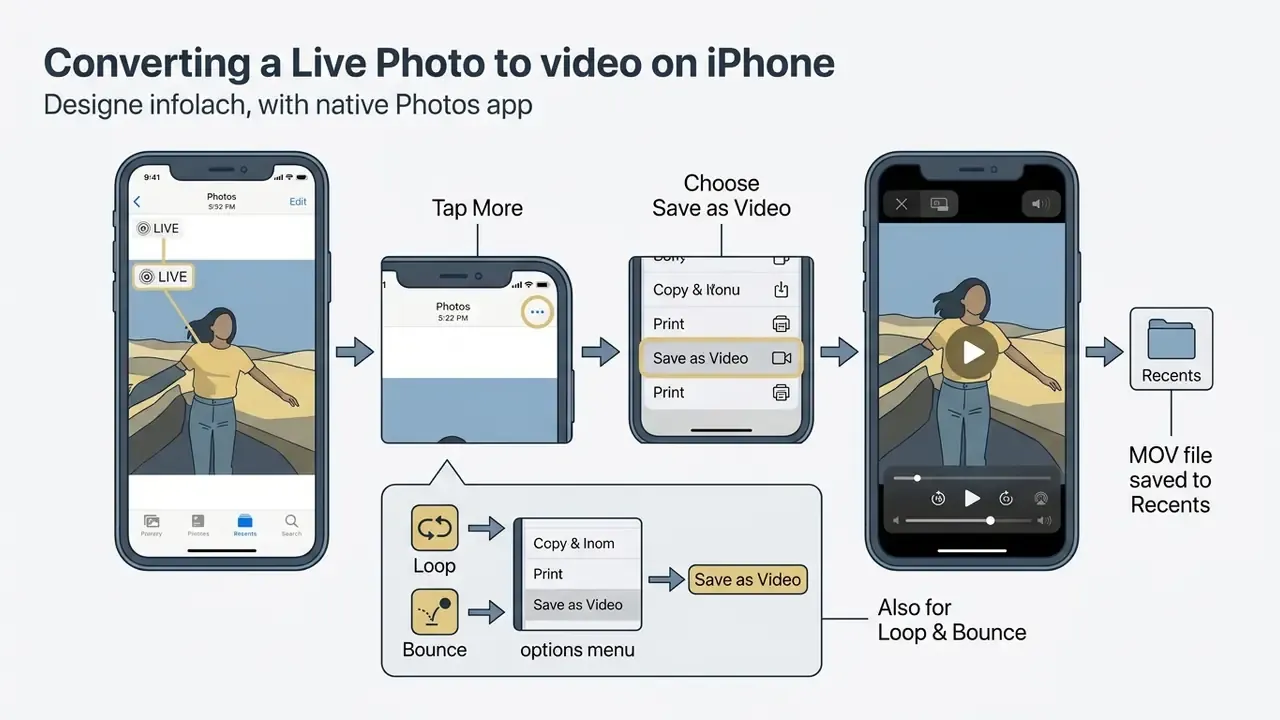
You can convert a Live Photo to video directly inside the native Photos app, with no third-party software installed. The process extracts the motion sequence and writes a new video file to your camera roll in a couple of seconds.
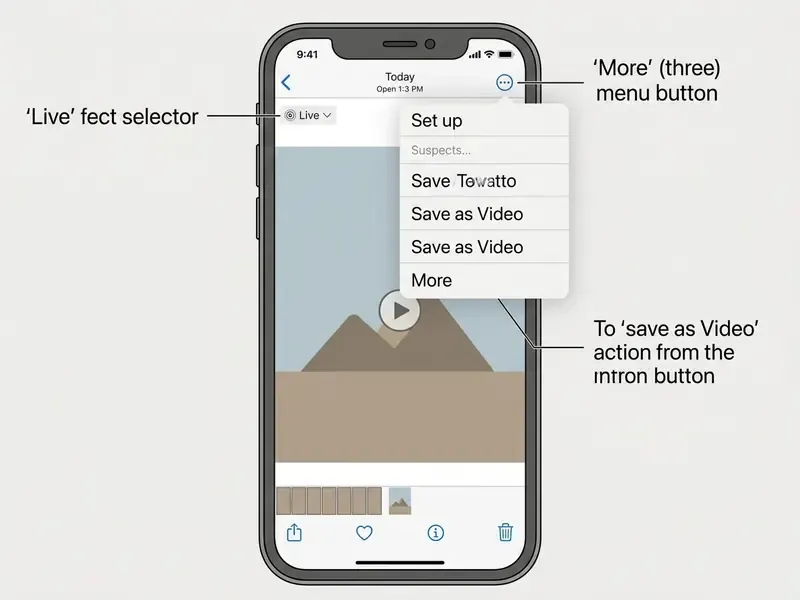
The iOS interface offers two routes to the same result. An iPhone user can run the command from the top-right contextual menu, or through the system Share menu. Both preserve the underlying photo library asset while generating a duplicate clip. If the resulting file feels too heavy for a messaging thread, push it through a video compressor before sending.
Turn Loop and Bounce Live Photos into short videos
Applying Loop or Bounce changes how the 1.5 seconds of pre- and post-shutter frames play back. Open the asset in the Photos app, tap the Live menu in the top-left corner, and pick Loop or Bounce.
With the effect applied, open the options menu and choose Save as Video. The app renders the repeating motion pattern into a standalone short clip, and the processed asset also shows up in the Animated album. Expect silence: the native render mutes ambient audio, so plan on adding a music bed later in an editor or an animation maker if sound matters to the story.
How to convert Live Photos to video with the Shortcuts app
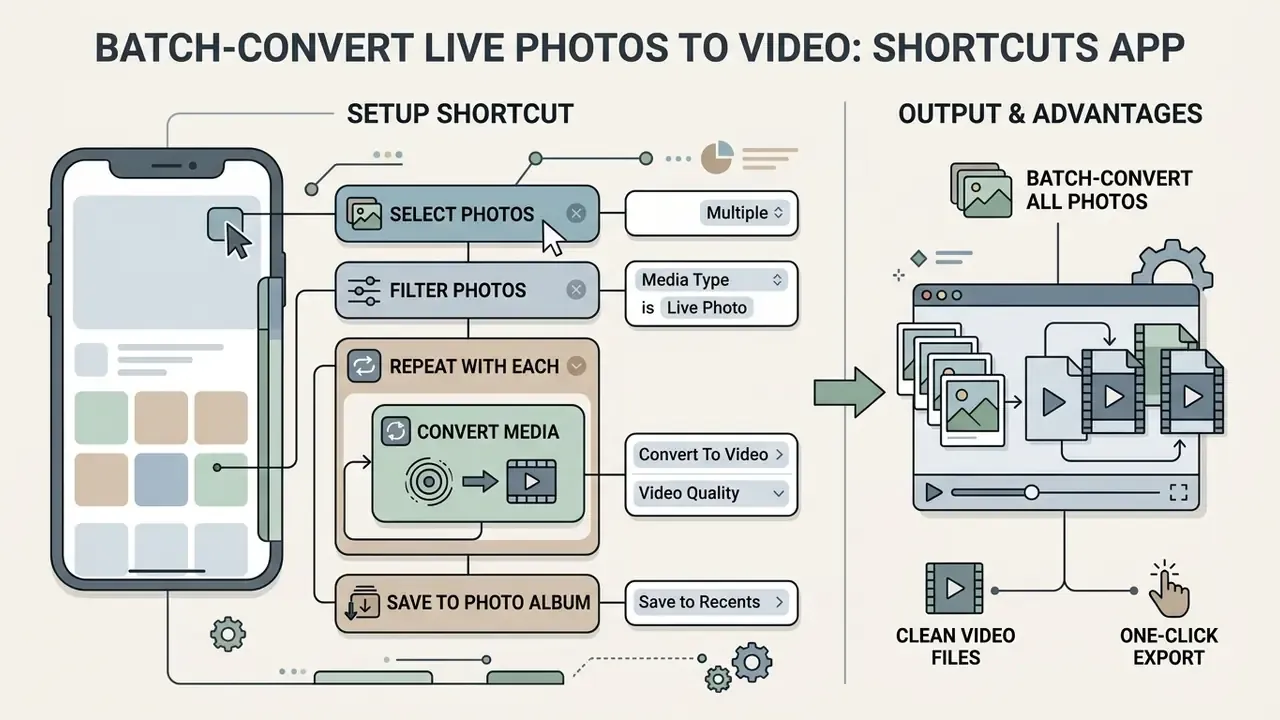
The iOS Shortcuts app lets you batch-convert many Live Photos into standalone video files with essentially one click. This workflow clears bulk media queues far faster than manual menu taps (Macworld, 2023).
Automation cuts the administrative overhead for anyone processing volume. A single run can scan your photo library, filter assets, convert videos, and write the output files back to disk while you do something else.
Set up a shortcut to export selected Live Photos
Open the Shortcuts app, create a new shortcut, and assemble the actions in this order:
Running the workflow prompts you to pick items from your photo library, converts them sequentially, and writes clean video files into the chosen album. If a run halts, the two usual culprits are an iCloud-optimized asset that has not been downloaded to the device yet, and not enough free storage for the render. Add an If → Otherwise branch with a Show Notification action so the failing item gets logged instead of the batch dying in silence. Teams optimizing media pipelines at scale can study broader system frameworks in our AI Media Workflows hub.
- Select Photos.Enable the Select Multiple toggle so the picker accepts a whole batch in one pass.
- Filter Photos(optional, but recommended). Add the condition Media Type is Live Photo so plain stills in the same selection are skipped instead of throwing conversion errors.
- Repeat with Each.Wrap the conversion steps in a repeat loop. Handling items one by one rather than as a single array keeps peak memory low, which starts to matter past roughly 50 to 100 assets on older devices.
- Convert Media.Set the target format to Video. Leave "Preserve Metadata" enabled if capture dates must survive; switch it off when the point is to strip location data before distribution.
- Save to Photo Album.Point the output at a dedicated album such as Converted Videos instead of Recents, so originals and exports never blur together.
How to convert a Live Photo as a video on a Mac
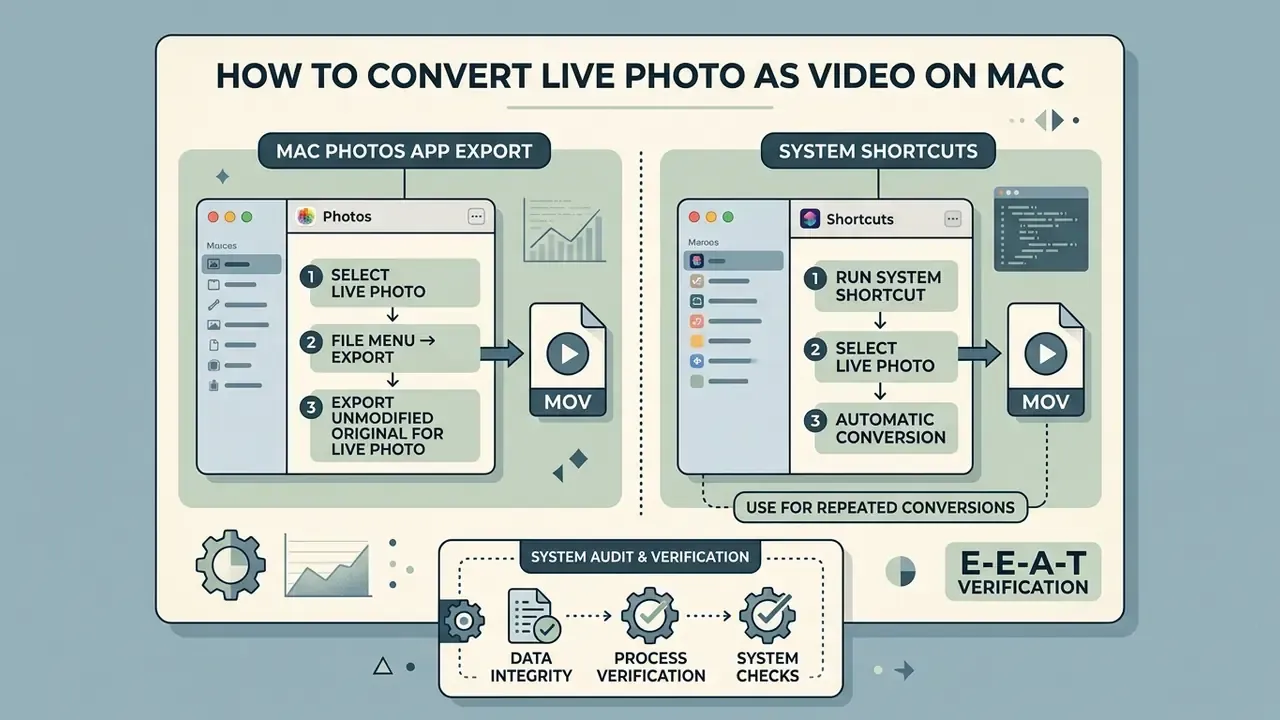
On macOS you either export the asset from the Mac Photos app or run a system Shortcut. The desktop route gives precise control over export directories, file naming, and resolution settings (Apple Developer Documentation).
A Mac also handles batch exports and library organization more comfortably than a phone. macOS decodes HEVC natively, so extraction from the original Live Photo source file stays lossless.
Export a Live Photo from Photos on Mac
Launch Photos on macOS and locate the original live photo. Click the file, then go to the top menu bar and choose File → Export → Export Unmodified Original.
That native extraction guarantees compatibility with desktop editing suites. When you need a specific delivery spec instead of the raw original, use File → Export → Export Video and set Movie Quality (480p, 720p, 1080p) plus aspect ratio (16:9, 4:3, or Original) in the dialog. Photos on Mac also exposes Export GIF for Live Photos set to Loop, which is handy for lightweight web embeds, at the cost of audio and color fidelity.
Use Shortcuts on Mac for repeated conversions
The macOS Shortcuts app supports folder watching and batch media processing. You can build a desktop shortcut that ingests Live Photos dropped into a specific directory, exports them as compressed video files, and then triggers from the Shortcuts app, the Dock, the Services menu, or the command line with shortcuts run.
A dependable pattern looks like this: Get Contents of Folder → Filter Files (extension is mov) → Encode Media (H.264, 1080p) → Save File into an output directory with Replace existing: Off, so nothing gets overwritten by accident. Point the output at a staging folder that your editing suite or free AI video generator workflow already watches, and cross-platform asset prep collapses into a single click.
E-E-A-T verification / system audit:
Live Photo to video converter: when to use online and third-party apps
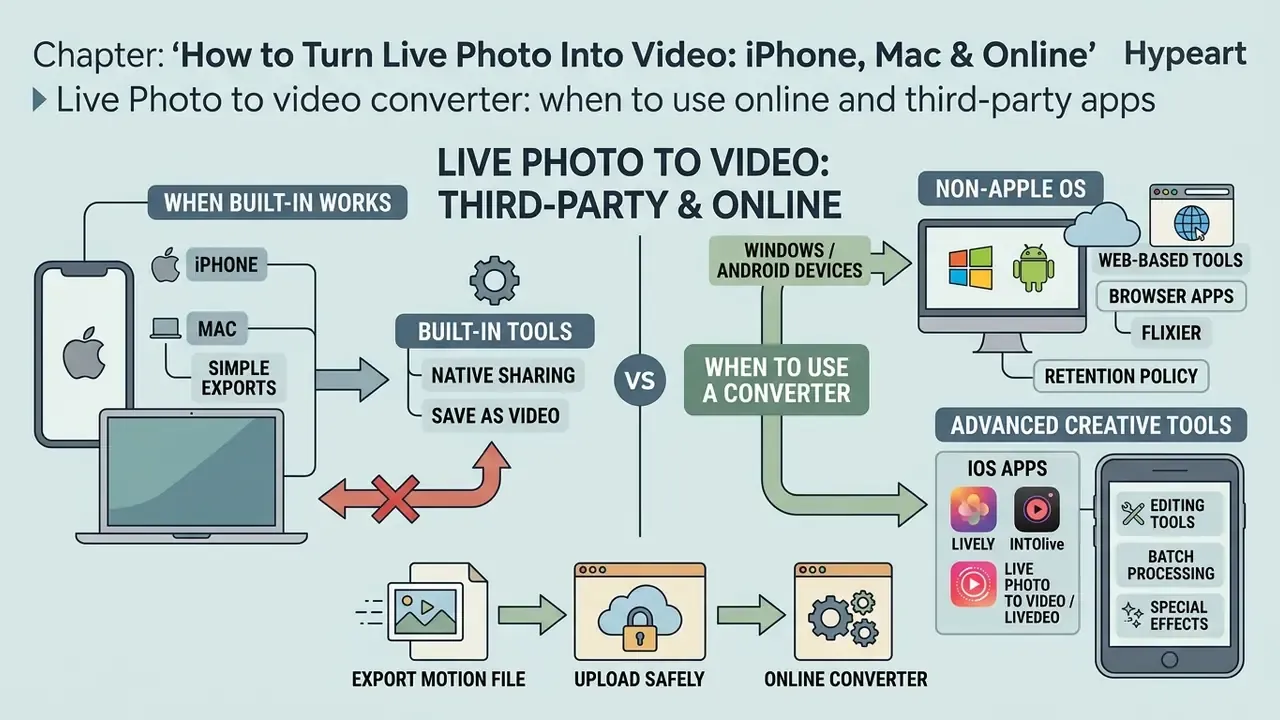
A live photo to video converter, whether an App Store utility or a browser tool, earns its place in three situations: you are working on a non-Apple operating system, you received a non-standard container, or you need batch conversion without an iOS device in reach. Native tools stay the better default for privacy-sensitive media, while specialized software adds export formats and finer control.
Before installing anything, weigh data privacy policies and file handling. On-device utilities keep media local. Cloud tools require uploading raw assets to someone else's servers.
"Live Photos automatically record ambient sound around the moment of capture, so uploading them to third-party servers risks exposing private audio."
App Store privacy labels in this category vary sharply. Some developers declare that no data is collected at all and advertise fully offline, on-device processing with MP4/MOV export. Others disclose collection of usage data, diagnostics, or identifiers, and in a few cases tracking. Apple's own privacy documentation warns that granting photo-library access can expose metadata including location and the Live Photo video component, and that access is controlled under Settings → Privacy & Security → Photos.
Built-in tools versus a live photo to video converter
Built-in iOS and macOS utilities give you zero-cost, fully private, zero-latency conversion. Dedicated third party apps add what the Photos app does not expose: timeline trimming, sound toggles, frame-rate or bitrate selection, GIF export. Treat feature claims as claims, though, and check each current App Store listing rather than trusting a review from two years ago.
While native tools cover baseline extraction, a few utilities are worth naming:
- Lively (iOS) trims the three-second timeline, toggles ambient sound on or off, exports to MOV or GIF. The free tier watermarks exported GIFs, while MOV/MP4 video exports stay watermark-free; a one-time purchase (around $2.99) removes the GIF watermark.
- intoLive (iOS) strongest on playback-speed adjustment (roughly 0.5× to 2×) plus scaling and cropping before saving. The usual pick for custom wallpapers.
- Live Photo to Video / Livedeo-class utilities (iOS) advertise 100% on-device, offline conversion with no uploads, which suits confidential material.
- Flixier (web/browser) built for non-Apple users who received a zipped
.heic+.movbundle and need to trim, stitch, caption, or resize clips online without touching an iPhone.
For wider comparative reviews of media software, see our analysis in the AI Media Comparison portal, and check how still-image tooling stacks up in the photo editor guide.
Export the motion file before uploading it to an online converter
Web services cannot ingest raw Live Photo bundles through standard browser upload forms. Extract the .mov motion clip first, via Save as Video on iOS, Export Unmodified Original on Mac, or an Option-drag of the asset into Finder. Alternatively, wrap the pair into a compressed .zip archive before uploading it to a browser utility.
Once uploaded, the photo converter processes the stream and returns a downloadable MP4 video file. One fidelity caveat, documented by batch web converters themselves: browser pipelines often drop animation timing, metadata, color profiles, and other format-specific features, and pixel-identical output is guaranteed only for lossless targets.
Table 2. Tool selection matrix for Live Photo conversion
| Tool / Option | Primary Use Case | Installation Required | Batch Processing | Privacy Level |
|---|---|---|---|---|
| iOS Photos App | Single file conversion on iPhone | No (Built-in) | No (Manual) | High (100% on-device) |
| iOS/macOS Shortcuts | Automated batch conversion | No (Built-in) | Yes | High (100% on-device) |
| macOS Photos Export | Extracting raw MOV component on Mac | No (Built-in) | Yes | High (100% on-device) |
| Lively / intoLive (App Store) | Trimming, sound toggle, speed control, GIF export | Yes (App Store) | Varies by app | Medium (check privacy nutrition label) |
| Flixier & other web converters | Non-Apple OS conversion, online editing | No (Browser-based) | Limited | Low (requires server upload) |
Pre-upload security checklist for corporate or personal media
Disclaimer: this material is general information, not legal or security advice. Review each provider's privacy policy and your organisation's data-handling rules before uploading personal or corporate media to any third-party service.
Edit a converted Live Photo video before saving or publishing
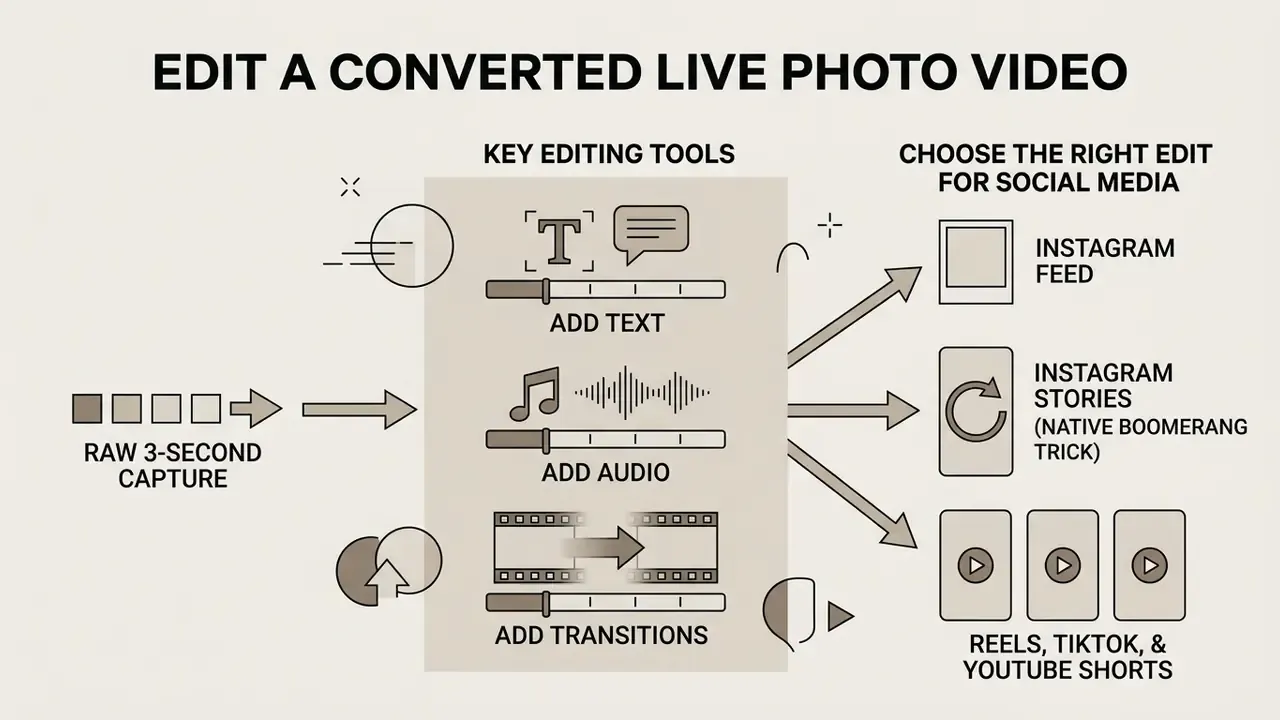
Editing turns a raw three-second motion capture into an asset you can actually publish. Trim stray frames, normalize audio, correct colour, or stitch several clips into one continuous sequence.
Raw captures usually carry shaky camera movement at the start or the end of the temporal window. Trimming those boundaries produces clean, professional motion. But because the source window is exactly three seconds, every trimming decision affects whether the clip clears the platform minimum-duration rules described below. Keep that in mind before you shave off half a second.
Add text, audio, and transitions to multiple Live Photos
Combining several converted Live Photos builds a cohesive short-form narrative. Import the extracted video files into an editor such as iMovie or CapCut, line the segments up on the timeline, and drop cross-dissolve transitions between clips. Then overlay text captions and a background music track to finish the production.
Because Loop and Bounce exports arrive silent, that music layer is not decoration; it functionally replaces the stripped ambient audio. When stitching many short clips, duplicate the timeline loop so each beat lands at a comfortable four to six seconds. If a frame still shows an old caption or a burned-in watermark, our guide on how to remove text from image online covers the fix before you export. Operations teams can also use our media calculators to estimate project dimensions and bandwidth requirements.
Save and share the converted video without quality or compatibility issues
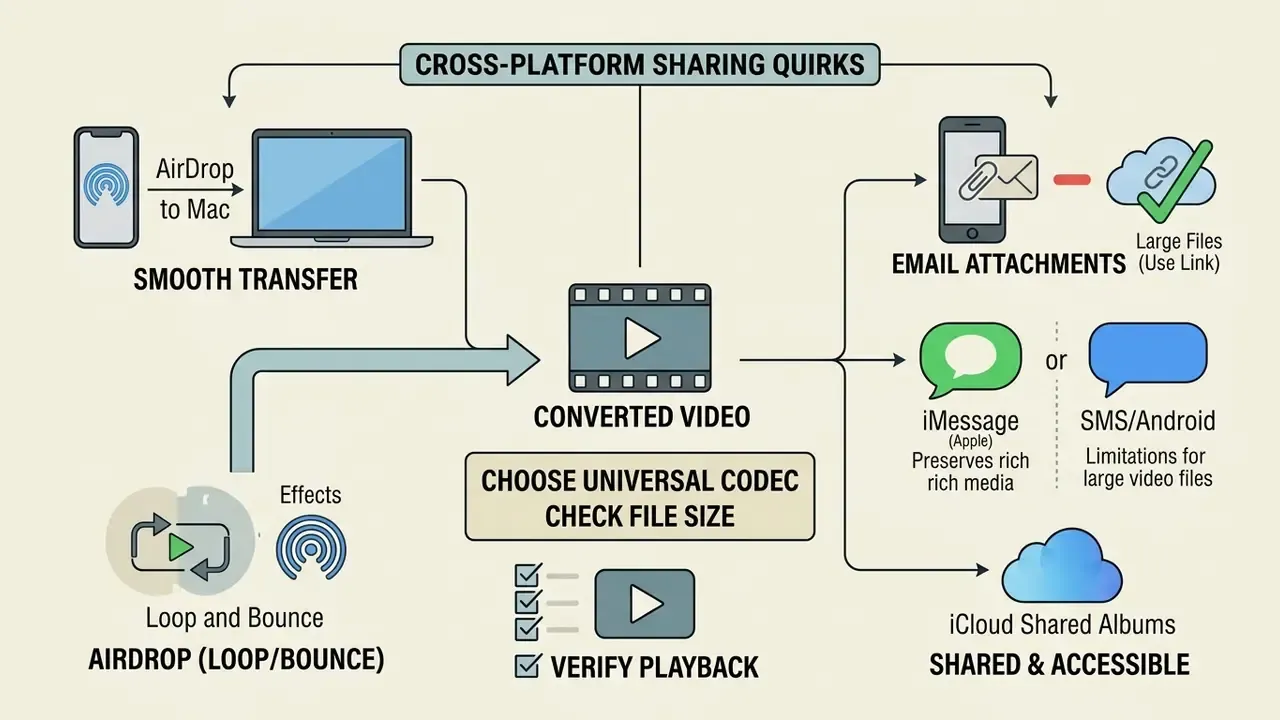
Sharing without degradation comes down to two decisions: a universal distribution codec and a file size that survives the transport layer. Encoding output into H.264 MP4 containers guarantees native playback across Android, Windows, and legacy web platforms.
High-efficiency formats such as HEVC cut footprint by roughly a quarter to a half at comparable quality, yet they can fail on older consumer hardware and get rejected by messaging platforms that accept only H.264 plus AAC. Baseline H.264 prevents those black-screen playback errors in transit. Archival practice draws the line differently: preservation masters favour lossless or mezzanine encodings, access copies favour widely decodable H.264 MP4. So keep the unmodified original if the asset has long-term value.
Cross-platform transfer quirks: AirDrop, email, and messaging
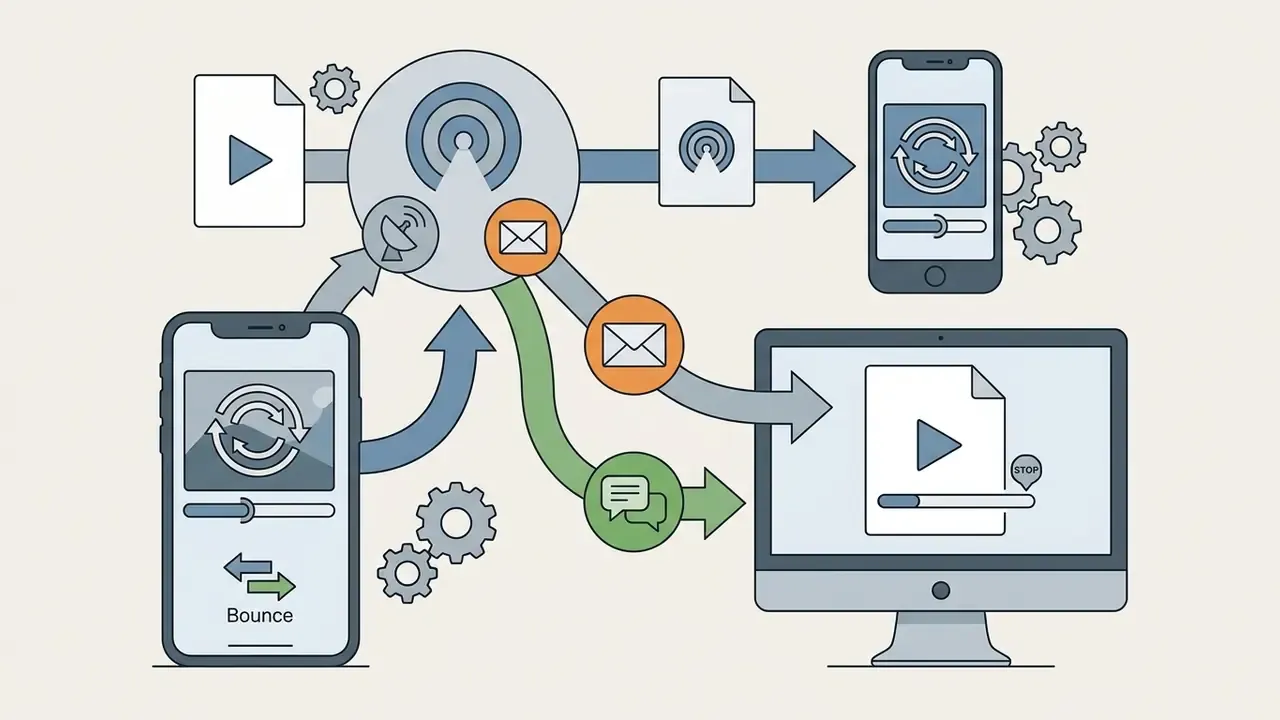
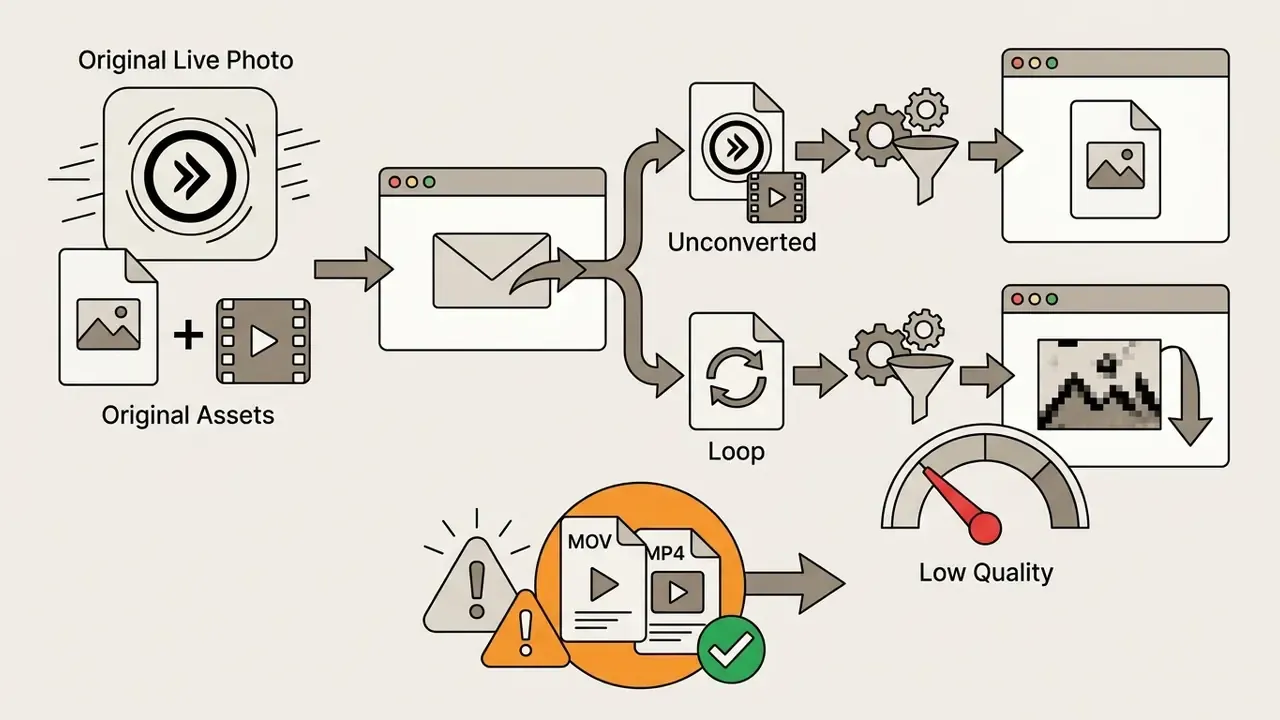
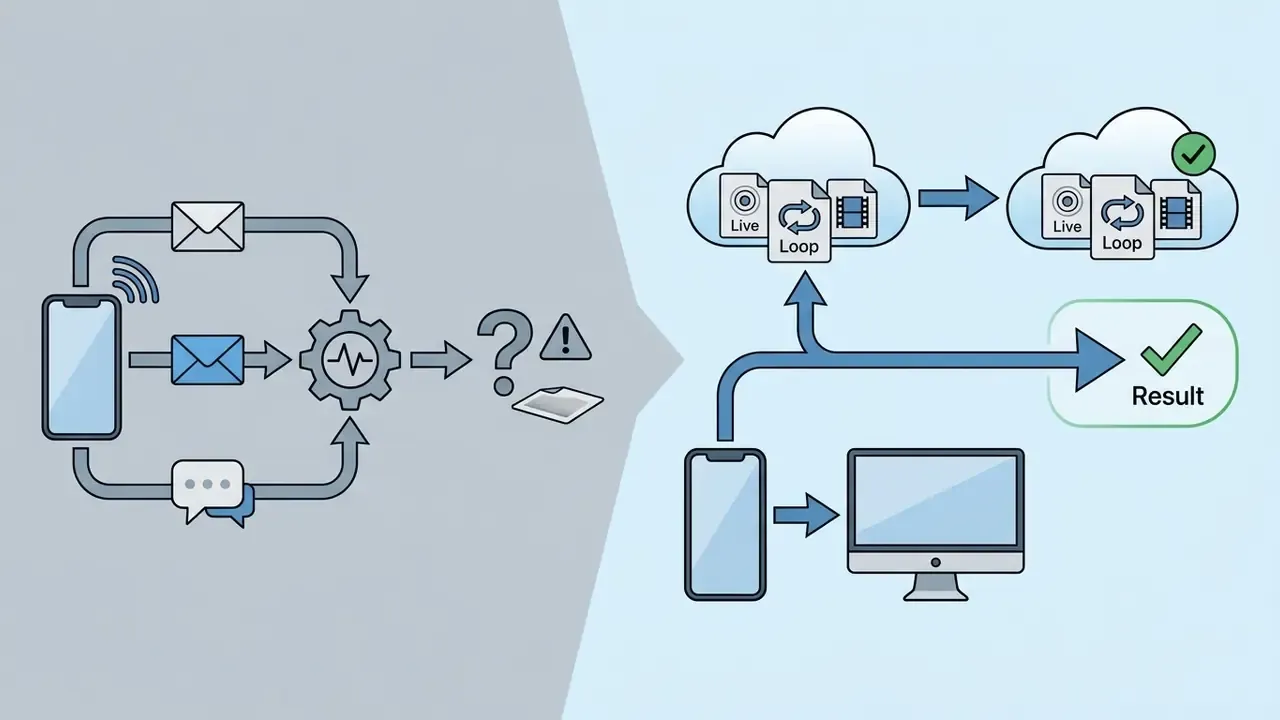
.mov container and delivers a still JPEG/HEIC only. Loop and Bounce assets emailed out are frequently downgraded to low-quality GIFs. Convert to .mov or .mp4 first, always.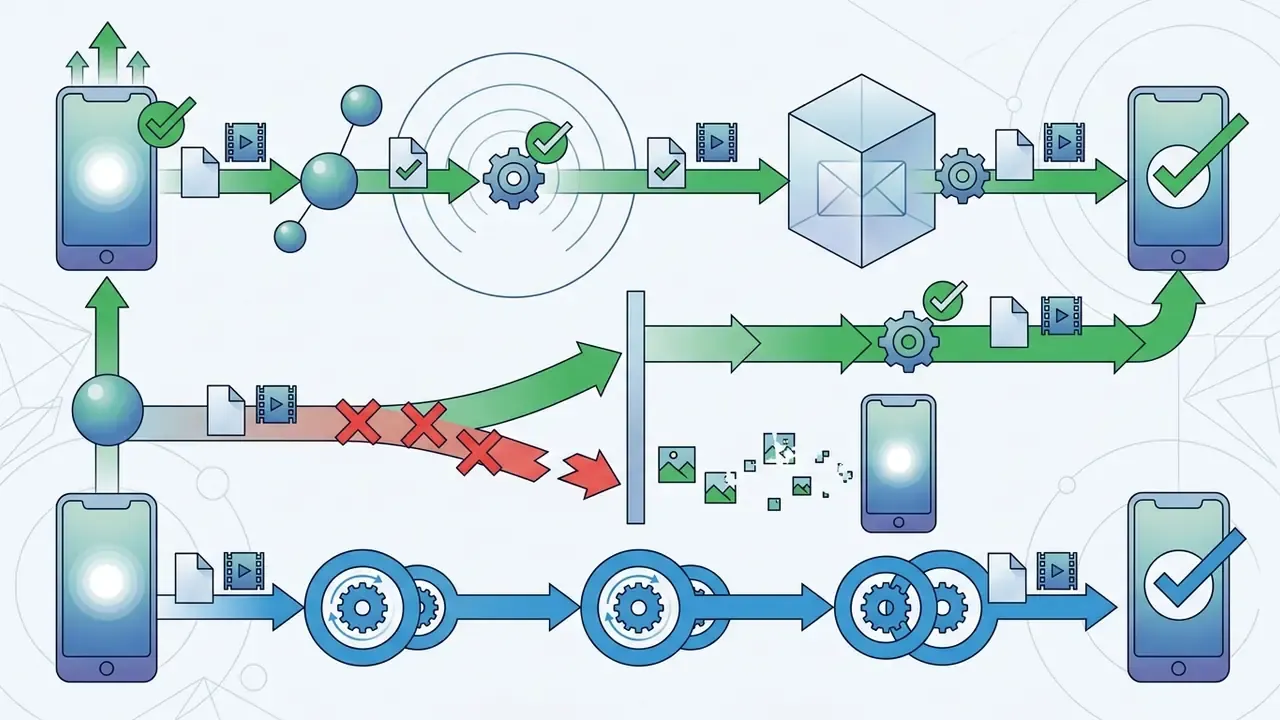
Check file size and playback before sharing
Before you send anything through a messenger or email, check the file size and actually watch the clip with sound on. Messaging networks apply heavy compression above their platform caps, and resolution is the first casualty.
Which means resolution and audio integrity are not cosmetic. They are the same signals that drive engagement, so a clip mangled by messenger compression underperforms twice over. Run heavy exports through a video compressor to land under platform caps without re-encoding into visible mush. If sizes still exceed transfer limits, our technical guide on how to send large assets covers secure delivery options. For enterprise integration standards, consult our AI Media API Guides.
FAQ about converting Live Photos to videos
Quick answers on apps, costs, privacy, compatibility, and reverse conversion.
Do I need to install a third-party app to convert a Live Photo to a video?
No need. Both iOS and macOS ship with native tools. On an iPhone, open the asset in the Photos app, tap the More (•••) menu, and choose save as video. On a Mac, use File → Export → Export Unmodified Original.
Does converting a Live Photo to a video delete or change the original photo?
No. The conversion is non-destructive. The Photos app writes a new duplicate MOV/MP4 clip and leaves the original interactive Live Photo in your library.
Is the original ambient sound preserved when converting to video?
Yes, for a standard Live Photo. The embedded video component records ambient audio 1.5 seconds before and after the shutter press, and "Save as Video" keeps that track. Loop and Bounce are the exception: iOS mutes audio when it renders those effects.
Is it free to convert a Live Photo to video?
Yes. The native Photos and Shortcuts workflows on iPhone, iPad, and Mac cost nothing and need no subscription. Paid tiers only show up in third party apps that add watermark removal, GIF export, or advanced encoding controls.
Can I combine multiple Live Photos into one single video file?
Yes. Batch-convert with the iOS Shortcuts app, then import the resulting clips into iMovie, CapCut, or Flixier and stitch them into one continuous video with transitions and music.
How do I change a Live Photo to video on Windows or Android?
Indirectly. Extract the .mov on an Apple device first, or unzip the .heic + .mov bundle you were sent, then convert or trim it in a browser editor. Windows and Android cannot read the paired Live Photo format natively, which is why the extraction step comes first.
Can I convert a regular video back into a Live Photo?
Yes, though iOS offers no native one-click reverse conversion. Use a third-party app such as intoLive or Video to Live: import your MP4/MOV, select a segment under five seconds, choose a key frame, and export it as a Live Photo straight to your camera roll.
How do I set a converted video as an animated Lock Screen wallpaper?
Convert the video back into a Live Photo with an app like intoLive. Then open Settings → Wallpaper → Add New Wallpaper → Live Photo, select your file, and confirm that the Live Photo motion toggle at the bottom of the screen is ON before setting the lock pair.
How do I turn a Live Photo back into a plain still image?
Open it in Photos, tap Edit, tap the yellow LIVE badge to disable motion, and tap Done. The asset is stored as a standard static image and the change stays reversible in the edit history.
Do Live Photos take up a lot of storage?
They take noticeably more space than a plain photo, since they bundle a full-resolution still with a short HEVC clip and audio. Still considerably less than a full-length video at the same resolution.
Enterprise & platform links
- Explore workflows and automation strategies: AI Media Workflows
- Review benchmark performance evaluations: AI Media Benchmarks and Review Proof
- Compare video creation tooling: best free AI video generators