Converting an AI-generated rendering into a believable photograph means aligning digital visual signals (lighting physics, micro-textures, optical focus) with established photographic standards. Modern generative diffusion models often produce synthetic polish or anatomical inconsistencies that betray their origin under close inspection. Achieving commercial-grade realism involves a structured workflow: prompt refinement, structural conditioning, targeted inpainting, and high-fidelity upscaling.
Vendor landing pages promise you can create stunning photos in one click. Production reality is layered, and slightly slower than the marketing copy suggests.
Quick Summary: What Actually Drives Photorealism
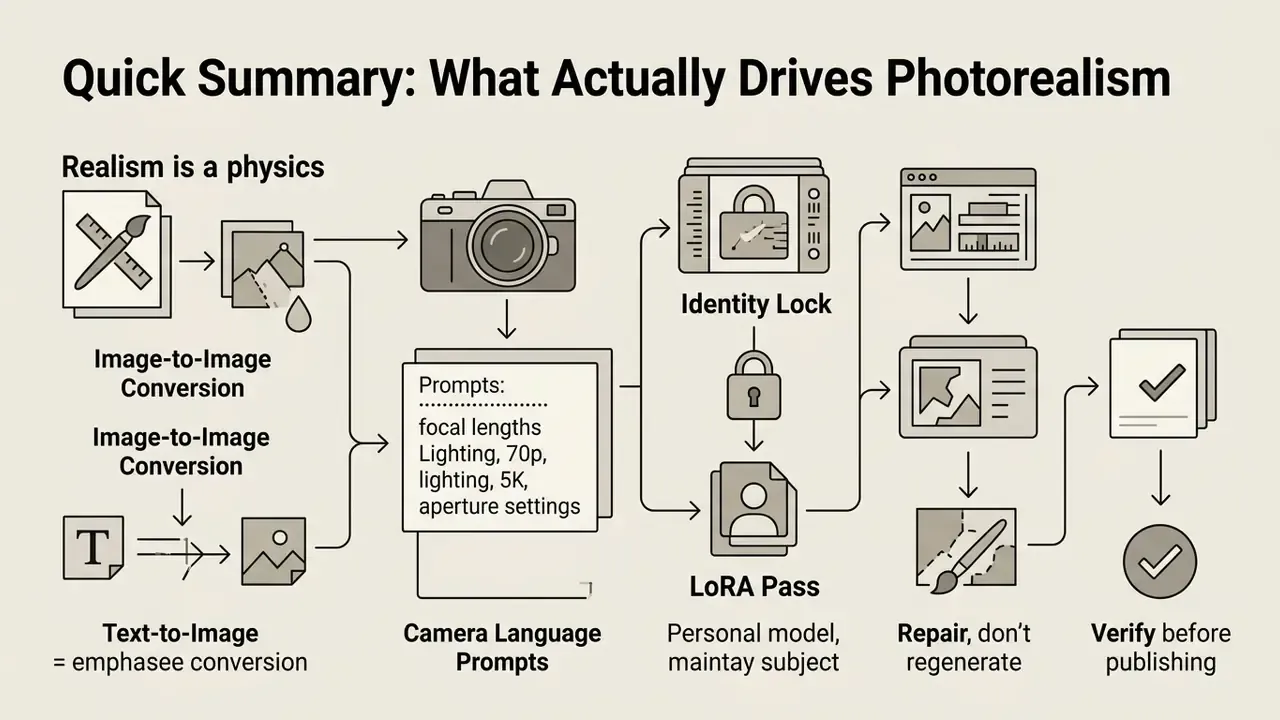
- Realism is a physics problem, not a filter. Photorealism depends on micro-texture, single-vector lighting, lens-credible depth of field, and restrained saturation, not on buzzwords like "hyperrealistic 8K".
- Use image-to-image, not text-to-image, for conversions. Set denoising strength between
0.35and0.55and add ControlNet (Canny or Depth) conditioning so the source geometry survives the pass. - Write prompts in camera language. Focal length, aperture, light direction, and surface descriptors outperform subjective quality adjectives. Keep text prompts specific but not bloated, since extremely long prompts increase detectability.
- Lock identity with a personal model. For real people, train a lightweight LoRA on 12–15 reference images and run it at weight
0.6–0.75to preserve brow arc, interpupillary distance, nose bridge, and lip contour. - Repair, don't regenerate. Masked inpainting and natural-language "type-to-edit" commands fix hands, tourists, plastic skin, and cropped framing at a fraction of the compute cost.
- Verify before publishing. Run the anatomy/lighting/focus/typography matrix, export uncompressed PNG or TIFF, and confirm commercial licensing plus data-retention terms before uploading proprietary media.
Who This Guide Is For, and What Changed
This guide is written for three groups that rarely share a workflow but share the same failure modes: in-house creative teams producing product photos at catalogue scale, marketing operations leads standardising headshots and social assets, and the risk or procurement reviewers who have to sign off on the tool before anyone uploads a file.
Three things shifted over the last year. First, base models improved enough that geometry and lighting are usually correct on the first pass, so the bottleneck moved to texture restraint and identity stability. Second, natural-language editing matured, which means a large share of routine repairs no longer needs a node graph. Third, disclosure and data-retention questions became procurement blockers rather than afterthoughts. The sections below follow that order: definition, causal factors, workflow, tooling, commercial selection, and repair.
What Does It Mean to Convert an AI Image to a Realistic Photo?
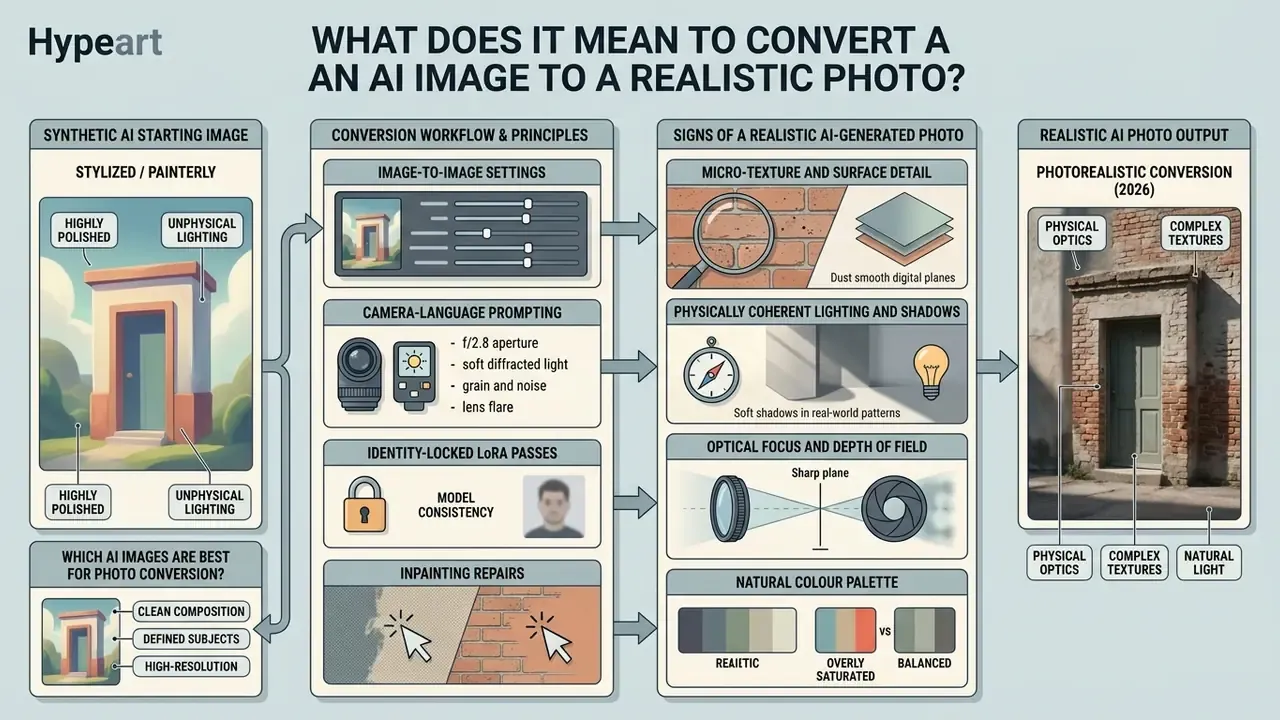
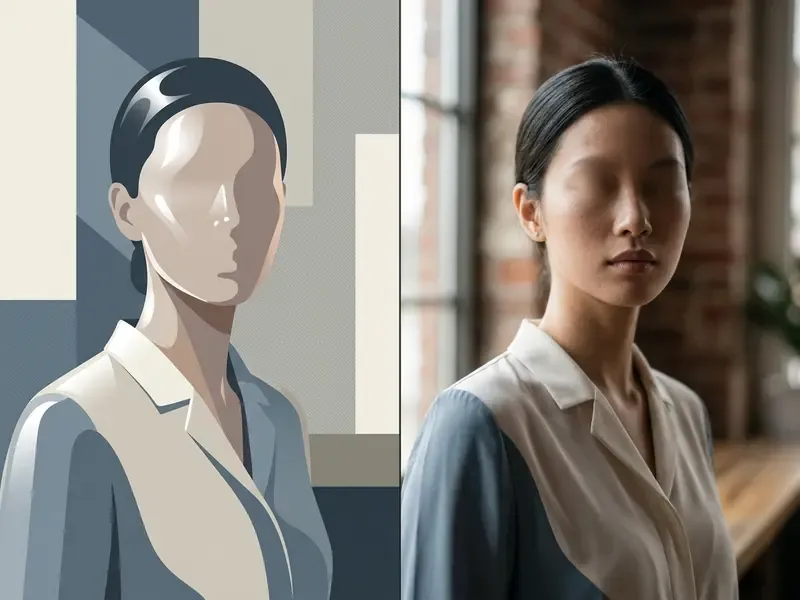
To convert an AI image to a realistic photo means transforming stylized, painterly, or overly polished synthetic assets into outputs that follow the physical and optical properties of camera-captured photography. Stylized AI art prioritizes expressive aesthetics. A professional photo relies on realistic sensor characteristics, plausible depth of field, and naturalistic surface textures.
The distinction is operational, not cosmetic. Artistic generation is described through art movements, media types, and rendered mood. Photographic style is described through capture conditions: sensor, lens, aperture, light direction, ambient temperature. Changing the descriptive vocabulary changes the distribution the model samples from, which is why converted assets improve dramatically once "digital painting" language is replaced with optical terminology.
In empirical research, photorealism is evaluated by how accurately an image mirrors physical reality and resists human fake detection. The GLIPS study (Aziz et al., 2024) asked 350 participants to rate photorealism on a five-point scale, comparing camera-captured COCO photographs against outputs from DALL·E 2, Stable Diffusion, GLIDE, and DALL·E 3.
«Camera-captured images averaged 4.06 out of 5 for photorealism, while leading diffusion models scored between 2.04 and 3.63.»
Achieving a true ai image to real life aesthetic means narrowing that gap: replacing synthetic smoothness with believable micro-details, structural accuracy, and balanced exposure dynamics. Call it the difference between an image that looks good and an image that looks captured.
Signs of a Realistic AI-Generated Photo
A photorealistic AI image demonstrates physical lighting coherence, balanced colour saturation, and accurate surface micro-textures without visual glitches. Under human perception benchmarks, photorealistic output mirrors professional camera captures across four indicators:
- Micro-Texture and Surface Detail Human skin displays pores, fine lines, and subtle imperfections rather than uniform plastic smoothness. Fabric, wood, and metal reflect light according to their real-world tactile properties. Diffusion-artifact taxonomies classify "shiny" or plastic-looking skin as a stylistic failure category distinct from anatomical errors.
- Physically Coherent Lighting and Shadows Shadows align precisely with identifiable key and ambient light sources. Secondary reflections and highlights follow the inverse-square law of light degradation across the environment.
- Optical Focus and Depth of Field Background blur mimics real camera lenses, showing a natural bokeh gradient rather than uniform digital Gaussian blurring. Uniformly soft outlines and halo edges are treated as realism defects in current quality-evaluation guidance.
- Natural Colour Palette Colours stay inside realistic dynamic ranges, which makes restraint a primary marker of visual authenticity. Over-saturation is the single most common giveaway in high quality images that otherwise pass inspection.
«Statistical analysis showed camera-captured images carry lower hue, saturation and brightness values than typical AI-generated images.»
Which AI Images Are Best for Photo Conversion?
Clean sketches, CAD line drawings, 3D renders, and low-complexity digital drafts are the most reliable inputs for any ai image to realistic photo conversion tool. They provide clear structural geometry and spatial boundaries without heavy stylistic noise that the model must unlearn.
Sketch-to-photo research presented at CVPR (2023) showed that abstract line art and structured sketches let image-to-image conditioning networks infer form accurately while synthesizing natural photographic textures from scratch. A dataset-level benchmark quantifying conversion fidelity across abstraction levels is still limited, so treat this as directional guidance rather than a measured score. Vendor documentation aligns with the same ranking: scanned pencil or ink elevations, CAD line exports, and digital line art convert most predictably, while rough gesture thumbnails should be cleaned first. 3D snapshots and basic renders rank next, since they already encode perspective, volume, and material cues.
Heavily stylized AI art or complex illustrations with exaggerated lighting introduce conflicting visual cues. In those cases, lower style strength or apply preliminary detail smoothing before processing the file through an ai image to realistic photo converter. When comparing available image-to-image generators, prioritize systems that expose structural conditioning rather than style presets alone. A quick way to sanity-check candidates is to compare options by control surface, not by gallery quality.
What Affects How Realistic an AI Photo Looks?
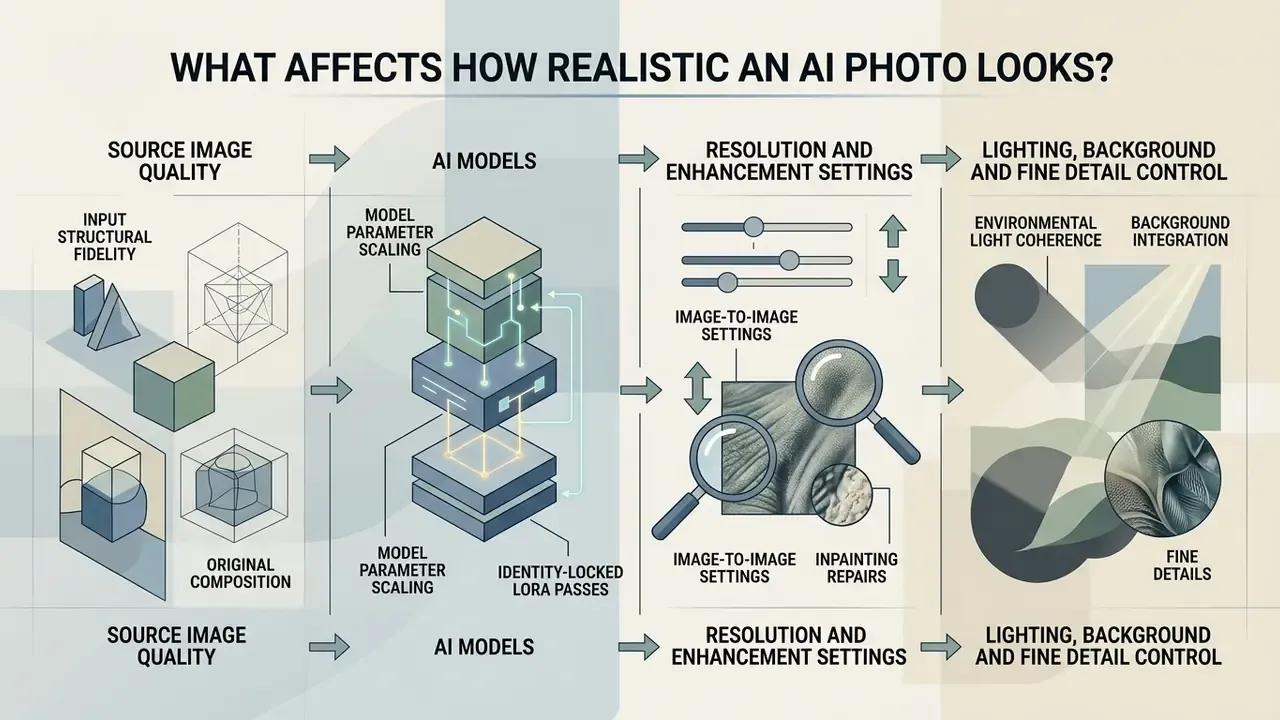
Perceived photorealism depends on input structural fidelity, model parameter scaling, resolution settings, and environmental light coherence. Weak geometry in the source asset or incorrect upscaling settings can break realism even when overall exposure looks correct. Realism behaves multiplicatively: one broken factor, whether an implausible shadow direction, a resampled texture, or mode-collapsed upscaling, collapses the believability of the whole frame.
«AI-generated images consistently outperform camera photos on perceived image quality, yet score lower on photorealism due to excess saturation.»
Source Image Quality and Original Structure
Geometric alignment and structural clarity in the reference asset establish the quality ceiling for the final conversion. High-resolution inputs with clear object boundaries let image-to-image algorithms interpret depth and surface contours accurately.
When an asset contains ambiguous geometry or heavy compression artifacts, diffusion models misinterpret structural boundaries and generate distorted edges or unnatural surface blending. Full-reference and reduced-reference quality metrics treat preserved edges, contours, and local gradients as proxies for perceived realism, and textured-mesh evaluation research shows that geometric error degrades perceptual quality even when texture fidelity stays high. Preserving structure without losing key proportions means using clean reference images, or pre-cleaning rough sketches before the photographic transformation pass.
AI Models, Resolution and Enhancement Settings
Model capacity and training alignment determine how accurately an AI system reproduces real-world physics and camera dynamics. In comparative benchmark testing, different base architectures produced different photorealism scores based on their training distributions and prompt adherence.
«DALL·E 2 scored 3.63 of 5, Stable Diffusion 3.30, DALL·E 3 2.75, GLIDE 2.04; camera-captured photographs scored 4.06.»
Generating at native model resolutions (1024×1024, for example) and then applying a secondary artifact-aware upscaling pass yields cleaner detail retention than generating at ultra-high resolutions from the start. Direct high-resolution diffusion can trigger mode collapse, duplicating patterns or introducing structural artifacts across complex scenes. Reviews of high-resolution synthesis note the same trade-off: raising native output resolution increases compute demand and can degrade fine detail rather than improve it.
Two safeguards reduce that risk. First, separate resolution increase from re-encoding: upscale losslessly, then compress once at export. Second, prefer reconstruction methods that suppress artifacts by design, such as reality-guided diffusion super-resolution or total-variation regularisation against jagged edges, over aggressive unsharp masking.
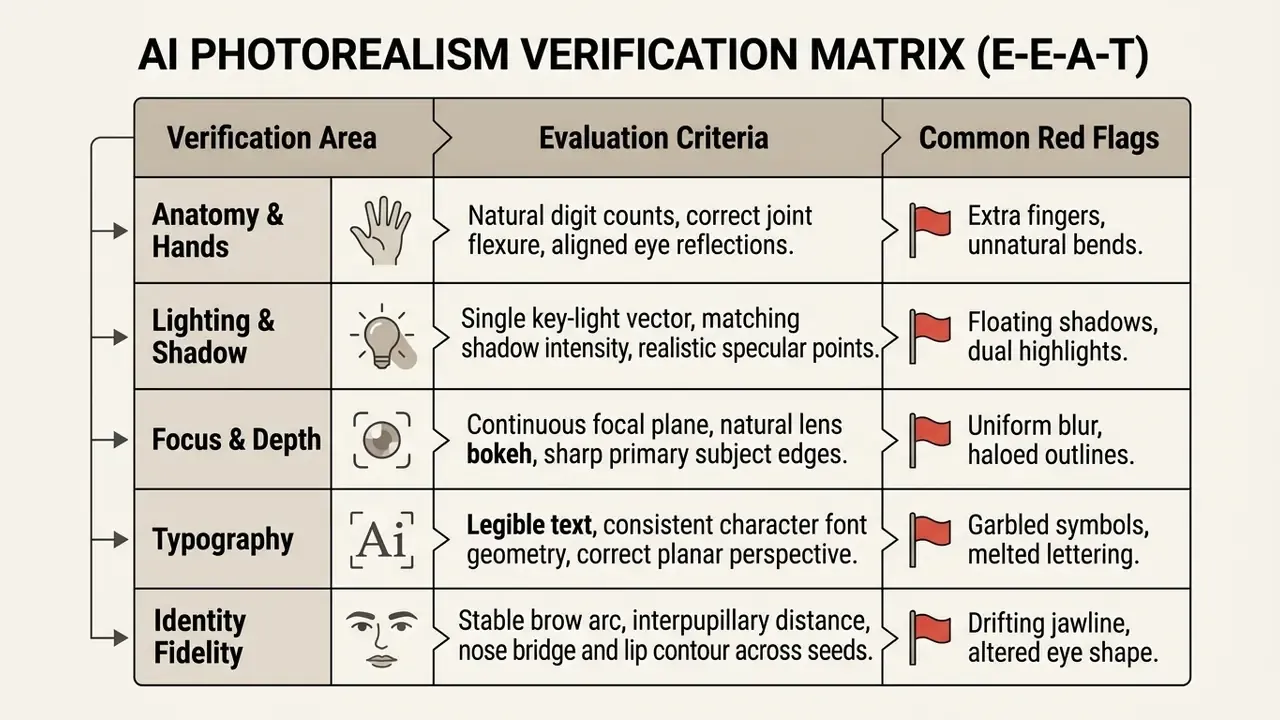
Lighting, Background and Fine Detail Control
Physically accurate lighting requires that key light, fill light, and background ambient exposure follow consistent directional vectors across the entire scene.
International portrait quality benchmarks (ICAO TR-Portrait-Quality, v1.0, 2026) specify that facial illumination should be evenly distributed, without harsh unexplained shadows obscuring eye sockets, nose, mouth, or chin contours. That document targets biometric capture rather than creative photography, so apply it as a floor standard, not an aesthetic goal. It also describes a reproducible reference setup: a single key light with reflector panels placed roughly 35° above the camera-subject axis and under 45° horizontally, an opposing reflector to lift facial shadows, and a separate background light to eliminate shadow spill behind the head. Replicating that geometry in prompt language ("single soft key light 35 degrees above camera axis, reflector fill from right, clean lit background") produces measurably more plausible portrait lighting.
When replacing or refining an ai background, match the backdrop's colour temperature, brightness, and focal blur to the subject's lighting profile. Otherwise you get the classic synthetic "cut-and-paste" look. Plain, uniform, texture-free backdrops also reduce segmentation errors during later editing passes, including background removal.
How to Make an AI Photo More Realistic Step by Step
To make an AI photo more realistic, production workflows use a three-stage conditioning pipeline: structural conditioning via image-to-image diffusion, prompt-based detail injection, and targeted post-processing refinement. The sequence prevents structural distortion while replacing synthetic aesthetics with photographic detail.
The stakes of getting this right are lower than perfectionists assume, and higher than casual users expect.
«Across 287,000 ratings, participants identified AI-generated images correctly only 63% of the time, marginally better than chance.»
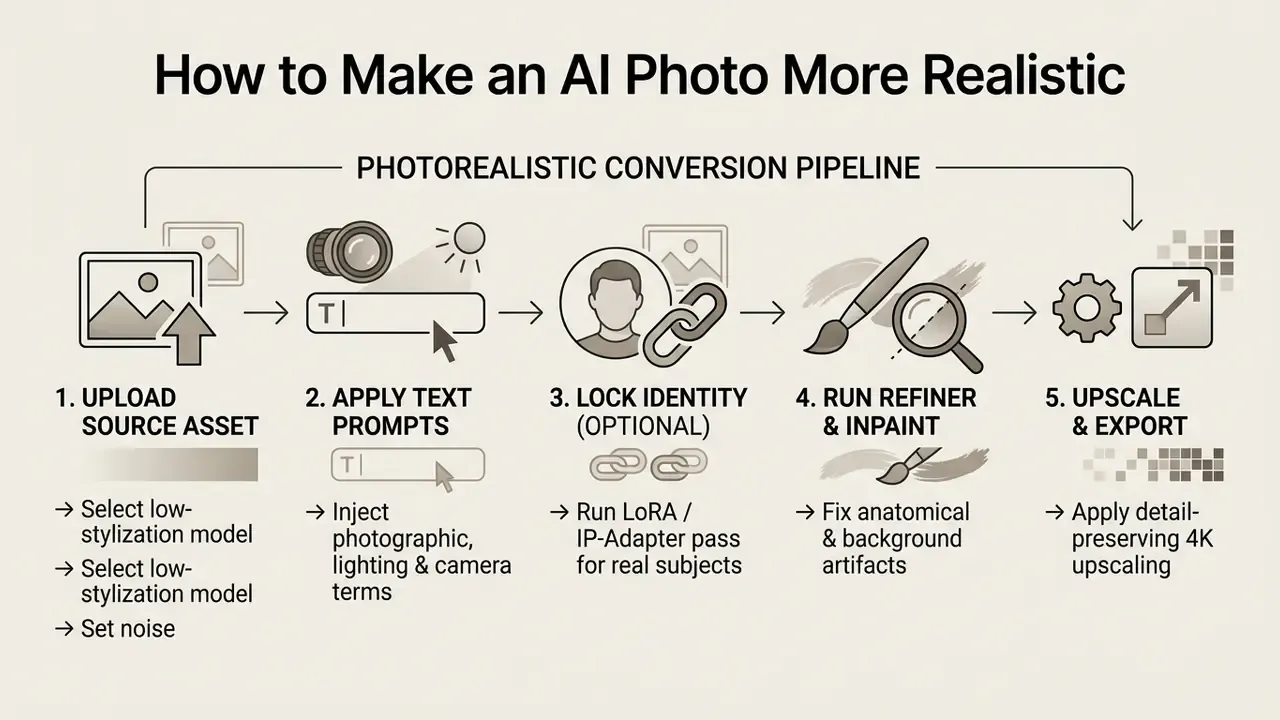
Upload an Image and Choose the Right AI Model
The process begins by uploading the source image into an image-to-image interface and selecting a diffusion model tuned for photorealistic generation rather than artistic rendering. When shortlisting AI image generators, check whether the platform exposes denoising control, seed locking, and spatial conditioning. Without those three levers, structural preservation is guesswork.
During configuration, setting denoising strength (sometimes labelled image variation) between 0.35 and 0.55 lets the system preserve the original layout, pose, and spatial structure while regenerating surface textures. Spatial conditioning tools such as ControlNet (Canny edge, Depth, or HED soft-edge preprocessors) keep core object boundaries stable through the conversion pass and prevent unwanted structural shifting. In FLUX-class pipelines, structural control is achieved differently: combine multiple reference images with explicit prompt instructions for pose, layout, and spatial arrangement.
A two-model sequence improves fidelity further. Published SDXL workflows run a base model pass followed by a dedicated refiner. One documented configuration uses 18 base steps plus 15 refiner steps, so coarse structure resolves first and fine texture consistency is restored afterwards. That split is precisely what separates a clean render from a believable photograph.
Use Text Prompts to Add Photorealistic Details
Injecting precise camera, lens, and lighting terminology into text prompts guides the model toward authentic photographic qualities.
Instead of subjective buzzwords like "hyperrealistic" or "8K resolution", effective prompt engineering uses objective camera vocabulary:
- Camera and Lens Specs
"35mm prime lens, f/2.8 aperture, subtle sensor grain, natural focal falloff" - Lighting Dynamics
"soft diffused window light from left, subtle fill light, realistic specular highlights","golden hour side light","overcast diffuse lighting" - Surface Properties
"detailed skin micro-contrast, natural pores, visible fabric weave, unpolished surfaces" - Focus Control
"shallow depth of field, sharp primary subject edge, continuous focal plane"
Keep the prompt in a stable order (subject, style, composition, light, palette, technical details) and iterate with small edits rather than rewriting one monolithic block. An explicit negative prompt, such as "over-saturated, plastic skin, CGI render, digital painting, smooth studio polish, extra digits", neutralizes common diffusion artifacts before final pixel rendering.
One caveat is worth engineering around: verbosity has a detectability cost.
«Images generated from long, highly detailed prompts were flagged as AI-made significantly more often by both humans and automated classifiers.»
In practice, specific beats sprawling. A tight 25–40 word prompt built from optical facts usually outperforms a 200-word stack of adjectives. I used to write longer prompts by default; the flagging data changed my habit.
Preserving Identity in Photorealistic Generations (LoRA & Personal Models)
Photorealism is counterproductive if the subject's face loses its recognizable identity. When converting AI images or draft photos of real individuals, standard diffusion passes tend to alter facial geometry: jawlines drift, eye spacing widens, and the output becomes "a person who resembles the subject" rather than the subject.
To maintain identity consistency across photorealistic passes:
- Dataset PreparationCollect 12–15 high-resolution reference photos across diverse angles under neutral lighting. Avoid aggressive beauty filtering, heavy makeup variance, or optical distortion from ultra-wide phone lenses.
- Key Feature AnchoringTrain a lightweight LoRA (Low-Rank Adaptation) or custom persona model. Make sure it anchors the essential landmarks: brow arc shape, interpupillary distance, nasal bridge contour, lip symmetry, and overall face shape. These are the same cues human observers use to accept or reject a likeness.
- Conditioning WeightingDuring image-to-image conversion, set the LoRA weight between
0.6and0.75alongside a ControlNet IP-Adapter pass. That preserves authentic features while synthesizing photographic skin pores and realistic lighting. - Reuse and Version ControlOnce trained, a single persona model can be reused across outfits, locations, and campaign concepts without re-uploading selfies. It also simplifies consent tracking, since one documented dataset governs every downstream asset.
Teams standardizing this for staff portraits can cross-reference feature sets in our guide to AI headshot generators before committing to a training vendor.
Generate, Preview and Download the Best Version
Generating multiple seed variations lets operators compare subtle differences in facial geometry, lighting falloff, and shadow density before export. Lock the seed once a promising variant appears, then iterate prompts against that fixed seed so every change is attributable.
Once the optimal variation is selected, run a refiner pass to resolve fine-detail inconsistencies. For commercial deployment, export as uncompressed PNG or TIFF to preserve edge sharpness and prevent blocky JPEG artifacts across downstream channels. For print destinations, target 300 ppi at final trim size, the long-standing industry standard for high-quality output, and resize using detail-preserving resampling rather than plain bicubic reduction. Export each required aspect ratio from the master file, not from an already compressed derivative.
AI Tools for Turning Images Into Realistic Photos
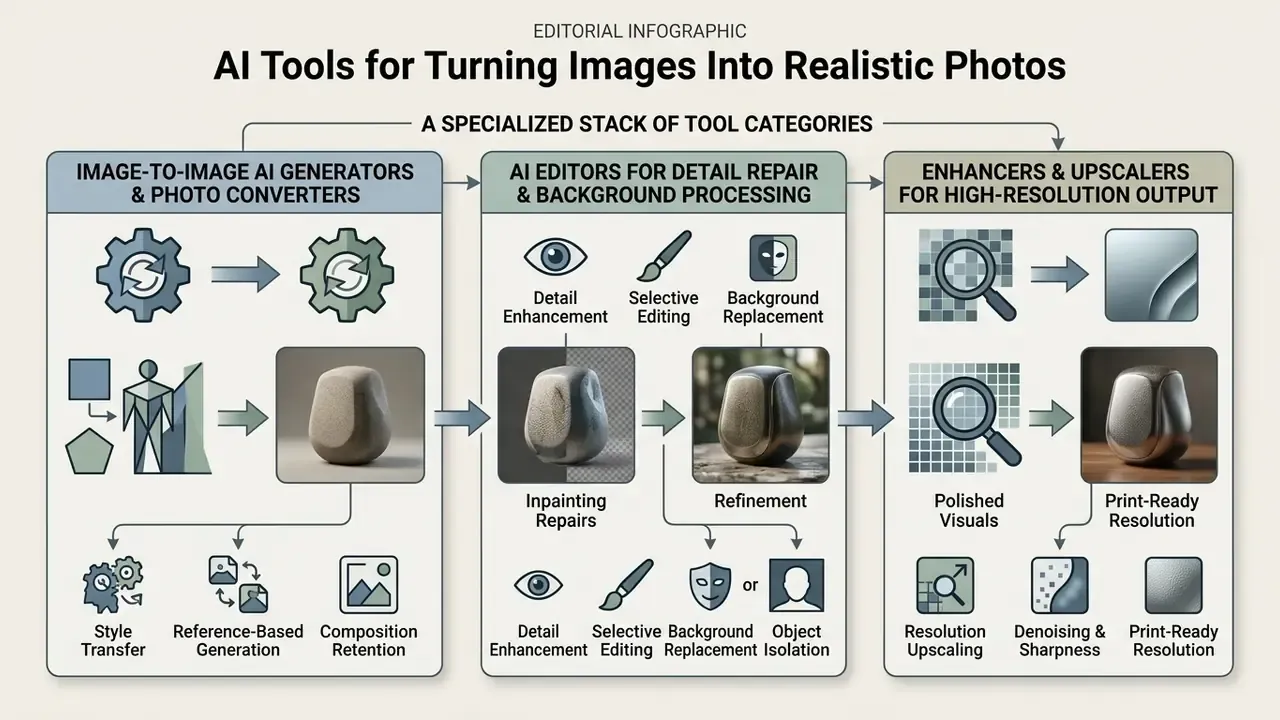
A photorealistic output needs a specialized stack: image-to-image converters for style transformation, specialized AI photo editors for local repair, and artifact-aware upscalers for high-resolution output.
Image-to-Image AI Generators and Photo Converters
Modern photorealistic workflows rely on current diffusion architectures: FLUX.1 (Dev/Schnell) and FLUX.2 for prompt adherence and natural lighting, Seedream 4.0 / 4.5 for high-precision texture synthesis, nano banana pro for fast instruction-style edits, GPT image models and Grok Imagine for quick concept passes, and open-source Stable Diffusion XL / Cascade pipelines managed through ComfyUI. Selecting the right base model prevents synthetic artifacts before any post-processing begins. No amount of upscaling repairs a render with collapsed geometry.
Dedicated image-to-image converters translate stylized inputs into photographic styles while retaining structural composition. ComfyUI pipelines offer spatial control through custom nodes, enabling precise conditioning over edge maps, depth layers, and colour palettes. Its documented image-to-image tutorial explicitly covers converting line art into realistic images and restoring degraded originals. The trade-off is a real learning curve: expect a week of practice before node graphs feel faster than a hosted interface.
Commercial platforms like Adobe Firefly (Generative Match) let creative teams upload reference photography to standardize style strength, lighting, tone, and composition across bulk runs. When shortlisting leading AI image generators, weigh reference-conditioning depth against licensing terms. For adjacent stylistic pipelines, teams often benchmark against a comparison of the best AI art generators and the broader media transformation requirements documented in our photo editor glossary.
AI Editors for Detail Repair and Background Processing
Local repair editors use mask-driven inpainting to regenerate isolated regions, such as distorted hands or facial landmarks, without disturbing the surrounding composition. Vendor implementations now expose four distinct local operations: masked inpainting, object erasure, background removal, and background replacement. Several platforms support automatic mask detection, so operators can skip manual brushing entirely.
During a background removal pass, or when replacing an unnatural backdrop, advanced segmentation networks extract foreground subjects with clean alpha mattes. That isolation lets you relight or blur the background independently before compositing. Teams working with large asset libraries can explore the hub to compare specialized editing integrations, while frame-extension tasks are covered in the AI outpainting and image expansion comparison.
Enhancers and Upscalers for High-Resolution Output
AI image upscalers use generative priors to reconstruct fine surface details, pushing image dimensions to 4K while eliminating compression noise.
Magnific AI separates Creative mode, which invents micro-detail, from Precision mode, which scales faithfully up to 16×. That distinction matters enormously for product photography, where invented texture is a compliance risk rather than a feature. Topaz Gigapixel AI focuses on precision restoration, sharpening soft focus lines and removing compression artifacts while maintaining original pixel fidelity. Inside Krea's Enhancer, Topaz models are offered alongside Krea Enhance at 1×, 2×, 4×, and 8× scaling. Comparative notes on additional AI image enhancers help match the tool class to the defect class.
| Tool Category | Core Task | Input Asset | Control Mechanism | Deployment Model | Primary Output |
|---|---|---|---|---|---|
| Image-to-Image Generators | Global style & texture conversion | Line art, draft AI images, 3D renders | Denoising sliders, ControlNet, text prompts | Local (ComfyUI/SDXL/FLUX) or Cloud API | Structural photo-like conversion |
| AI Photo Editors | Local defect repair & background edit | Converted draft photo | Inpainting masks, semantic negative prompts, natural-language commands | Mostly Cloud; open-source local options (IOPaint) | Cleaned asset with repaired details |
| AI Upscalers & Enhancers | Resolution expansion & detail sharpening | Low-res or soft AI photo | Scale factor (2x/4x/8x/16x), creativity vs precision modes | Desktop (Topaz) or Cloud (Magnific, Krea) | High-resolution 4K/8K photographic output |
| AI Background Removers | Foreground subject isolation | Mixed-background asset | Automatic segmentation, edge refinement | Cloud API; local models available | Transparent PNG cutout asset |
| Persona / LoRA Trainers | Identity preservation across passes | 12–15 reference selfies | Training steps, LoRA weight, IP-Adapter strength | Local training or managed cloud training | Reusable identity-locked model |
No matching rows Clear one or more filters to restore the matrix.
For institutional buyers operating inside a hardened security perimeter, the Deployment Model column is the first filter, not the last. Local ComfyUI or IOPaint installations keep source media inside the corporate boundary, whereas cloud APIs shift raw assets into third-party retention windows.
How to Choose an AI Image-to-Realistic-Photo Tool for Commercial Use
Selecting a commercial AI image processing tool means evaluating output quality, processing speed, licence terms, and privacy protections for proprietary media.
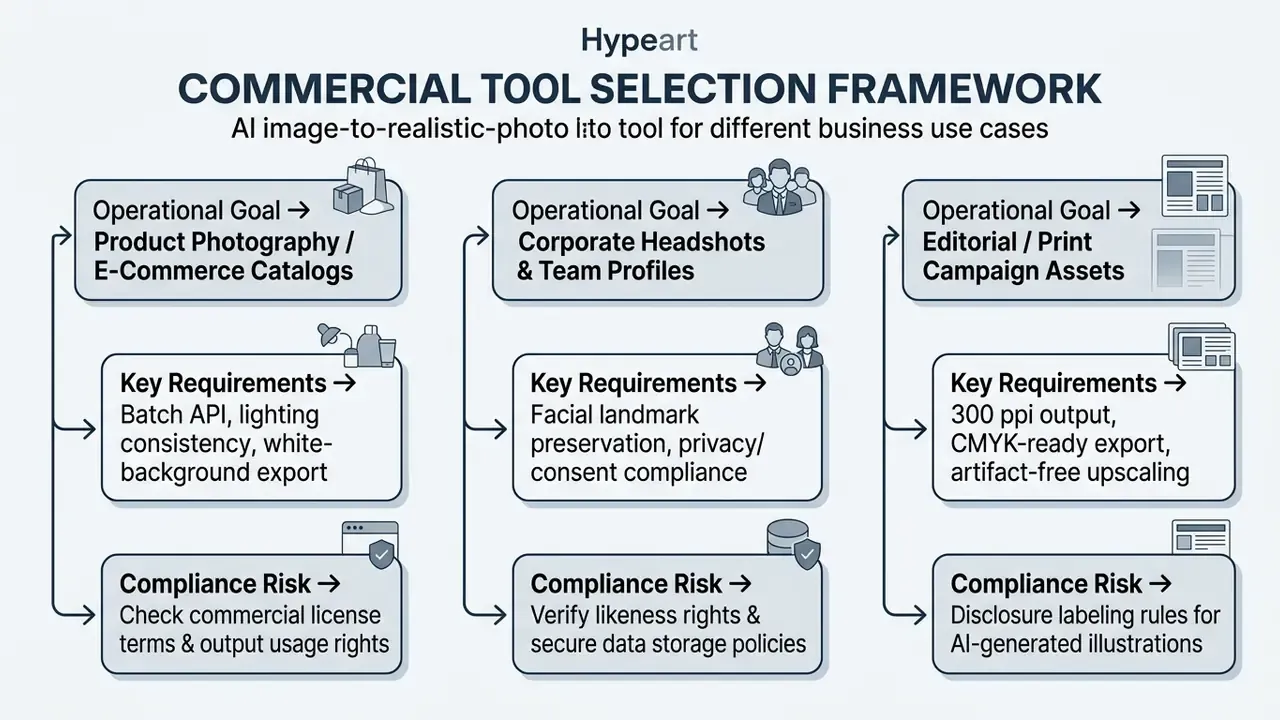
Tools for Product Photos, Headshots and Creator Content
Commercial implementations cluster around e-commerce catalogue production, marketing assets, and corporate headshot generation:
- Product Photography Brands use workflow automation tools like ComfyUI and FLUX to generate contextual lifestyle scenes from basic studio product shots, then output tailored aspect ratio variants for social channels and storefronts. One documented DTC cosmetics case turned five smartphone photos into 60 delivered product images within 48 hours, formatted for Instagram, marketplaces, web, and stories.
- Corporate Headshots Organizations use specialized portrait tools to standardise background tones and lighting across employee profiles. To evaluate broader media workflows, visual teams often view the guide to automated media creation pipelines.
- Content Creation A content creator or social media team can convert conceptual sketches into marketing graphics quickly, keeping publishing momentum without photography overhead. A documented D2C launch reused a single AI-generated product visual set across Amazon listings, website hero blocks, organic social, and paid ads, exported at 1:1, 16:9, and 9:16.
Production Workflows: Specialized Commercial Use-Cases
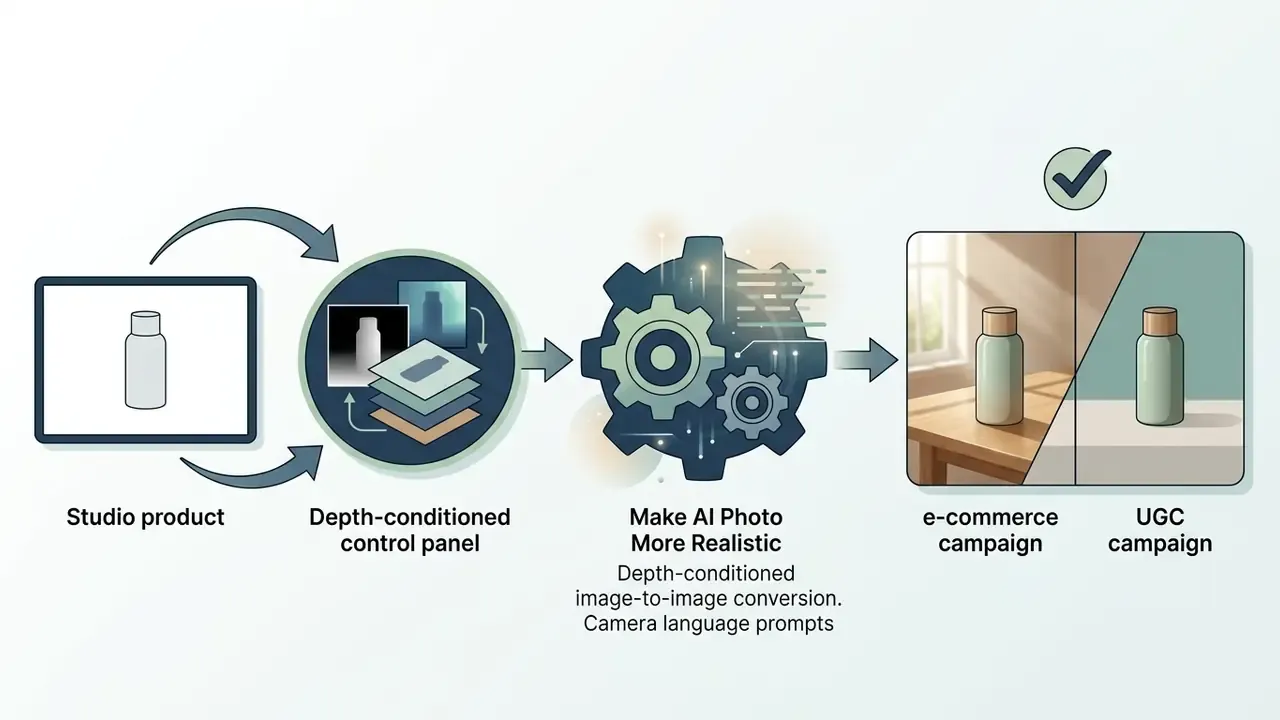
"product sitting on sunlit oak table, soft morning window light, realistic reflections, 85mm lens") to generate conversion-focused social ads, locking product geometry with a Depth or Canny ControlNet pass. For UGC-style authenticity, deliberately reduce polish: add 2% grain, allow slight handheld framing imperfection, avoid symmetrical studio lighting.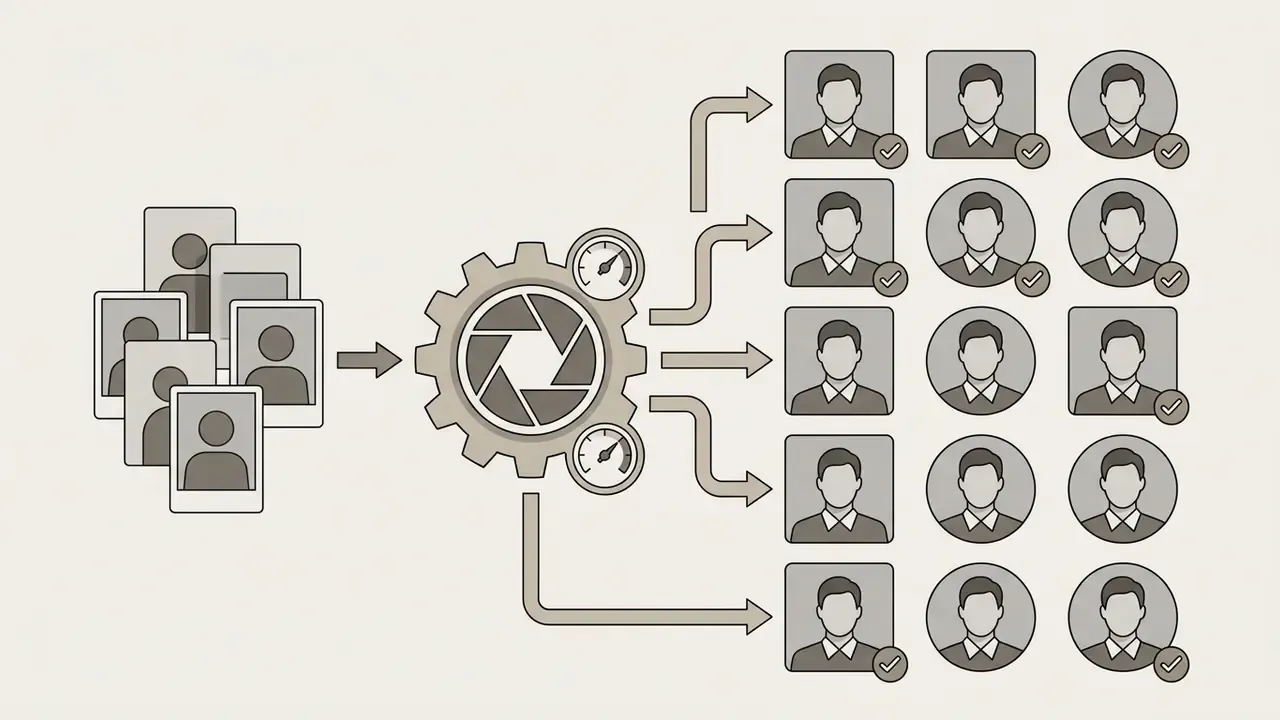
"professional executive portrait, navy blazer, dark neutral office background, soft key lighting"), and keep visual harmony across team directories. Keep written consent records for every subject, and reuse the same seed family so the whole directory shares one lighting signature.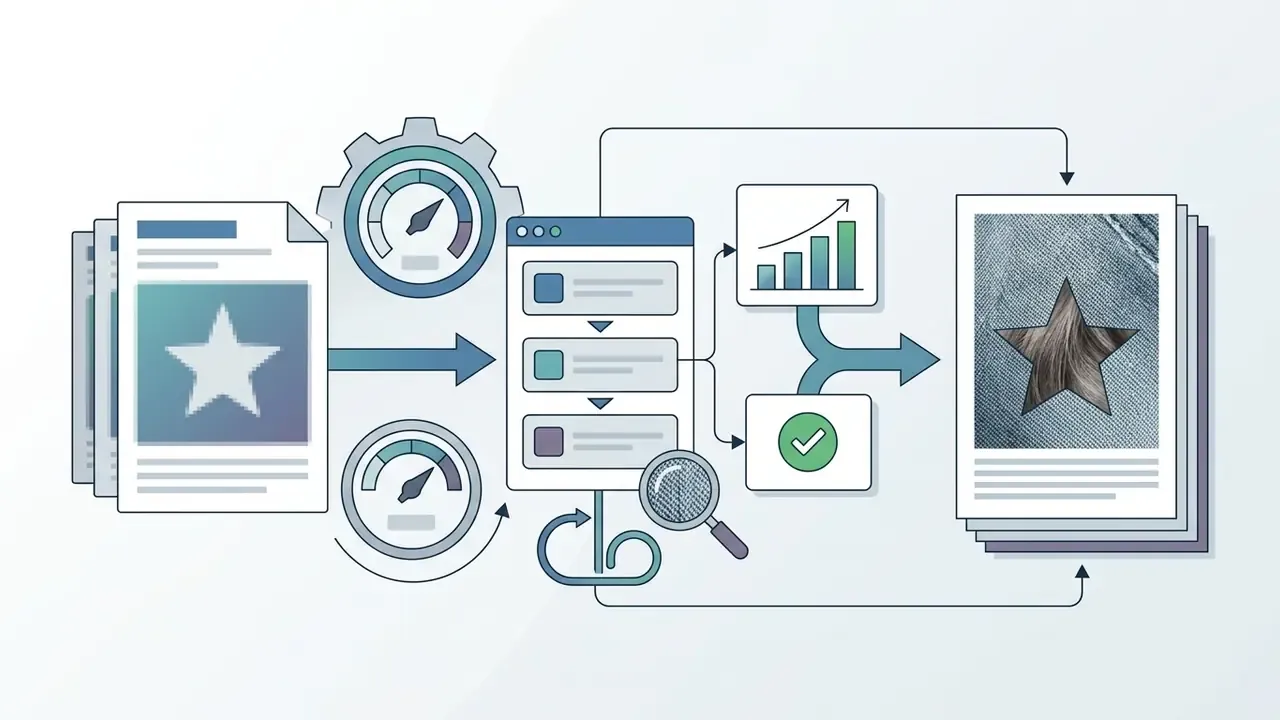
"fine fabric weave, visible hair strands, realistic eye catches"), pushing native 1024px renders to crisp 4K/8K CMYK-ready files at 300 ppi.
Data Privacy, Shadow AI and Vendor Retention Terms
Compare Plans, Output Quality and Download Options
Evaluating commercial subscriptions involves API throughput limits, processing speeds, export formats, and intellectual property rights:
Commercial Licensing Rights: Confirm that subscription terms explicitly grant commercial usage rights for generated outputs. Under guidelines from the U.S. Copyright Office (2025/2026, https://www.copyright.gov/ai/), images generated entirely by AI without human creative modification lack copyright protection, whereas human-assisted edits and creative arrangements may qualify where a human determines the expressive elements. Some vendors move in the opposite direction: certain generative outputs are restricted from any commercial purpose under their additional terms, so check the plan page and the legal terms. Restricted content categories sit outside most standard licences entirely. Tools marketed as an adult ai generator or an adult ai image platform carry separate rules, and regulated brands should treat them as out of scope for corporate assets.
This overview is general information, not legal advice. Consult qualified counsel regarding copyright, likeness rights, and licensing of AI-generated content in your jurisdiction.
- Export Quality and Uncompressed Formats: Professional workflows need uncompressed PNG or TIFF export to avoid cumulative blocky compression artifacts across editing passes. Verify that watermark-free export is actually included in the tier you buy. Several "free forever" claims apply only to legacy non-AI features, while AI functions stay watermarked or credit-limited.
- Processing Speed and API Integration: High-volume teams should prioritize dedicated API endpoints with defined requests-per-minute (RPM) capacity for automated catalogue batching. Published tiers vary sharply: some providers offer no free image-generation access at all, with paid tiers scaling from roughly 5 to 250 images per minute. Treat "2-second generation" claims as best-case marketing. Plan capacity around 5–15 seconds per high-resolution pass under real queue conditions, and read what the plans include for concurrency, not just monthly credits.
- Disclosure and Labeling Obligations: Business-facing guidance increasingly requires clear labeling of AI-generated content. Some institutional brand standards mandate an explicit "Image created using AI" tag for primary generated illustrations while exempting merely enhanced photographs. Build the label decision into asset approval, not publishing.
- Detection Readiness: Quality-control teams should assume outputs will be machine-tested downstream.
«The best-performing detector misclassified 13% of images, versus 38.7% error among human participants.»
Procurement teams comparing per-credit economics against subscription models will find tier-by-tier breakdowns in our free photo editor limits guide.
How to Fix Unrealistic AI Photo Results
When a conversion yields synthetic artifacts, distorted features, or unnatural backgrounds, structured repair can salvage the image without a full re-generation. The documented repair flow is consistent across sources: inspect at full resolution, classify the defect as global or local, isolate the broken region with a tight mask, regenerate only that region, re-inspect for residual artifacts, then export at low compression.
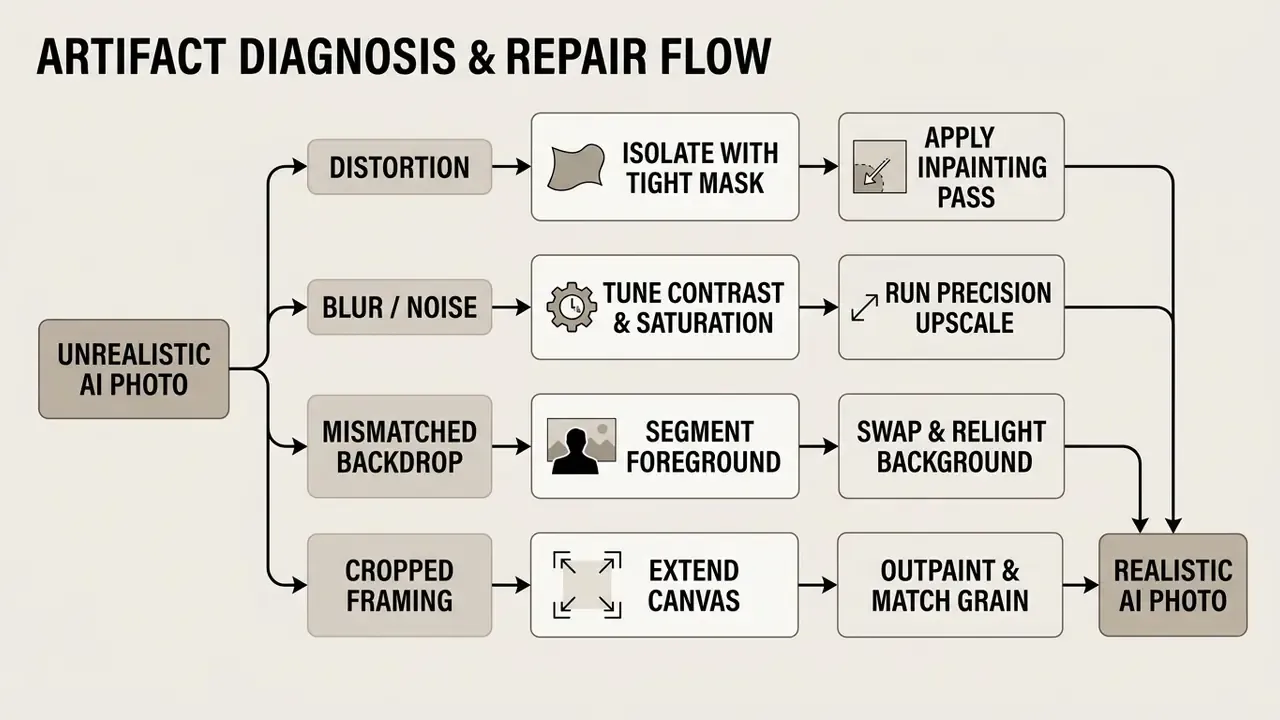
Quick Natural-Language Editing Presets (Type-to-Edit Workflow)
| Task / Visual Problem | Input Command Prompt | Key Parameter / Denoising | Expected Result |
|---|---|---|---|
| Remove Background Tourists | "Remove people in the background, fill with soft blurred architecture bokeh" | Masked Inpaint / 0.40 | Clean background retaining light vectors |
| Fix Plastic Skin Smoothness | "Add realistic skin micro-pores, fine texture, subtle freckles, 35mm film grain" | Full Img2Img / 0.30 | Natural skin surface replacing CGI sheen |
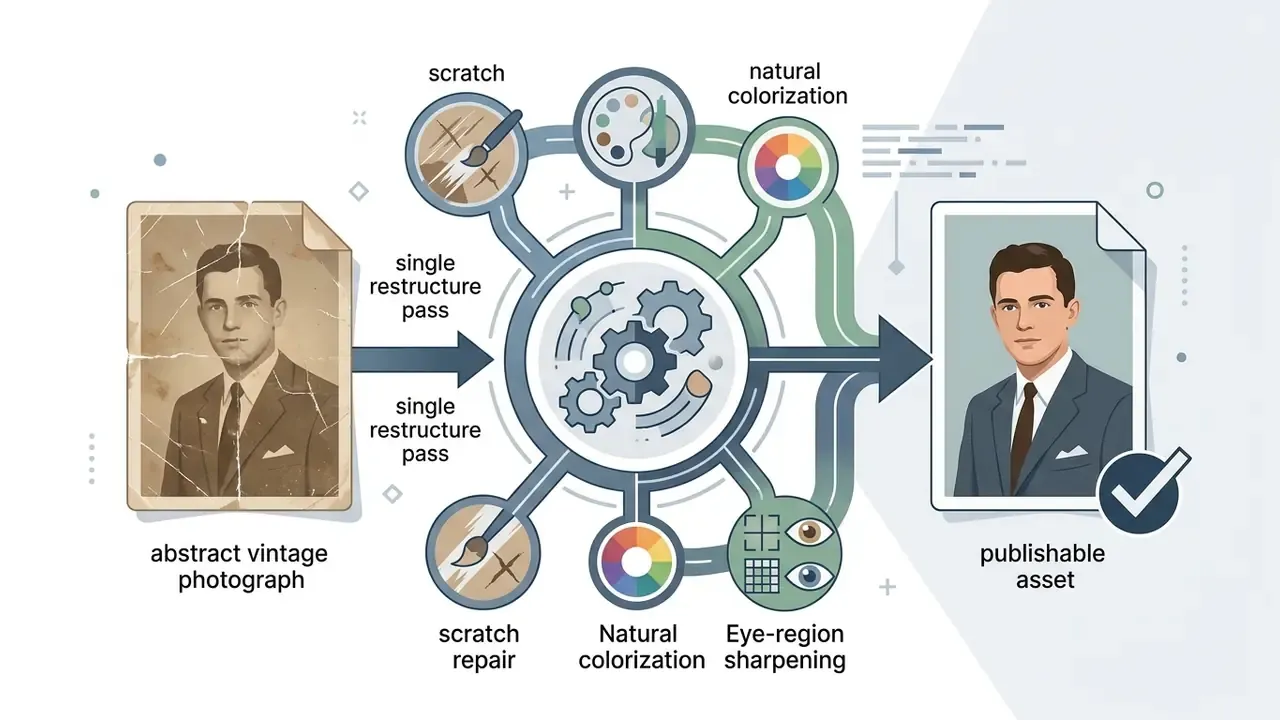
| Restore Old Scanned Photo | "Restore vintage photo, repair paper scratches, colorize naturally, sharpen eyes" | Restructure Pass / 0.45 | High-clarity restoration with authentic tones |
| Uncrop / Expand Framing | "Expand scene to 16:9 widescreen, show realistic studio environment background" | Outpaint Node / 0.60 | Seamless edge continuation without seams |
| Relight a Flat Portrait | "Relight with soft key light from camera left, add reflector fill, remove flat frontal flash" | Masked Img2Img / 0.35 | Directional, physically plausible illumination |
| Kill Over-Saturation | "Reduce saturation, restore neutral white balance, lift crushed shadows" | Global Adjust / 0.20 | Camera-plausible tonal range |
For complex, repeatable, brand-critical work, graduate the winning command into a ComfyUI graph so the parameters become auditable. For one-off cleanup, the one click text command is the cheaper path.
Repair Distorted Faces, Objects and Image Details
Fixing distorted anatomy, bent fingers or misaligned pupils, is best done with masked inpainting. Classic exemplar-based inpainting reconstructs the region from surrounding patches, while current diffusion methods accept an object mask plus a natural-language instruction. Newer removal models can remove an object together with its cast shadow and reflections.
In one enterprise campaign asset managed by a marketing team, the initial diffusion pass produced a high-converting product scene, but the model distorted the subject's hand digits. Placing a tight isolation mask around the hand and running an inpainting pass with a focused prompt ("naturally proportioned human hand holding product, correct digit count") restored anatomical accuracy while retaining the surrounding lighting and product placement. Total cost: two minutes of GPU time.
Faces deserve tighter scrutiny, because viewers scrutinize them hardest.
«Eye-tracking participants distinguished real faces from StyleGAN-3 outputs with 76.8% accuracy, concentrating on the eyes, mouth and skin texture.»
The practical implication: allocate inpainting effort to the eye region, mouth corners, and skin transitions first. Attribute-aware face inpainting research confirms the same priority ordering, with nose, mouth, and facial-hair regions carrying disproportionate realism weight.
For broader creative transformations, operators can explore image-to-image transformation tools, stylized options such as an ai anime generator from photo, or use an ai alt text generator to optimize published image metadata.
Improve Blur, Noise, Colour and Resolution
Addressing unnatural digital smoothness or muddy shadow areas requires targeted colour grading and noise calibration:
- Lower Hyper-Saturated Colours Reduce global saturation by 5–10%, tame blown highlights, and lift compressed shadow values slightly to restore natural photographic tonal range.
- Inject Subtle Sensor Grain Applying 1–3% monochromatic noise or fine film grain breaks up overly smooth digital gradients, so surfaces read as physical camera captures.
- Apply Precision Upscaling Use an artifact-aware image upscaler to sharpen soft focal areas without jagged edge halos or unnatural line sharpening. Upscale last, after colour and texture decisions are locked, then export once.
Performance has improved sharply at the 4K tier, which makes precision passes practical inside production deadlines.
Research on joint restoration supports the combined approach: diffusion restoration models now address super-resolution, deblurring, colorization, and intelligent noise reduction under a single posterior-sampling framework, and unified deblur-denoise-upsample pipelines use local colour statistics as a constraint to avoid inventing false texture.
For motion-based visual campaigns, marketing teams often extend still assets using an ai animate image tool or generate dynamic assets via an ai animated image platform.
Replace or Remove an Unnatural Background
When an AI background shows perspective errors or impossible shadow physics, isolating the main subject via automated segmentation allows a clean swap. Keep the replacement backdrop plain and uniform where segmentation accuracy matters most, since textured or object-heavy backgrounds confuse face-finding and matting algorithms.
Shadow handling is the decisive step. Two-stage background-guided shadow removal first estimates a spatially varying background, then refines the result with background attention and detail enhancement so appearance and shadow boundaries stay consistent. Complementary illumination-transfer methods use alpha-matte interpolation and Bayesian boundary correction to eliminate visible shadow seams. When placing a subject onto a new backdrop, generate subtle contact shadows along the ground plane. Without them, the subject floats.
Extending Static Realism into Video Assets
Once a photo reaches photorealistic quality, visual teams often extend static assets into cinematic micro-videos for short-form ad campaigns on TikTok, Reels, and Shorts. Importing the refined 4K PNG into video generation models such as Runway Gen-3, Luma Dream Machine, or Kling AI, with minimal motion prompts ("subtle camera pan right, hair blowing gently in wind, realistic light shimmer"), preserves surface realism without introducing warping artifacts.
Two operational rules keep that realism intact: restrict motion to a single dominant vector per clip, and avoid prompting for facial expression changes, which is where identity drift and rubber-face artifacts appear first. Teams building repeatable ai video pipelines can review capability and cost details in our Google Veo implementation guide or compare entry-level options across free AI video generators.
FAQ: Frequently Asked Questions About AI Image-to-Photo Conversion
Can Free AI Tools Make an Image Look Realistic?
Free AI tools can convert images into realistic photos for casual or non-commercial use, but they operate under strict functional limits compared with enterprise platforms.
Free tiers typically enforce usage caps, apply lower resolution ceilings (512×512 pixels, for instance), and add visible watermarks to exported files. Several major API providers list image generation as unsupported on the free tier entirely, reserving throughput for paid plans. Free API tiers also tend to lack advanced spatial conditioning (ControlNet) and the fine-grained inpainting controls needed to repair anatomical glitches or small background details.
Capability, though, is no longer the bottleneck for visual believability.
«Under fast, uncontrolled viewing conditions, people are largely unable to separate high-quality AI images from real photographs.» "Seeing is not always believing" (Fake2M/HPBench) study (2024). https://arxiv.org/html/2412.09715
For commercial applications needing 4K exports, uncompressed formats, and verified usage rights, paid tiers or custom open-source diffusion implementations are the safer choice. Readers comparing entry points can review free AI image generators and free AI art generator limits before committing budget. Enterprise teams tracking regulatory standards and legal developments around synthetic media rights can reference resources covering AI litigation and intellectual property frameworks, and can validate outputs against third-party AI image detectors as part of pre-publication QA.
How Do I Keep the Same Person's Face Across Many Generated Photos?
Train a reusable persona model on 12–15 varied reference photos, then apply it at 0.6–0.75 weight with an IP-Adapter pass on every generation. Check each output against the Identity Fidelity row of the verification matrix (brow arc, interpupillary distance, nose bridge, lip contour) before approval, and keep documented consent for the person whose likeness is trained.
What Is the Fastest Way to Fix One Small Defect?
Use a natural-language command on a masked region instead of regenerating the full frame. A 0.30–0.45 denoising inpaint pass on a tight mask preserves surrounding lighting and costs a fraction of the compute of a fresh render.
How Long Does a Realistic 4K Conversion Take?
Plan for 5–15 seconds per high-resolution pass on queued cloud GPUs, plus extra time for refiner and upscaling stages. Marketing claims of two-second generation usually describe low-resolution previews under ideal, uncontended conditions.
Can I Publish AI-Converted Photos Without Disclosure?
It depends on jurisdiction, platform policy, and internal brand standards. Current business guidance trends toward explicit labeling of primarily AI-generated imagery, while photographs that were merely enhanced often fall outside labeling requirements. Confirm the rule set that applies to your channel before publishing, and document the decision.
Can AI Restore Old Photos Realistically?
Yes, and this is one of the more reliable use cases, because the original scan supplies ground truth. A single restructure pass at 0.40–0.50 denoising handles scratch repair, gentle colorization, and eye-region sharpening. Keep the archival scan untouched as the master file, and treat every restored version as a derivative with its own version record.
Key Takeaways for Realistic AI Photo Generation
- Focus on Photographic Language Replace generic quality buzzwords in text prompts with explicit camera, lens, and lighting terminology, and keep prompts specific rather than sprawling.
- Enforce Structural Control Use image-to-image conditioning, seed locking, and ControlNet parameters to preserve source geometry through photorealistic conversion.
- Lock Identity Deliberately For real subjects, a persona LoRA trained on 12–15 references at
0.6–0.75weight prevents the "similar stranger" failure mode. - Iterate Through Inpainting Isolate and repair anatomical or typographical defects with local masked inpainting or natural-language edit commands rather than regenerating whole scenes.
- Maintain Restraint in Post-Processing Reduce hyper-saturation, inject subtle micro-grain, avoid aggressive over-sharpening, and keep outputs inside real-world camera performance.
- Govern the Data Path Vet retention SLAs, training-reuse clauses, and deployment boundaries before uploading proprietary or personally identifiable media.
- Verify, Then Publish Run the anatomy, lighting, focus, typography, and identity checks, export uncompressed, and label assets according to your channel's policies.