Executive Summary
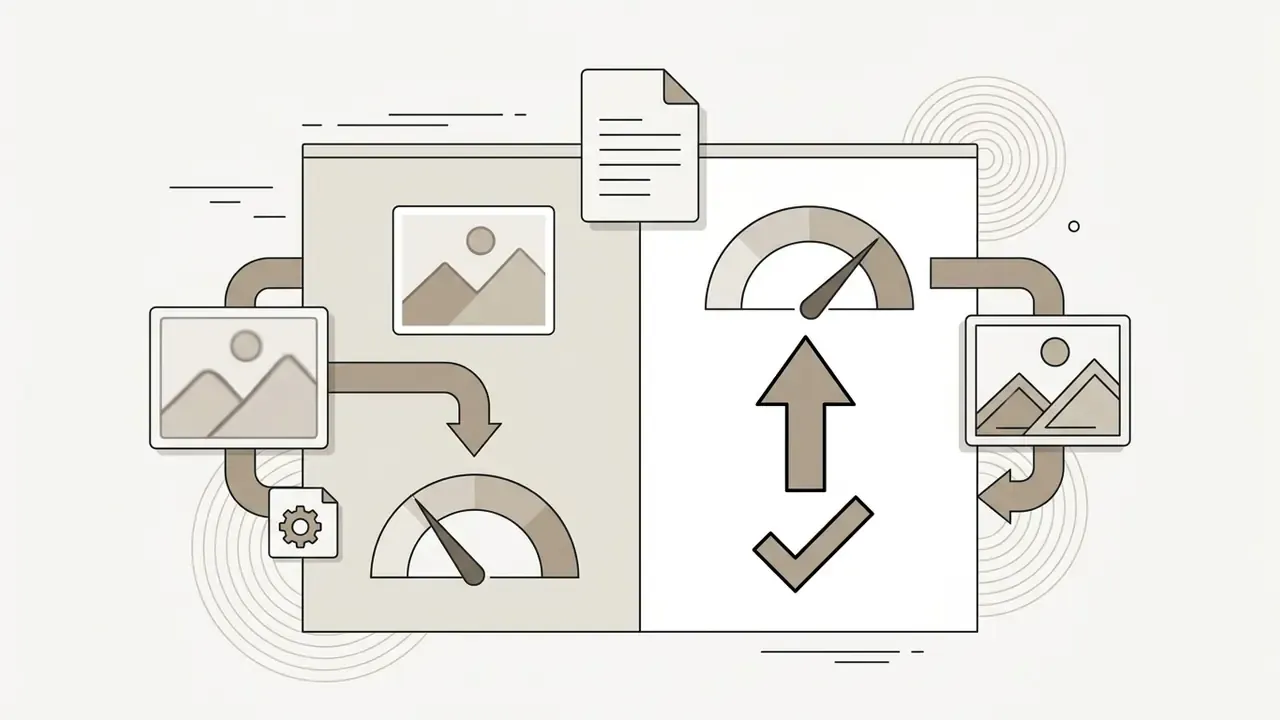
- An AI image enlarger uses deep single-image super-resolution (SISR) models to reconstruct missing high-frequency detail. Classic resizing (bilinear, bicubic) only interpolates existing pixels, and therefore blurs.
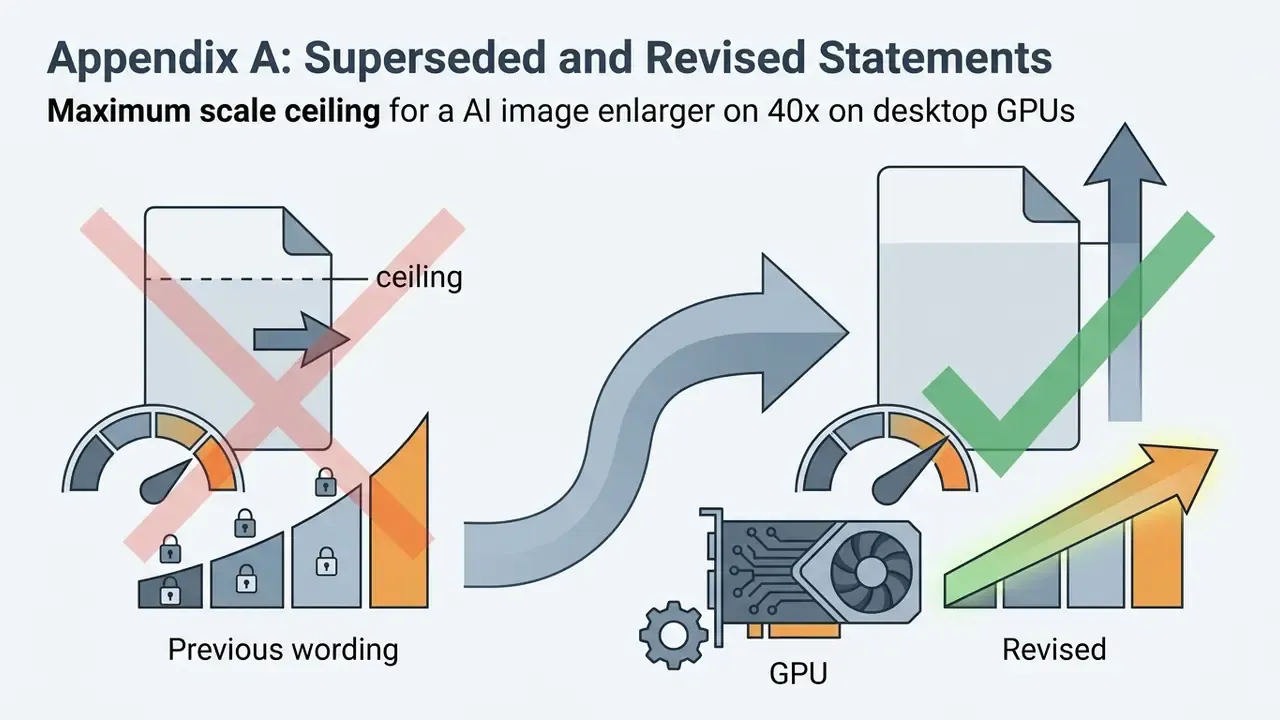
- Practical ceilings differ by deployment. Browser tools typically cap at 2x-8x; desktop engines running on a local GPU (CUDA or Metal) go up to 40x. Input pixel limits tighten as the scale factor rises, and 8x usually allows only about 1,250×1,250 px for guests.
How to Read This Guide
Three questions drive almost every purchase decision here. What can the model reliably reconstruct? Where does it start inventing? And who owns the residual risk when an invented pixel reaches a customer, an auditor or a print run?
So the guide moves in that order. First the mechanics of AI upscaling versus traditional resizing, then content suitability, then the factors that decide quality results, then the practical workflow to enlarge image online, then procurement, privacy and commercial-use terms, then formats and a short methodology note.
A quick framing worth keeping in mind, borrowed from model-risk practice:
For a broader taxonomy of terms used below, the AI Media Glossary is the reference index.

What Is an AI Image Enlarger and How It Differs from Standard Resizing
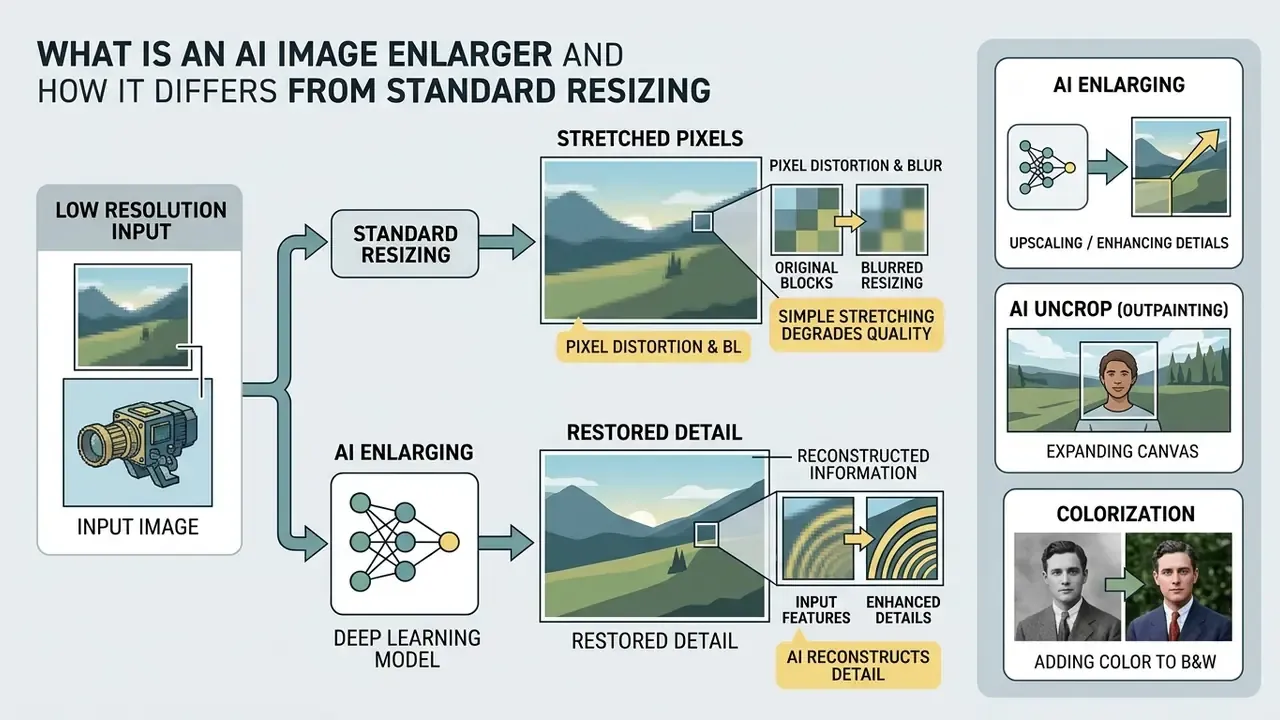
An AI image enlarger is a software system powered by deep learning single-image super-resolution models. It predicts and reconstructs missing high-frequency visual details when increasing an image's spatial dimensions. Unlike traditional resizing methods, such as bilinear or bicubic interpolation, which merely estimate new pixel values by averaging neighboring points, an ai image upscaler leverages learned neural priors to synthesize sharp edges, realistic textures and structural clarity.
Two pipelines, side by side:
Traditional resizing (bicubic or linear): low-res pixel grid → interpolation kernel → stretched and blurred pixels.
AI upscaling (neural SR or generative): low-res pixel grid → deep neural network (CNN, GAN or diffusion) → reconstructed high-resolution detail.
When changing image size, standard resampling spreads existing data across a larger area. Contrast softens, and visible blur follows. Bilinear interpolation estimates every new pixel from just 4 surrounding samples, while bicubic uses 16 and produces a smoother result with fewer stair-step artifacts. Yet both remain averaging operators. Neither can introduce information absent from the source grid. Neural ai image enlargement frameworks reverse this degradation model instead, mapping low-resolution feature maps to high-resolution outputs and producing a genuine high resolution result without manual editing.
How AI Upscaling Restores Detail in Low Resolution Images
Neural networks restore details in low resolution images by evaluating contextual patterns across multi-scale feature representations, rather than processing isolated pixels. Modern architectures, including residual convolutional networks, vision transformers and latent diffusion models, analyze global scene geometry alongside local edge dynamics to generate plausible high-frequency content.
"A global-local information extraction module lets the network model long-range dependencies and fine local detail simultaneously, reaching an optimal balance of quality and computational cost."
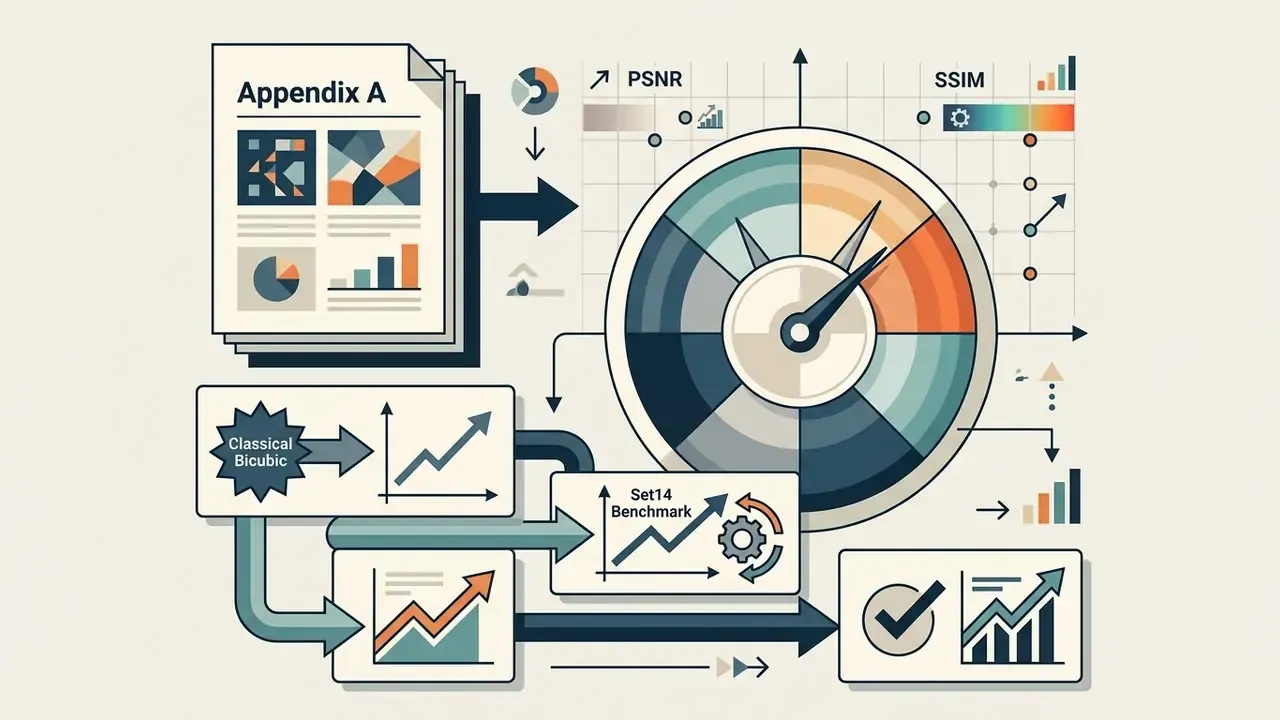
"On Set14 at 4x scaling, bicubic interpolation yields 26.00 dB PSNR and 0.7027 SSIM, while a CNN model reaches 27.58 dB and 0.7510 respectively."
This statistical advantage explains why an ai image upscaler preserves a natural look where traditional interpolation fails.
"Deep networks consistently outperform bicubic interpolation by at least 2 dB PSNR on standard benchmarks, which corresponds to a visually perceptible gain in sharpness."
The perceptual side of the equation comes from the loss function, not from raw pixel accuracy. Adversarial and perceptual objectives (SRGAN-style content plus adversarial loss, EnhanceNet-style automated texture synthesis) push models to synthesize plausible grain, fabric weave and skin micro-texture, instead of averaging everything into soap. Semantic priors and neural texture transfer go one step further, injecting high-resolution texture statistics that match the recognized object category. If you want to explore adjacent enhancement pipelines rather than pure resolution gain, our AI image enhancer overview covers denoise, deblur and relighting models that often run alongside upscaling.
Why Simply Stretching Pixels Degrades Image Quality
Simply stretching pixels with mathematical interpolation forces existing color data to spread over an expanded coordinate grid. The results are acute pixelation, ringing artifacts and edge blurring. Because deterministic interpolation kernels (4-neighbor bilinear, 16-neighbor bicubic) cannot invent missing high-frequency visual information, scaling beyond roughly 150% already means losing quality in a way most viewers notice.
When an image is scaled up, the spatial frequency spectrum is compressed, which effectively eliminates sharp boundaries and fine surface details. Geometrically, upsampling places new pixel centers where no original sample exists. Nearest-neighbor simply repeats samples and produces blocky output, while linear and cubic kernels smooth the transition and sacrifice edge acuity. To compensate, basic graphics tools reach for sharpening filters, which typically accentuate compression noise and create harsh halos around high-contrast borders. Artificial intelligence avoids this structural degradation by conditioning feature synthesis on learned real-world priors, maintaining perceptual fidelity even during aggressive 4x and 8x enlargements.
AI Upscaling vs AI Uncrop (Outpainting) vs Colorization
Resolution gain is only one of three neural operations commonly bundled into the same interface. Conflating them leads to the wrong tool choice.
| Operation | What changes | Typical use |
|---|---|---|
| AI Upscaling / Super-Resolution | Pixel density inside the existing frame (2x-8x online, up to 40x on desktop) | Print masters, retina web assets, zoomable product photos |
| AI Uncrop / Outpainting | Canvas boundaries; the model paints new scene content outside the original border | Aspect-ratio changes (1:1 to 16:9), banner extension, breathing room around a subject |
| AI Colorization | Chrominance channels only; luminance structure is preserved | Black-and-white archive photos, faded slides, monochrome scans |
Beyond direct pixel multiplication, advanced toolkits apply AI Uncrop (Outpainting). Instead of rescaling content within the existing frame, outpainting generates missing background regions beyond the original border while keeping the main subject's proportions intact. A practical rule of thumb: if the subject is framed correctly and only looks soft, upscale. If the subject is sharp but the crop is too tight for the target layout, uncrop. For a dedicated walkthrough of generative canvas extension, see our guide to AI outpainting tools for expanding images.
Which Images Can Be Enlarged Without Visible Quality Loss
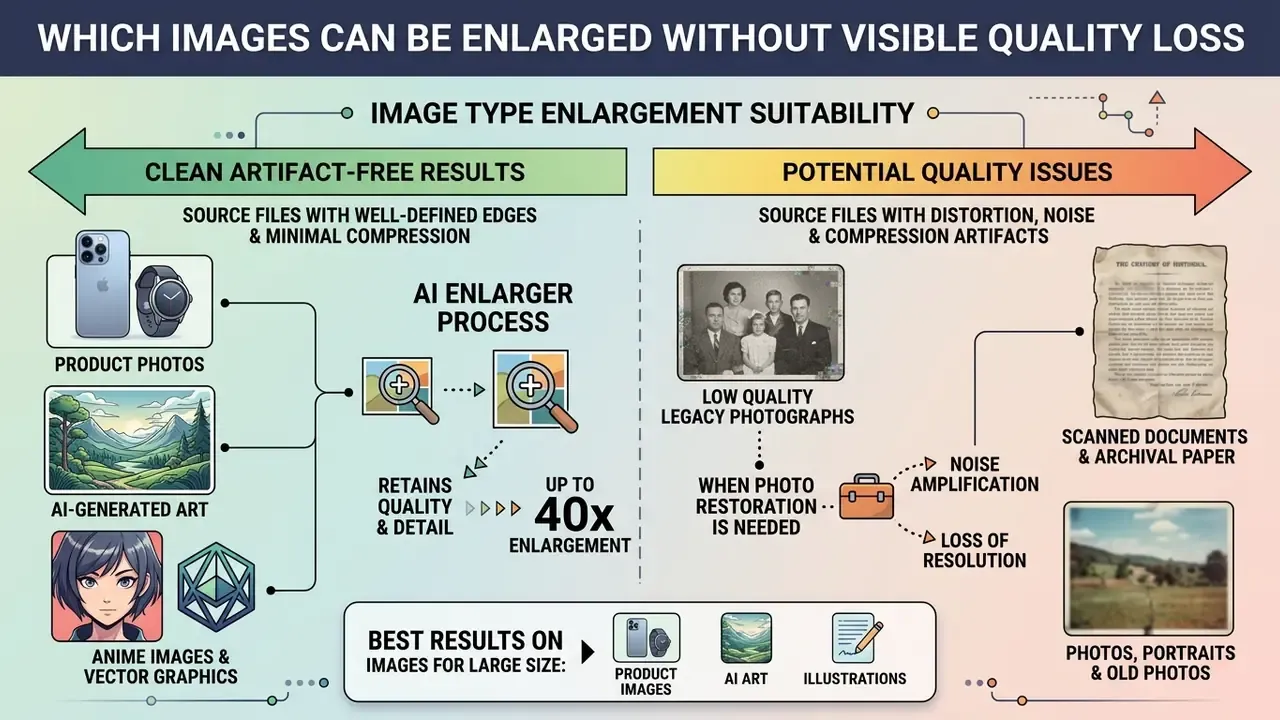
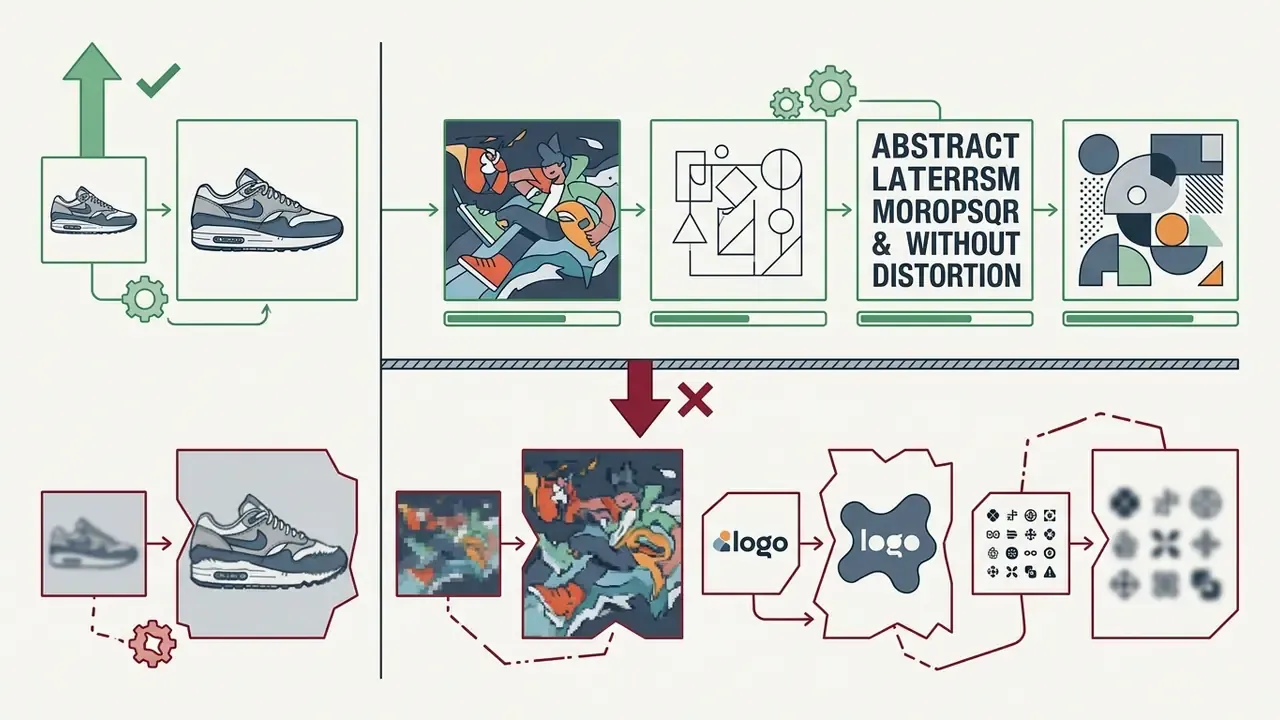
An ai image enlarger achieves clean, artifact-free results without losing quality mainly on source files with well-defined edge boundaries and minimal compression damage. High-fidelity upscaling depends directly on the structural integrity of the original image. Graphics with crisp lines or smooth photographic gradients enlarge seamlessly, whereas heavily degraded files need dedicated restoration pre-processing first. Readers comparing generative alternatives to resolution recovery can also review image-to-image generators, which re-synthesize a scene rather than reconstruct it.
Different media categories tolerate ai image enlargement differently:
If the goal is stylized output rather than fidelity, a dedicated ai anime generator will usually beat upscaling a low-resolution anime frame, because it re-draws instead of guessing.


Photos, Portraits and Old Photos: When Photo Restoration Is Needed
Standard super-resolution algorithms applied to low-resolution portraits often amplify baseline flaws. That is why integrated photo restoration modules matter for facial detail. When processing ai photo content, dedicated models apply blind face restoration techniques (CodeFormer, GFP-GAN) to synthesize realistic skin texture, eye reflections and hair strands without plastic distortion.
Restoration order for legacy material: legacy scan or old photo → noise and artifact removal → blind face restoration → 4x AI upscale → archival result.
"A CNN- and GAN-based model for vintage photograph restoration demonstrates 96% overall restoration accuracy, removing noise, blur and physical damage."
The academic task taxonomy is well established. Face denoising, deblurring, artifact removal, super-resolution and blind restoration are treated as distinct stages, with GFP-GAN, RestoreFormer, CodeFormer, VQFR and DifFace as representative methods. Old-photo pipelines often add triplet domain translation in latent space to recover fine facial structure.
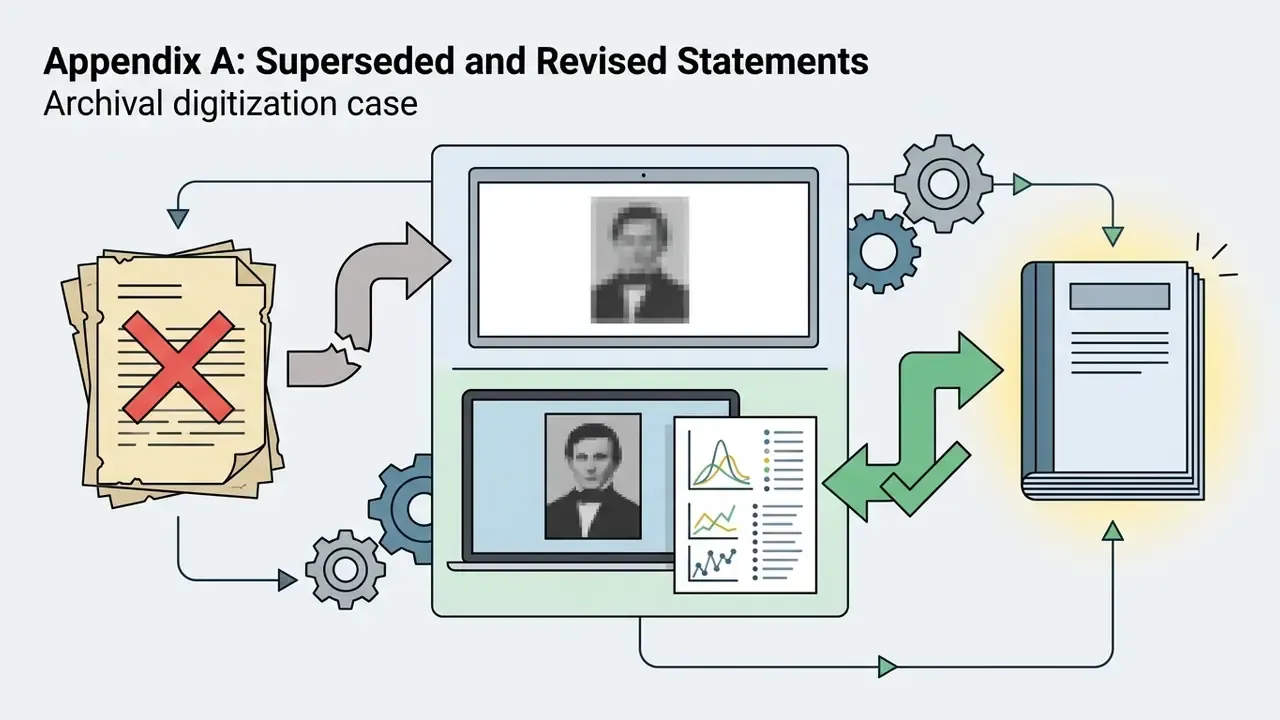
(Updated, illustrative scenario, internal editorial observation.) In archival digitization work on degraded historical portrait records, plain bicubic upscaling typically collapses fine facial structure into unusable blur. Switching to a pipeline that combines deep latent-space translation with an ai photo enlarger restores facial detail alignment and reaches 300 DPI print standards without identity drift. This is an editorial observation, not a controlled study. Sample size, scanner calibration and identity-verification protocol were never published, so treat the direction of the effect as indicative and validate on your own archive subset. For downstream retouching of the restored file, our AI photo editor reference explains which corrections are safe to apply after upscaling rather than before.
Product Images, AI Art and Illustrations for Large Size
E-commerce product images and digital ai generated artwork are ideal candidates for scaling up to large size dimensions. Digital illustrations and synthetic graphics feature uniform gradients and sharp vector-like boundaries, which let deep learning models predict exact line trajectories without visual distortion. Formally, the W3C CSS Images Module Level 3 separates the two rendering intents: photographic material should be scaled with smoothing, while line art requires crisp-edges handling that preserves contrast instead of blurring it.
For commercial product catalogs, crisp product edges and accurate material surface textures carry direct buyer-confidence weight. An ai image generator large size workflow, or post-generation super-resolution, lets brands convert baseline web graphics into print-ready packaging assets, billboard displays and high-density retina banners. If the source asset itself needs to be created rather than rescued, compare the best AI image generators that output natively high-resolution masters, or start from an existing photograph with an ai art generator from photo workflow.
Scanned Documents, Receipts and Technical Drawings: Improving Text Readability
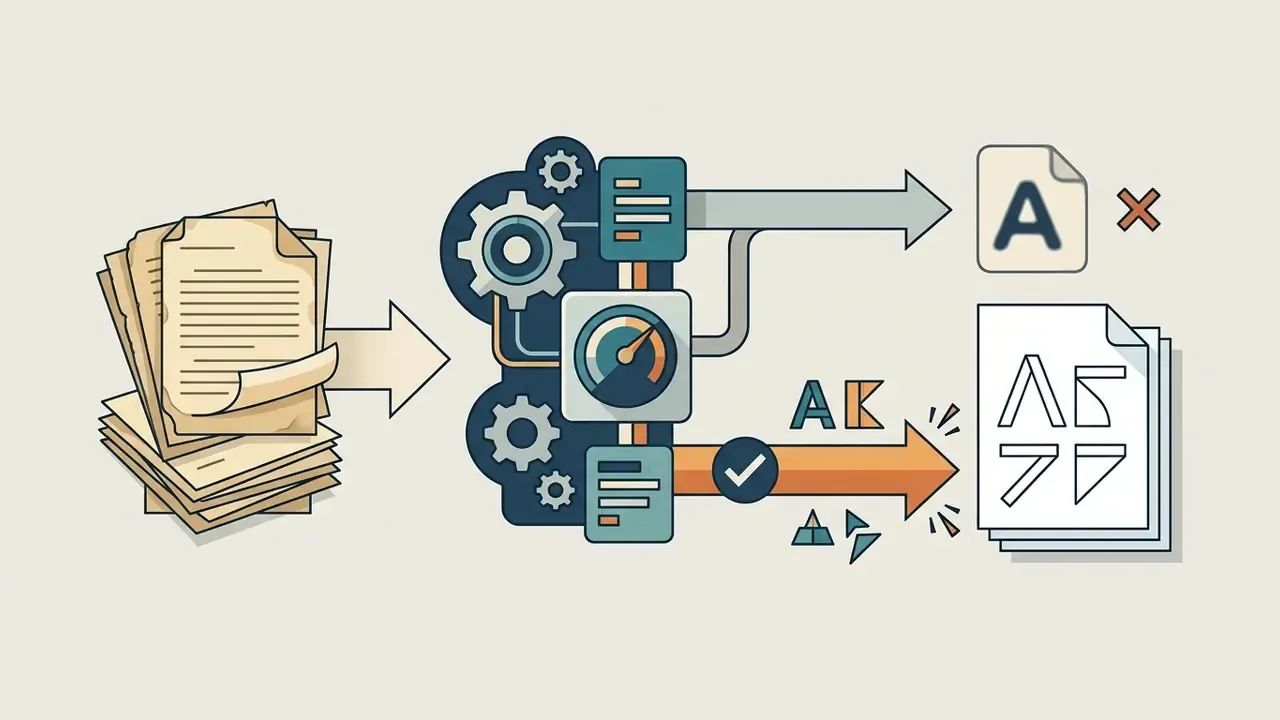
When upscaling text scans, general-purpose photographic networks tend to blur glyphs, serifs and hairline strokes, turning thin characters into grey smears. Specialized text and OCR enhancement models instead rebuild character contours, suppress the moiré-like grid pattern left by flatbed scanners, and neutralize the bluish chromatic aberration common in duplex scans. The payoff is twofold. OCR engines recognize the text correctly, and archival contracts, faded invoices, handwritten registers or engineering drawings become print-ready without manual redrawing.
Recommended sequence for document assets:
- Deskew and despeckle first.Geometric correction before resolution gain, otherwise the model faithfully amplifies skewed edges.
- Use a text or line-art model, not a photo model.Flat fills and high-contrast strokes need edge-preserving reconstruction.
- Keep the scale modest, 2x to 4x.Glyph hallucination risk grows sharply beyond 4x, and an altered digit in an invoice is a material error.
- Verify at 100% magnificationon numerals, signatures and stamps before running OCR.
- Archive the untouched originalalongside the enhanced file, so the provenance chain stays auditable.
What Determines the Quality of AI Image Enlargement
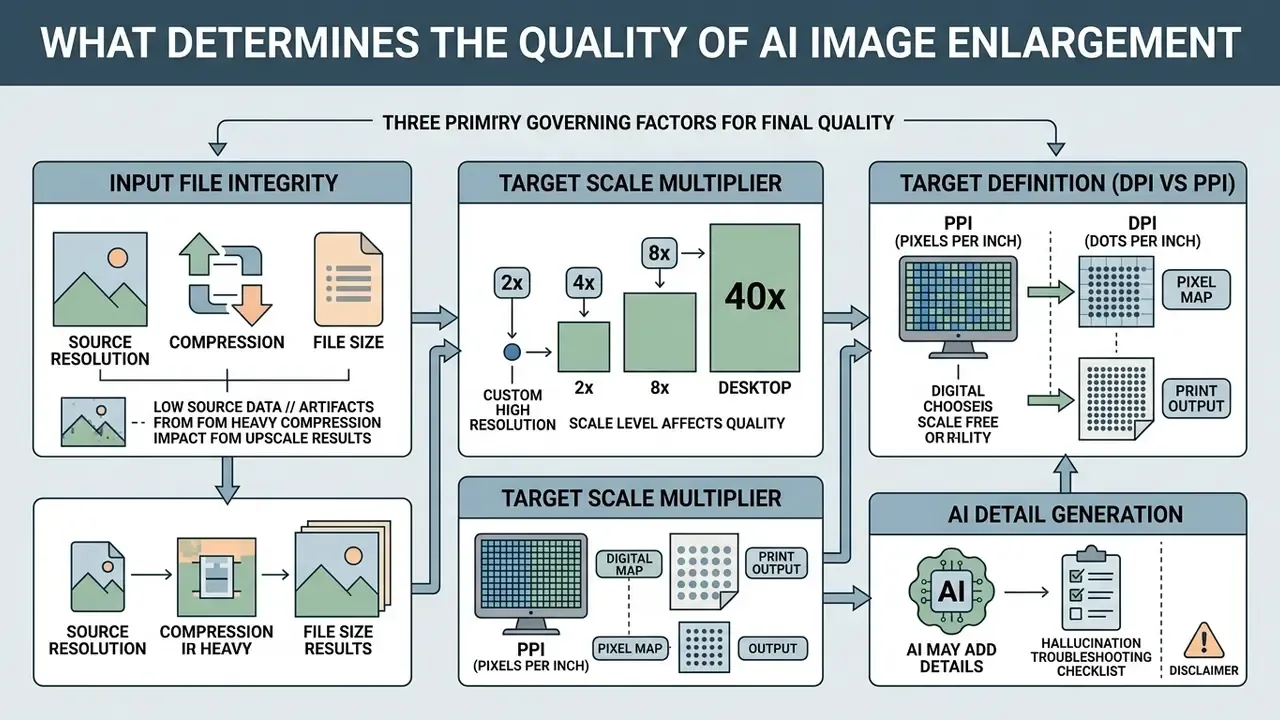
The final quality of an ai image enlargement operation is governed by three things: the input file's structural integrity, the target scale multiplier (such as 2x 4x), and the selected enhancement loss function. Higher quality input sources yield predictably cleaner outputs. Heavily compressed files force generative models to guess.
To obtain quality results and reach the best results, operators balance three core parameters:
| Factor | Low impact / preserved quality | High impact / risk of artifacts |
|---|---|---|
| Input Format | Uncompressed PNG, WebP (lossless), HEIC decoded losslessly | Heavily compressed jpg jpeg (quality below 70) |
| Scale Multiplier | Conservative 2x enhancement | Aggressive 8x to 40x enlargement |
| Enhancement Mode | Perception-guided GAN or diffusion with fidelity weighting | Pure pixel-wise MSE optimization, or unconstrained creative mode |
| Number of Passes | Single pass at the required factor | Repeated 2x, 2x, 2x chains that accumulate artifacts |
A practical corollary of that last row: return to the original file and select 4x once. It produces cleaner output than running 2x twice, because each pass re-encodes and re-amplifies whatever the previous stage introduced. For a platform-by-platform breakdown of measured output quality, see our comparison of AI image upscaler tools.
Source Resolution, Compression and File Size
The spatial resolution and compression level of the source file set the upper bound of fidelity achievable by an ai image enlarger. With high-compression jpg jpeg files, neural networks risk misinterpreting 8×8 block boundary artifacts as genuine object edges, and then amplifying that noise across the scaled output.
"JPEG compression artifacts introduce spatial high-frequency distortion that severely interferes with standard feature extraction layers in super-resolution networks."
Selecting lossless input formats, or running an initial artifact removal pass, reduces residual error. It also keeps the final file size manageable while maintaining a credible natural look. Worth noting: resolution loss and compression damage are measured as separate defects in NIST's face-image quality work. Blur reduces fine detail; JPEG quantization imposes an 8×8 grid signature. An upscaler that treats them as one problem will simply trade one artifact class for another.
Choosing 2x, 4x or a Custom High Resolution Target (DPI vs PPI)
Choosing between a 2x 4x multiplier and custom pixel dimensions depends on the destination: high-density digital displays, social media, or physical print. A 2x magnification quadruples total pixel count, which is usually right for retina web screens. A 4x upscale yields a 16-fold pixel increase, suitable for large-format media.
Two units get confused constantly, and the distinction matters in production:
- PPI (pixels per inch) describes the pixel grid of a digital file or screen. Screen deliverables are defined by absolute pixel dimensions (1080×1080, 1080×1350, 1200×630), never by a DPI tag.
- DPI (dots per inch) describes the ink dots a press or plotter puts on the substrate. DPI targets always apply at final print size, not at the original file size.
For web workflows, excess pixel volume inflates page load times without any visible benefit on standard screens. A 2x export relative to the displayed CSS size is the pragmatic ceiling for high-density displays, and 4x is justified only when a single master must survive aggressive re-cropping. Commercial print runs the other way: multiply source dimensions until you reach at least 300 PPI at the target physical size. Choosing 2x 4x settings deliberately prevents pointless processing overhead while still meeting output criteria.
Why AI May Add Details That Never Existed
"GAN models with perceptual loss functions improve visual quality but may synthesize non-existent textures; this trade-off requires verification of critical image regions."
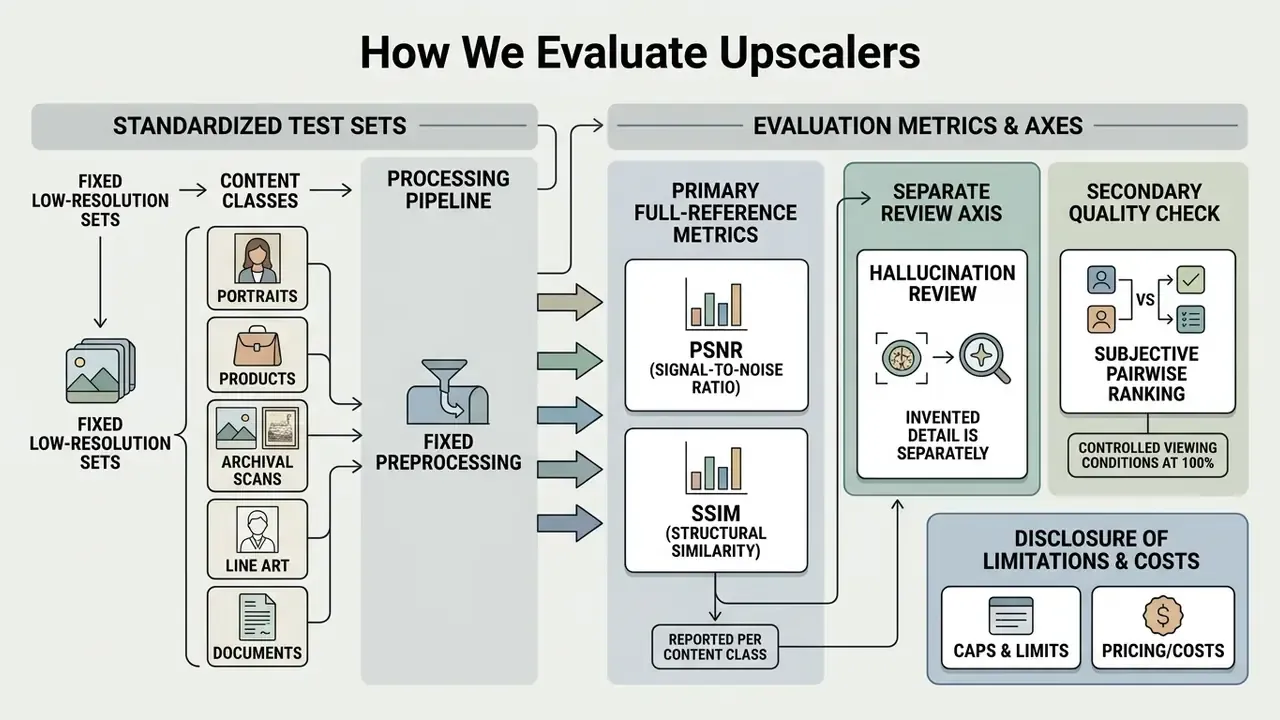
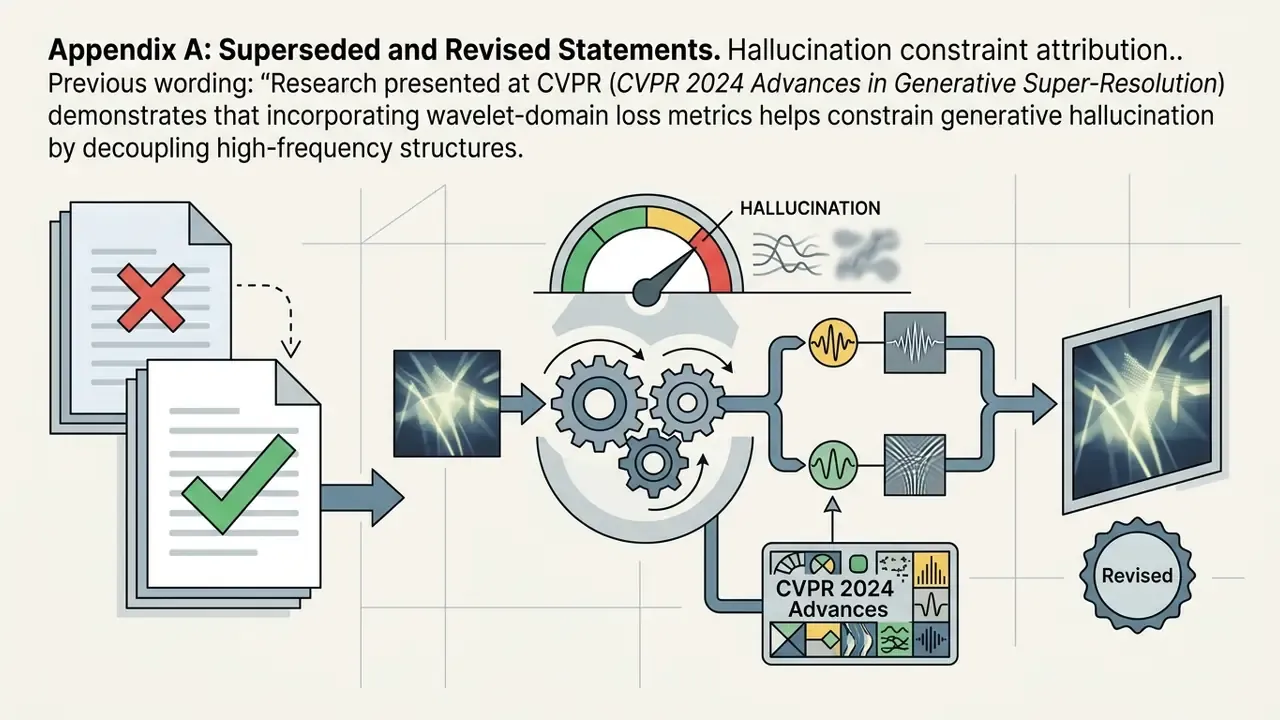
Mitigation happens on two fronts. On the training side, wavelet-domain loss terms decouple genuine high-frequency structure from artifact noise, which constrains what the generator is rewarded for inventing. On the evaluation side, hallucination-specific scoring (rather than PSNR and SSIM alone) detects invented content that conventional fidelity and no-reference metrics miss, and those scores can be fed back as optimization rewards for diffusion-based upscalers. Reconstruction theory also sets hard limits. The null space of the degradation operator expands with magnification, which is precisely why reliability degrades past 4x and turns fragile around 8x to 16x.
So the review step is not optional. Operators inspecting model output in a before-and-after preview interface should verify critical asset regions, corporate logos, typography and facial features, before final approval.
Hallucination troubleshooting checklist
| Symptom | Likely cause | Corrective action |
|---|---|---|
| Warped or invented letters | Photo model applied to text; scale too high | Switch to a text or line-art model, reduce to 2x, re-verify at 100% |
| Plastic, waxy skin | Face-restoration strength too high | Lower fidelity or creativity weight, disable the face module, blend with the original |
| Fake wood grain or fabric weave | Creative texture synthesis mode | Switch to a fidelity-preserving preset or an MSE-weighted model |
| Halos along high-contrast edges | Post-sharpening applied on top of upscaling | Disable sharpening; rely on the model's own edge reconstruction |
| Blocky 8×8 patterns amplified | Compressed JPEG source | Run artifact removal first, then upscale in a single pass |
| Logo geometry drift | Raster upscaling of a brand mark | Replace the logo with the original vector file after upscaling |
How to Enlarge an Image Online with AI: Step-by-Step
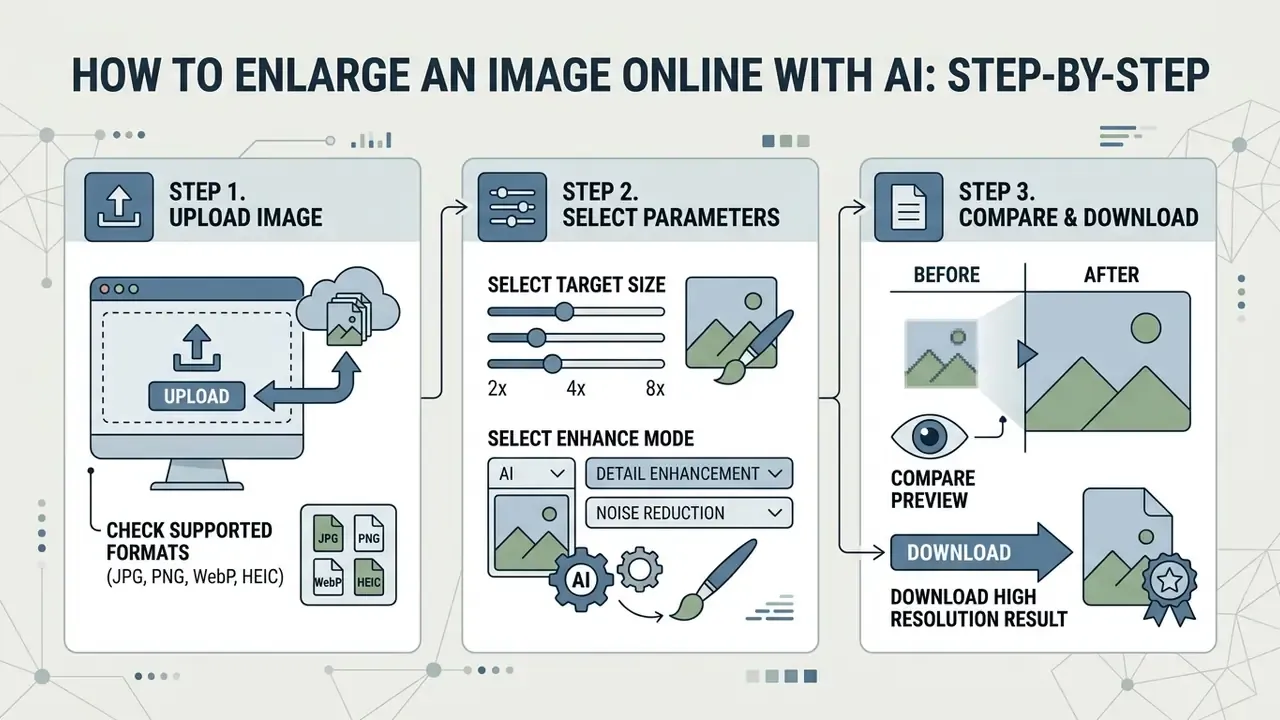
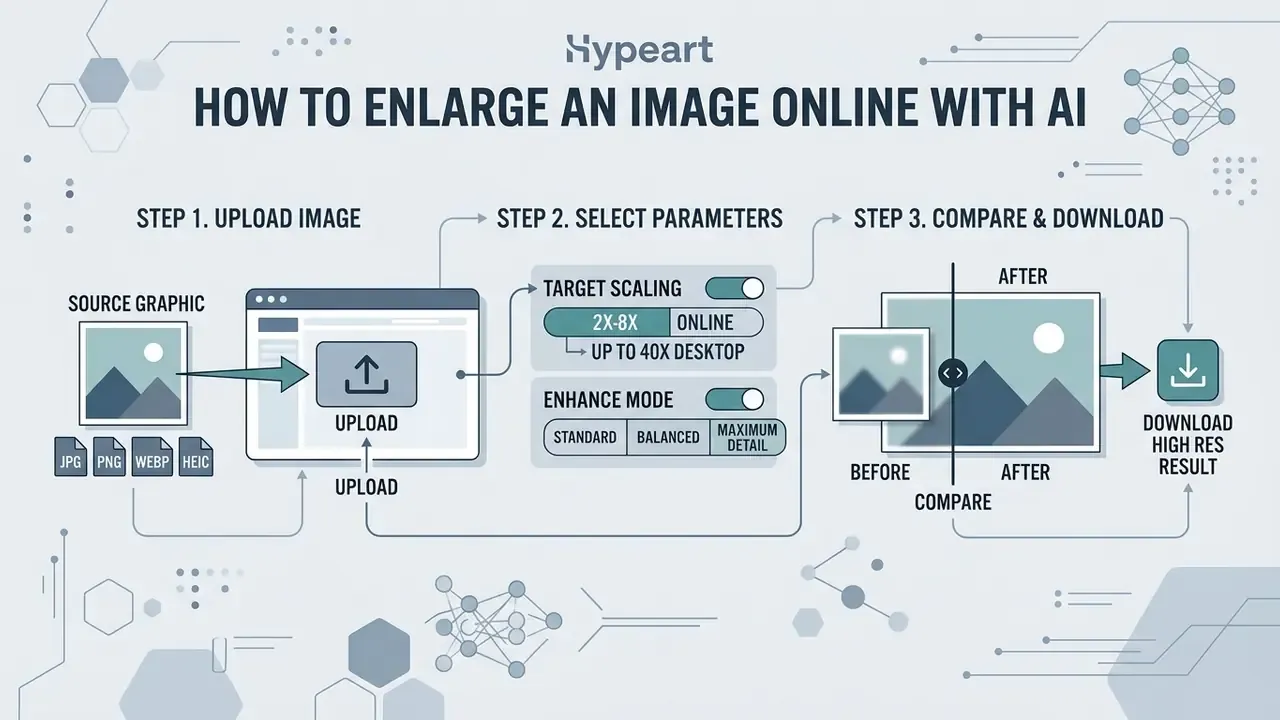
To enlarge image online with artificial intelligence, you upload a source graphic to a web portal, select target scaling parameters, run automated model inference, and download the reconstructed high-resolution asset. Modern online tool architectures process files asynchronously in cloud sandboxes, and turnarounds stay fast inside a standard browser.
The four steps in sequence:
Step 1: upload the source image (JPG, PNG, WebP, HEIC).
Step 2: configure the scaling factor (2x, 4x, 8x) and the enhancement toggles.
Step 3: run AI model inference and review the split preview.
Step 4: export and download the high-resolution file.
Step 1. Upload the Image and Check Supported Image Formats
The first step is drag-and-dropping a target file into the browser interface while verifying compliance with supported image formats. Most online upscaling platforms accommodate standard web extensions, formats including jpg, JPEG, PNG, WebP and HEIC, with file weight ceilings typically between 10 MB and 100 MB.
Before uploading, confirm that the original resolution does not exceed maximum portal dimensions, often capped between 4,096×4,096 px and 20,000×20,000 px for cloud processing. Crucially, the admissible input resolution shrinks as the scale factor grows, because the output must stay inside the platform's render ceiling:
| Scale | Guest limit (input) | Signed-in limit (input) |
|---|---|---|
| 1X / Enhance only | 10,000 × 10,000 px | 20,000 × 20,000 px |
| 2X Upscale | 5,000 × 5,000 px | 10,000 × 10,000 px |
| 4X Upscale | 2,500 × 2,500 px | 5,000 × 5,000 px |
| 8X Upscale | 1,250 × 1,250 px | 2,500 × 2,500 px |
Representative of current market practice. Verify the exact ceiling in the uploader, which displays live limits before processing.
Supplying uncompressed source files avoids transferring pre-existing compression artifacts straight into the neural enhancement pipeline.
"Pixel-level adaptive allocation of computational resources enables efficient processing of 2K to 8K images without retraining the model."
Step 2. Select the Target Image Size and Enhance Image Mode
After uploading, select the desired output multiplier, 2x or 4x for most jobs, and configure the enhance image modes optimized for your input material. Advanced portals expose dedicated algorithm toggles, so you can activate specialized sub-models for face restoration, noise suppression, detail enhancement or line-art sharpening.
Matching parameters to the visual context keeps upscaling balanced. Photo modes prioritize smooth tonal transitions and natural skin texture, while vector and illustration modes focus on crisp edge contrast. Low-light presets combine denoise with exposure lifting before reconstruction. Aligning model selection with asset type minimizes generative hallucination and preserves the original color gradients.
Step 3. Compare the Preview and Download the High Resolution Result
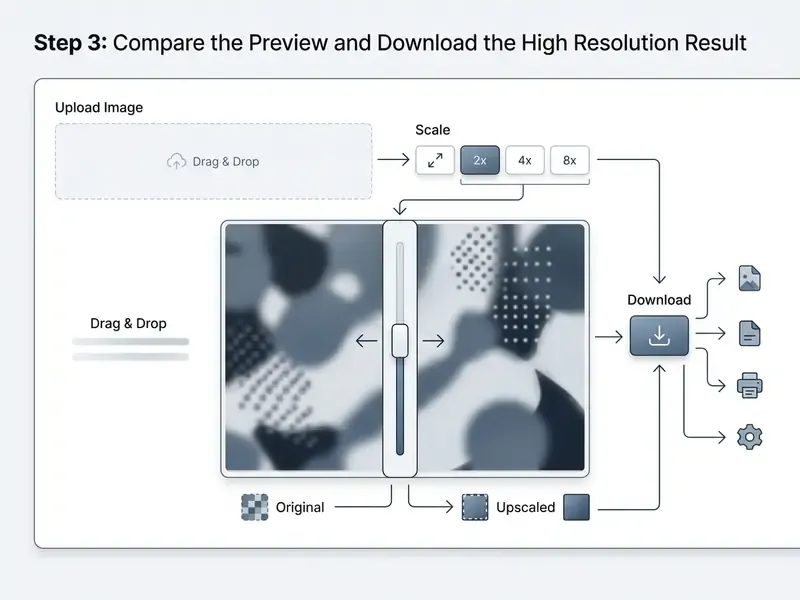
Before exporting, inspect the interactive split preview and compare the original against the generated asset at 100% magnification. Evaluate high-contrast boundaries, small text labels and fine surface textures. That is how you confirm the model increased clarity without distorting key elements.
Digitization standards offer a ready-made QC protocol worth borrowing for batch work. Verify that 100% of output files open and match the required resolution, color mode, bit depth and color profile. Then visually inspect at least 10 files or 10% of each batch, whichever is larger, at 100% magnification on a calibrated display, checking tone, contrast, color accuracy, clipping and quantization errors against the source. Automated conformance verification first, human eyes on a representative sample second.
Once compliance is verified, select the target download file type and bit depth to retrieve the high resolution result. For web deployment, WebP or optimized JPEG balances visual fidelity against bandwidth cost. Uncompressed PNG preserves full pixel accuracy for downstream production editing.
How to Choose an AI Image Enlarger for Free and Commercial Use
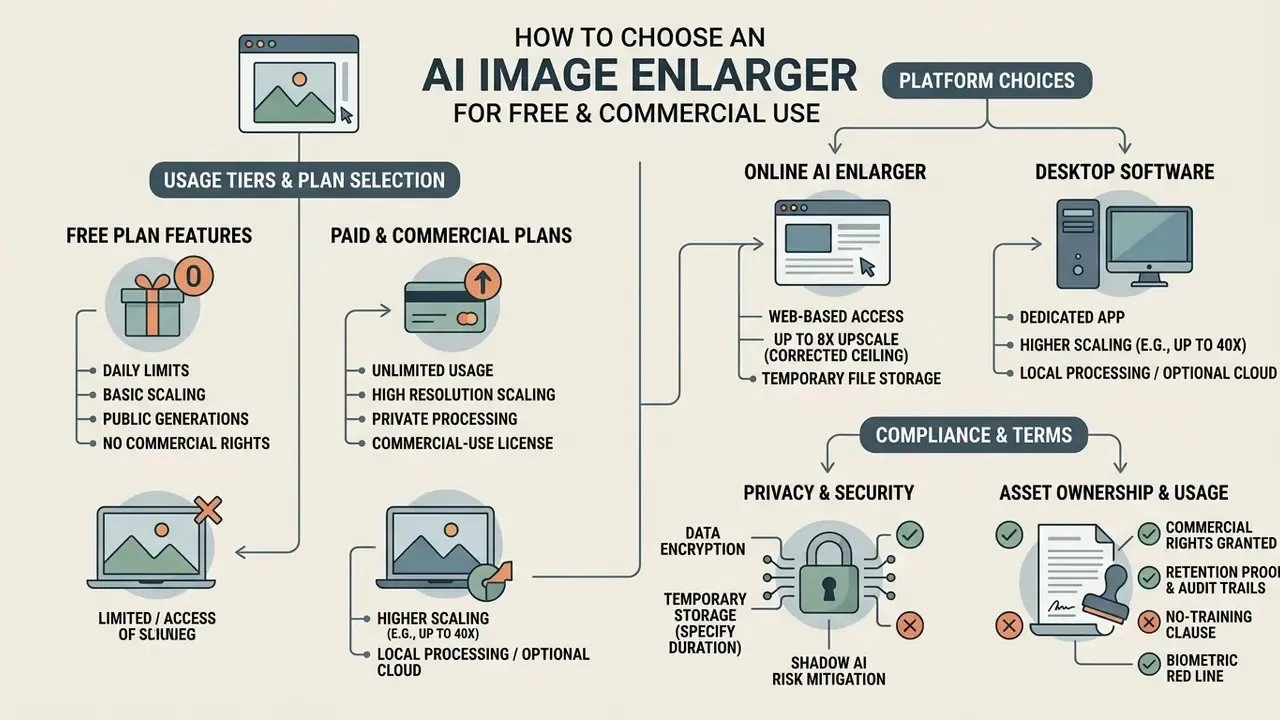
Selecting an ai image enlarger website or dedicated ai image enlarger software means evaluating usage tiers, processing privacy policies, asset ownership terms and functional feature sets. Organizations handling sensitive intellectual property or commercial product collateral need transparent data retention rules and explicit commercial licensing, in writing. A criterion-by-criterion breakdown of vendors sits in our review of AI image upscalers for commercial tasks.
The feature matrix to work from:
| Feature dimension | Free online portals | Enterprise / desktop software |
|---|---|---|
| Pricing Model | Daily free credits or trial allocations (commonly 5 to 20 per day) | One-time license or monthly subscription |
| Upscale Limits | Typically capped at 2x, 4x or 8x | Ultra-scale factors up to 40x on local GPU |
| Batch Processing | Single file queue, or a restricted batch of about 10 | Unlimited local batch processing plus Batch API |
| Data Privacy | Cloud processing; server file storage purged in 6 to 24 hours | Local GPU execution; zero server uploads |
| Commercial Rights | Personal use; commercial requires a paid tier | Full commercial rights granted |
| Compliance Artifacts | Varies, often none published | SOC 2 / ISO 27001 reports, DPA, GDPR addendum |
Need a wider decision frame across adjacent media tasks? You can compare options for enterprise asset automation before locking a vendor in.
What an AI Image Enlarger Free Plan Usually Includes
An ai image enlarger free plan typically grants basic upscaling constrained by strict daily usage caps, lower file weight limits, or lower maximum resolution ceilings. Many web portals offer introductory free credits or daily request allowances, 5 to 20 free transformations per day being common, so you can test quality before upgrading. Market examples range widely. Some services grant 10 starting credits charged once per delivered result. Others grant 20 credits with tiered pricing, 2 credits for standard enhancement and 10 to 40 for a professional engine. A few allow only 2 simultaneous images on the free tier.
Free tiers also restrict advanced functionality: batch queue processing disabled, 4x and 8x factors behind a paywall, or promotional watermarks applied to output. Anyone evaluating an ai image enlarger free online service for commercial workflows should check whether the free tier's explicit terms grant commercial reuse, or limit output to personal evaluation only. Fully open-source desktop options exist as well. An AGPL-licensed local upscaler is free without credits and never transmits images off the machine, which removes both the cost question and the confidentiality question at once.
Online AI Image Enlarger or Desktop Software: Which to Choose
Choosing between a browser-based online ai image enlarger and desktop ai image enlarger software comes down to processing volume, local hardware and computational requirements. Online tools remove the need for a local GPU by running inference in cloud infrastructure, which makes them highly accessible for periodic, single-image editing. Our AI image enhancer comparison covers the adjacent cloud services worth testing in the same session.
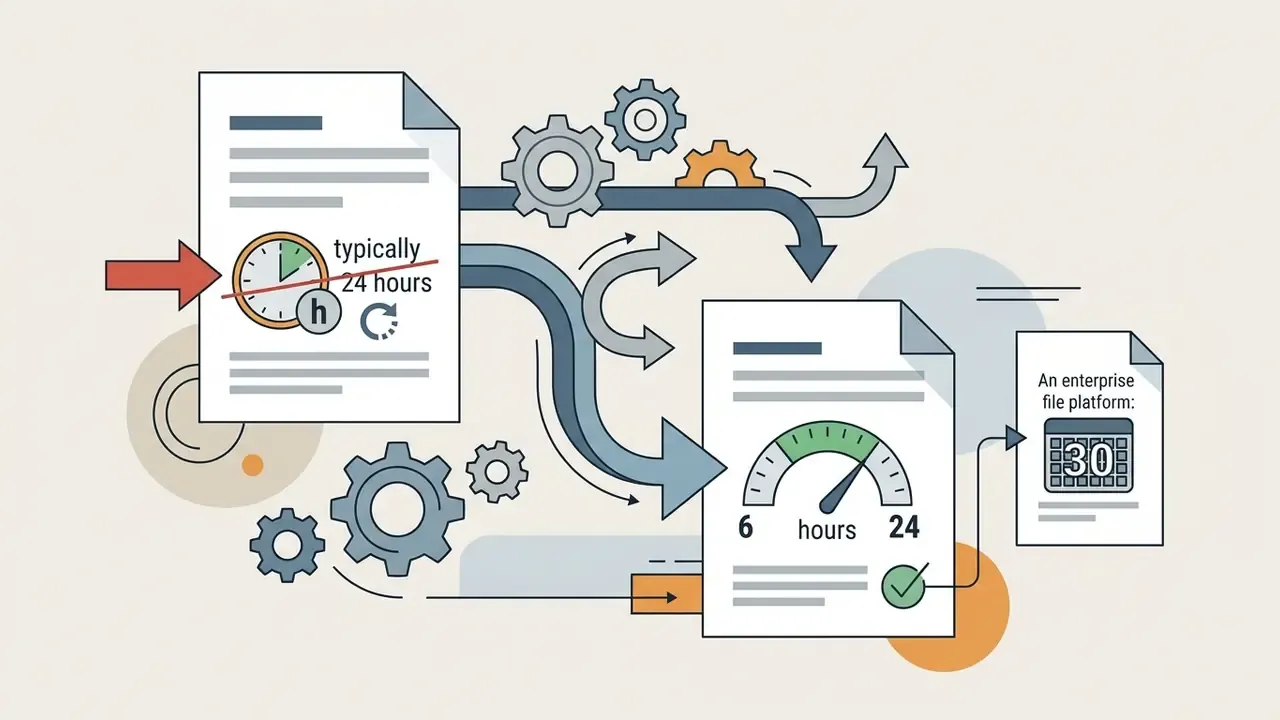
(Updated, corrected scale ceilings.) Cloud services are typically limited to 2x-8x because of shared server load and per-request time budgets. Desktop software driving a local GPU through CUDA or Metal can perform ultra-upscaling up to 40x without transmitting data to external nodes. Desktop applications such as Upscayl or Topaz Gigapixel also process massive asset libraries locally. For organizations running large-scale asset transformation pipelines, desktop tools deliver faster throughput, support continuous bulk execution, and eliminate bandwidth bottlenecks without recurring API transaction fees. The trade-off is licensing and hardware: current Gigapixel builds are subscription-only with export gated behind a license, while browser tools need nothing beyond a modern browser on macOS, Windows, iPhone or Android.
Performance and security diverge structurally too. Browser execution runs inside a sandbox and reaches the GPU only through WebGPU, which the W3C requires to be tightly validated and isolated, with throttling, memory caps and fingerprinting mitigations that reduce raw throughput. Native applications address hardware more directly, but they shift patching, configuration and OS-level isolation onto the operator. Neither option is automatically safer. The control owner simply changes.
Privacy, Temporary File Storage, Shadow AI and Commercial Use
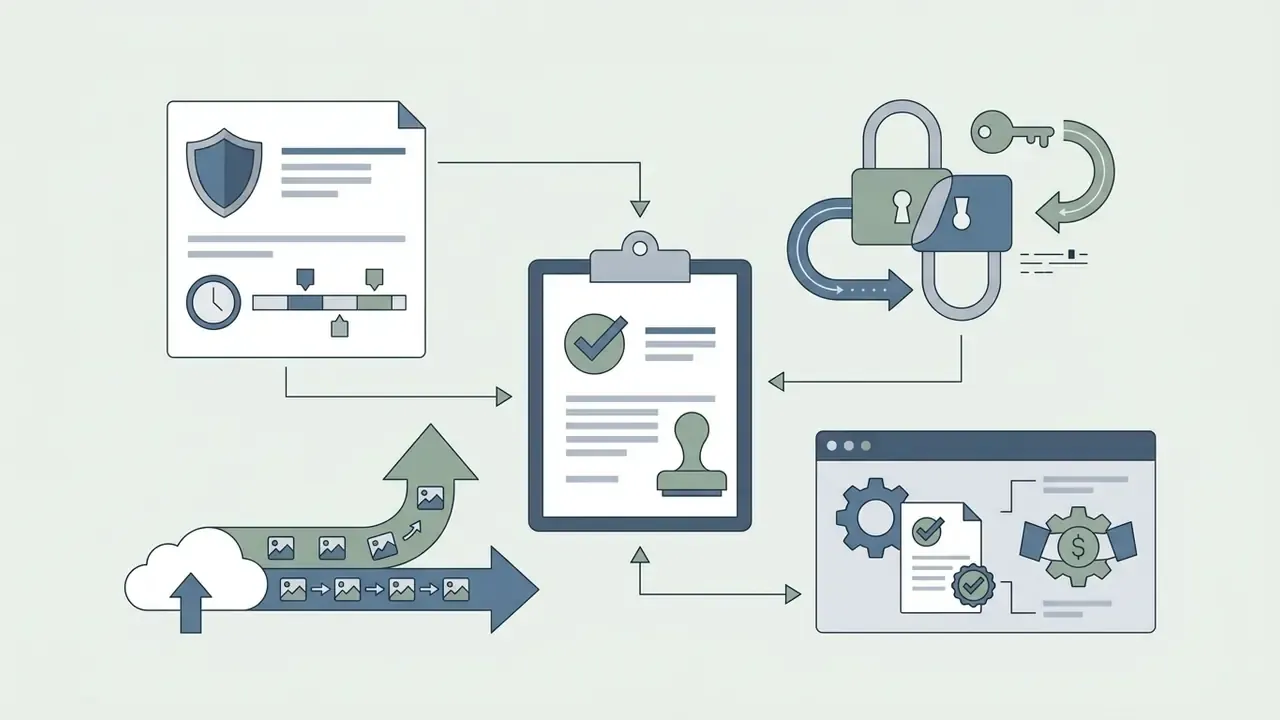
Evaluating privacy protocols and terms of service is essential when uploading corporate graphics, confidential product designs or customer photos to a cloud upscaler. Reputable enterprise platforms use end-to-end transport encryption, enforce automated temporary file deletion (published windows range from 6 to 24 hours, while some document platforms operate on a 30-day retention and disposal rule), and state explicitly that uploads are not ingested into AI training sets.
For commercial marketing campaigns or e-commerce catalogs, governance teams must confirm that platform licensing terms grant unrestricted commercial usage rights. Reviewing vendor documentation supports compliance with data protection standards and prevents unauthorized third-party access to proprietary visual assets. Content-policy scope deserves a separate line in the review: teams that also process restricted categories, including adult ai image material, need an approval path distinct from general product photography.
Enterprise procurement and Shadow AI checklist
- Compliance evidence.Request the SOC 2 Type II report or ISO/IEC 27001 certificate, a signed DPA, and the GDPR transfer mechanism for any EU personal data contained in portraits or ID scans.
- Retention proof.Confirm the deletion window in writing (6 hours, 24 hours, 30 days) and whether the purge is automated or manual.
- No-training clause.Terms must state that uploads are excluded from model training and evaluation datasets.
- Biometric red line.Employee and customer portraits, KYC selfies and passport scans are biometric-adjacent data. Process them on-premise or under an executed DPA, never through a free consumer portal.
- Document red line.Contracts, invoices and engineering drawings routed through public upscalers constitute uncontrolled disclosure. Mandate a local desktop tool or a private API endpoint for this class.
- Shadow AI controls.Publish an approved-tool list, block unapproved upscaler domains at the proxy, and provide a sanctioned alternative, so staff have no incentive to bypass it.
- Integration path.Verify a documented Batch API or SDK (bulk submission, cloud storage in and out, per-item error reporting), so upscaling becomes an auditable pipeline step rather than a desktop habit.
- Rights provenance.Even with a commercial licence, you still need rights to the source image. The upscaler grants nothing about the underlying subject matter.
AI Image Upscaler for Print, Social Media and Product Photos
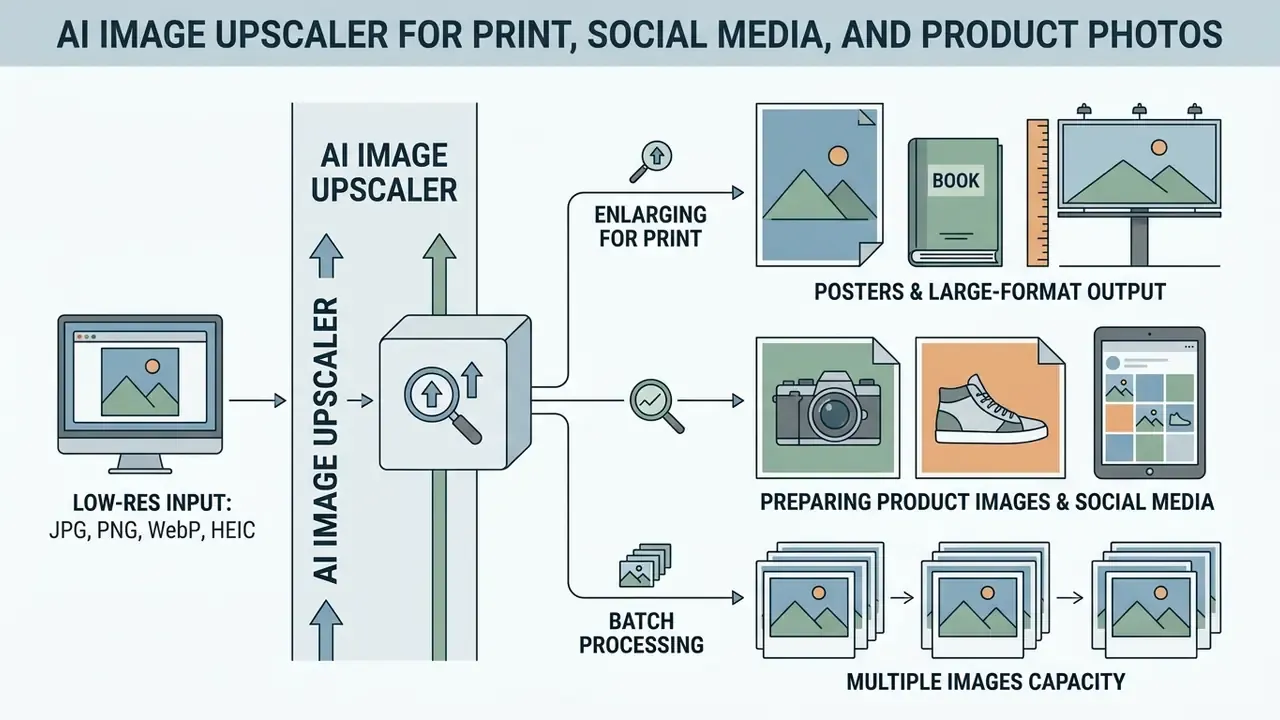
Applying an ai image upscaler across real commercial workflows means adapting output specifications to the target publishing environment. Whether you are preparing visual assets for high-density physical print, optimizing promotional banners for social media, or refreshing a large e-commerce catalog, the resolution metrics decide the visual impact.
Three routes from one raw source asset:
Print workflow → high DPI conversion (300 PPI target) → TIFF, lossless PNG or PDF.
E-commerce catalog → batch 4x upscale with crisp-edges mode → WebP or optimized JPG.
Social media → exact display dimensions (for example 1080 px) → formatted web graphics.
Enlarging Images for Print, Posters and Large-Format Output
Preparing digital images for physical print media, posters, trade show displays, fine art prints, demands far higher pixel density than screen publishing. Standard commercial printing workflows target 300 DPI at the final physical print dimension, to prevent visible line rasterization and blur.
A worked example. Producing a crisp 24×36 inch promotional poster at 300 DPI requires a master file of 7,200×10,800 pixels. If the source material exists only as a 1,800×2,700 pixel asset, a 4x neural enlargement bridges the spatial resolution gap accurately, delivering clean typography and sharp photographic detail across large-format output.
Viewing distance changes the arithmetic for truly large formats, though. Posters in the A3 to A1 range are commonly produced at 200-300 DPI, roller banners at around 150 DPI, and wall graphics or trade-show banners viewed from 2 to 3 metres remain perfectly acceptable at 100-150 PPI at final size. A common production shortcut: build the file at a fraction of final size, say 33%, at 300 DPI, and let the RIP scale it. That keeps the working file manageable. Print-oriented upscaling interfaces support this by exposing a target-DPI field that derives pixel dimensions from width times DPI, plus export to TIFF or PDF rather than web-only containers.
Batch Processing for Multiple Images
Automated batch processing workflows let organizations upscale multiple images simultaneously, which removes manual editing overhead during large-scale catalog updates. Modern catalog pipelines ingest raw seller uploads or legacy database images, then submit bulk request queues to parallel cloud APIs or desktop inference engines. Architecturally, two patterns dominate: a single API call carrying a list of images with one result and one error object per input, and bucket-to-bucket processing, where inputs are read from cloud storage, passed through a model node, and written back as a completed set.
"A cascaded multi-frame and single-frame super-resolution method reaches an average PSNR of 33.41 dB on Set5 and 29.66 dB on Set14, exceeding the baseline by 0.76 dB."
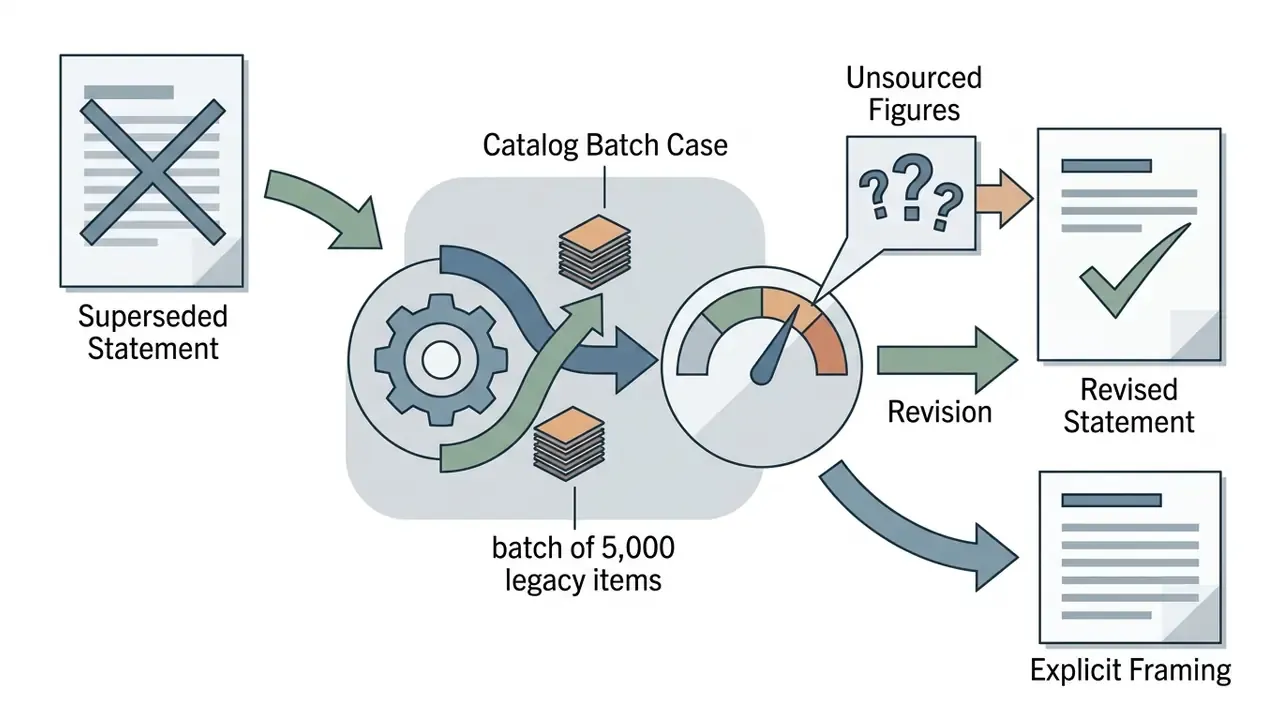
(Updated, reframed as a capacity model rather than a verified case study.) Consider a catalog optimization scenario: 5,000 legacy low-resolution item graphics moving from 400×400 px to 1,600×1,600 px through a 4x pipeline. With parallel batch jobs, throughput of roughly 40 to 50 images per minute completes the set in under two hours on commodity cloud capacity, delivering visual consistency across the storefront and removing manual editing from the update cycle. Treat these figures as an order-of-magnitude planning model. The underlying project was never published with methodology, hardware specification or error rates, so benchmark your own queue on a 100-image pilot before committing to an SLA. Chaining upscaling with background removal, shadow generation and resizing into one automated workflow is the standard production pattern for marketplace assets.
Which Image Formats an AI Enlarge Image Converter Supports
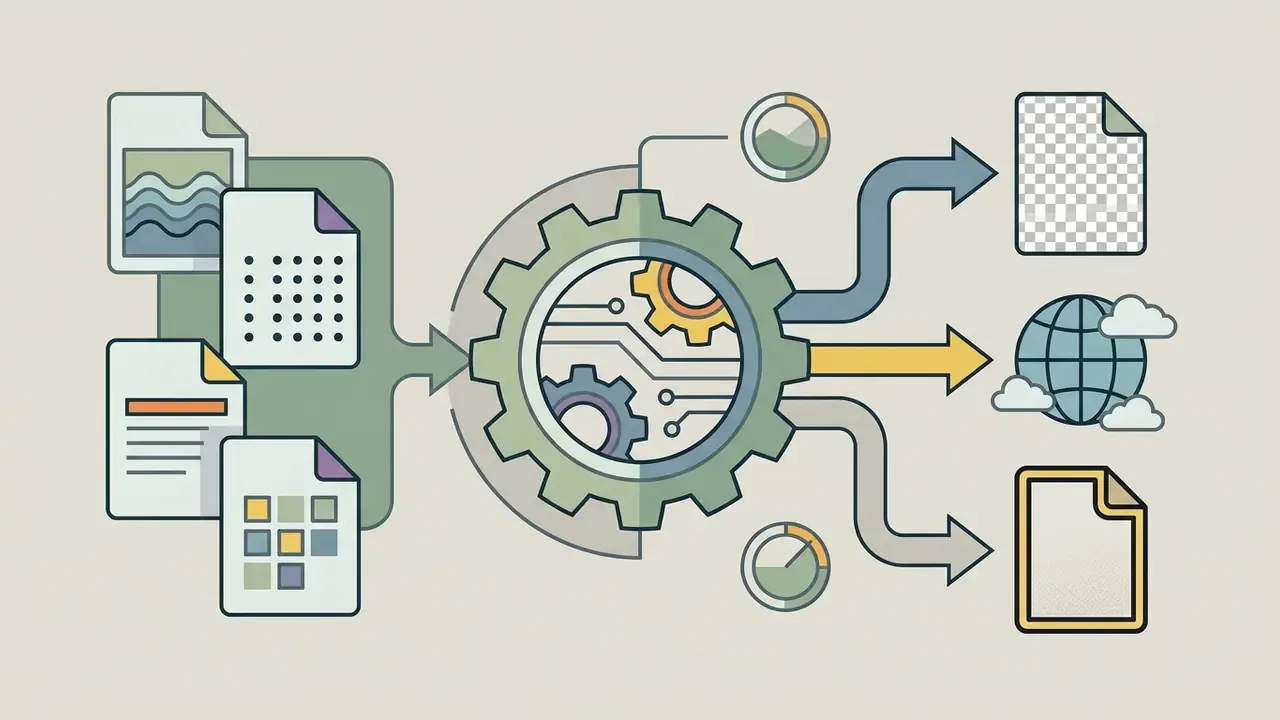
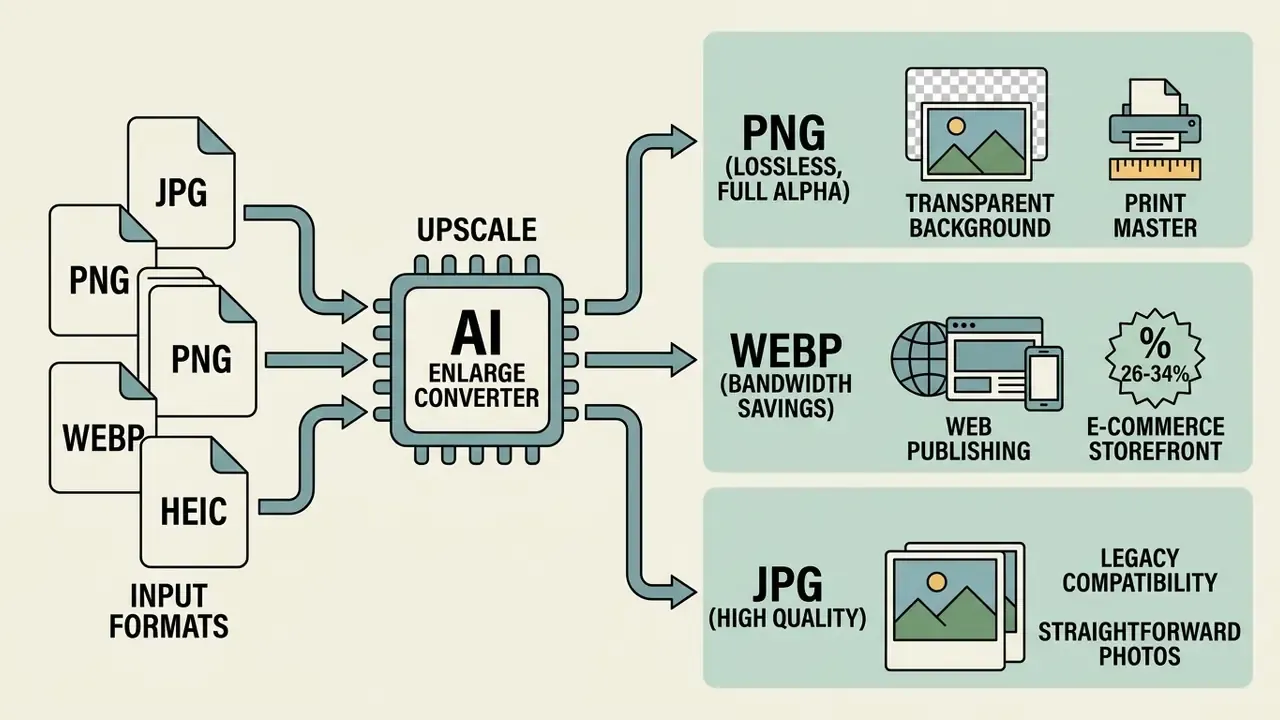
A professional ai enlarge image converter supports the common web raster extensions, so you can import low-resolution files and export upscaled assets in whatever format downstream tools require. Understanding the structural differences between jpg jpeg png, WebP and HEIC is what keeps compression and fidelity under control.
Common input and output format characteristics:
- JPG / JPEG standard lossy compression, optimal for natural photography; no alpha channel transparency.
- PNG lossless compression with full alpha transparency; ideal for logos, graphics and print masters.
- WebP modern web container with lossy and lossless modes; delivers roughly 26% to 34% smaller file sizes than legacy formats and, per RFC 9649, restores pixel values exactly in lossless mode, including zero-alpha pixels.
- HEIC / HEIF the default capture format on modern iOS devices, standardized as ISO/IEC 23008-12 for single images, collections and sequences. Before upscaling, current converters decode HEIC into an uncompressed pixel array, which prevents color shifts when the result is re-saved as PNG or WebP. Many platforms accept HEIC inputs up to about 20 MB while exporting only PNG or JPEG.
Choosing JPG, PNG or WebP After You Upscale an Image
The target container after an upscale depends on asset utility, transparency requirements and delivery bandwidth:
Transparent background or print master → export as PNG (lossless, full alpha).
Web publishing or e-commerce storefront → export as WebP (26% to 34% bandwidth savings).
Legacy system compatibility or straightforward photos → export as high-quality JPG (quality 90 or above).
"WebP reduces page load time by 21% compared with JPEG at comparable visual quality, making it the preferred format for web publishing."
For photographic assets published to high-traffic web platforms, exporting upscaled files as WebP gives superior visual fidelity at lower payload weight than legacy JPEG. For assets with transparent backgrounds, brand logos or isolated product overlays, PNG is necessary to preserve alpha channel boundaries without compression halos, because JPEG carries no alpha channel at all. If the upscaled file still needs cropping, color grading or text overlays, our AI photo editor guide covers non-destructive finishing steps that avoid a second lossy re-encode.
FAQ: Frequently Asked Questions About AI Image Enlargers
What is the maximum image size an AI image enlarger can process?
Most browser-based online tools limit input dimensions to between 4,096×4,096 pixels and 20,000×20,000 pixels, with file weight caps from 10 MB to 100 MB. Admissible input shrinks as the scale factor rises, and 8x often allows only 1,250×1,250 px for guests. Desktop software using a local GPU can process significantly larger assets, up to 16,000×16,000 pixels or higher, constrained mainly by available VRAM and storage capacity.
What is the real maximum upscale factor, 8x or 40x?
Both, depending on where inference runs. Browser services generally publish 2x, 4x and 8x tiers, because cloud GPUs are shared and requests are time-boxed. Desktop clients executing on a local GPU via CUDA or Metal advertise enlargement up to 40x. Usable quality and marketing ceilings differ, though. Reconstruction reliability degrades past 4x and becomes speculative around 8x to 16x, so 40x suits stylized or graphic content far more often than forensic photographic detail.
Does using an AI image upscaler require design or technical experience?
No. Modern AI image upscalers ship automated, user-friendly interfaces that assume no graphics editing expertise. Upload the file, select a preset magnification factor such as 2x or 4x, preview the result in a split-screen interface, download the high-resolution output. Some judgment still helps, honestly: identifying the blur type, choosing the right model for text versus photography, and inspecting output at 100% magnification are what separate a clean result from an over-processed one.
Can AI image enlargers restore extremely blurry or out-of-focus images?
AI upscalers can moderately sharpen soft focus and mild motion blur by predicting underlying geometric edges. Severe out-of-focus blur or extreme low-resolution degradation is different: the structural visual data is simply absent. In those cases, the model cannot reconstruct lost reality and may produce synthetic hallucinations or unnatural textures. Severe motion blur, heavy compression and extreme defocus are missing-information problems, not resolution problems.
Can AI upscaling make scanned documents and contracts more readable?
Yes, with a text-specific model. Document models rebuild glyph contours, suppress scanner grid patterns and reduce chromatic fringing, which improves both human readability and OCR accuracy on faded invoices, handwritten registers and archival contracts. Keep the factor at 2x to 4x, and manually verify digits, signatures and stamps. An altered character in a financial or legal document is a material error, not a cosmetic one.
Which formats can I upload, and is HEIC from my iPhone supported?
Most current platforms accept JPG/JPEG, PNG and WebP, and a growing number accept HEIC/HEIF directly, decoding it to an uncompressed pixel buffer before inference. Output is usually offered as PNG, JPEG or WebP. If a service rejects HEIC, convert it losslessly first. Screenshotting the photo instead discards color depth and adds a lossy generation.
Will enlarging an image with AI increase its overall file size?
Yes. Increasing pixel dimensions expands the volume of raw visual data stored in the file. Scaling by 4x quadruples both width and height, producing a 16-fold increase in total pixel count. Saving the result in a high-quality or lossless format naturally means a larger output file. Exporting to WebP recovers a meaningful share of that weight for web delivery.
Is AI upscaling better than standard Photoshop bicubic resampling?
Yes, AI upscaling clearly outperforms bicubic resampling at meaningful magnification factors such as 2x, 4x and above. Bicubic mathematically stretches existing pixels and introduces blur, while AI models analyze contextual structures and synthesize new high-frequency detail. The result is sharper edges and higher visual clarity, quantified at roughly 1.5 to 3 dB PSNR on standard benchmarks.
How long do online services keep my uploaded images?
Published windows in vendor documentation cluster between 6 and 24 hours for automatic deletion of uploads and results. Enterprise file platforms sometimes operate on a 30-day retention-then-disposal schedule instead. Always confirm the figure in the current terms of service, and route confidential or biometric material through local desktop processing or a contracted private endpoint.
Can I process a whole catalog at once?
Yes, via batch processing or a Batch API. Free tiers typically allow one image at a time, sometimes up to about 10 per batch, while paid and desktop tiers support unlimited local queues. Production-grade integrations submit a list of images in a single request with per-item results and errors, or read from and write back to cloud storage buckets. That is what makes the step auditable inside an existing pipeline.
Adjacent Utilities and Ecosystem Checklist
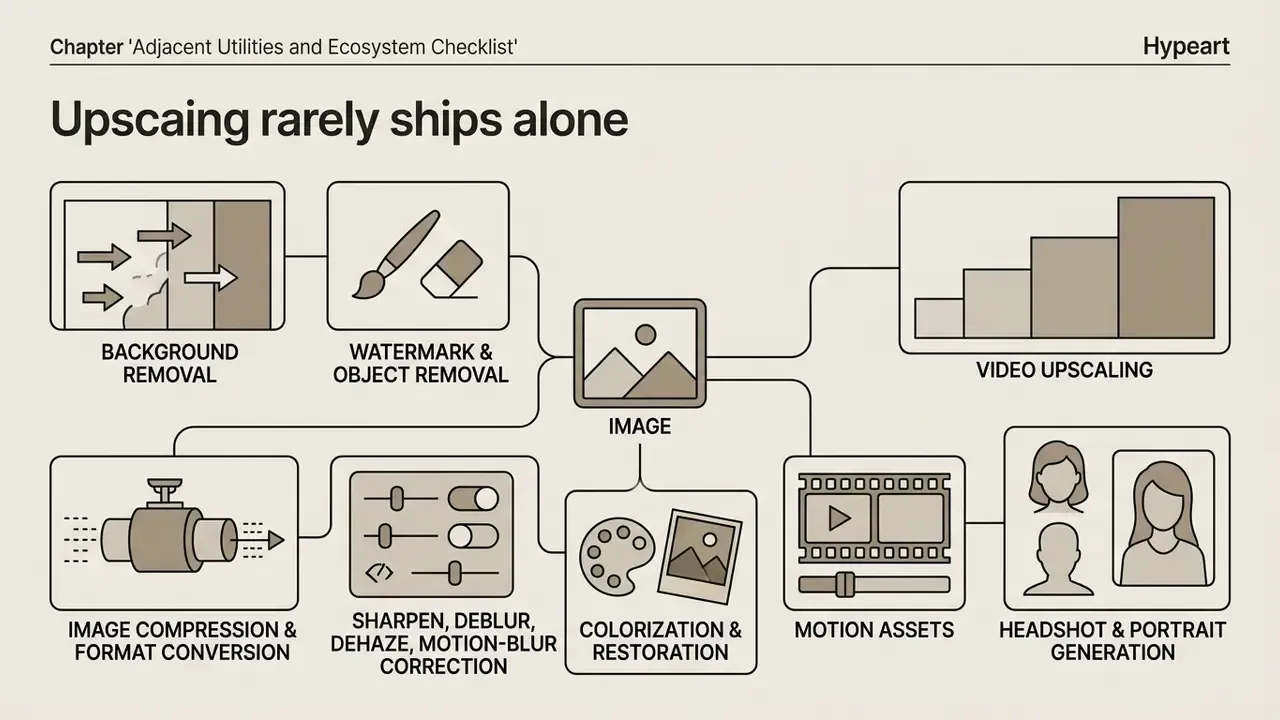
Upscaling rarely ships alone. When assembling a visual production stack, the following neighbouring operations usually belong in the same workflow. Choosing tools that share an account, a credit pool and an API surface reduces both cost and governance overhead.
- Background removal. Isolate the subject before upscaling, so the model does not spend capacity reconstructing a background you intend to discard.
- Watermark and object removal. Clean the plate first; upscaling amplifies whatever remains.
- Image compression and format conversion. The final step for web delivery, converting the upscaled master to WebP at a controlled quality target.
- Sharpen, deblur, dehaze, motion-blur correction. Targeted fixes are more predictable than asking one upscaler to repair everything at once.
- Colorization and restoration. For monochrome or damaged archives, run colorization after structural restoration and before final resolution gain.
- Motion assets. An ai animated image engine turns a static upscaled master into a looping asset for ads and product pages.
- Video upscaling. Short-clip enhancement, commonly capped around 1 minute per job for MP4, MOV and WebM on consumer tiers, applies the same super-resolution families frame by frame with temporal consistency constraints.
- Headshot and portrait generation. See our AI headshot generator guide when the goal is a new professional portrait rather than rescuing an old one.
How We Evaluate Upscalers (Methodology)
Appendix A: Superseded and Revised Statements
For transparency, the following earlier formulations were revised in this edition. They are retained here with the reason for the change.
Hub Navigation and Related Resources
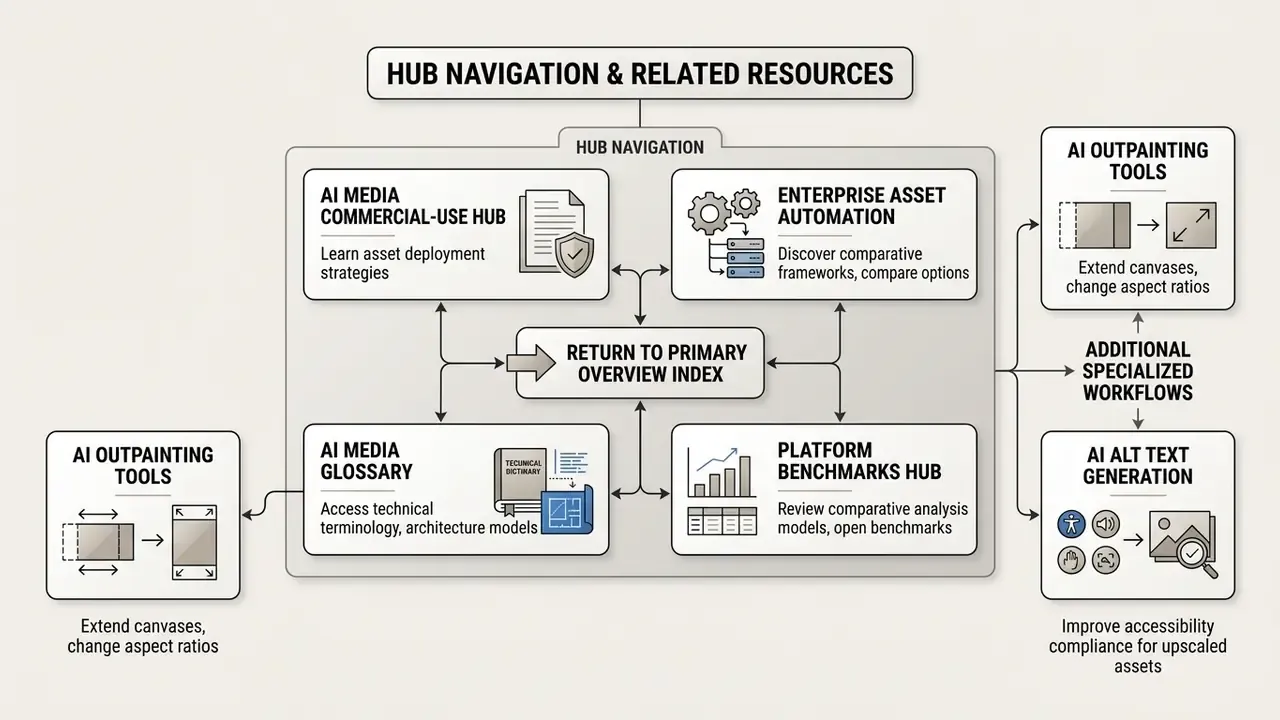
To explore commercial licensing frameworks, compare media transformation engines, or analyze automated creative workflows, use the dedicated resource hubs:
- Learn more about asset deployment strategies in our AI Media Commercial-Use Hub.
- Discover comparative evaluation frameworks and compare options for enterprise asset automation.
- Access technical terminology and architecture models in the AI Media Glossary.
- Review comparative analysis models and open the hub for platform benchmarks.
- Return to the primary overview index and open the hub.
Additional specialized workflows and comparative guides:
- Extend canvases and change aspect ratios with AI outpainting tools.
- Improve accessibility compliance for upscaled assets using ai alt text generation engines.
- Convert static graphics into dynamic motion assets with tools to ai animate image content.
- Compare commercial licensing terms across Google AI Image Generator and Microsoft AI Image Generator.
- Evaluate design-suite integration in our Canva AI Generator overview.
- Verify asset provenance before publishing with AI reverse image search tools.
- Reduce delivery weight after upscaling with our video compressor and photo editor references.