These browser-based utilities automate face detection, cropping, background removal and aspect-ratio adjustment according to country-specific regulatory standards, so no desktop graphics suite is needed. You still have to check the numbers yourself, which is the part most people skip.
Last updated: 2026. Reviewed against the U.S. Department of State passport photo guidance, GOV.UK passport photo rules, Government of Canada photo specifications and ICAO Doc 9303 (Machine Readable Travel Documents).
Five rules that decide acceptance
- Shoot the original, edit only geometry.Official rules require an unedited capture: no beauty filters, no skin smoothing, no AI-generated or AI-retouched faces. Editors may only crop, resize and uniform the background.
- Respect the exact format.US: 2×2 in (51×51 mm), head 25–35 mm (50–69% of frame). UK and Schengen: 35×45 mm, face 29–34 mm. Canada: 50×70 mm print, digital JPEG in 3:2 portrait.
- Control physics before software.Front camera 40–50 cm (16–20 in) from the face, rear camera 1.5–2 m (4–6 ft), phone at eye level, portrait mode off, facing a window in daylight.
- Print smart, not expensive.Export a 10×15 cm (4×6 in) sheet with 4–6 identical portraits and print it as an ordinary photo for roughly $0.20–$0.35 per sheet, with printer scaling set to 100% (“Actual Size”).
- Treat the file as biometric data.Check for HTTPS/TLS, a published deletion policy, avoid public Wi‑Fi, and clear caches and downloads on shared devices.
What a rejected photo actually costs
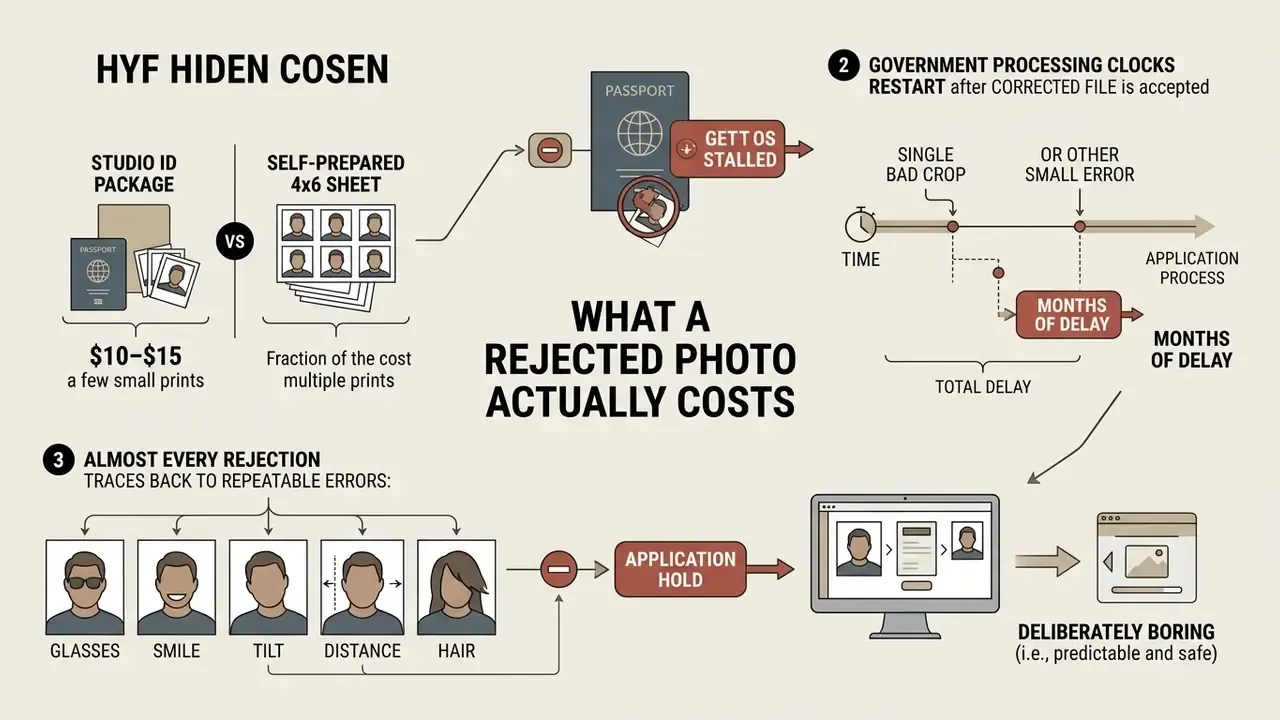
The photo is the cheapest part of an application and the most common reason it stalls. A rejected image rarely means a lost fee; it usually means a second round of correspondence, a new appointment slot or a re-upload, and that eats calendar time you may not have before a trip.
Three practical numbers worth holding in your head:
- A studio ID package typically runs $10–$15 for a handful of prints, while a self-prepared 4×6 sheet costs cents.
- Government processing clocks generally restart only when the file is accepted, so a single bad crop can add days or weeks depending on the authority.
- Almost every rejection traces back to one of eight repeatable issues: glasses, smile, tilt, distance, hair, shadows, background, or a soft file.
That is why the workflow below is deliberately boring. Measure, verify, then submit. No creativity required.
What an online passport photo editor does
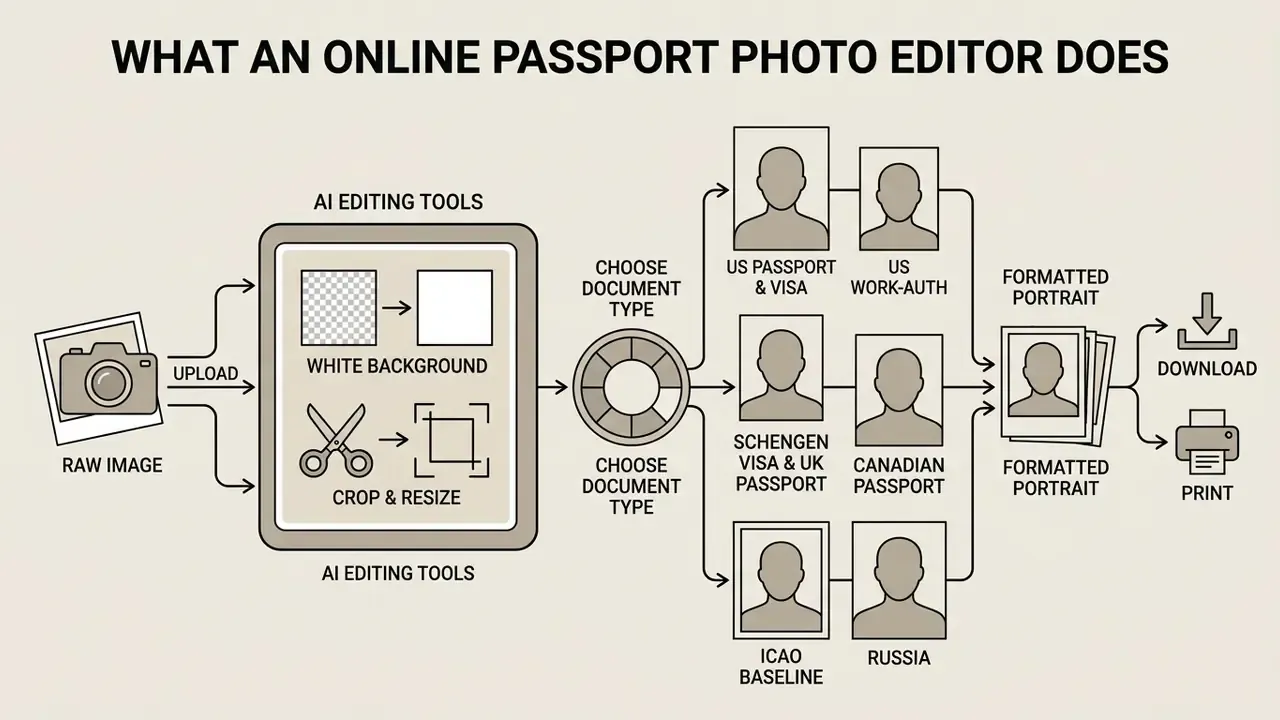
An online passport photo editor automates the formatting of raw images into valid document portraits. The tool centres the facial structure, evens out the background, and scales dimensions to match official agency criteria. For a broader view of browser editing features and export options, see our guide to online photo editors.
Modern identity tools function as a passport photo maker: they combine document alignment, geometric validation, background cleaning and layout export inside a web browser. An online passport size photo editor is really just this pipeline with country templates bolted on. Capabilities differ by vendor, so the practical test is simple. Does the output match the published specification of the issuing authority for your document? Users do not need specialised desktop graphics software to achieve compliant results, but they do need to verify the measurements before submitting.
AI tools for editing a passport photo
AI tools use neural networks to identify facial landmarks and isolate subject foregrounds automatically. Specialised machine learning models, such as Multi-Task Cascaded Convolutional Networks (MTCNN), locate the eyes, nose and mouth to calculate head positioning accurately.
«MTCNN works as a three-stage convolutional cascade: it first proposes candidate face regions, then refines them and outputs precise bounding boxes and landmark points.»
Semantic segmentation models separate the individual from complex backgrounds without altering facial geometry. Automated background removal replaces outdoor or textured backdrops with uniform white or off-white surfaces, typically targeting an RGB value close to (255, 255, 255).
«Photos created or edited with artificial intelligence or other digital tools are not accepted.»
That single sentence draws the boundary for every tool on the market: automated geometry is welcome, automated appearance is disqualifying. Using a dedicated photo background editor helps eliminate shadows behind the subject, while advanced photo editor software supplies the computer-vision models that keep the crop geometrically accurate. Readers comparing broader toolsets can review how AI photo editors differ in the balance between automation and manual control.
One small caveat on wording. Retouchers who work in photo editor jobs call this class of work "documentary editing", because the operator is allowed to change the frame and nothing inside the face. People hired for photo editor jobs remote on visa and passport queues are usually given a written rule sheet that forbids the healing brush entirely. Useful discipline to borrow.
Passport, visa or ID: choosing the document type
Every official document enforces explicit dimensional and biometric presentation standards. Selecting the target document preloads exact physical margins, pixel resolution targets and background rules into the editor pipeline.
«Head size in a printed photo must measure 1 to 1 3/8 inches (25–35 mm) from the bottom of the chin to the top of the head.»
- US passport and visa 2×2 inch (51×51 mm) printed format; head height 1 to 1 3/8 inches (25–35 mm), equal to 50–69% of frame height; eye line 28–35 mm from the bottom edge. Digital visa uploads: square JPEG, 600×600 to 1200×1200 px, up to 240 kB.
- US work-authorisation paperwork searches for an "OPT photo editor" almost always come from students preparing Optional Practical Training and EAD forms. Those filings use the same 2×2 inch passport-style specification, so a single template covers both, but confirm the current form instructions on the USCIS page before you print.
- Schengen visa and UK passport 35×45 mm print size, with the face occupying roughly 70–80% of the vertical frame. GOV.UK states the size as 45 mm × 35 mm with the crown-to-chin measurement between 29 mm and 34 mm; Schengen visa instructions describe a face width of 35–40 mm and 70–80% coverage (see GOV.UK, Photos for passports, https://www.gov.uk/photos-for-passports, and the European Commission’s ICAO-based visa photo guidance).
- Canadian passport 50×70 mm physical dimensions with the face covering approximately 65–75% of the image; digital files must be JPEG/JPG, 3:2 portrait, 1,800×1,200 to 4,500×3,000 px and 200 KB to 5 MB (Government of Canada, Passport photo specifications, https://www.canada.ca/en/immigration-refugees-citizenship/services/canadian-passports/photos.html).
- ICAO baseline Doc 9303 sets the holder portrait at 45.0 × 35.0 mm, and Part 10 states that from 1 January 2030 issuers must encode biometric data using ISO/IEC 39794, the standard behind most national templates.
- Russia the statutory annex specifies 35×45 mm, colour or black-and-white, frontal face, head height 32–36 mm and an eye-line distance of 23–31 mm; requirements are document-specific.
Capabilities and functional modules of an online document photo editor
| Functional module | Technical implementation | Standards compliance | Resulting output |
|---|---|---|---|
| Upload and formats | Accepts JPG, PNG, HEIC, WebP up to 10 MB | Government portal file limits | Source frame held in memory |
| AI cropping | MTCNN / FaceNet face detection | ICAO Doc 9303 / US State Dept | Centred face (50–69% of frame) |
| Background replacement | Semantic segmentation (MediaPipe) | Plain white or light background, no shadows | Background at RGB (255, 255, 255) |
| Quality validation | Sharpness, exposure and glare scoring | NIST face image quality / US State Dept | Validation report for the shot |
| Export and printing | JPEG (300 DPI) and PDF sheet generation | 10×15 cm (4×6 in) print standards | Upload-ready file or print sheet |
Passport photo requirements: size, face, background and quality
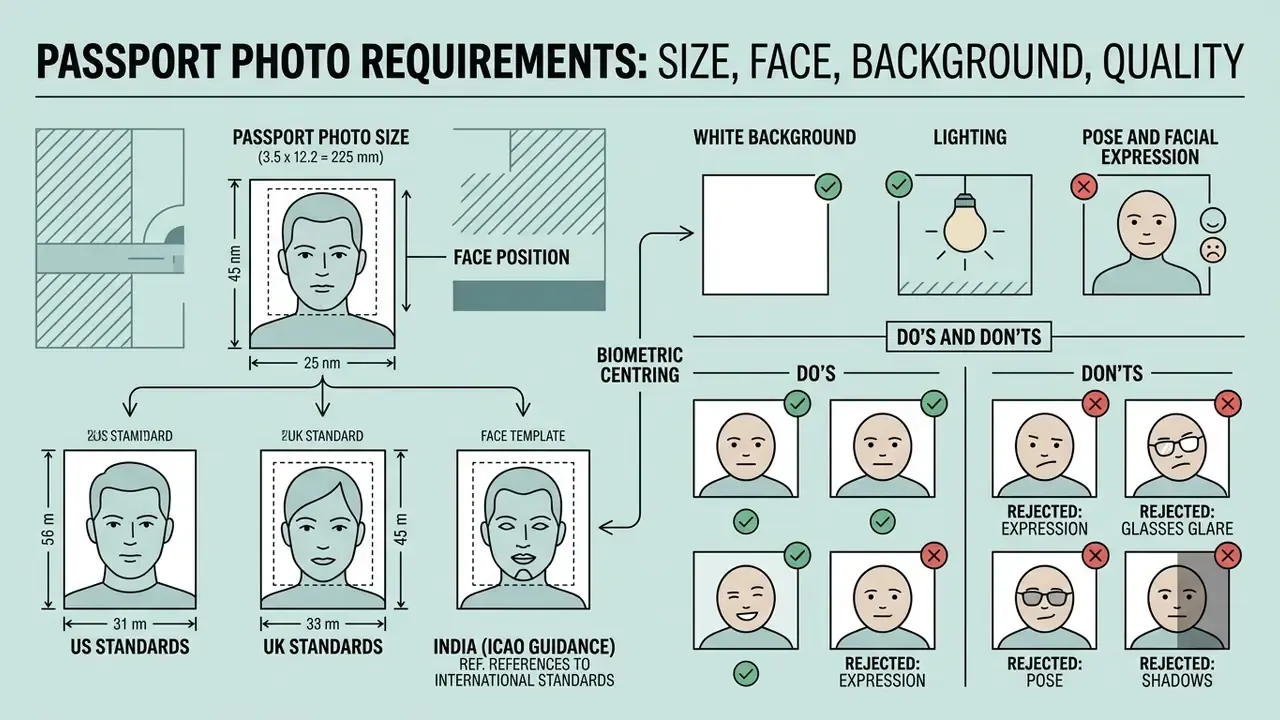
Official identity photograph standards protect biometric verification accuracy across national boundary controls. Government authorities reject submitted images that fail strict geometric, exposure or background standards.
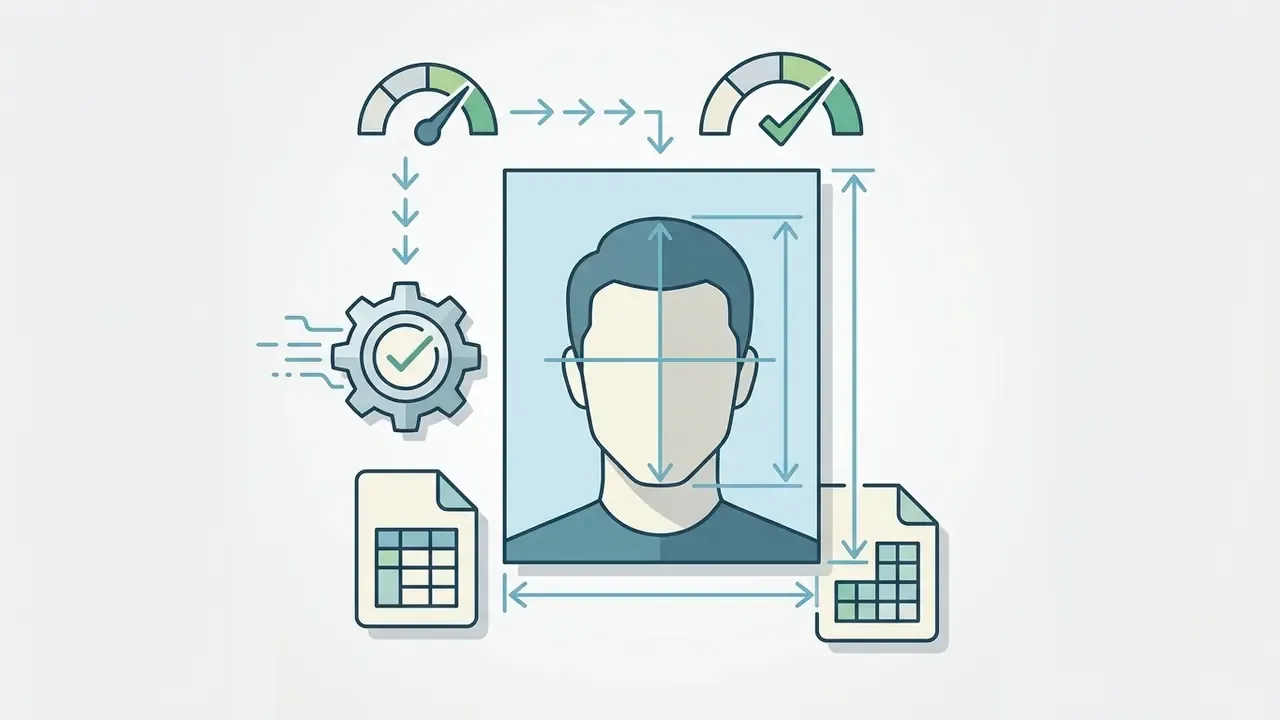
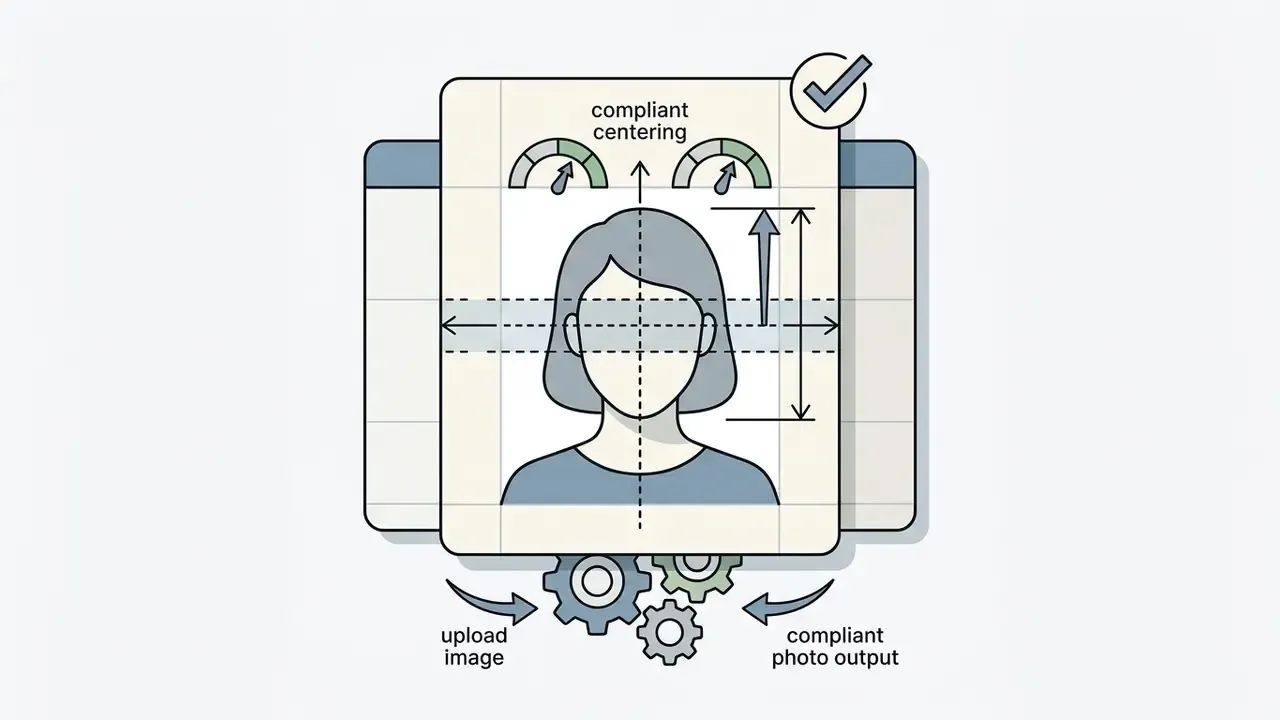
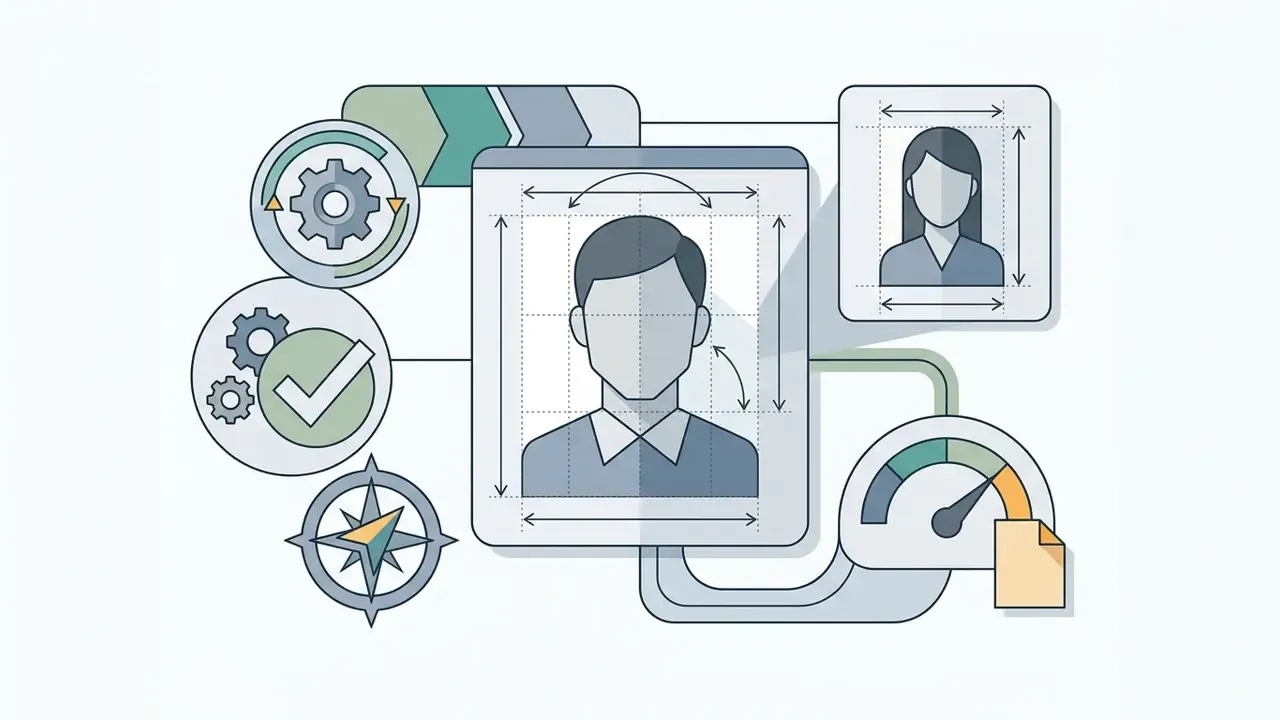
Passport photo size and face position in the frame
Dimensional criteria mandate precise physical measurements for printed and digital identity photographs. The distance from the bottom of the chin to the top of the head must remain within specified boundaries.
An id passport size photo editor that offers a single generic template is therefore a red flag. Ask which country and which document the preset was built for, and when it was last checked against the source page.
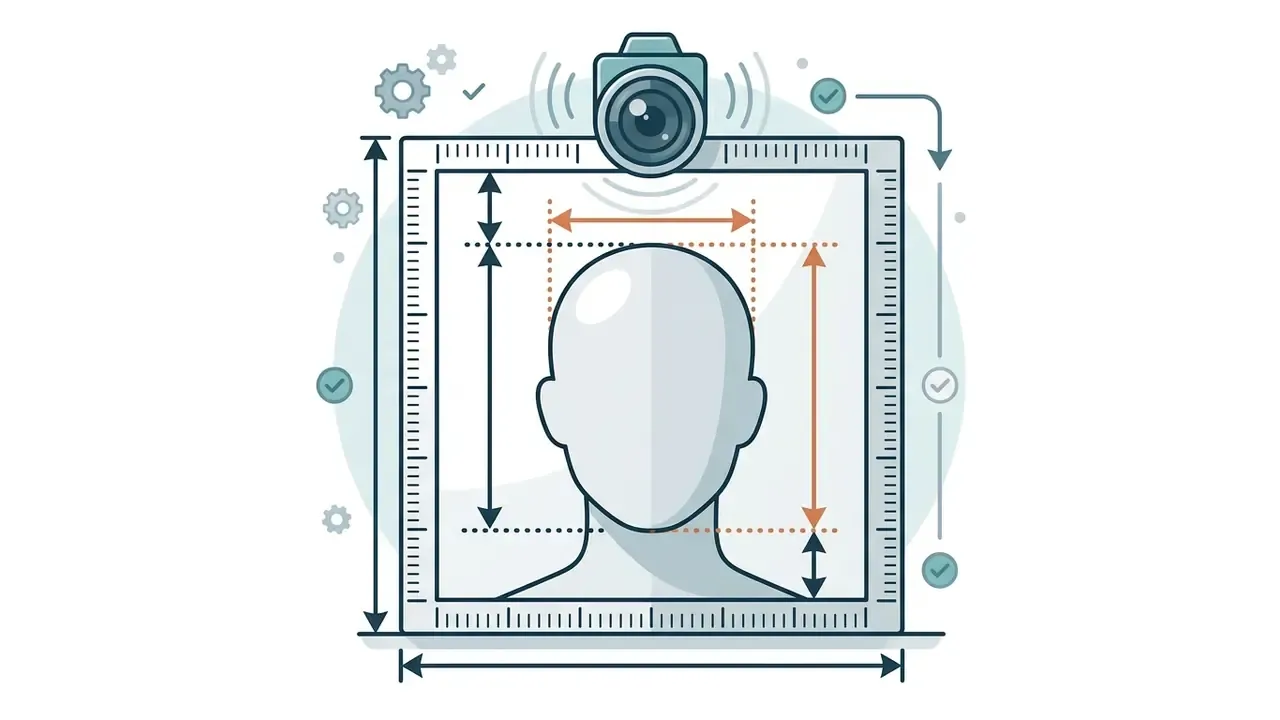
White background, lighting, pose and facial expression
The background must remain plain white or off-white, free from shadows, patterns, textures or objects. Overhead or side lighting that casts visible shadows on the face or backdrop is strictly prohibited.
«Research found a systematic bias in under-exposure metrics: naive image-quality algorithms may misjudge photographs of people with darker skin tones.»
Do’s and don’ts: the exact reasons photos get rejected
Government photo tools publish galleries of "good" and "bad" examples for a reason: most rejections come from a handful of repeatable mistakes rather than from exotic edge cases.
| Parameter | Acceptable ✅ | Reason for rejection ❌ |
|---|---|---|
| Glasses | Removed completely | Any frame, lens glare, tinted or transition lenses |
| Expression | Neutral, mouth closed | Toothy smile, raised eyebrows, squinting, exaggerated pose |
| Head position | Straight, centred, full-front | Looking up or down, tilted body, off-centre head, profile view |
| Distance | Head and shoulders visible | Subject too close (distorted features) or too far (head too small) |
| Hair | Face oval and eyes fully visible | Fringe covering eyebrows or eyes, hair across the cheekbones |
| Shadows | Even light across face and backdrop | Shadows behind the ears, hollow eye sockets, shadow on the wall |
| Background | Plain white or off-white | Patterned wall, furniture, door frames, colour gradients |
| Resolution | Sharp, natural colour | Blurry, grainy, pixelated, colour cast from indoor bulbs |
| Face obstruction | Nothing covering the face | Object in the mouth, scarf over the chin, mask, hand in frame |
| Child photo | Child alone in frame | Parents’ fingers, pacifier, toys, open mouth, second person visible |
File resolution and digital photo quality
Digital image uploads must preserve high visual sharpness without visible compression artifacts, grain or pixelation. Official guidance requires an initial capture or scan resolution of at least 300 pixels per inch (PPI), equivalent to 12 pixels per millimetre for a 2×2 inch source. If the source frame is technically sharp but slightly small, AI image enhancers can improve clarity before cropping; they must never be used to alter facial features.
Digital files submitted to online government portals must maintain natural colour accuracy without digital retouching.
«Digital processing and facial retouching are not permitted; beauty filters and filters from social networks or mobile applications are prohibited.»
Red-eye removal software, facial smoothing filters and AI generative modifications cause immediate rejection during official evaluation.
«Attribute editing, such as skin smoothing or contour changes, degrades the accuracy of biometric face-recognition systems.»
Archival digitisation guidance points the same way: lossless or minimal compression, correct colour profile, and minimal sharpening, because over-sharpening is itself treated as an artifact (NARA digitisation standards).
How to make a passport photo online
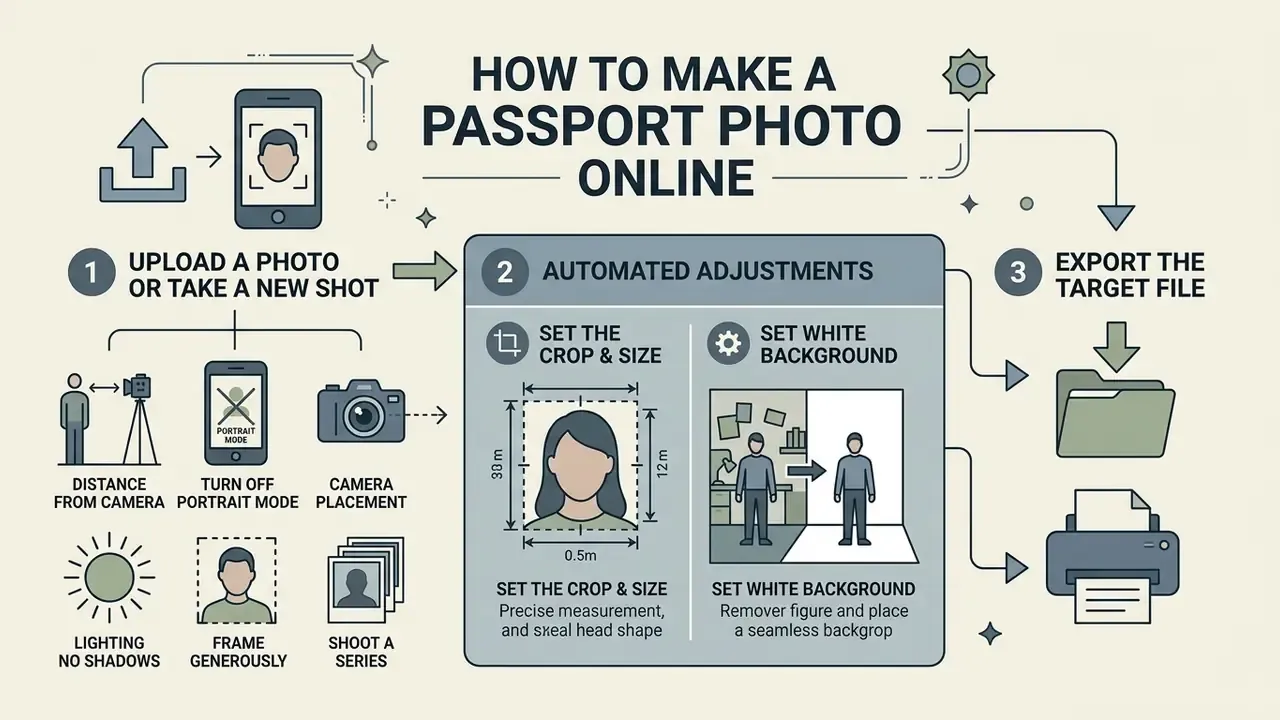
Creating a compliant identity photo online requires uploading a clear source image, applying automated adjustments and exporting the target file. Modern web platforms streamline this sequence into three distinct operational steps.
«Even after automated validation, an agency employee reviews every uploaded photo and may request a new one if a discrepancy is found.»
A user can take a passport photo online with a smartphone camera or an existing digital photograph. The software then applies regulatory cropping rules to prepare the image for digital upload or physical printing.
Upload a photo or take a new shot
Users can upload an existing file or capture a fresh portrait using a mobile device camera. The source image must show a clear, centred view of the entire face with both eyes open.
How to photograph yourself for a passport at home with a smartphone:
A mobile photo editor app allows camera capture directly inside the web browser interface. Desktop users can process high-resolution images smoothly in a photo editor mac web environment. If a HEIC file refuses to upload or the preview loads blank, the fixes in AI Media Support and Troubleshooting usually cover it: convert to JPEG, disable the ad blocker, retry in a different browser.
Avoid using beauty filters, digital enhancement tools or aggressive compression settings before uploading the file. The initial capture must display natural skin tones and even lighting across both sides of the face.
Set the crop, size and white background
Once uploaded, the editor identifies facial landmarks and scales head height correctly. An online passport photo editor with white background replaces non-compliant backdrops with a clean, solid shade.
The software crops the canvas so the face occupies the exact percentage required by national standards. Manual adjustments allow fine-tuning the frame position while preserving mandatory top and side margins.
How to fine-tune the crop manually:
- Zoom
- mouse wheel on desktop, or pinch-to-zoom on a touchscreen; keyboard
+and–in editors that support shortcuts. - Shift the frame
- drag with the left mouse button (or a finger on touch devices), or nudge with the
W A S Dkeys, so the eyes sit strictly inside the dotted horizontal band. - Rotate
- use the 1° rotation buttons (or
Q/E) to level the eye line if the head is tilted in the source shot; a 90° flip is usually a single keypress. - Check the margins
- leave visible space above the crown. A head that touches the top edge is a classic rejection cause even when the head-height figure is correct.
- Verify after every change
- a manual nudge of a few pixels can pull the head size outside the 50–69% band, so re-read the on-screen measurement panel before exporting.
Download the digital photo or prepare a print sheet
After processing, the user downloads either a standalone digital file or a printable sheet layout. Digital application portals generally require square JPEG images with specific file-size constraints (600×600 to 1200×1200 px for US uploads; 3:2 portrait JPEG for Canada).
Physical submission requires printing the output on high-quality glossy or matte photo paper at 300 DPI. Printable 10×15 cm sheet layouts arrange multiple identical portraits to simplify trimming and submission.
How to print the finished layout cheaply:
- Do not order the "ID photo" service at a studio.That tariff typically costs $10–$15 for a handful of prints.
- Download the ready-made sheetin 10×15 cm (4×6 in) format, holding 4 to 6 identical portraits.
- Send it to any standard photo-print service, such as CVS, Walgreens, Walmart, Costco or a local lab, as an ordinary 4×6 photo, or upload it to an online print service.
- Costroughly $0.20–$0.35 per sheet, so a few cents per usable portrait.
- Critical settingin the printer dialog choose 100% scale ("Actual Size" or "Original Size") and switch off "Fit to page", otherwise the physical size (2×2 in or 35×45 mm) will be distorted and the print measured with a ruler will fail.
- Home printinga photo-capable inkjet on 200+ g/m² photo paper works, but check colour accuracy. Cheap paper and draft mode produce a colour cast that graders read as "inaccurate colour".
- Trim preciselywith a guillotine cutter or steel ruler; ragged edges and white borders are avoidable reasons for a second visit.
Note that some authorities do not accept home-printed submissions for in-person applications, and GOV.UK warns that home prints are often not clear enough for biometric measurement. Check your country’s rule before buying paper.
Process schematic: creating a passport photo online
| Step | Action | Result |
|---|---|---|
| 1. Upload | Upload or capture the source frame with even lighting and no filters | Source image accepted by the editor |
| 2. AI processing | Face detection, ICAO-aligned crop, background replaced with white | Geometry and background matched to the template |
| 3. Export | Download digital JPEG (300 DPI) or a 10×15 cm PDF sheet | Upload-ready file or print-ready layout |
Baby passport photo editor: preparing a child’s photo
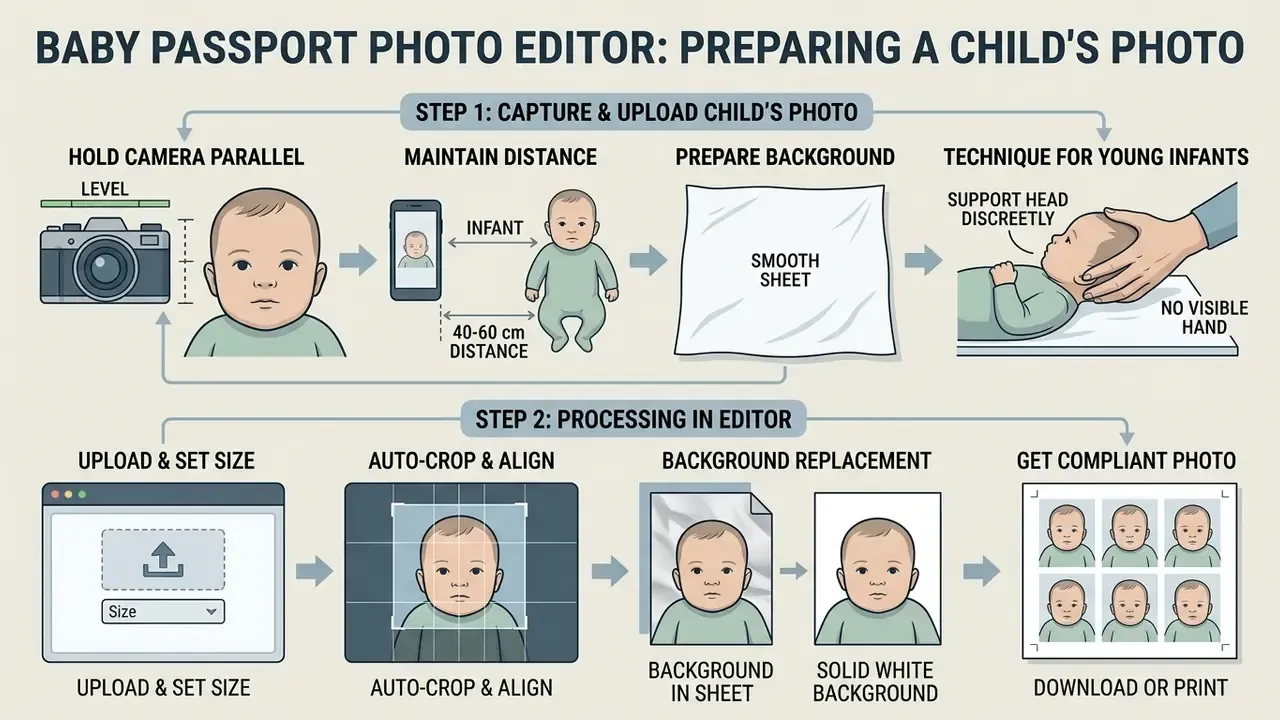
Photographing infants and young children introduces unique operational challenges for identity compliance. Official regulations grant specific allowances for babies while maintaining strict baseline background and face-visibility standards.
How to shoot and upload a child’s photo for processing
Infants who cannot sit upright should be laid on a plain white sheet and photographed from directly above. Alternatively, place the child in a car seat covered completely with an off-white blanket to eliminate background textures. The same lighting logic that governs AI headshot generators applies here: diffuse daylight from a window, no overhead lamp, no flash bouncing off the sheet.
For infants under one year old, rules regarding fully open eyes and neutral expressions are partially relaxed under US guidelines. Children aged five and under are not required to hold a neutral expression or look directly into the lens, but the face must still point forward. No second person, supporting hands, toys or pacifiers may appear anywhere inside the final image frame.
«For children under one year of age, the eyes need not be fully open; place the child on a white sheet or in a car seat covered with a light-coloured cloth.»
Practical shooting notes for overhead captures:
- Hold the camera parallel to the child’s face, directly above the eyes, not at an angle. A tilted lens introduces perspective distortion that automated geometry checks read as an oversized forehead.
- Keep 40–60 cm of distance and use the rear camera; zoom with your feet, not with digital zoom.
- Smooth the sheet. Every fold becomes a shadow line that violates the "plain background" rule.
- A hand may discreetly support the head under US Foreign Affairs Manual guidance, but it must not be visible in the final crop, so leave generous margins for cropping.
- Automated cropping and background filling for infant photos meaningfully reduces the risk of rejection compared with hand-drawn manual cropping, because head-height and margin tolerances of a few millimetres are hard to hit by eye.
One more small thing, learned the hard way by most parents: shoot when the child is fed and calm, not right before a nap. A relaxed baby holds a forward-facing head position for the two or three seconds you actually need.
Free passport photo editors: what to check before using one
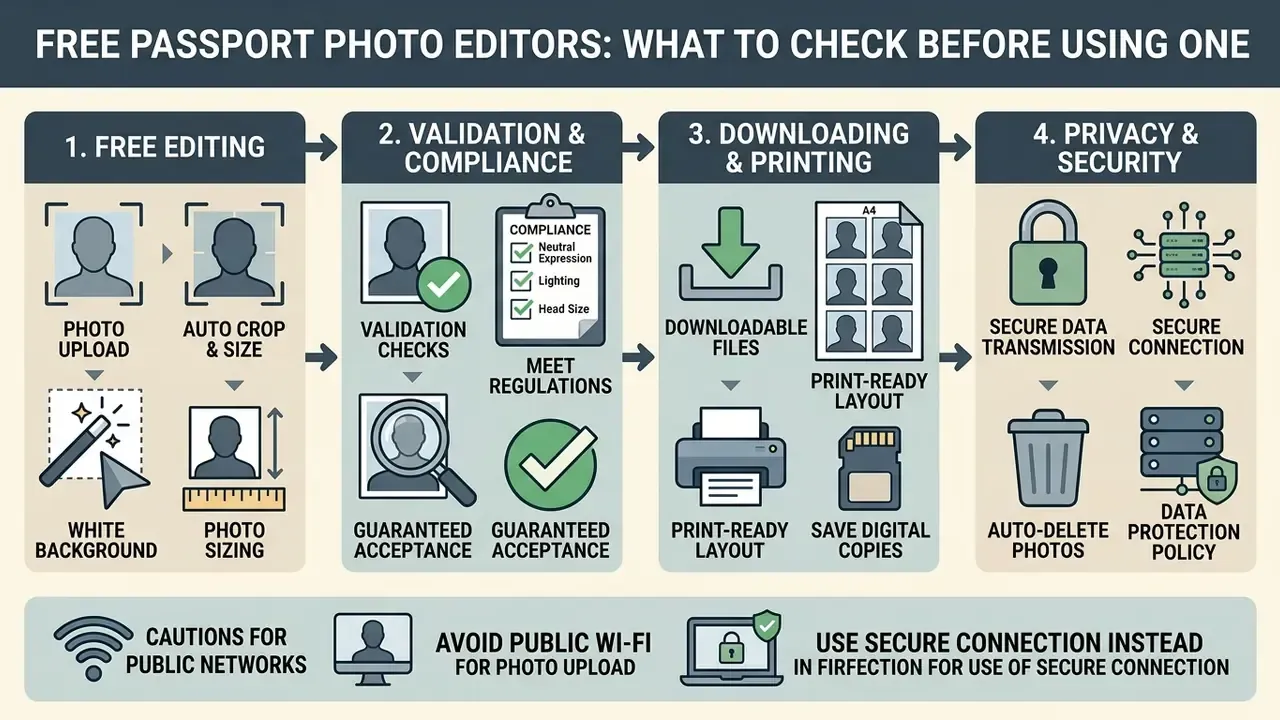
Free web tools let users format identity pictures without buying a complex graphic editing suite. Applicants should evaluate functional restrictions and security policies before uploading personal photographs to external web servers.
Free editing, validation and downloading the result
Basic free tiers usually include manual cropping, automatic face detection and preview generation. Our overview of free photo editors shows the same pattern across categories: geometry is free, automation and high-quality export are monetised. That is true of most services marketed as a free online id photo editor or a free passport size photo editor online, and it is not a scandal, just a business model you should read before you invest twenty minutes in a crop.
Premium upgrades often restrict high-resolution 300 DPI exports, print-ready PDF generation, or automated biometric rule validation behind paid tiers. Where a service caps export resolution, AI image upscalers can raise pixel dimensions to print requirements, but only sharpening and resampling are acceptable, never facial reconstruction, which would breach the "no digital changes" rule.
A realistic expectation of the split:
| Typically free | Typically paid |
|---|---|
| Manual and automatic crop, preview | 300 DPI or print-ready export |
| Face detection and framing guides | PDF sheet layout for 10×15 cm printing |
| Watermarked or low-resolution preview download | Watermark-free high-resolution file |
| Single-country template | Full library of country templates, human compliance review |
Users evaluating platform costs can review AI Media Pricing Guides for structured cost comparisons, and comparing capabilities through AI Media Comparison Matrices helps identify hidden export restrictions before editing. Sizing and print-cost estimates can be sanity-checked with AI Media Calculators. The decisive numbers stay simple, though: a digital passport photo from a commercial service typically costs $6–$17, while printing your own compliant sheet costs cents.
Privacy when uploading a passport photo
Identity photographs contain sensitive biometric data subject to strict data-protection principles under GDPR and NIST guidelines. Web editors should secure user uploads using encrypted Transport Layer Security (TLS 1.3) communication protocols, as recommended in NIST SP 800-52 Rev. 2.
«Modern generative models can produce realistic faces whose synthetic nature is difficult to detect, which pushes regulators to prohibit AI-altered photographs outright.»
If you need to confirm whether an image in your library is a genuine capture rather than a generated portrait, AI image detectors provide a first-pass signal. Useful when several people share a device and a photo folder.
Verify that the platform explicitly publishes its data retention and automatic deletion policies. GDPR Article 17 requires erasure "without undue delay" once the purpose ends, and Article 28 requires processors to delete or return data after processing concludes.
«The European Parliament has proposed absolute bans on several applications of AI facial-recognition systems, including building databases through untargeted scraping of images from the internet.»
Where the boundaries of biometric processing currently sit is still being argued in court, and the running record in AI Litigation and Case Timelines is a reasonable place to watch how those limits move. Compliant tools purge uploaded images from temporary cloud servers shortly after processing; good practice ranges from "deleted at session end" to a maximum of 24 hours.
Safe use on public networks: when using an online editor over public Wi‑Fi (cafés, airports, hotels), confirm the padlock or HTTPS indicator in the address bar. After downloading the finished layout on a shared or borrowed device, clear the browser cache and the Downloads folder so your biometric image does not remain accessible to third parties. Delete both the original upload and the exported file from any device that is not yours.
Enterprise deployment requires verifying terms for official commercial use rights. Teams wiring photo processing into their own portals should document retention periods, encryption in transit and at rest, and the legal basis for processing biometric data before launch; the integration patterns in the AI Media API Guides are a practical starting point for that review.
Checklist: verify the photo before downloading and submitting
| ✔ | Check |
|---|---|
| ☐ | Correct document and country selected (US 2×2 in, Schengen or UK 35×45 mm, Canada 50×70 mm) |
| ☐ | Head occupies 50–69% of frame height (or the national equivalent), with visible space above the crown |
| ☐ | Background fully uniform white or light grey, with no shadows or objects |
| ☐ | Neutral expression, mouth closed, both eyes open and clearly visible |
| ☐ | Glasses removed (unless a documented medical exemption applies) |
| ☐ | Camera was at eye level; portrait mode was disabled; distance 40–50 cm (front) or 1.5–2 m (rear) |
| ☐ | Image sharp, with no pixelation, filters, retouching or red-eye correction |
| ☐ | Resolution at least 300 DPI for print, or 600×600 to 1200×1200 px for US digital upload |
| ☐ | Print sent as a 10×15 cm sheet at 100% scale with "Fit to page" switched off |
| ☐ | Original and downloaded files deleted from any shared device |
FAQ about online passport photo editors
Can I use a selfie for a passport photo?
Official guidance, including the U.S. Department of State, recommends that someone else takes the photo. Selfies distort facial proportions because the lens sits too close, and some consular photo sheets explicitly reject uploaded or printed selfies. If you must self-shoot, keep the front camera at arm’s length (40–50 cm), or better, use a tripod with a 10-second timer and the rear camera at 1.5–2 m.
Is retouching or AI facial processing allowed?
No. Any change to facial features, skin smoothing, beauty filters or generative AI editing is strictly prohibited, and the U.S. Department of State states that photos created or edited with AI are not accepted. Only technical cropping, resizing and replacement of the background with a plain white surface are permitted.
How do I print the finished photo correctly at home or in a shop?
Print the layout file (PDF or JPEG at 300 DPI) on glossy or matte photo paper sized 10×15 cm (4×6 in). Make sure printer scaling is disabled ("Fit to page" or "Scale to fit" off) so the physical dimensions of 2×2 inches or 35×45 mm are preserved. Ordering it as an ordinary 4×6 print typically costs $0.20–$0.35 per sheet instead of $10–$15 for a studio ID package.
Is it safe to upload personal photos to online editors?
Reputable services use TLS encryption and delete uploaded files from their servers within a short window, from minutes to 24 hours. Read the privacy policy before uploading, avoid public Wi‑Fi, and clear the cache and Downloads folder if you work on a device that is not yours.
Which distance and camera should I use?
Front camera: 40–50 cm (16–20 in). Rear camera with a helper: 1.5–2 m (4–6 ft). The rear camera is preferable because it introduces less perspective distortion; keep the lens at eye level in both cases.
Does a free passport photo editor online produce a usable file?
Often yes for geometry, less often for export. A passport photo editor online free tier will typically crop, detect the face and preview the result, then gate the 300 DPI download or the printable sheet. Check the export resolution and the presence of a watermark before you commit to a service.
Do children follow the same rules?
Mostly, with documented relaxations: babies under one year need not have fully open eyes, and children five and under need not hold a neutral expression or look straight at the lens, though the face must face forward. No hands, pacifiers, toys or other people may appear in the frame.
Will a compliant-looking photo definitely be accepted?
No tool can guarantee acceptance. Automated validation reduces geometric and background errors, but a government officer reviews the submission and can request a new photograph. Treat the editor as a compliance assistant, not as an approval.
Further reading and resources
Explore more tooling references in our glossary directory, compare browser-based editing workflows in the online photo editor guide, and review feature caps in the free photo editor guide before choosing a service for your document photo.
Regulatory disclaimer: this article summarises publicly available government requirements for informational purposes and does not constitute legal or immigration advice. Requirements change; always confirm the current specification published by the issuing authority for your document before submitting an application.