Author: Marcus Hale, author. Biography, examples, and results are illustrative and do not describe a real individual, employer, or client.
Last updated: February 2026. Platform dimension presets are reviewed quarterly, because social networks change crop behaviour without notice.
Why should a risk or operations leader care about a resizer? Because uncontrolled image handling is a quiet governance gap. Marketing uploads customer photography to an unvetted site, an onboarding scan lands in a third-party cloud, and nobody logged it. That is Shadow IT wearing a friendly interface.
Executive summary
- Four operations are not interchangeable. Resizing changes the pixel grid, cropping changes the bounding box, compression changes quantization, conversion changes the container. Choosing the wrong one is the single most common cause of avoidable quality loss.
- Lock the aspect ratio, then decide how to fill the gap. When source proportions do not match the target frame, pick deliberately between crop, stretch, blurred bars, letterbox bars, or contain-scale. Never accept single-axis stretching as a default.
- Pixels rule the screen; DPI rules the print shop. Use 72 DPI for web assets, 150 DPI for office documents and posters, 300 DPI for commercial printing, and calculate pixels as inches × DPI.
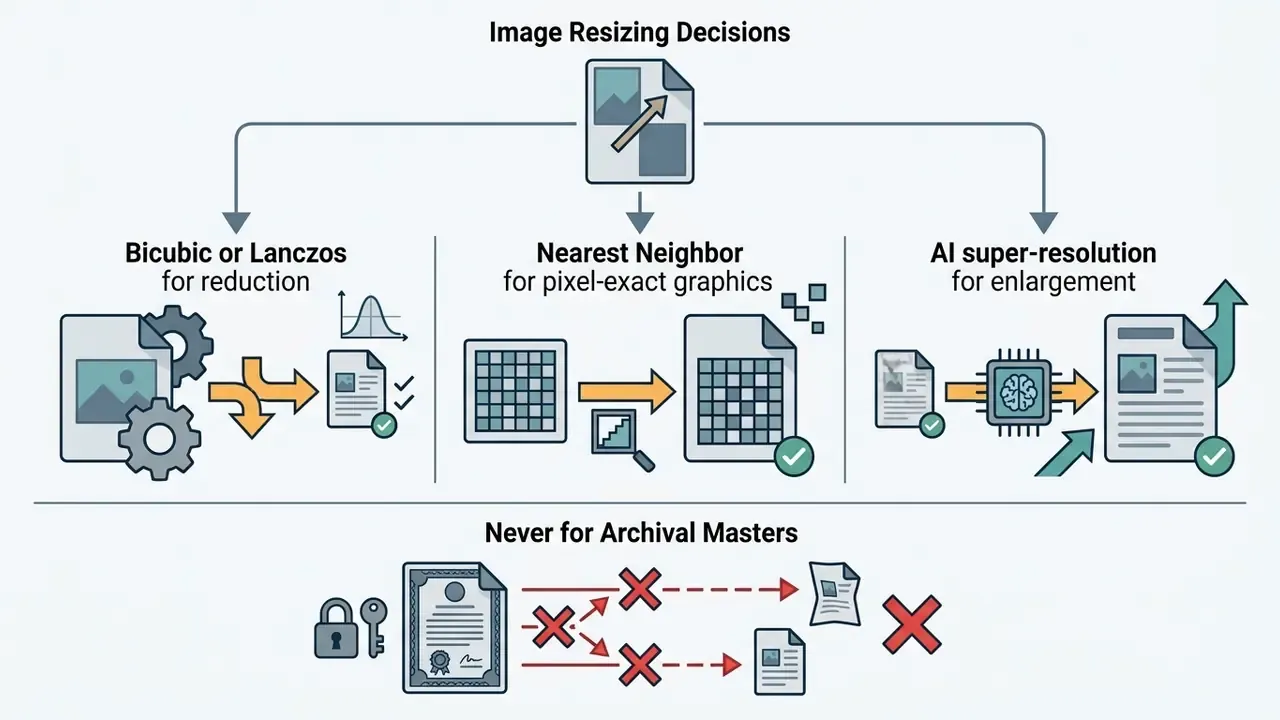
- Downscaling is safe, upscaling is generative. Bicubic or Lanczos resampling handles reduction. Enlargement beyond the native optical resolution requires AI super-resolution and should never be used for master archives.
- Security matters more than convenience. Client-side processing through HTML5 Canvas, Web Workers, and WebAssembly keeps binary payloads inside browser memory. Cloud upload of customer or contract imagery is a Shadow IT event that needs governance.
Who this guide is written for, and what decision it supports
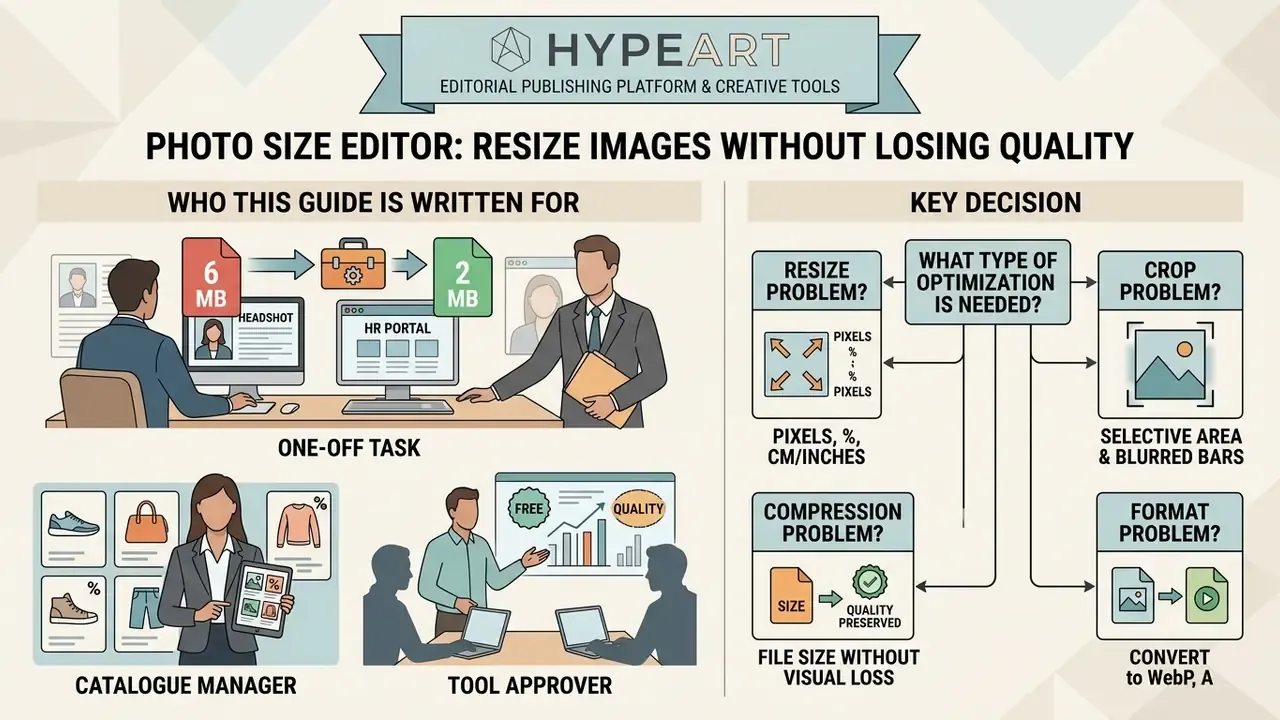
Three groups tend to land on this page, and their questions differ.
The first group is doing a one-off task: a headshot is 6 MB, the HR portal accepts 2 MB, and someone needs to make an image smaller in the next four minutes. For that job, a browser-based free photo size editor is entirely sufficient, and the rest of this guide is optional reading.
The second group runs a catalogue. Hundreds or thousands of product shots, merchant logos, or document scans move through a repeatable pipeline. Here the questions become procedural: which resampling filter, which format, which batch limit, who approved the tool.
The third group signs off on the tool. Risk, compliance, and security leaders need to know whether pixels leave the endpoint, whether uploads feed model training, and whether the vendor can produce an audit trail. If that is you, jump ahead to the procurement checklist and the security matrix; the technical sections give you the vocabulary to challenge a supplier's claims.
One decision frames all three cases: is this a resize problem, a crop problem, a compression problem, or a format problem? Answer that first and most quality complaints disappear.
What a photo size editor can change
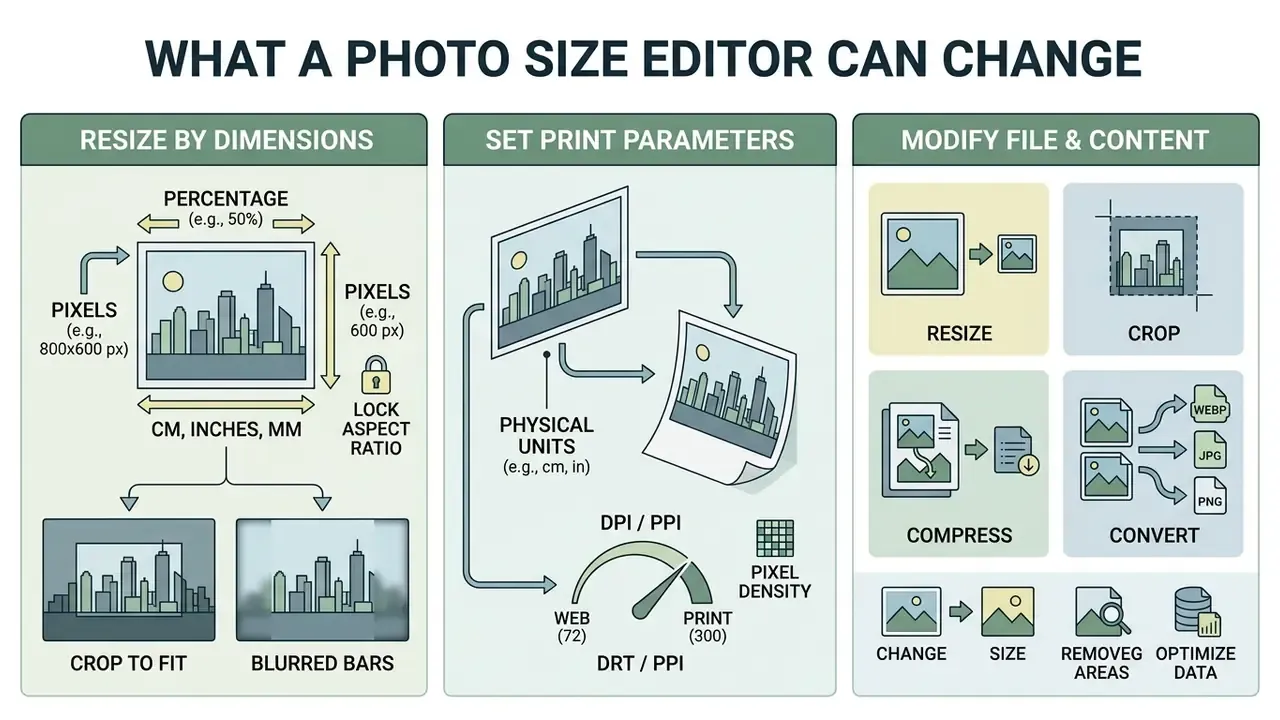
A photo size editor alters physical spatial parameters, file container structures, and pixel density metrics of a digital image file. Core alterations include modifying width and height in pixels, adjusting proportional scale by percentage, setting aspect ratio bounds, and rewriting resolution or DPI metadata. Users routinely confuse geometric resizing with cropping, data compression, or format conversion.
«Conventional compression schemes must limit the compression ratio in order to keep perceived image quality acceptable.»
Geometric resizing changes total pixel count. Cropping alters visual composition. Compression reduces binary weight via quantization. Conversion changes the encoding standard. Treating all four as one undifferentiated "make it smaller" action is exactly what produces blurred logos, banded gradients, and stretched faces in production channels.
| Operation | Primary parameter changed | Effect on dimensions | Effect on file size | Typical effect on quality |
|---|---|---|---|---|
| Resize | Pixel dimensions (width and height) or percentage | Changes width and height directly; can lock aspect ratio | Reduces file size during downscaling; increases size during upscaling | Downscaling removes noise but can clip fine detail; upscaling causes blur unless AI super-resolution is applied |
| Crop | Spatial bounding box (x,y coordinates) | Reduces overall dimensions by removing outer pixels | Decreases file size proportionally to removed pixel count | Retained region keeps original pixel clarity; zero resampling artifacts introduced |
| Compress | Encoding precision and quantization parameters | Dimensions remain unchanged | Decreases binary file weight | High compression introduces blocking or banding; moderate lossy settings remain visually lossless |
| Convert | Container format and codec structure | Dimensions remain unchanged | Depends on target format efficiency (for example JPG to WebP) | Lossless formats maintain exact quality; lossy conversions depend on encoding quality parameters |
Read the table as a decision aid, not a ranking. There is no "best" operation, only the one that matches the outcome you were asked to deliver.
Resize by pixels, percentage and dimensions
Resizing by pixels, percentage, or specific dimensions adjusts the total pixel grid of an image size using target spatial values. Entering precise numeric values into a photo pixel size editor sets exact horizontal and vertical boundaries for production specs. Percentage scaling instead applies a uniform mathematical scalar across both axes: a 50% reduction of a 4000 × 3000 px source yields exactly 2000 × 1500 px. When operating an online photo dimension editor, keeping proportional constraints on means that changing the horizontal value automatically recalculates the vertical one, which prevents visual distortion across web interfaces.
Implementations differ in how they resolve conflicts, and this detail bites people. Some tools accept a single dimension (for example 300x or x150) and derive the second axis from the source ratio. Others force both values and pad the difference with whitespace. A few silently stretch. Confirm the behaviour of your photo resize editor before batch-processing a catalogue, because a silent stretch applied to 400 product photos costs far more to fix than to prevent.
A small habit helps here. Test the tool on three deliberately awkward files first: a very wide banner, a tall portrait, and something already smaller than the target. The way a photo editor and resizer handles those three tells you almost everything about its defaults.
Set physical units (cm, inches, mm) and target DPI for print
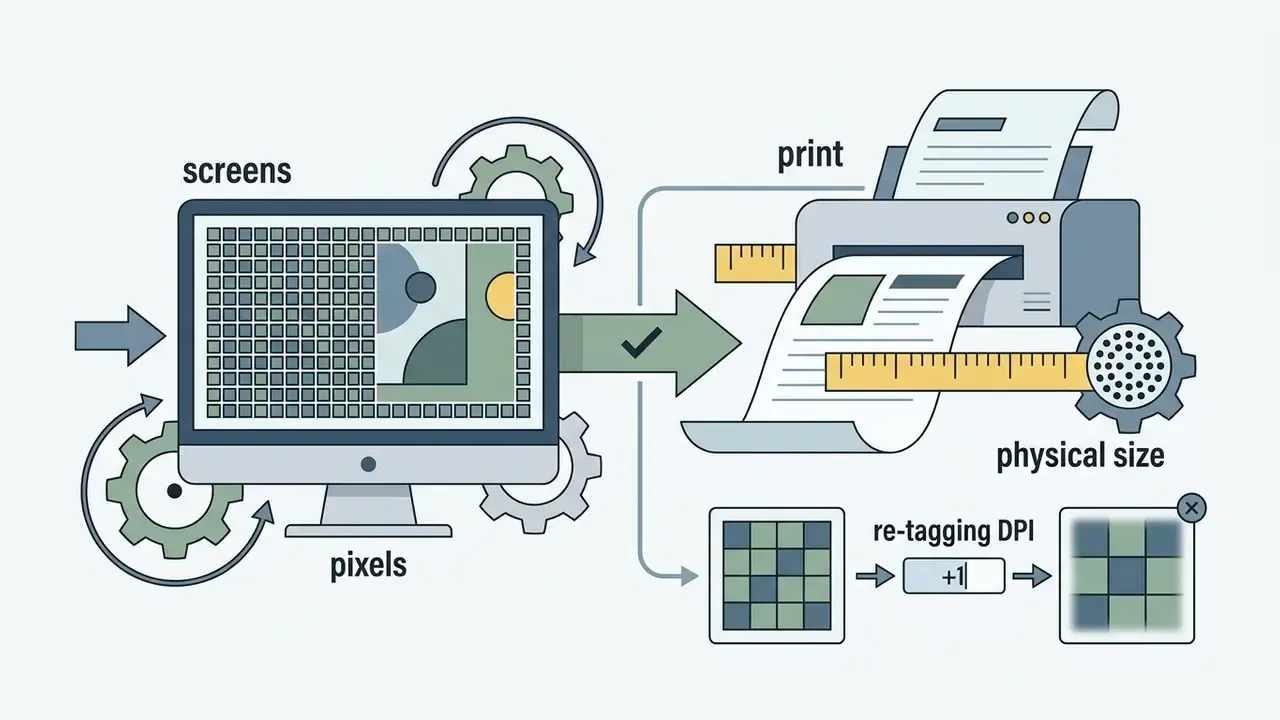
Standard web displays calculate scale using raw pixel grids, regardless of metadata. Preparing graphics for physical media is a different discipline: you set density in DPI (dots per inch) alongside spatial measurements in centimeters, inches, or millimeters. Use 72 DPI exclusively for digital web assets to minimise file weight. For physical production, apply 150 DPI for desktop documents, internal reports, and large-format posters viewed at distance, or 300 DPI for high-resolution commercial printing and brochures.
Setting print dimensions in inches automatically recalculates pixel count using the formula Pixels = Inches × DPI. A 5 × 7 in print at 300 DPI therefore needs 1500 × 2100 px of genuine optical detail. Professional photo resolution editor interfaces allow DPI values anywhere between roughly 10 and 1200, but arithmetic never creates information. If the source file holds only 900 × 1200 px, tagging it as 300 DPI simply declares a smaller physical print area.
| Output target | Recommended density | Example physical size | Required pixel grid |
|---|---|---|---|
| Web page, email, social feed | 72 DPI | Screen-relative | Match CSS layout width (× device pixel ratio) |
| Office document, internal deck | 150 DPI | A4 (8.27 × 11.69 in) | ≈ 1240 × 1754 px |
| Large-format poster (viewed at distance) | 150 DPI | 24 × 36 in | 3600 × 5400 px |
| Commercial brochure, packaging | 300 DPI | 8.27 × 11.69 in (A4) | ≈ 2480 × 3508 px |
| Photo print | 300 DPI | 4 × 6 in | 1200 × 1800 px |
Resize, crop, compress and convert: what is the difference
The fundamental difference between resizing, cropping, compressing, and converting lies in whether pixel geometry, frame composition, data density, or file encoding is altered. Using a photo editor and resizer modifies total spatial pixel dimensions (width × height). Cropping isolates a specific frame area and discards peripheral pixels without resampling the remaining content. Compressing reduces stored byte volume by optimizing encoding or quantization levels while keeping the original pixel dimensions intact. Converting changes file formats, for instance transforming JPG files to PNG or WebP, to adjust transparency support or compression efficiency. Understanding these distinctions prevents unnecessary quality loss during production asset preparation.
«PNG is the most widely used raster format on the web, followed by JPEG and SVG, while WebP is promoted as an efficient JPEG replacement.»
Practical outcomes make the boundaries obvious. Cropping a 400 × 400 px subset out of a 4000 px master keeps every retained pixel untouched. Resizing that same master to 300 × 200 px resamples every pixel in the frame. Re-encoding a JPEG at quality 50 leaves the grid alone but rewrites the frequency coefficients. Converting JPEG to WebP swaps the codec while preserving the geometry exactly.
To analyze full tool feature sets, pricing models, and desktop versus web capabilities, consult our comprehensive AI Media Glossary and the dedicated overview of AI photo editors.
How to resize an image online in three steps
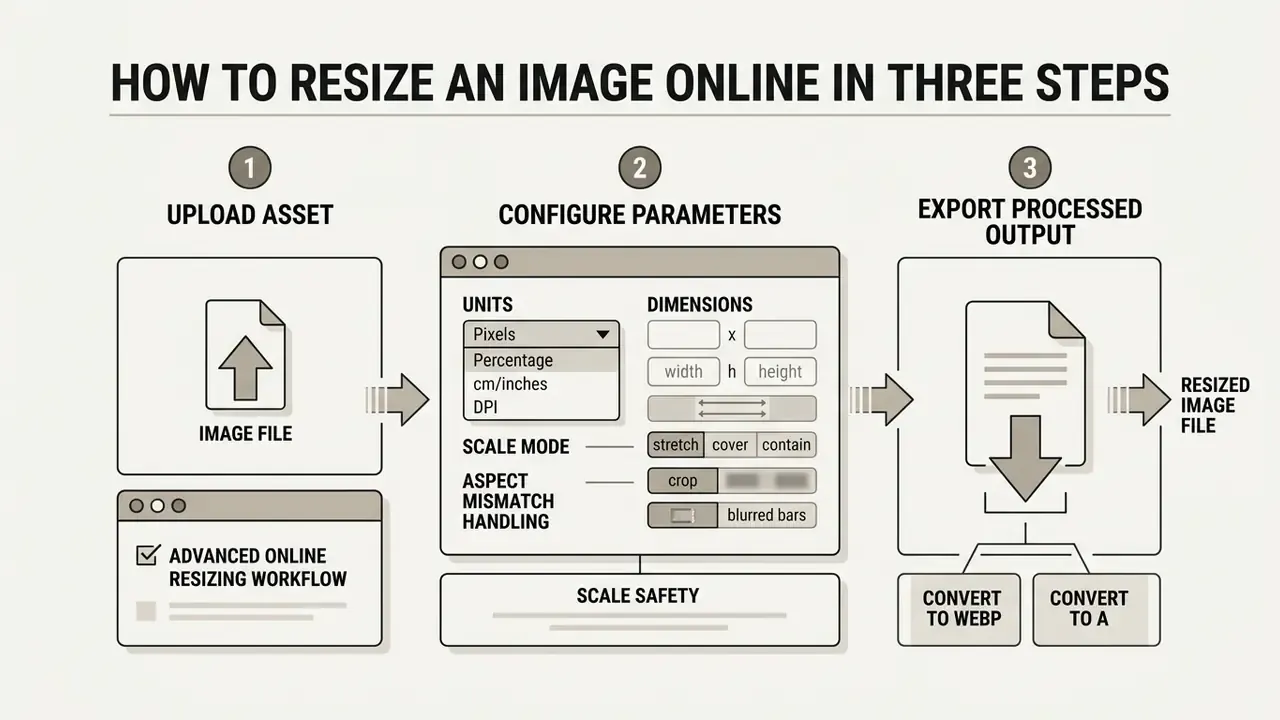
Resizing an asset online involves three operational steps: upload the file, configure scale parameters, export the processed output. Standard web tools accept common raster formats and handle spatial transformations using browser-side processing or cloud infrastructure. A direct execution sequence enables fast delivery and prevents unexpected visual distortion. W3C mobile guidance adds a useful rule: resize at the source and declare dimensions in markup, because pre-sized assets cut transferred bytes and device processing instead of forcing the browser to rescale on arrival.
Upload the image and choose a resize method
To start, upload images online by selecting local files or dragging assets straight into the photo resize editor workspace. Modern web services support drag-and-drop ingestion alongside cloud storage imports, including direct pickers for Google Drive and Dropbox that avoid the download-then-reupload round trip. Once the file is ingested, choose between exact pixel entry, percentage scaling, or platform-specific presets.
Percentage scaling applies a scalar reduction across both axes. Entering exact values into a photo dimension editor online forces precise horizontal and vertical dimensions for strict layout compliance. Device presets cover most responsive delivery cases in one click: email (768 px), tablet (768 px), desktop (1920 px), mobile (320 px). For a quick one-off task, that single click is the whole workflow, which is why a free image resizer still wins on speed.
Check quality and download the new file
Before saving, review the transformed output inside the preview frame to verify visual sharpness and structural integrity. A capable photo editor resizer shows a real-time side-by-side comparison of the scaled output against the original source file.
«Diffusion-based assessment models establish a clear correspondence between image reconstruction behaviour and quality scores without any reference image.»
Confirm that edge sharpness stays crisp, colour accuracy holds, and no aliasing artifacts appeared. Inspect the three areas that fail first: fine text, high-contrast diagonal edges, and smooth sky or gradient regions where banding shows up. Then select the target file format, apply the appropriate compression factor, and download the processed asset to local storage or an enterprise repository.
One caution from experience. Reviewing a downscaled asset at 200% browser zoom tells you nothing useful; check it at the size the audience will actually see. For automated cleanup of soft or noisy source material before scaling, review our overview of AI image enhancers.
How to preserve image quality when resizing photos
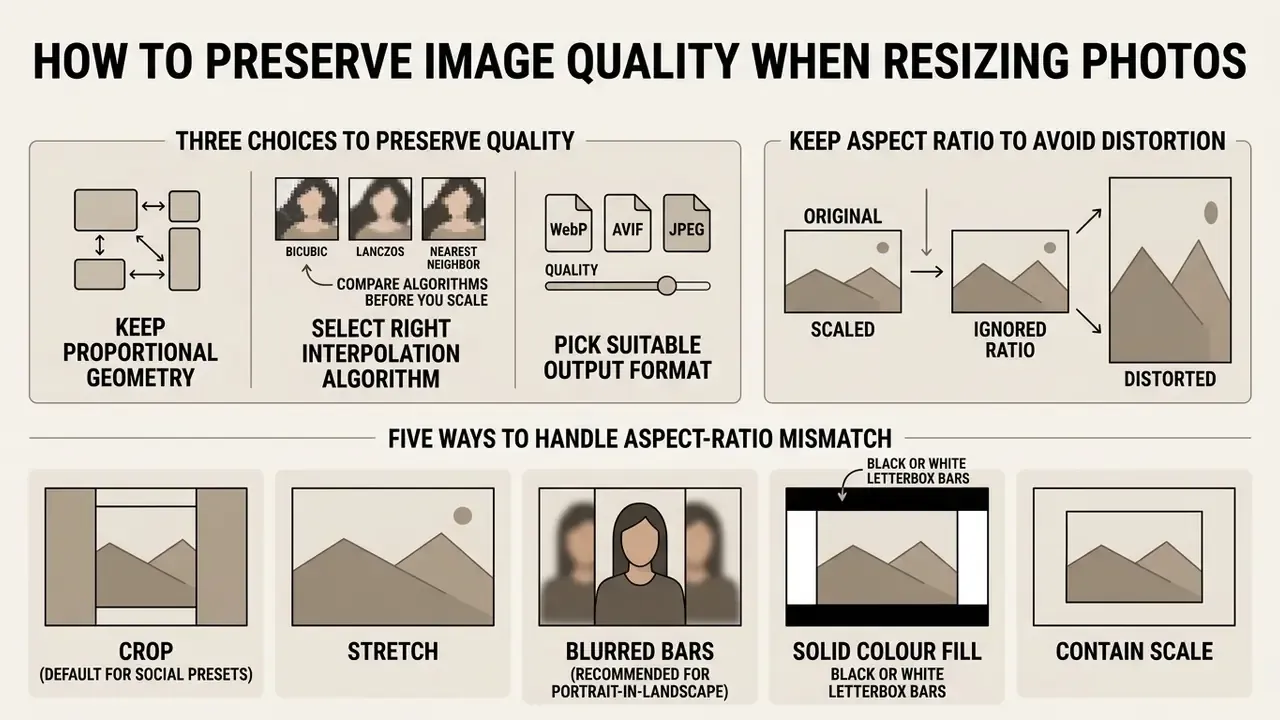
Preserving quality during resizing comes down to three choices: keep proportional geometry, select the right interpolation algorithm, pick a suitable output format. Downsampling reduces total pixel count and can even sharpen an image by suppressing high-frequency noise. Upsampling is a different animal, since it requires generating spatial data that was never captured, which puts it closer to synthesis than to scaling. That is where AI image upscalers outperform classic filters.
«Combining aggressive compression and resolution reduction with deep-learning super-resolution reduces transmission latency and energy consumption by up to 10%.»
Standard technical guidelines from the National Archives and Records Administration and the Federal Agencies Digital Guidelines Initiative specify native optical capture and forbid artificial upscaling for master archives, while explicitly permitting high-quality interpolation such as bicubic resampling when generating web-delivery derivatives. NARA's Guidelines for Digitizing Archival Materials for the National Archives of the United States (1998) states that interpolating a lower-resolution scan upward "shall not be permitted" for master capture, and names bicubic interpolation as the acceptable method for resizing large access files from those masters (https://www.archives.gov/). FADGI's Technical Guidelines for Digitizing Cultural Heritage Materials (2023) lists "adjust size, scaling, and spatial resolution" as a controlled digitisation step rather than an ad-hoc resize (https://www.digitizationguidelines.gov/).
The governance principle transfers directly to commercial asset libraries: capture once at maximum genuine resolution, derive everything else. Master files stay untouched. Derivatives are disposable and reproducible.
Compare interpolation algorithms before you scale
The resampling method determines how missing or surplus pixels get calculated. NIST's comparative study of downsampling and upsampling methods (1998) remains the baseline technical reference for these trade-offs (https://nvlpubs.nist.gov/). Selection depends on whether you are reducing, enlarging, or preserving hard pixel boundaries.
| Algorithm | Sampling behaviour | Best use case | Failure mode |
|---|---|---|---|
| Nearest neighbour | Copies the closest source pixel, no blending | Pixel art, QR codes, screenshots of UI grids, indexed icons | Severe jaggedness and aliasing on photographic content |
| Bilinear | Weighted average of 4 neighbouring pixels | Fast previews, thumbnails, real-time canvas rendering | Noticeable softening; weak at large reduction ratios |
| Bicubic | Weighted cubic function across 16 neighbouring pixels | General-purpose downsampling and archival derivative generation (the NARA-named method) | Mild halo or ringing on very high-contrast edges |
| Lanczos (sinc-windowed) | Higher-order kernel across a wider pixel neighbourhood | Maximum-detail downscaling of detailed photography and print-to-web conversion | Visible ringing on hard graphic edges; slower computation |
| AI super-resolution (diffusion or GAN) | Learned generative reconstruction of missing detail | Enlargement beyond native resolution, restoration of degraded or legacy assets | Hallucinated texture; unsuitable for evidentiary or archival masters |
Two operational rules follow. Apply anti-aliasing before large reductions. And never chain multiple lossy resize-and-save cycles on the same JPEG, because each generation re-quantises the previous generation's artifacts. The damage compounds quietly.
Keep the aspect ratio to avoid distortion
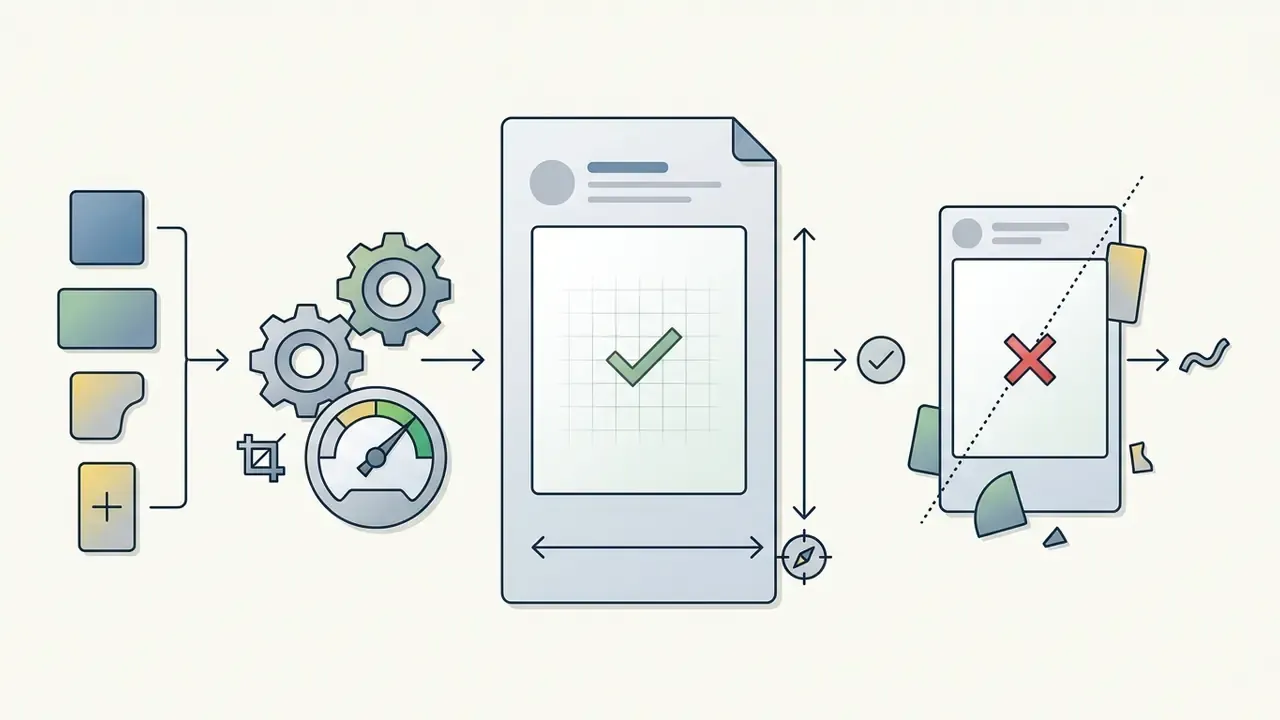
Locking the aspect ratio prevents geometric distortion by holding a fixed mathematical proportion between width and height. Stretching along a single axis alters object proportions, and viewers notice immediately, especially on faces and logos.
«Remote quality-assessment testing confirms that geometric distortion is perceived as severe quality degradation regardless of resolution.»
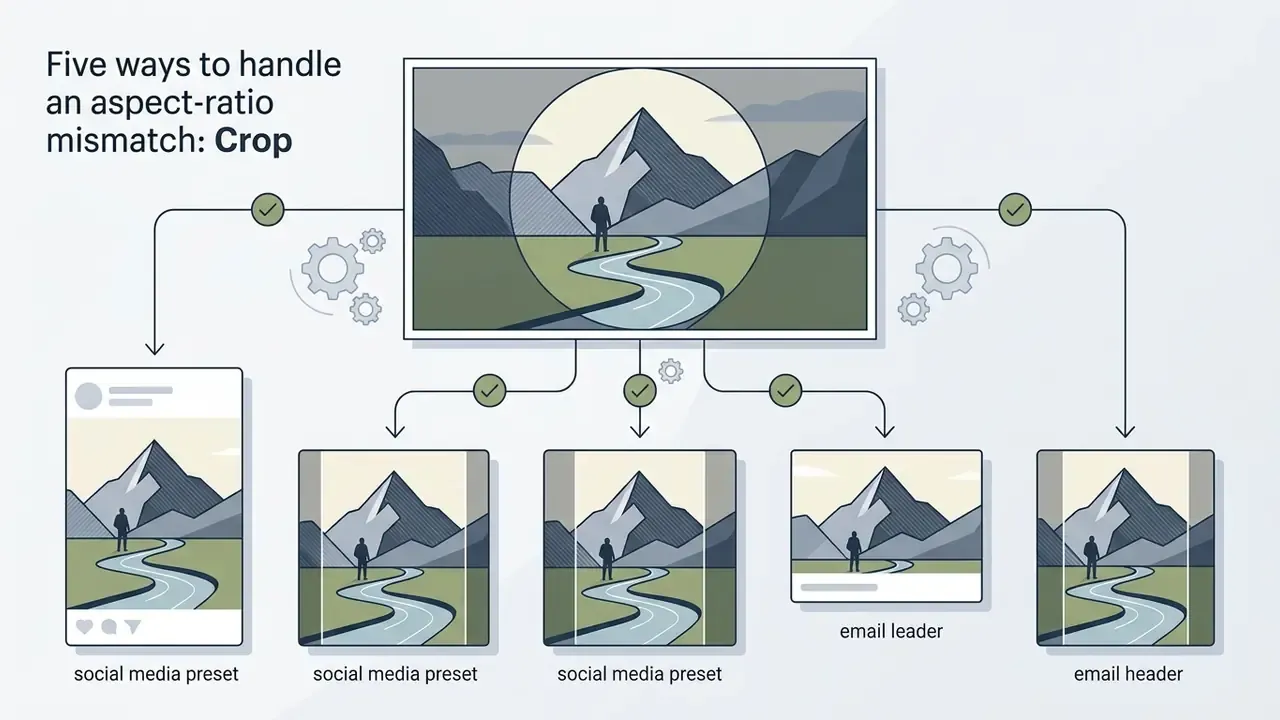
Microsoft's Win32 imaging documentation frames the same rule for developers: scale an image to fit the display area while preserving the original aspect ratio, and treat single-axis stretching as a deliberate, distorting exception. When target layout containers demand a different ratio than the source file, crop instead of stretching, or expand the canvas generatively with AI outpainting tools when peripheral content must survive. Scaling the image down to fill the target boundary and cropping the remaining overflow preserves structural integrity without distorting the original geometry.
Five ways to handle an aspect-ratio mismatch
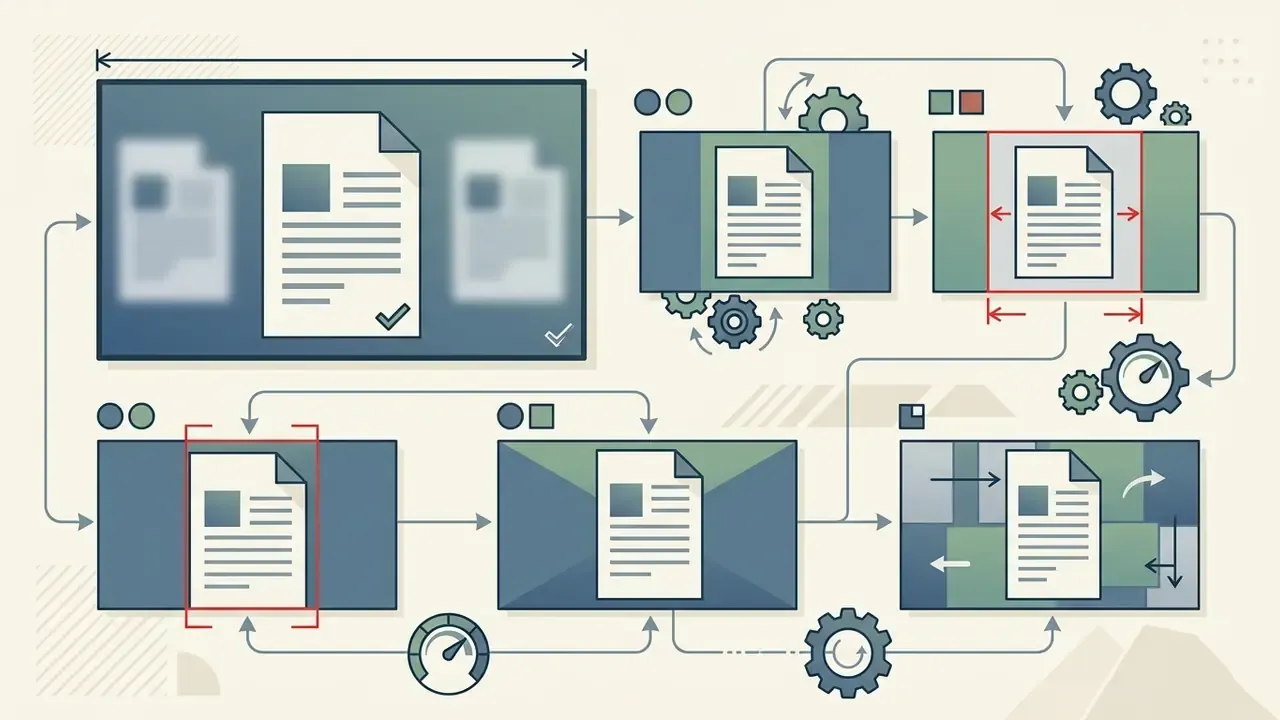
When the target frame does not match your source ratio, choose one of five spatial fitting behaviours rather than accepting the tool's default:


| Fit mode | Content loss | Distortion | Typical channel |
|---|---|---|---|
| Crop | Yes (edges) | None | Instagram feed, LinkedIn cards, thumbnails |
| Stretch | None | High | Textures, background fills |
| Blurred bars | None | None | Reels and Shorts covers, portrait video frames |
| Letterbox bars | None | None | Product catalogues, PDF documentation |
| Contain | None | None | Email templates, transparent PNG placements |
Choose JPG, PNG, WebP or AVIF for the resized image
Choosing between JPG, PNG, GIF, WebP, and AVIF depends on source complexity, transparency requirements, and the byte budget. JPG uses lossy compression best suited to photographic content, achieving high compression ratios with minimal perceived quality loss when the quality factor stays between 75 and 85, as defined by the JPEG standard ISO/IEC 10918-1:1994 (https://www.iso.org/standard/18902.html). Pushing quality above roughly 85 grows the file quickly with almost no perceptual gain. PNG uses DEFLATE lossless compression, preserving sharp graphic edges and supporting multi-level alpha transparency, per the W3C PNG Recommendation and ISO/IEC 15948:2003 (https://www.w3.org/TR/PNG/). GIF relies on indexed 8-bit palettes with binary-only transparency, which makes it efficient for simple animation and poor for continuous-tone photography.
«Comparative web-data analysis shows PNG is the most widespread raster format, JPEG holds second place, and GIF persists for animation.»
Modern web publishing means evaluating next-generation formats alongside the traditional three. WebP provides stronger lossy and lossless compression, delivering file sizes materially smaller than comparable JPG assets while holding visual fidelity, and it supports full alpha transparency. AVIF goes further using AV1 intra-frame encoding, which suits high-density mobile sites and hero imagery where every kilobyte affects Largest Contentful Paint. Use PNG exclusively when alpha transparency or pixel-perfect text rendering is required. Convert legacy Apple HEIC camera files to WebP or JPG during the resize step for cross-platform compliance. And drop unneeded alpha channels during conversion, since a redundant transparency layer inflates non-transparent web assets for nothing.
Fact check and technical evidence verification
For detailed encoding comparisons, consult our breakdown of JPEG vs PNG compression artifacts, or follow the step-by-step walkthrough on optimizing web images for Core Web Vitals.
Photo dimensions for social media, devices and web use
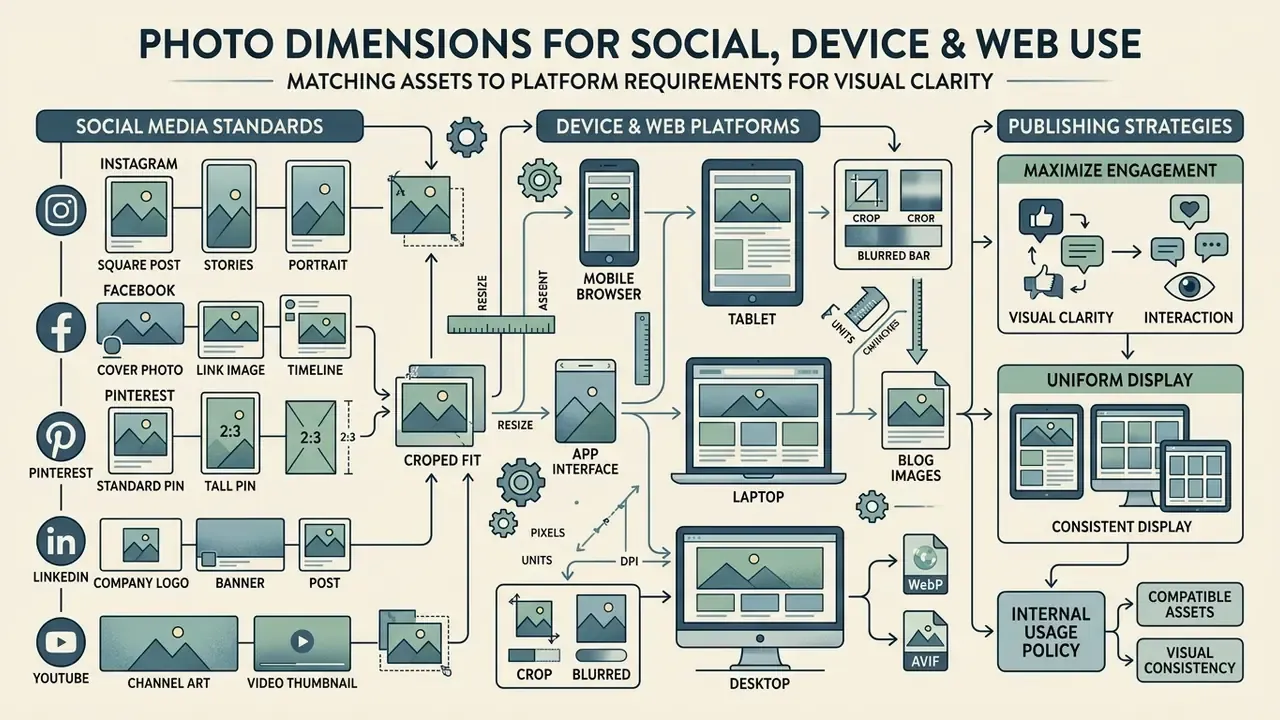
Digital publishing platforms mandate specific asset dimensions and aspect ratios to keep display uniform across mobile devices and desktop browsers. Treat their published numbers as a moving target; they change, sometimes without an announcement.
«Image delivery systems generate derivative variants at multiple sizes for different screens and pixel densities, adapting quality to device capability.»
Standardizing asset specs before upload stops platforms from applying automated centre-cropping or destructive re-compression on your behalf. Across every major network in 2026, the safest baseline stays a 1080 px width with mobile-first 4:5 and 9:16 ratios.
| Platform / surface | Recommended dimensions (px) | Aspect ratio | Primary use case and crop behaviour |
|---|---|---|---|
| Instagram feed | 1080 × 1350 (portrait), 1080 × 1080 (square) | 4:5, 1:1 | Maximizes vertical mobile screen real estate; grid view crops the preview to a centre 1:1 square |
| Instagram Stories / Reels | 1080 × 1920 | 9:16 | Full-screen vertical display; keep text and key UI elements clear of the top and bottom 15% margins |
| Facebook feed / link share | 1080 × 1350 (post), 1200 × 630 (link) | 4:5, 1.91:1 | Standard mobile feed post; link previews crop automatically around the centre visual focus |
| LinkedIn posts and banners | 1080 × 1350 (post), 1584 × 396 (profile banner), 1512 × 256 (page cover) | 4:5, 4:1, 5.9:1 | Banners scale dynamically on desktop; mobile browsers truncate horizontal banner edges |
| X / Twitter post | 1200 × 675 | 16:9 | Fills the timeline preview card without cropping; profile images 400 × 400 |
| YouTube thumbnail / Shorts | 1280 × 720 (thumbnail, 640 px minimum width), 1080 × 1920 (Shorts), 2560 × 1440 (channel banner) | 16:9, 9:16, 16:9 | Standard 720p HD video cover; text must stay legible at small mobile scale |
| Pinterest pins | 1000 × 1500 (standard), 1080 × 1920 (Idea Pin) | 2:3, 9:16 | Standard vertical pin layout; taller ratios get truncated in mobile feeds |
| Responsive web (device presets) | 1920 (desktop), 768 (tablet and email), 320 (mobile) | Layout-dependent | Serve via srcset; multiply by 2× or 3× for high-DPI screens |
Resize images for Instagram, Facebook and Pinterest
To maximise engagement and visual clarity on Instagram, Facebook, and Pinterest, scale assets to native vertical ratios before publishing. A vertical 4:5 portrait (1080 × 1350 px) on Instagram and Facebook occupies noticeably more physical screen space on mobile than a square or landscape asset. Some 2026 guides list Instagram portrait posts at 1080 × 1440 px (3:4); the discrepancy reflects feed-crop versus profile-grid treatment, so keep critical subject matter inside a central safe zone that survives both interpretations. Honest caveat: neither number is guaranteed to hold through the year.
Pinterest standard pins want a 2:3 ratio (1000 × 1500 px), and assets taller than that risk automated feed truncation, while Idea Pins follow full-screen 1080 × 1920 px. Always crop original files to the target ratio before downscaling, which avoids accidental single-axis stretching. Teams working without a paid licence can prepare these variants with the tools covered in our review of free photo editors.
Set image size for LinkedIn, YouTube and mobile
Configuring exact media specifications for LinkedIn, YouTube, and mobile web surfaces means accounting for dynamic layouts and high-density Retina displays. Personal LinkedIn banners need 1584 × 396 px, company pages need 1512 × 256 px plus a 400 × 400 px logo. YouTube video thumbnails should be 1280 × 720 px at 16:9 with a minimum width of 640 px, and some 2026 guidance additionally recommends keeping a 3840 × 2160 px source for future-proof scaling. For responsive mobile deployment, developers use HTML srcset and sizes attributes to serve 2x and 3x variants matched to device pixel density, without pushing unnecessary bytes to standard displays.
«DREAM, a diffusion-based super-resolution model, achieves 2 to 3× faster training convergence and 10 to 20× fewer sampling steps while preserving high quality.»
Illustrative case, regional financial institution (hypothetical composite, not a documented client engagement). A regional bank updated its mobile banking interface and needed crisp merchant logos across account management screens. The team deployed a client-side downsampling script using HTML5 Canvas to reduce source files to exact 2x Retina dimensions (120 × 120 px) with bicubic interpolation. The implementation preserved edge sharpness on high-density screens and removed cumulative layout shift. The project's own build report recorded a 74% reduction in the merchant-logo bundle weight; that figure was not independently audited and should be read as illustrative. The same pipeline enforced a "do not enlarge if smaller" rule, so low-resolution legacy logos were flagged for redesign instead of being silently upscaled into mush.
Static imagery rarely travels alone. If the same campaign also needs motion assets, plan them in one pipeline rather than three: our comparison of AI image generators covers synthetic stills, the guide to video compressors handles delivery weight for the moving half, and the vertical-format workflow in our tiktok video maker overview reuses the same 9:16 safe zones described above. Teams building short-form tributes or event recaps can borrow the ratio logic from our tribute video maker walkthrough, while deck-ready visuals follow the sizing conventions in the tome ai presentation guide.
Two adjacent categories are worth flagging for anyone drafting an internal usage policy, because they raise likeness and rights questions that a resizer never does. Music generation workflows, covered in our notes on the timbaland ai artist case and the topmediai ai music toolset, and synthetic-likeness generators such as the trump ai generator category, sit in a materially higher risk tier than dimension editing. Resizing a photo changes pixels. Generating a public figure's face or voice changes your legal exposure.
Free photo size editor versus paid editor features
Choosing between a free online photo size editor and a paid enterprise platform depends on processing volume, automation needs, and whether the work has to run programmatically. Basic web editors handle reliable single-file operations. Premium software unlocks high-volume batch runs, generative tooling, and API integration.
| Functional scenario | Free editor capabilities | Paid / enterprise capabilities | Recommended tool selection |
|---|---|---|---|
| Single image resizing | Complete support for custom pixel dimensions, percentage scaling, and aspect locking | Identical execution; may add saved workspace presets | Free tool sufficient. Basic web tools execute single-file changes efficiently |
| Batch asset processing | Client-side browser batches up to RAM limits (commonly a few dozen files; some tools cap free batches at 3 to 10) | Parallel cloud queues, unlimited bulk runs, automated folder watching | Paid tool required for enterprise bulk publishing pipelines |
| Social media templates | Static dimension presets for major platforms | Dynamic auto-resizing across all platform variants at once, with smart re-framing | Paid tool recommended for cross-channel marketing operations |
| AI super-resolution upscaling | Basic 2x/4x upscaling with daily credit limits or browser-based interpolation | Generative fill, object removal, diffusion super-resolution, unconstrained processing | Paid tool required for severe enlargement or restoration of degraded sources |
| Metadata and privacy controls | Manual EXIF stripping, one file at a time | Policy-enforced metadata removal, audit logs, private processing mode | Paid tool required where geotag leakage is a compliance risk |
| Workflow API integration | Not available in browser-based interfaces | Full REST API access, webhooks, SDKs, custom CDN optimization rules | Paid tool required for automated app or CMS workflows |
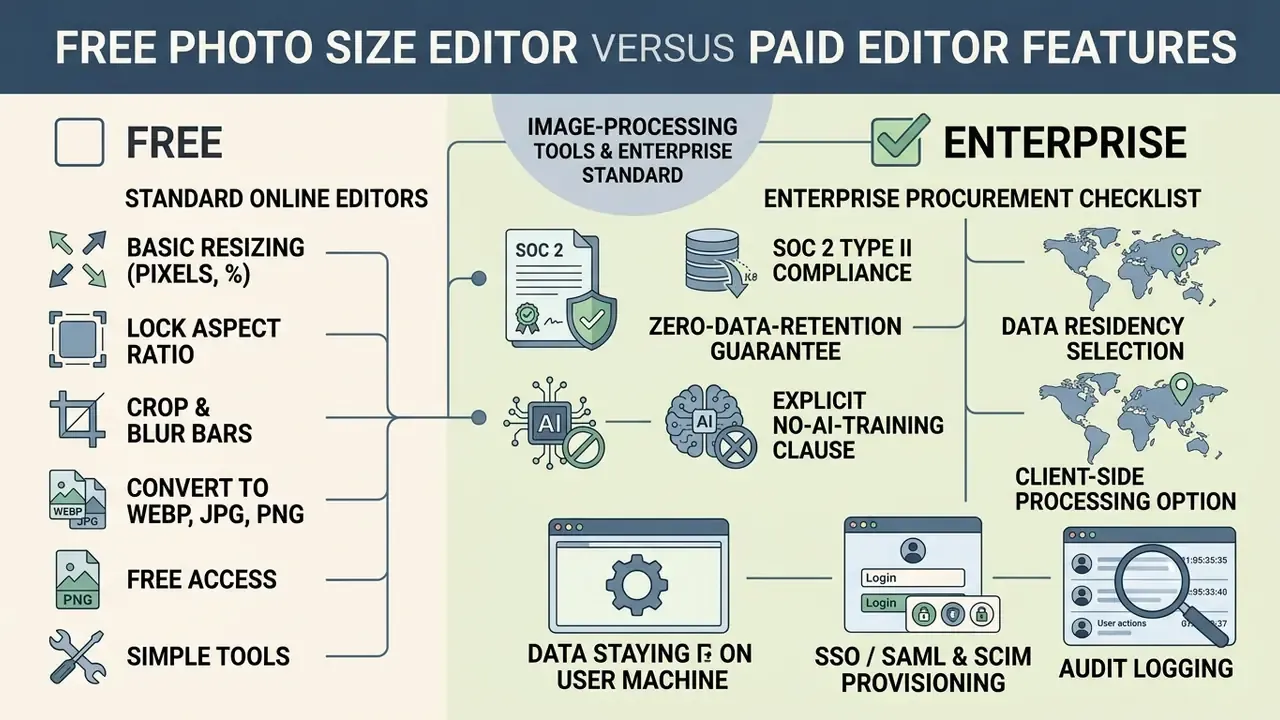
«Invertible neural networks allow images to be downscaled while retaining auxiliary latent variables that later restore a high-quality original.»
Single-file adjustments are handled perfectly well by a photo size editor free tool running inside the browser. Teams processing large catalogues, or wiring image adjustments into a software pipeline, need dedicated platform software or a documented API instead. Check current tier limits on our pricing documentation page, and compare the wider market in our overview of online photo editors.
Enterprise procurement checklist for image-processing tools
Before approving any resizing tool for a regulated environment, verify these ten criteria. Free consumer tools rarely satisfy more than three of them, which is fine for a public banner and unacceptable for a signed contract scan.
- SOC 2 Type IIor equivalent ISO/IEC 27001 certification, with a current dated report.
- Zero-data-retention guaranteewritten into the contract rather than the marketing page, including a stated deletion window and sanitization method.
- Explicit no-AI-training clausecovering uploaded customer imagery and any derived embeddings.
- Data residency selectionso processing stays inside the required jurisdiction.
- Client-side processing optionfor the highest-sensitivity asset classes.
- SSO / SAML and SCIM provisioningto eliminate shared logins and orphaned accounts.
- Audit loggingof uploads, transformations, and exports, exportable to the corporate SIEM.
- API SLAwith documented uptime, rate limits, and incident-response commitments.
- Sub-processor registernaming every CDN, storage, and inference vendor in the chain.
- Metadata handling policyconfirming automatic EXIF and geotag stripping on export.
Assign one accountable owner per approved tool. Without a named owner, the control list is decoration. To model infrastructure costs and optimization trade-offs, use our interactive AI Media Calculators.
Enterprise security, privacy and Shadow IT controls
| Processing model | Where the file travels | Residual risk | Suitable asset classes |
|---|---|---|---|
| Client-side (Canvas, WASM, Web Workers) | Nowhere. Decoded in browser memory on the employee device | Local malware, unmanaged endpoint, browser extension access | Customer imagery, internal documents, unreleased assets |
| Cloud processing with encrypted transit and stated deletion | Vendor infrastructure over HTTPS/TLS; deleted after a declared window | Retention drift, sub-processor exposure, log copies | Public marketing assets, already-published imagery |
| Cloud processing with unclear terms or AI-training rights | Vendor infrastructure, potentially retained for model training | Loss of confidentiality and potential regulatory breach | None in a regulated environment |
| Approved internal service or API | Corporate VPC with audit logging and SSO | Misconfiguration, insufficient access review | All classes, subject to classification policy |
Three controls close most of the gap. First, publish an approved-tools list, so teams do not improvise under deadline pressure at 6 p.m. Second, prefer browser-local processing for anything above the "public" classification tier, and verify the vendor's claim by watching network activity in developer tools, because a genuinely local resizer issues no upload request at all. Third, mandate EXIF and geotag stripping on export, since camera metadata routinely carries GPS coordinates, device serials, and author names that nobody intended to publish.
«Semantic communication frameworks show that image preprocessing, including resizing and compression, can be integrated into protected transmission pipelines without harming downstream tasks.»
Sanitization expectations should reference a recognised baseline. NIST SP 800-88 Rev. 1 defines media sanitization as rendering data unrecoverable and remains the common contractual reference point, although its official page records withdrawal on 26 September 2025 (https://csrc.nist.gov/publications/detail/sp/800-88/rev-1/final). NIST's own site privacy language reflects the complementary retention principle: submitted information is destroyed once the purpose is fulfilled, unless statute requires longer retention. Where a vendor cannot articulate an equivalent commitment in writing, treat the tool as unsuitable for anything beyond already-published marketing material.
For enterprise security standards, compliance workflows, and copyright litigation developments around digital assets, review our updates on AI Litigation and Case Timelines.
FAQ about online photo size editors
Can I resize multiple images online at once?
Yes. Browser-based batch processing handles multiple assets in a single pass. Modern web applications use HTML5 Canvas, Web Workers, and WebAssembly (WASM) to run parallel downsampling tasks locally inside browser memory. Vendor documentation for browser-side resizers describes worker pools processing files in parallel, with device RAM as the practical ceiling, and Dynamsoft's client-side resize documentation confirms selectable interpolation algorithms (nearest neighbour, bilinear, bicubic, best quality) in the same execution model. That architecture lets you queue a large set of images online, apply uniform dimensional parameters or percentage scaling, and export the finished queue as one ZIP archive without sending raw files across external network channels. Published caps vary by tool, with several browser resizers documenting around 100 files per batch. Hosted free tiers are usually stricter, sometimes limiting free batches to 3 to 10 images.
Is it safe to upload photos to an online editor?
It is safe when the platform runs client-side JavaScript or enforces strict server-side controls. Local browser tools process image data entirely in device RAM without transmitting binary payloads to a remote server. When using a cloud service, verify HTTPS/TLS on the connection and confirm that the privacy policy mandates file destruction immediately after processing, ideally against a recognised sanitization baseline such as NIST SP 800-88 Rev. 1 (https://csrc.nist.gov/publications/detail/sp/800-88/rev-1/final). Confirm separately that uploaded images are excluded from AI training datasets, and strip EXIF metadata before sharing anything externally. The enterprise security section above holds the full risk matrix.
How do I resize an image without losing quality?
Downscaling preserves perceived quality, because the tool discards pixels the display cannot show anyway. Degradation shows up when you enlarge past the source resolution. Keep enlargement factors modest, use bicubic or Lanczos for reduction, avoid repeated lossy save cycles, and switch to AI super-resolution only when you genuinely need more pixels than the camera captured. Enabling a do not enlarge if smaller option protects mixed batches from accidental upscaling, which is the most common cause of a soft logo in a finished deck.
How do I make an image small enough for an upload limit?
Reduce dimensions first, then compress. That order matters. If a portal accepts 2 MB and your file is 6 MB at 6000 px wide, resizing to the 1200 px the portal actually displays will usually solve it before compression is even needed. To make an image smaller without visible loss, downscale to the required display width, then step JPEG or WebP quality down from 85 until you clear the limit.
Can I resize an image to an exact file size in kilobytes?
Yes, though strictly speaking that is a compression task rather than a resize task. Cut pixel dimensions first to the largest size the layout truly needs, then step the JPEG or WebP quality parameter down until the byte target is met, typically somewhere between quality 60 and 85. Moderate downscaling plus moderate compression beats aggressive compression alone, every time.
Can I use a photo editor resizer on mobile?
Yes. A photo size editor online free tool runs directly in mobile browsers on iOS and Android. Modern web image editors ship as Progressive Web Apps (PWAs) with responsive touch interfaces, and MDN documents PWA file_handlers plus LaunchQueue, so an installed app can open user-selected files by MIME type. Mobile browsers reach the photo gallery or camera through standard HTML controls, with the optional capture attribute for direct camera use. That means you can scale, crop, and convert assets on a phone without installing a native package. Explore mobile-capable options in our guide to the AI photo editor category.
Does changing DPI reduce my file size?
No. Editing the DPI tag rewrites metadata, not pixels, so the byte weight barely moves. File size follows pixel count and encoding quality. If your goal is a lighter file, change dimensions or compression; if your goal is a correct print size, change DPI and check that the pixel grid still supports it. For platform comparisons, developer implementation guides, enterprise integration models, and commercial usage frameworks, explore our AI Media Comparison hub, read our AI Media API Guides, or visit the AI Media Commercial-Use Hub. If you hit execution errors or processing limits, consult AI Media Support and Troubleshooting.
Key takeaways for technical asset optimization
- Distinguish the core operations.Match each transformation to the outcome you were asked for. Geometric resizing adjusts spatial dimensions, cropping refines framing, compression reduces byte size, conversion changes container compatibility.
- Lock proportions.Preserve the original aspect ratio when scaling. For mismatched containers, choose consciously between cropping overflow, blurred bars, or letterbox padding, never a single-axis stretch.
- Align format to content.Export continuous-tone photography as JPG, WebP, or AVIF at quality 75 to 85. Reserve PNG for sharp vector edges and multi-level transparency, and convert HEIC on ingest.
«Diffusion-based no-reference IQA models tested on seven public datasets outperform previous-generation methods in correlating predicted scores with human subjective judgement.»

Limitations and open questions
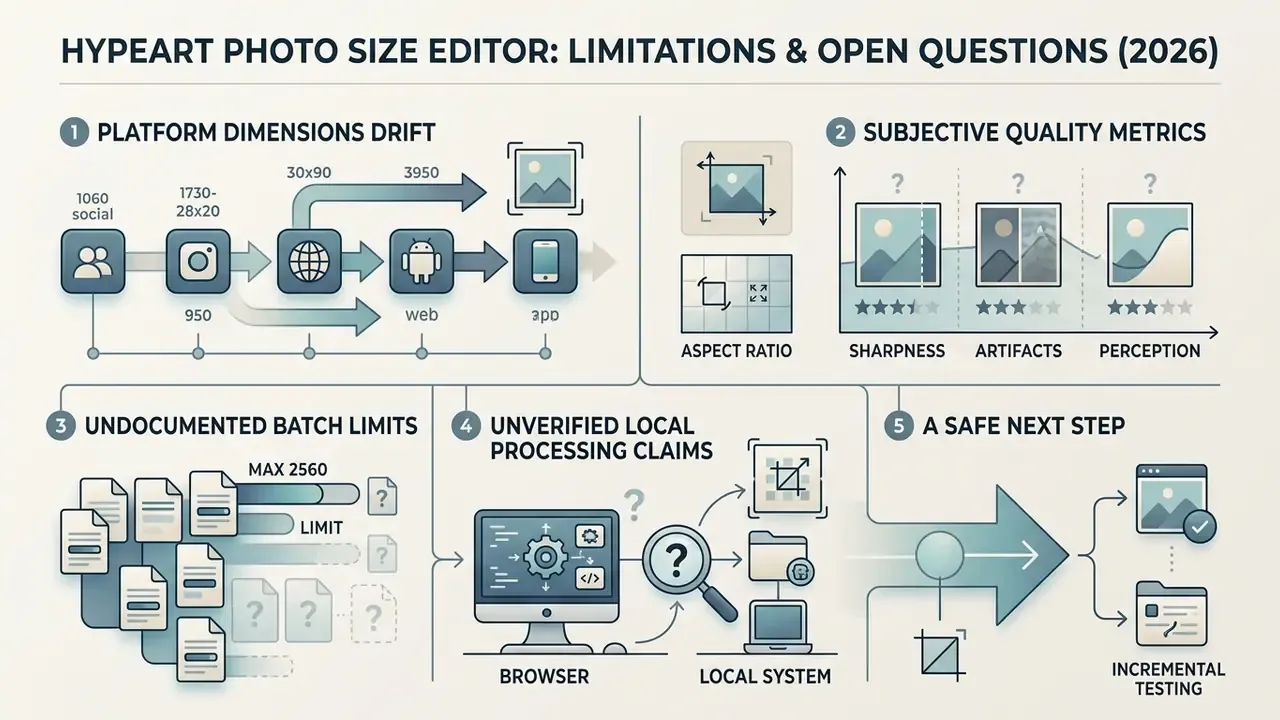
A few things in this guide are less settled than the tables suggest, and it is worth saying so plainly.
Platform dimensions drift. Instagram's portrait guidance has already split between 4:5 and 3:4 depending on which surface you read. Treat every number in the social table as a February 2026 snapshot, verify against the platform's current help centre before a large campaign, and design assets with a central safe zone that survives an unannounced crop change.
Quality metrics remain partly subjective. No-reference IQA models correlate well with human judgement on public datasets, but they were not trained on your product photography or your brand's tolerance for softness. Automated scoring supports human review; it does not replace it.
Batch limits are undocumented more often than not. Published caps around 100 files, or free-tier caps of 3 to 10, come from individual vendor documentation rather than any standard. Measure the real ceiling on your own hardware before committing a catalogue migration to a browser tab.
Vendor claims about local processing need verification. "Files never leave your device" is a marketing sentence until you confirm it in the network panel. This is a one-minute check that most teams skip.
A safe next step. Pick one asset class, ideally something public and low-risk such as blog header images. Document the target dimensions, format, resampling method, and export settings for that class alone. Run it for a month, log the exceptions, then extend the standard to the next class. Small, reversible, auditable. That beats a pipeline-wide policy nobody follows.
Appendix A: superseded formulations retained for transparency
Related hubs: AI Media Glossary | Online Photo Editors | JPEG vs PNG | Web Image Performance