Editing decides whether your footage communicates anything at all. Two people can film the same tutorial; the one with tighter pacing and readable captions keeps viewers three minutes longer. So when you ask how to edit videos on YouTube, the real question is narrower: what belongs in the browser, and what has to happen in a proper video editor before upload?
That split matters more than software brand loyalty. YouTube Studio is a repair kit. Everything structural, pacing, order, B-roll, sound design, happens earlier.
What You Need to Know in 60 Seconds
- Yes, you can edit an uploaded video. YouTube Studio lets you trim, cut internal segments, blur faces, swap audio and add end screens without changing the URL, view count or comments. It cannot add new footage, reorder clips or grade colour.
- Anything structural happens before upload. Use an external editor: YouTube Studio Editor for quick fixes, CapCut or Clipchamp for fast AI-assisted cuts, DaVinci Resolve when you want free and professional in the same sentence, Premiere Pro or Final Cut Pro for full control.

Who This Guide Is For
This guide assumes you already have footage and a channel, and you want a repeatable editing process rather than a one-off rescue. Three reader profiles keep showing up in our support inbox.
The first is a creator who published something with a stray phone number on screen and needs a post-upload fix in five minutes. The second is a small brand team, maybe a jewelry or skincare shop, building a weekly upload rhythm and wondering whether free video editing software is genuinely enough. The third is a solo educator who films long explainers and keeps losing viewers at minute two.
All three need the same map: what the platform can do, what third party editors do better, and which export numbers actually matter. That is the order below.
Can You Edit Videos on YouTube After Uploading?
YouTube allows creators to edit existing videos directly in the browser through YouTube Studio without changing the video URL, view count, or user comments. This built-in functionality removes the need to delete and re-upload content when minor adjustments or privacy edits are required after publishing.
Does YouTube let you edit videos after they are published? Yes, but inside clear functional boundaries. The browser-based youtube video editor lets you trim the beginning or end of an upload, cut out unwanted middle segments, blur faces or sensitive custom areas, swap background audio with tracks from the YouTube Audio Library, and attach end screens. It does not support adding new video footage, reordering separate video clips, or applying advanced multi-track visual edits to an already uploaded video file. Creators who need those capabilities, or who want to automate parts of assembly, often compare the best AI video generators and dedicated editors before committing to a pipeline.
How to Open the Editor in YouTube Studio
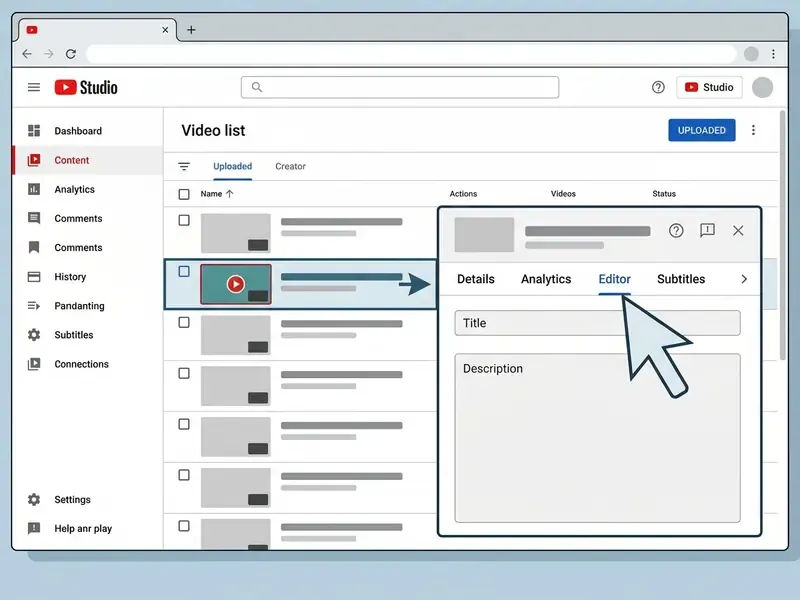
Sign in to your youtube channel, click your profile picture in the top right corner and open YouTube Studio. From there: select Content in the left navigation menu, click the video title or thumbnail you want to modify, then choose Editor in the left panel.
Once opened, the YouTube Studio Editor displays a visual timeline containing video, audio, blur, and end screen tracks. You can review your video content directly on the timeline, set trim boundaries, or click New Cut to select and erase specific internal segments. Additional controls include Trim & cut, Audio, Blur (face blur or custom blur), End screen and Preview. When the edit looks right, click save and confirm the change so processing can begin. If the edit is triggered by a copyright claim, the same panel exposes See details → Take action → Trim out segment / Replace song / Erase song, followed by a generated preview before you save.
One caution from experience: processing is not instant on long uploads. A 40-minute video can sit in "processing edits" for a while, and the old version may keep serving to some viewers in the meantime. Plan the fix before, not during, a launch.
What YouTube Studio Can and Cannot Edit
YouTube Studio supports essential post-upload modifications: trimming edges, cutting internal sections, blurring specific faces or coordinates, adding royalty free audio, and managing end screens. It cannot layer multiple video tracks, resequence clips, perform colour grading, or insert new footage.
| Feature Category | Supported in YouTube Studio Editor | Requires External Video Editor |
|---|---|---|
| Trimming & Cutting | Start/end trimming, middle cut removal | Re-sequencing separate clips |
| Audio Adjustments | Replace/add YouTube Audio Library tracks | Multi-track audio mixing & custom voiceovers |
| Privacy & Blurring | Automatic face blur, custom area blur | Advanced object tracking & visual masking |
| On-Screen Elements | End screens (for videos of 25 seconds or longer), info cards | Custom graphics, animated titles & lower-thirds |
| Footage Insertion | Not supported | Adding new video files or B-roll footage |
Bridge to the next section. Everything above is triage: it fixes mistakes that already exist in a published file. Every structural decision, pacing, narrative order, B-roll placement, captions, music, has to be made before you press upload. That is why the rest of this guide moves backwards through the pipeline, starting with what you do before a single clip touches the timeline. Readers who want an expanded walkthrough of platform-native tooling can also follow our YouTube Video Editor workflow guide.
Plan Your YouTube Video Before You Start Editing
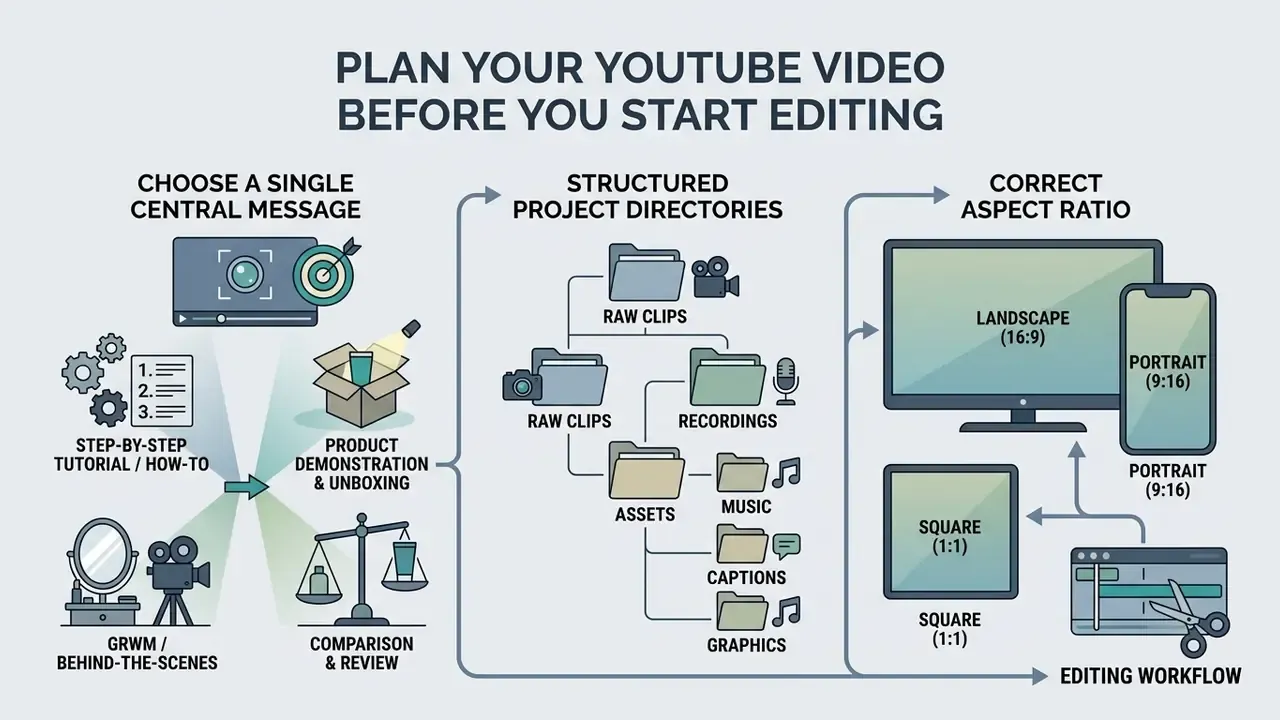
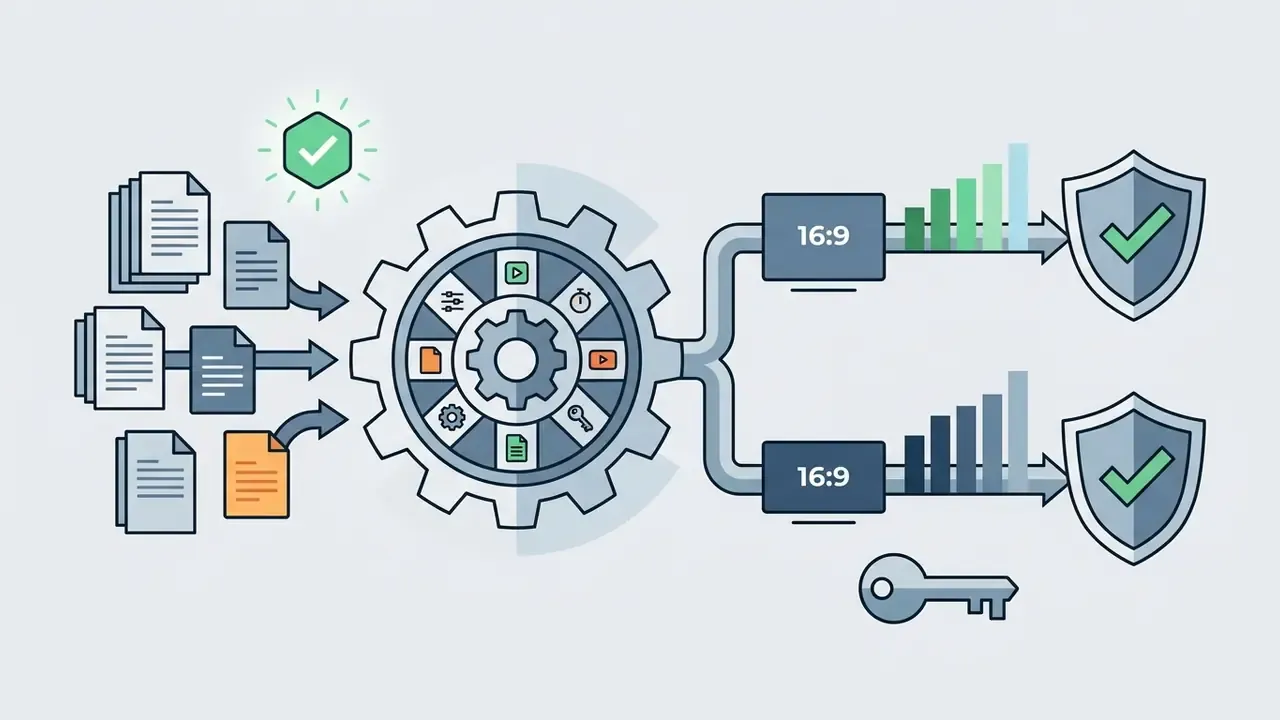
Planning a video before post-production means three things: a single central message, media assets sorted into structured project directories, and the correct aspect ratio chosen for your target format. Prepare footage properly and you cut the editing process roughly in half. Skip it and you spend an evening hunting for one clip.
Choose the Main Message and Keep the Video Focused
Focusing video content on a single core message prevents viewer distraction and keeps the narrative legible from the opening seconds. Every scene, visual clip, and spoken sentence should push the same point forward.
«Videos divided into three or four segments average 233–262 views, while single-segment videos average only 62 views.»
Research on video structure backs the instinct. That study of educational video engagement compared segmented and unsegmented uploads across a channel sample and found that mid-length videos split into three or four distinct segments averaged 233 to 262 views, against 62 views for single-segment uploads. Clear structural markers keep viewers oriented, and they make it far easier to delete irrelevant scenes during cutting, because you can see which segment a scene belongs to.
Pick a proven format before you shoot. Most successful YouTubers use a small set of repeatable structures rather than reinventing the format each week:
- Step-by-Step Tutorial / How-ToSolves a single problem in chronological steps, for example a fabric company teaching one sewing technique.
- Product Demonstration & UnboxingHighlights physical features, setup and real usage. A skincare brand walking through a cleanser, serum and moisturiser routine; a jewelry brand revealing branded packaging.
- Get Ready With Me (GRWM) / Behind-the-ScenesBuilds personal connection through casual storytelling while a process runs on camera.
- Comparison & ReviewEvaluates competing solutions against repeated criteria, so viewers can predict the format and stay for the verdict.
Person-on-the-street segments tied to your niche work as a fifth, lighter format, and they generate strong B-roll variety almost for free. Once the concept is chosen, write a brief script or sketch a storyboard scene by scene, and fix the storyboard frame to 16:9 for standard uploads or 9:16 for short-form. Confirm that camera batteries, props and any external microphone are ready before you press record. Sounds obvious. It is also the most common reason a shoot day gets rescheduled.
Production tip (take logging). Record more footage than you think you need, because trimming excess is far cheaper than discovering a missing shot. During filming, keep a take log note, or use a physical cue such as clapping twice near the microphone right after a good take. That habit lets you find the best A-roll clips on the timeline later without re-watching every failed attempt. Capture deliberate B-roll too: exteriors, product close-ups, process details. Those cutaways are what hold attention during long explanations.
Organize Raw Clips, Recordings and Assets
Sorting video clips, audio recordings, graphic files, and background music into dedicated project folders before you import them prevents broken file links and speeds up timeline assembly.
A standardized asset directory should separate source media by type:
/FOOTAGEfor raw camera recordings, screen captures, and mobile video files./AUDIOfor voiceover tracks, sound effects, and background music files./GRAPHICSfor image files, logos, lower-thirds, and visual overlays./EXPORTSfor finished renders prepared for YouTube upload.
Create named bins inside your editing software that mirror these external folders. Then copy every file into the project folder before importing. Linking to media that still lives on a memory card or in Downloads is the single most common cause of offline-media errors mid-edit, and it always happens at the worst moment.
How to Edit YouTube Videos Step by Step
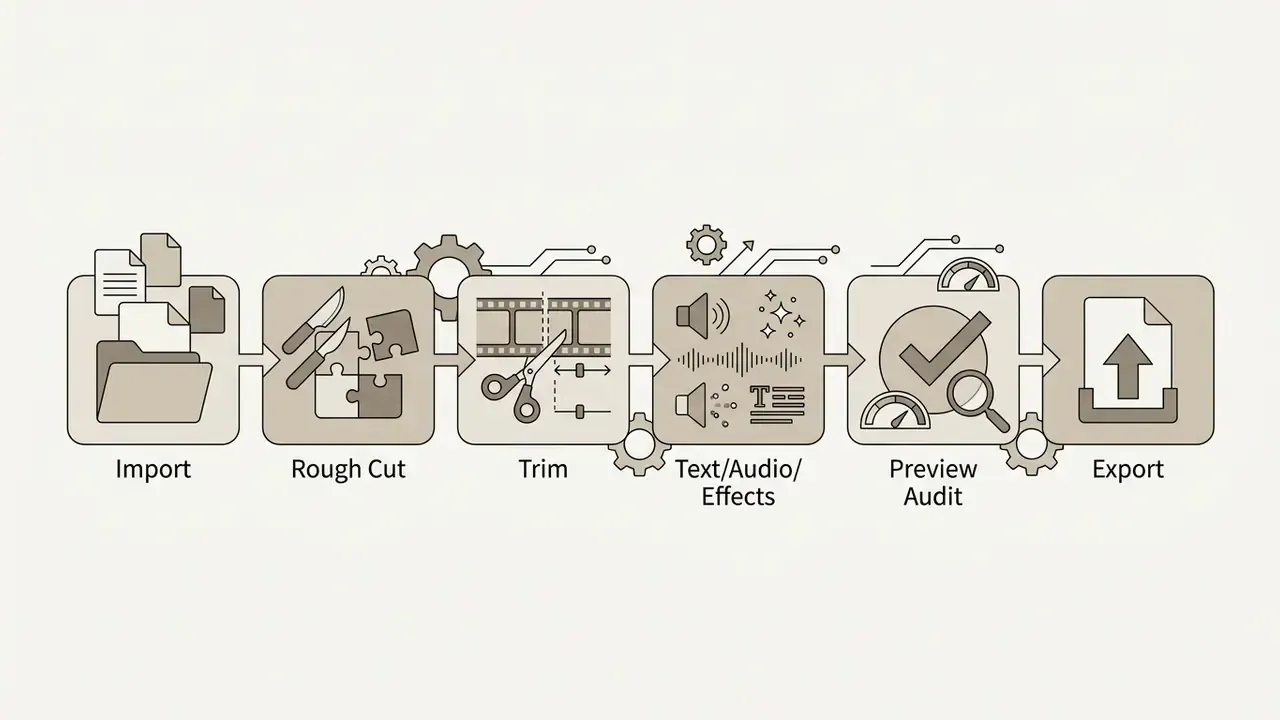
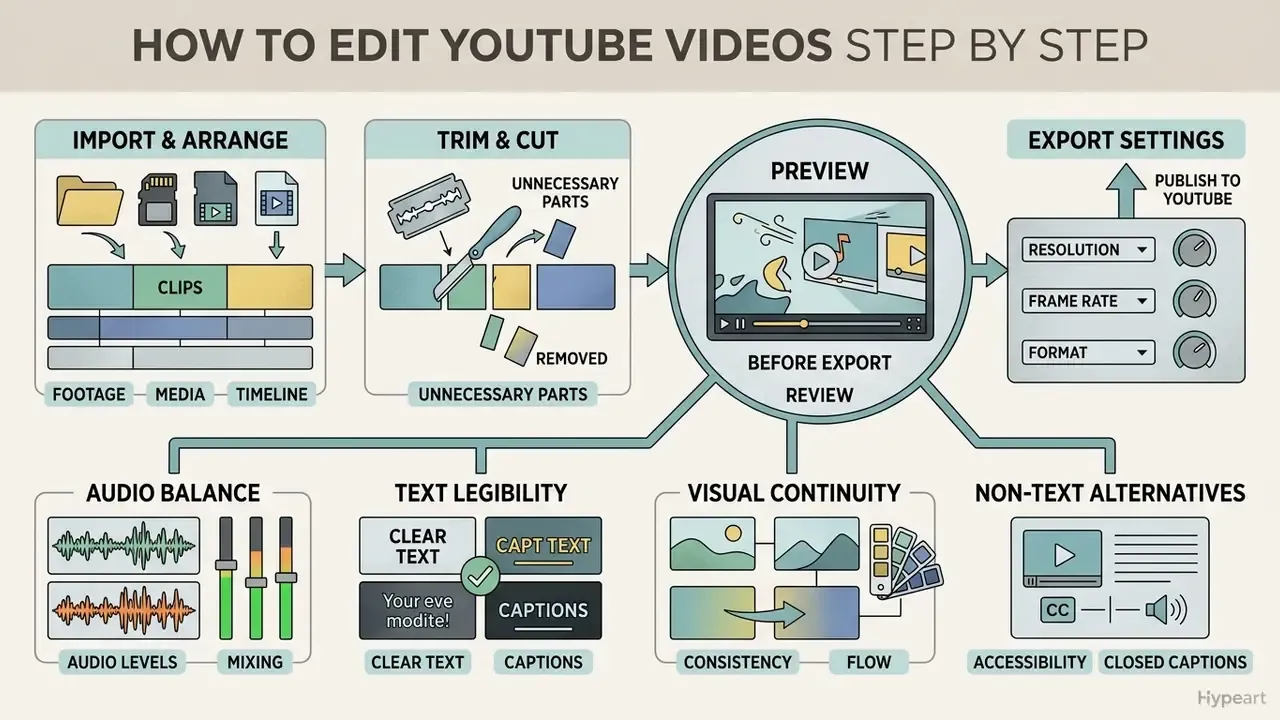
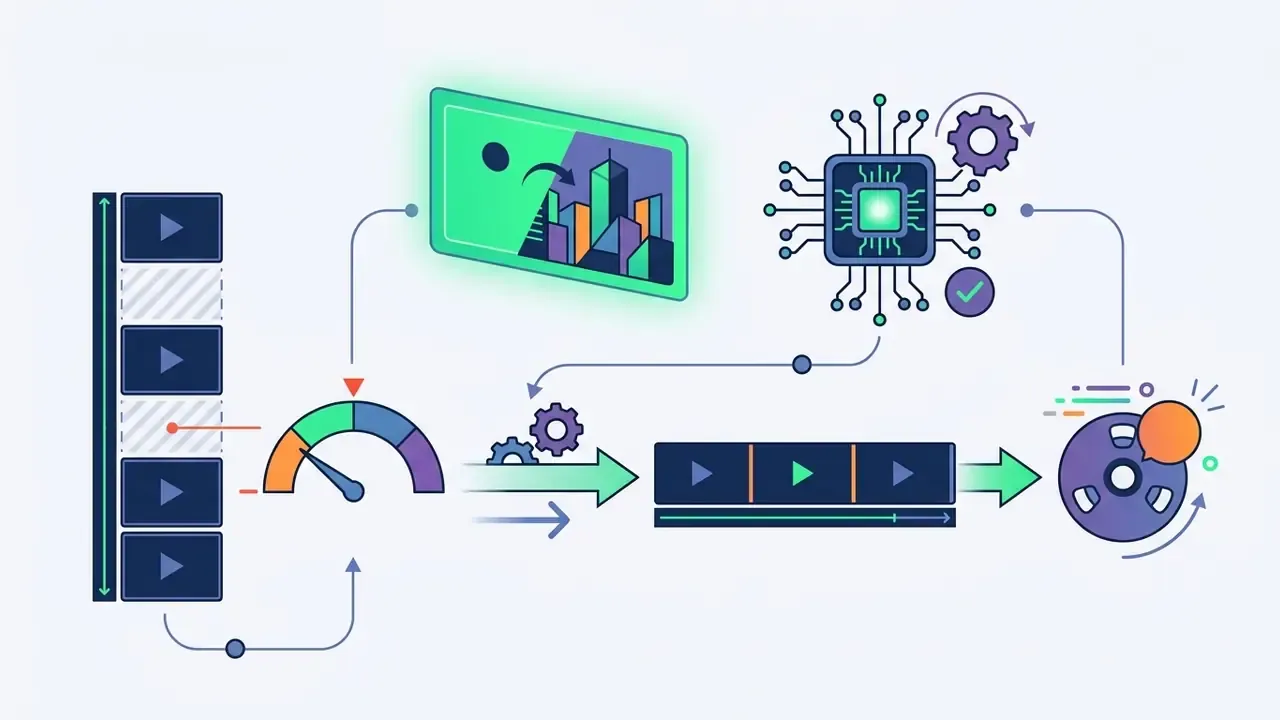
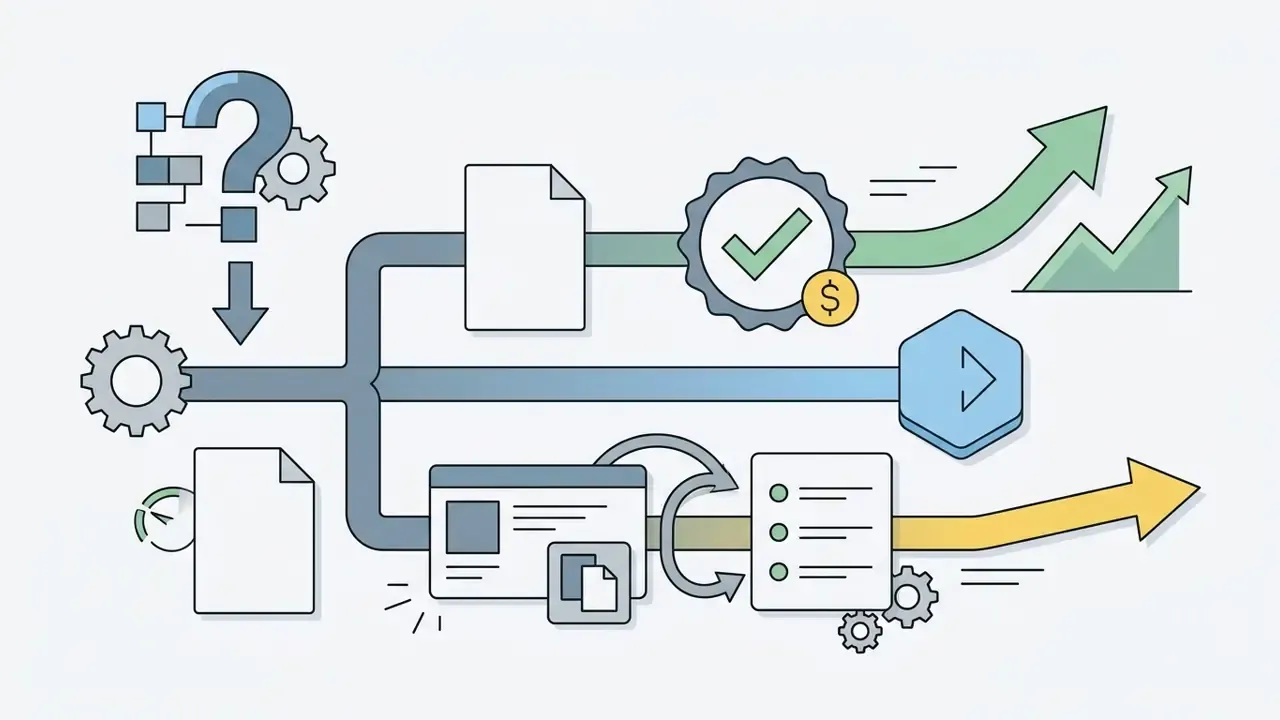
A universal editing workflow runs through six stages: import organized files, build a rough cut, trim unwanted segments, apply audio and text overlays, run a pre-export preview, then render the final file.
- Import Media AssetsLoad video clips, audio tracks, and graphic files into your project library.
- Assemble Rough CutDrag primary clips onto the main video timeline in chronological story order.
- Trim and CutRemove dead air, stumbles, redundant explanations, and false starts to refine pacing.
- Overlay Audio and TextInsert background music, sound effects, titles, and on-screen captions.
- Preview and AuditPlay the full timeline back to verify audio balance, text legibility, and visual transitions.
- Export High Quality FileRender using the codec and resolution parameters recommended below.
Import Footage and Arrange Clips on the Timeline
Start by importing source video files into your editor's media library, then arrange the selected clips on the timeline to establish narrative structure. Most editors accept MP4, MOV and MKV, and you can import one format and export another. MP4 stays the preferred delivery container for YouTube because it balances quality against file size better than the alternatives.
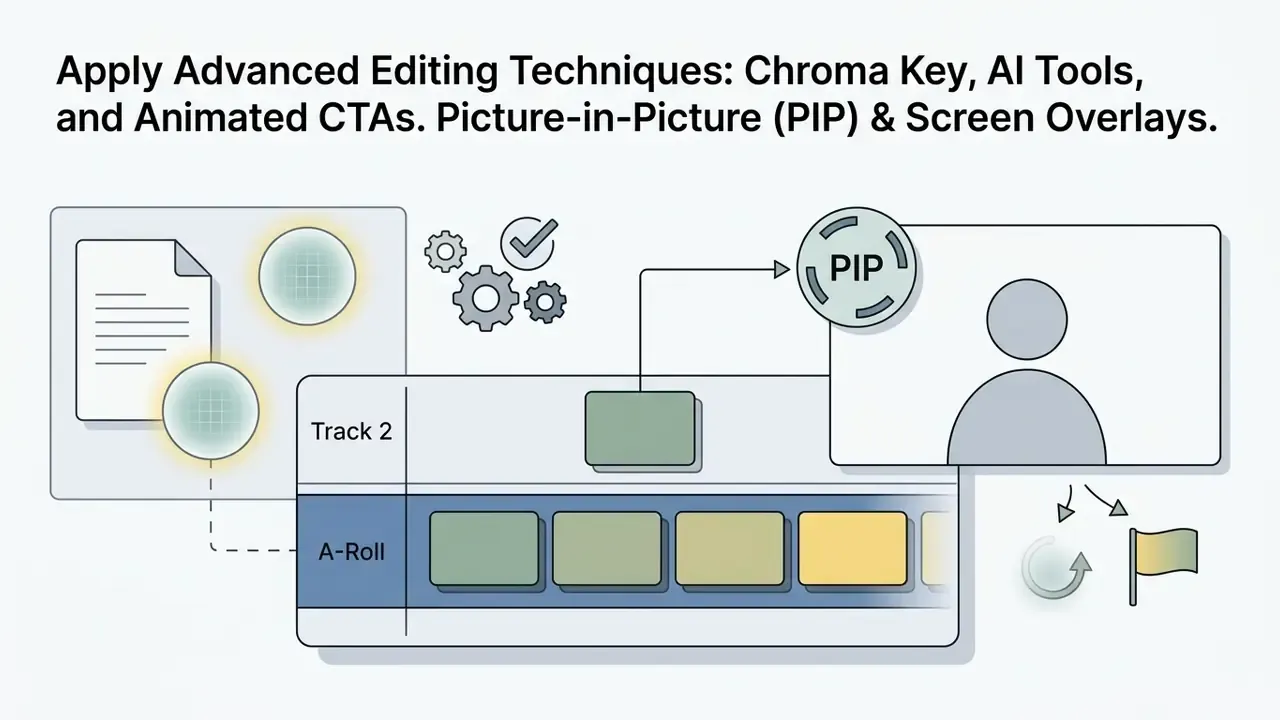
When placing footage, put your primary A-roll (talking head or main commentary) on the principal video track. Secondary B-roll, screen recordings and graphic overlays go on upper video tracks, directly above the audio they illustrate. That multi-track layout keeps visual overlays synchronized with spoken content without constant nudging.
Do not chase perfection in the rough cut. At this stage you only need a recognizable beginning, middle and end. Refinement is the next pass, and treating it as a separate pass is genuinely the easiest way to edit youtube videos without burning out.
Trim, Cut and Remove Unnecessary Parts
Dynamic pacing comes from precise trimming: silent pauses, filler words and duplicate takes go, while deliberate pauses that carry emphasis stay. Run a dedicated cut pass that targets long silences, filler words, tangents and abandoned takes first. Only then tighten the remaining pauses to a short, natural range.
Pacing changes show up in the metrics. In one post-production optimization project, an educational channel trimmed unscripted pauses and repetitive phrasing from a 15-minute rough cut, bringing runtime down to 11 minutes. The refined edit produced a 24% increase in average view duration across the following uploads. Caveat: this is an internal single-channel observation, not a controlled study. Treat the percentage as directional and validate it on your own channel using YouTube Analytics retention curves before and after a pacing change. Removing friction keeps viewers watching; the exact size of the gain is yours to measure.
Preview the Edit Before You Export
A full pre-export preview is where you catch audio level drift, unreadable text on small displays, and transitions that looked fine at 4K but break on a phone.
During the final timeline pass, check against core media standards:
- Audio Balance Voiceover levels stay steady, with background music sitting well below dialogue so nothing masks speech.
- Text Legibility On-screen titles and captions hold strong contrast against the footage, following WCAG 2.1 guidelines: 4.5:1 for normal text, 3:1 for large text.
- Visual Continuity Jump cuts across B-roll inserts should not create jarring jumps or mismatched framing.
- Non-Text Alternatives Anything critical shown only as a graphic is also spoken or captioned, in line with W3C guidance on text equivalents for non-text content.
One extra habit: watch the preview once on a phone at 50% volume. It is the closest thing to your real viewing conditions on social media platforms, and it exposes problems a studio monitor hides.
Add Text, Captions, Music and Effects That Support the Story
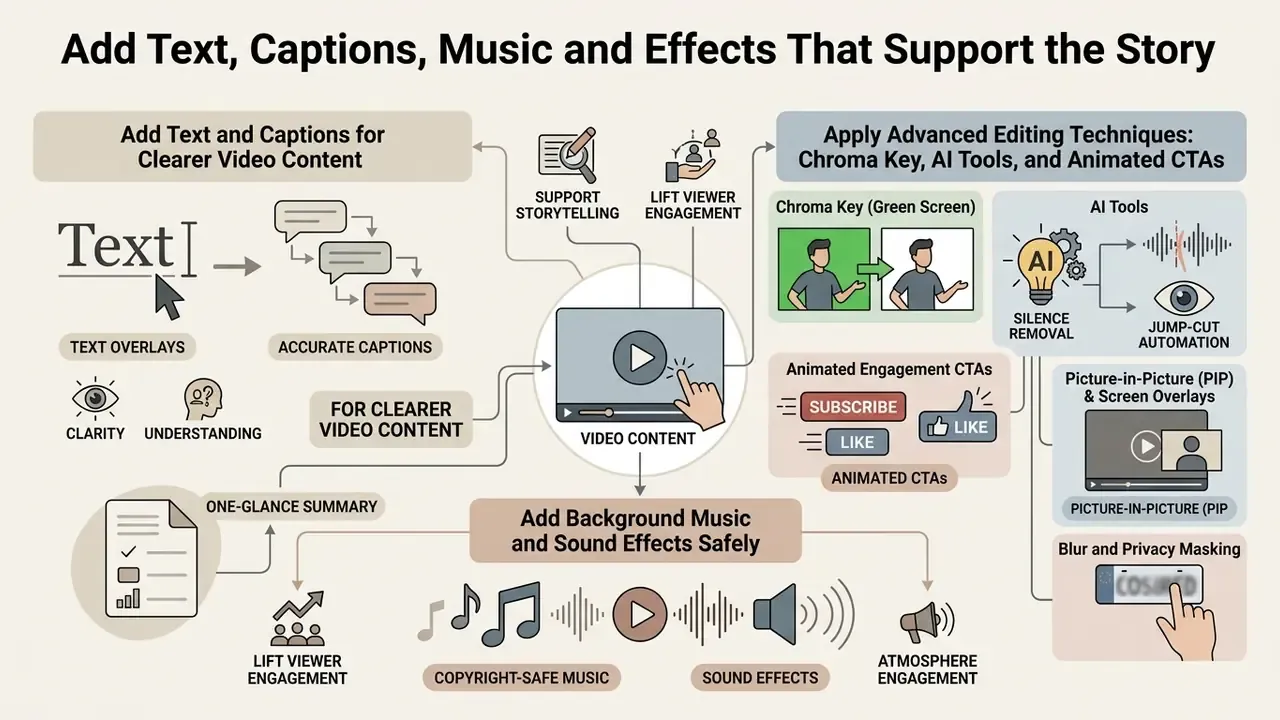
Text overlays, accurate captions, copyright-safe background music and targeted visual effects all support storytelling and lift viewer engagement. They also clutter the frame fast if you add them without a reason.
Add Text and Captions for Clearer Video Content
Adding text overlays and captions reinforces spoken messaging, improves comprehension, and supports sound-off viewing on mobile devices, which is how a large share of your audience watches.
An industry A/B test by AI-Media found that captioned versions increased viewer reactions by 17%, improved 10-second view completion by almost 18%, and drove 26% more call-to-action clicks than uncaptioned versions. A systematic review of 36 captioning studies (ACM, 2026) adds the craft detail: legibility depends on sans-serif fonts, strong background contrast, and mobile-safe sizing.
«Caption readability depends critically on size, colour contrast and synchronisation; desynchronisation lowers perceived video quality.»
A practical caption spec for YouTube: sans-serif or platform system font, default size around 18 pt, white text over a translucent black box, positioned in the lower centre third unless it covers something important, uploaded as SRT or VTT and proofread line by line rather than left to auto-generation. BBC subtitle guidance goes further and notes that non-platform fonts can actively damage legibility on small mobile screens.
If you want to automate part of the text layer, our guide to ai to summarize youtube videos covers transcript-driven summaries, while an ai thumbnail maker helps you produce eye catching artwork that matches the on-screen typography.
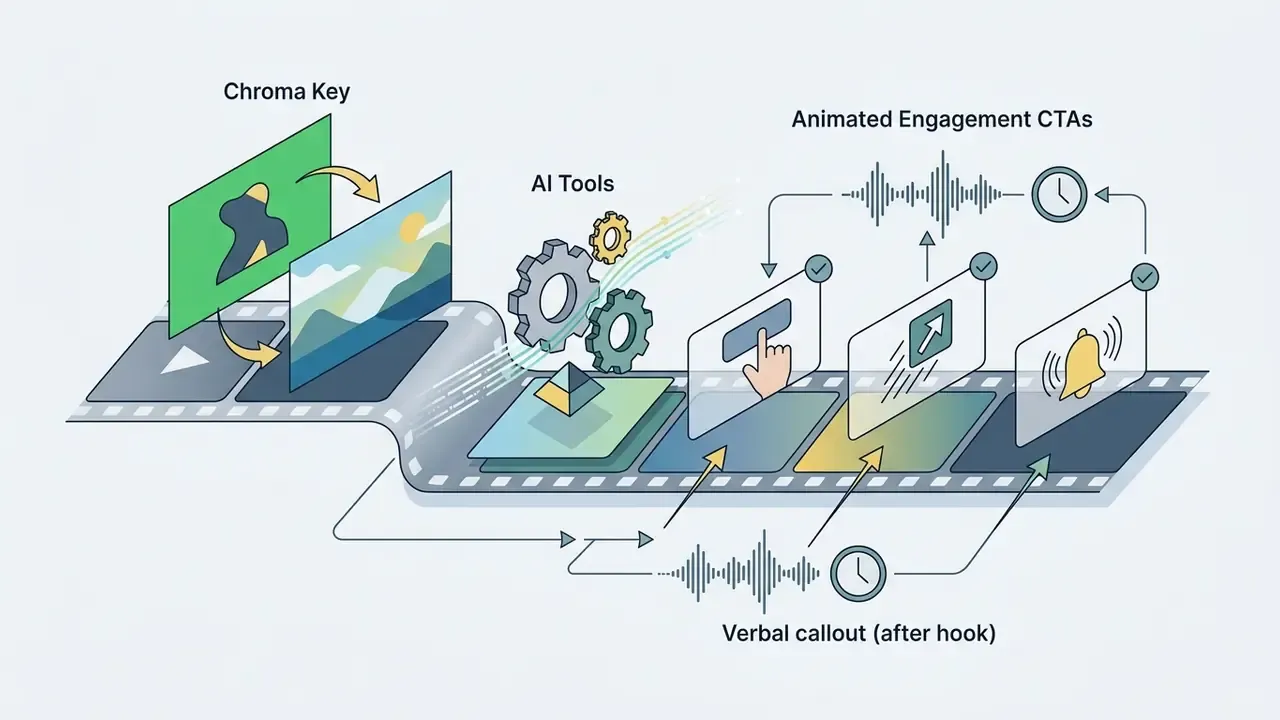
Apply Advanced Editing Techniques: Chroma Key, AI Tools, and Animated CTAs
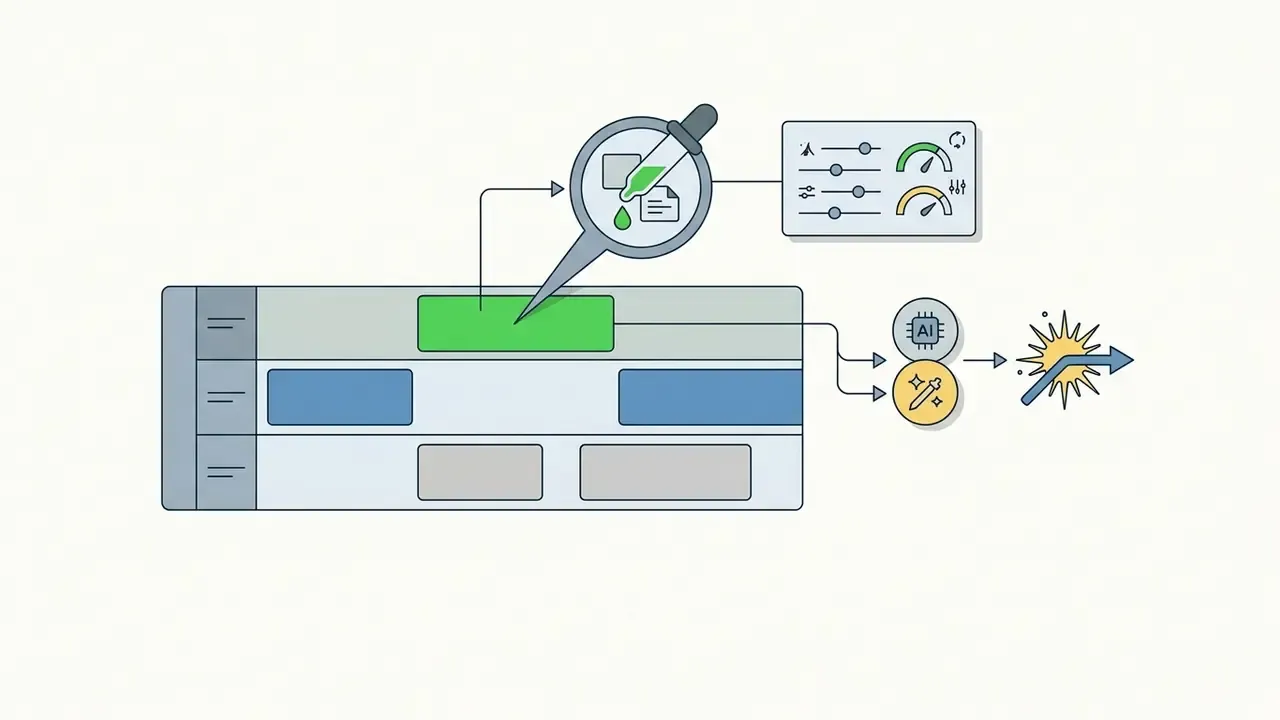
Most videos that look professionally produced rely on four repeatable techniques, not complex motion design. Each is available in free and paid editors alike.

Add Background Music and Sound Effects Safely
Copyright-cleared background music plus balanced levels protects your channel from strikes and keeps voiceovers clear. Creators who would rather not record narration themselves can substitute synthetic narration from AI voice generators and mix it against the same level targets.
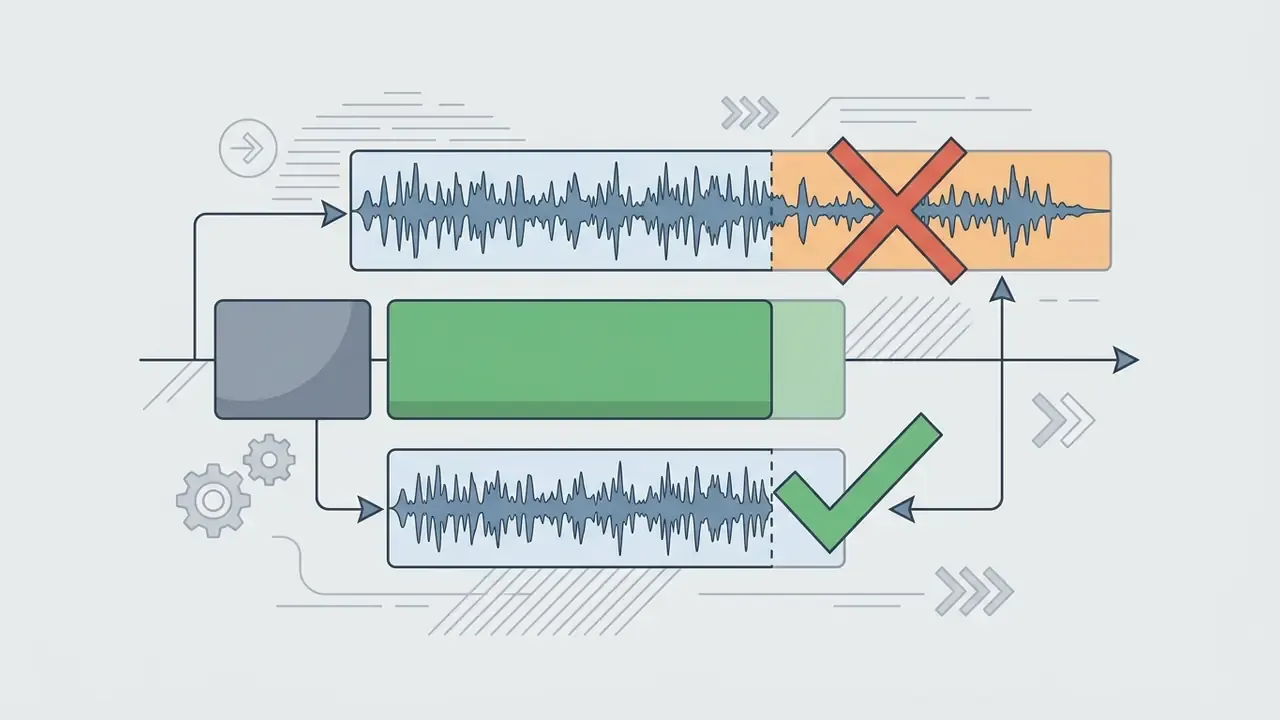
YouTube states that audio from the YouTube Audio Library is copyright-safe for on-platform monetization, and it also warns that tracks labelled "royalty-free" elsewhere are not guaranteed to be claim-free here. When mixing, background music should sit roughly 20 dB below the main voiceover, a figure consistent with public sector accessibility guidance from the Archives and Records Association, which recommends at least 20 dB of separation. BBC broadcast practice suggests trimming music by a further 4 dB during the final master so speech stays distinct on both phone and TV speakers. Both numbers are mixing conventions rather than platform requirements. Start there, then confirm intelligibility on a phone speaker.
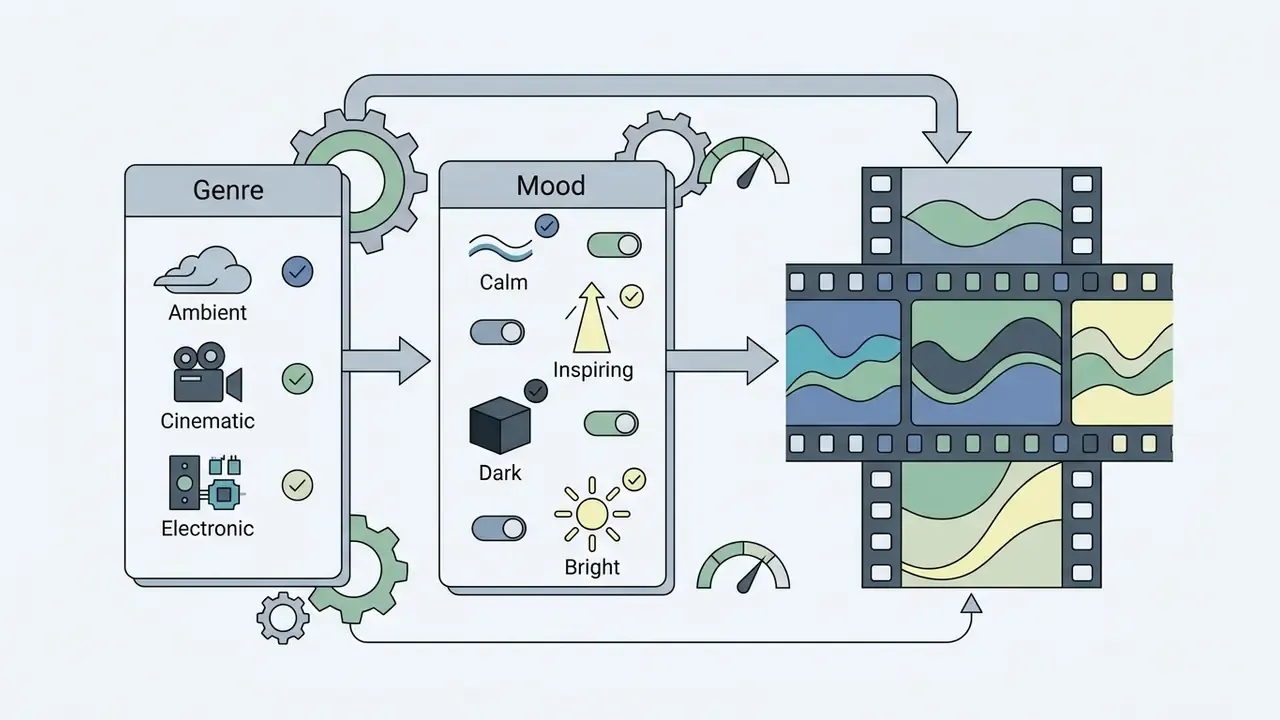
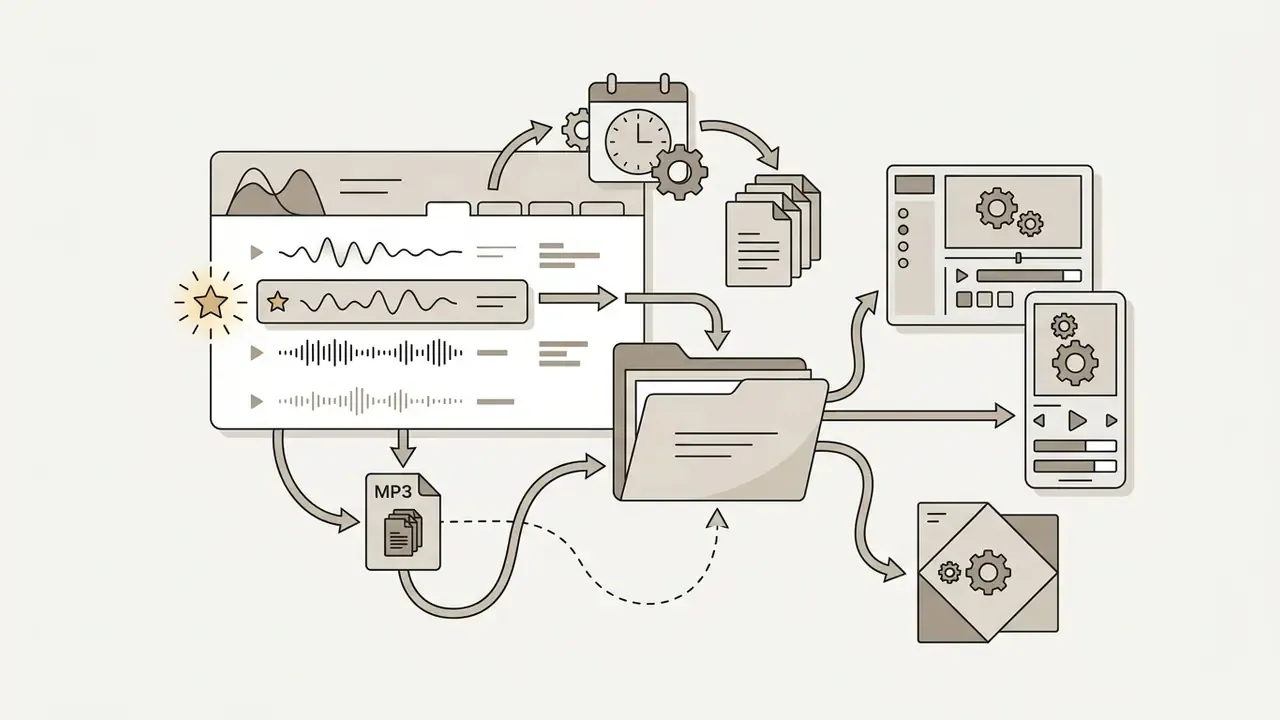
To move quickly through the free music in the YouTube Audio Library inside YouTube Studio:
Even dialogue-heavy formats such as interviews benefit from a short intro and outro bumper. And simple sound effects, a whoosh, a click, a soft pop, make on-screen text reveals feel intentional instead of accidental.
Use Visual Effects, Images and Transitions With Purpose
Transitions, image overlays and visual effects should serve the narrative. Decoration for its own sake reads as amateur, no matter how expensive the plugin.
When you add image assets or graphical B-roll, use simple slide, fade or straight cut transitions instead of 3D wipes. Restraint keeps focus on the subject. Institutional brand guidance converges on the same rule set: use transitions sparingly, favour cuts and dissolves, avoid 3D wipes and swirls, plan B-roll for continuity with the primary scene, and never mix several transition families inside one video. If you find yourself auditioning transitions for ten minutes, the underlying cut is probably the problem.
Choose the Best Video Editing Software for YouTube
The best video editing software for YouTube depends on your hardware, experience, budget and project complexity. Not on what a review roundup ranked first.
Comparison of video editing software for YouTube workflows
| Software / Platform | Supported Platforms | Learning Curve | Audio & Effect Capabilities | Export & Publishing Options |
|---|---|---|---|---|
| YouTube Studio Editor | Web browser (Windows, macOS, Linux, ChromeOS) | Low (beginner) | Basic trim/cut, blur tools, YouTube Audio Library insertion | Direct publishing to YouTube only; no external file export |
| Free / Online Editors (Clipchamp, Canva) | Web browser, Windows, macOS | Low to medium | Template overlays, basic audio mixing, simple text and subtitles, AI voiceover, noise removal | MP4 export (1080p on free tiers; higher resolutions may need a paid plan) |
| DaVinci Resolve | Windows, macOS, Linux | High | Fairlight audio suite, Color Match and node grading, Magic Mask AI subject isolation | Free 1080p/4K export; Studio adds multi-GPU acceleration and neural-engine tools |
| CapCut | Web, Windows, macOS, iOS, Android | Low | Auto-caption generator, AI background removal, smart reframing, filler-word removal, speed ramps | Direct 4K export, native vertical 9:16 templates for YouTube Shorts |
| iMovie | macOS, iOS | Low | Built-in trailers, simple green-screen effects, background noise reduction, magnetic timeline | Direct export to YouTube; native project transfer into Final Cut Pro when you scale up |
| Shotcut | Windows, macOS, Linux | Medium | Open-source multi-track timeline, native 4K editing, custom audio filters, colour wheels and scopes | Wide format support (MP4, ProRes, DNxHD) with no watermarks |
| Adobe Premiere Pro | Windows, macOS | Medium to high | Multi-track audio mixing, Lumetri colour grading, effect stacking, speech enhancement, scene edit detection | Broad export via Media Encoder (H.264, HEVC, ProRes, 4K and 8K) |
| Final Cut Pro | macOS only | Medium | Magnetic timeline, built-in visual effects, native audio EQ, multicam, Apple Silicon optimization | YouTube export presets, Apple ProRes, H.264, HEVC up to 8K |
Read the table by elimination, not by score. If you never leave the browser, the Studio editor and an online video maker cover you. If you edit multicam or grade colour, the cost moves from licence fee to hardware. If you publish daily Shorts, mobile-first tools win on speed, and desktop precision buys you nothing you can see at 1080×1920.
Free, Online and Built-In Editing Tools
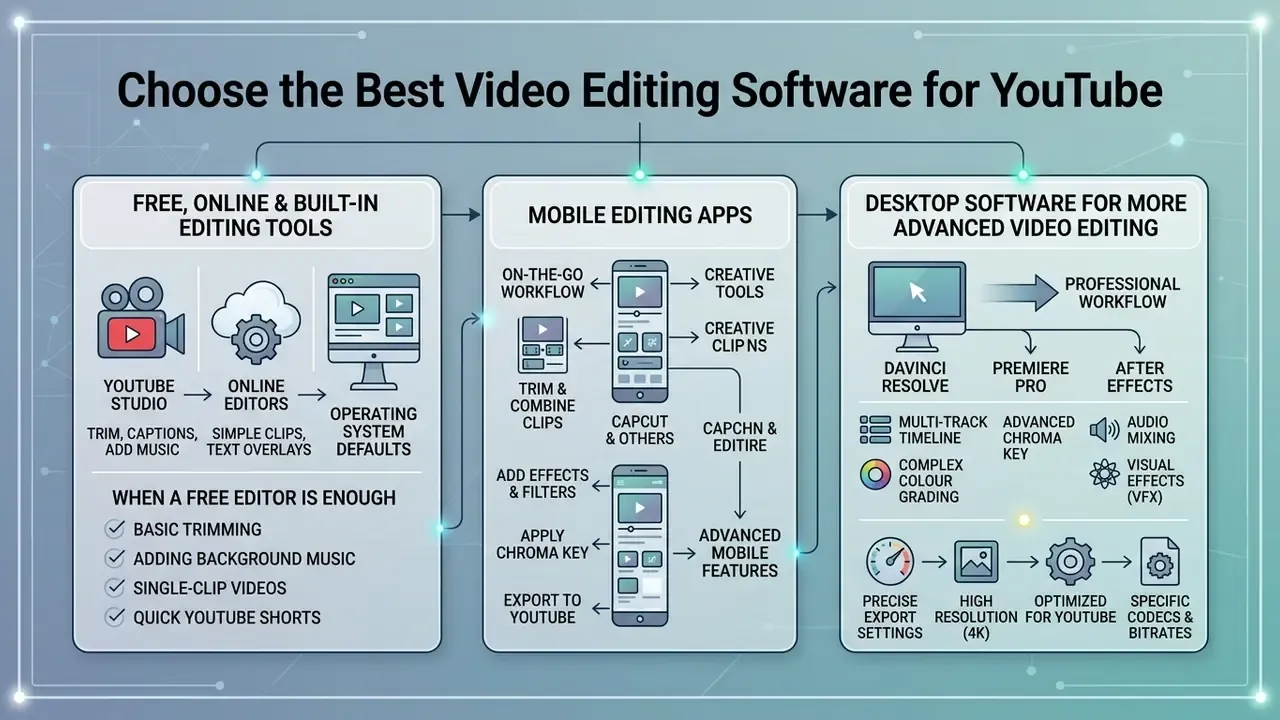
Free and online video editing tools handle essential trimming, text overlays and standard file export without a heavy desktop install. Before committing to a subscription, benchmark free video editing software against your actual project requirements. Most single-camera YouTube formats never exceed what a free editor can do, which is an uncomfortable fact for the paid tiers.
For beginners who don't need multi-camera editing, browser-based apps and mobile solutions are enough to publish videos on a weekly schedule. For voiceover-heavy tutorials without a proper microphone setup, web tools such as Clipchamp and Flixier support AI text-to-speech in more than 400 lifelike voices plus one-click background noise suppression, which removes a whole audio-repair pass. YouTube Create is free, ad-free and built for both long-form videos and Shorts, while Clipchamp and Canva supply templates, subtitles and stock media with watermark-free MP4 export on their free plans.
You can review detailed implementation steps in our ai video creation tutorial, compare features in the AI Media Comparison Matrices, estimate output volume with our calculators, or follow platform-native steps in the YouTube video editor workflow guide.
When a free editor is enough: single-camera talking head, screen-recorded tutorials and videos tutorials series, product demos under ten minutes, Shorts, and any project that needs trimming, captions, music and a thumbnail, but no colour grading pipeline, multi-track mix or motion graphics.
Desktop Software for More Advanced Video Editing
Professional desktop applications such as Adobe Premiere Pro, Final Cut Pro and DaVinci Resolve give you full control over timeline assembly, multi-track audio processing, precise colour correction and high-bitrate export. Their real advantage is consolidation: editing, grading, audio post and visual effects live in one project file, so quality is not lost in handoffs between applications. DaVinci Resolve is the clearest example, combining offline and online editing, colour, Fairlight audio and VFX in a single tool, with most of that available in the free version.
Hardware decides whether the experience is pleasant or painful. According to published specifications (Adobe Support, 2026), Adobe Premiere Pro needs a minimum of 16 GB RAM for HD editing and 32 GB or more for 4K workflows, plus 10 Gb Ethernet for shared 4K network projects. Final Cut Pro (Apple Support, 2026) requires macOS 15.6 or later and 8 GB RAM minimum, 16 GB recommended, with 7.2 GB of free disk space, and it leans hard on Apple Silicon optimization. The trade-off is simple: Premiere Pro gives cross-platform flexibility at a higher hardware cost, Final Cut Pro delivers a lighter footprint but ties you to Mac hardware.
How to Edit YouTube Videos on a Phone
Can I edit youtube videos on my phone? Yes, end to end. Mobile editing lets you assemble, crop, caption and publish straight from an iPhone or Android device, and for Shorts it is often faster than a laptop.
Edit Videos on iPhone or Android With Mobile Apps
Video editing apps such as YouTube Create, CapCut and InShot offer user friendly touch interfaces built for quick clip trimming, text insertion and audio overlay. Many now bundle generative features comparable to standalone AI video generators, including text-to-video assets and automatic reframing.
On a phone screen you can still perform clean jump cuts, add beat-synced background music and generate automated captions. Across mainstream mobile editors the baseline toolkit is consistent: trim, cut and merge, text overlays, music insertion, plus audio controls for split, volume, fade, beat markers and cleanup. YouTube Create supports ad-free mobile editing on Android (4 GB RAM or more) and iOS (iPhone XR or newer running iOS 17+), with direct uploads to YouTube Studio and no watermarks. Two caveats: YouTube Create availability varies by country, and Google has stated that YouTube Studio mobile app versions 24.31.6 and below become unsupported from 9 September 2026.
Shorts can also be edited entirely inside the YouTube app: timeline trimming, add sound, sync to beat, text, stickers, voiceover, captions, filters, layout and text-to-speech are all native features. For a fifteen-second clip, that is usually the whole job.
Prepare Mobile Videos for YouTube Shorts and Regular Uploads
Preparing mobile footage comes down to aspect ratio and duration, and which of the two formats you are publishing into.
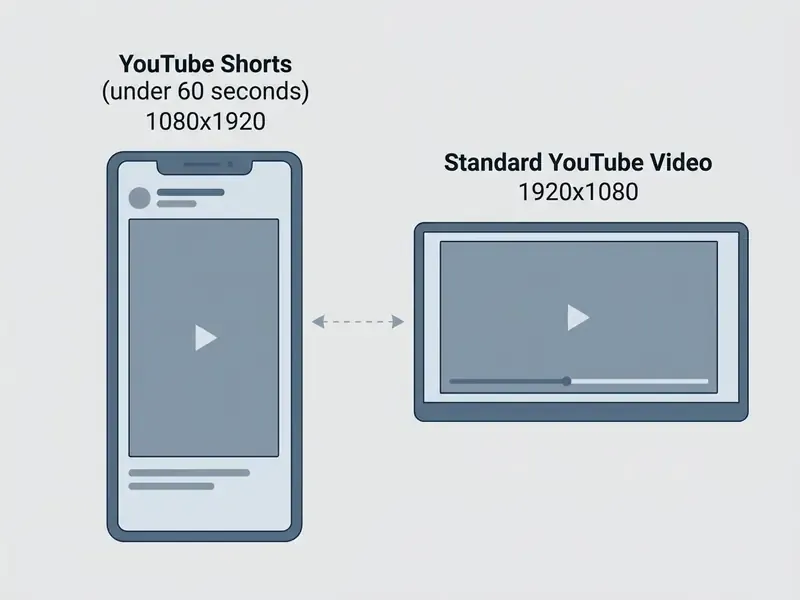
An empirical analysis of 70,000 channels and 16.8 million videos presented at the ACM Web Science Conference (Violot et al., 2024) found that Shorts generate higher views and likes per view than regular videos, with the effect strongest in entertainment categories.
«Shorts generate more views and likes per view but fewer comments; in educational categories the Shorts advantage is less pronounced.»
To prepare footage for Shorts, export vertical 9:16 (1080×1920) under 60 seconds. YouTube also accepts 1:1 square for Shorts, while 16:9 clips get classified as regular videos, which is an easy way to lose a Shorts placement by accident. For standard uploads, export 16:9 (1280×720 or 1920×1080) with square pixels and no added letterboxing. Dedicated creation tools are covered in our guide to AI Video for YouTube Shorts.
Export and Publish Your Edited Video on YouTube
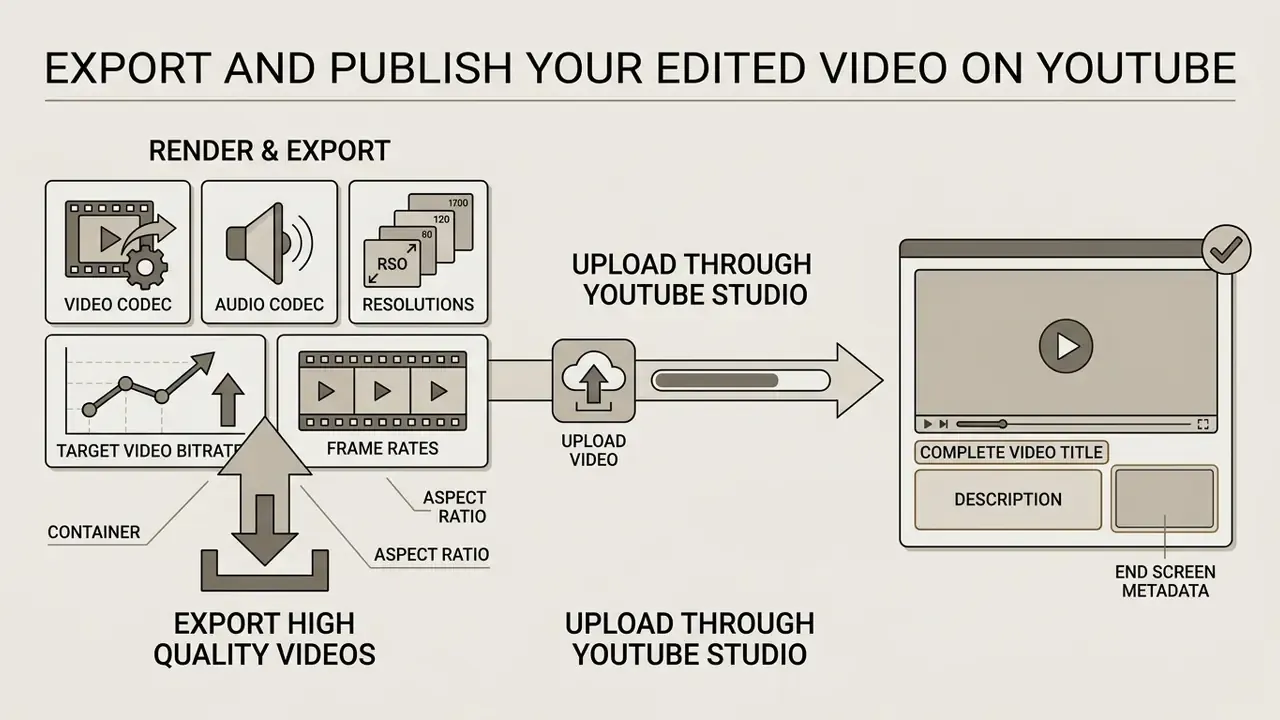
Publishing splits into three tasks: render with the right technical parameters, upload through YouTube Studio, then complete video title, description and end screen metadata.
Export High Quality Videos in the Right Aspect Ratio
Export in native 1080p or 4K using the MP4 container and H.264 codec so the file holds up through YouTube's server-side re-encode.
Recommended export settings for standard uploads:
- Container MP4
- Video Codec H.264 (progressive scan, closed GOP, 2 consecutive B-frames); HEVC/H.265 is documented for live encoding
- Audio Codec AAC-LC, stereo, 320 kbps, 48 kHz
- Resolutions 1080p (1920×1080) or 4K UHD (3840×2160)
- Target Video Bitrate roughly 8 to 12 Mbps for 1080p at 30 fps, 12 to 18 Mbps for 1080p at 60 fps, 35 to 45 Mbps for 4K. YouTube re-encodes with variable bitrate, so a generous source bitrate preserves detail
- Frame Rates your native recording frame rate (24, 25, 30, 48, 50 or 60 fps)
- Aspect Ratio 16:9, square pixels, no added letterboxing or pillarboxing
«Modern video quality assessment targets 4K content (3840×2160): extra compression passes introduce artefacts that lower perceived quality.»
The practical implication: export once, at the highest reasonable bitrate, and avoid intermediate re-compression. Check your current video editing tools against this specification before rendering, because some free tiers cap export resolution or force a second encode you never asked for. If the finished file is too large for your connection, apply controlled video compression rather than dropping resolution. Downscaling is visible; a slightly lower bitrate usually is not.
Complete the Upload With a Title and End Screen
Finish inside YouTube Studio: write a clear video title, add a detailed description, and place end screens that route viewers to more of your channel content.
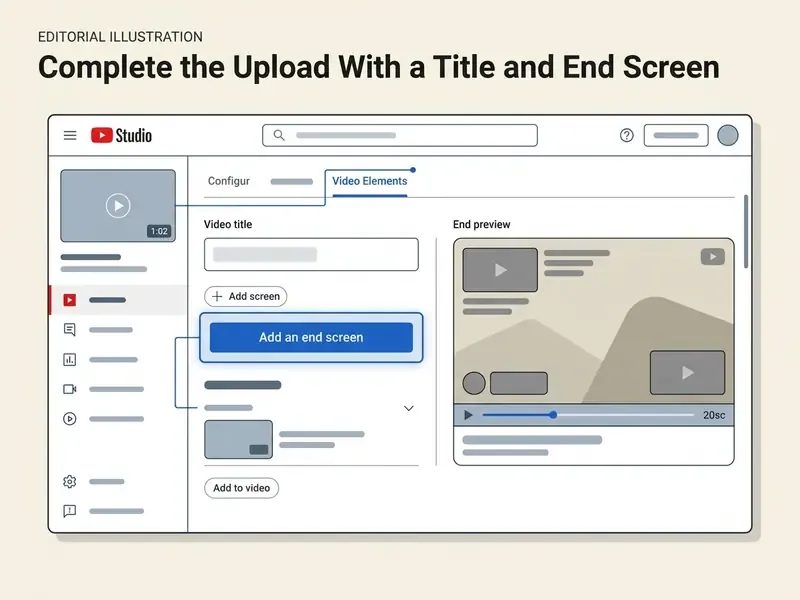
During the upload sequence in YouTube Studio (Create → Upload videos, up to 15 files at a time):
- Enter Video TitleWrite a descriptive, keyword-aligned title within the 100-character limit.
- Add Video DescriptionProvide a real summary, relevant links, and chapter timestamps.
- Configure End ScreensIn the Video Elements tab, add subscribe buttons or video recommendation cards. End screens work on videos of at least 25 seconds and appear during the final 5 to 20 seconds. Info cards live in the same editor, with an adjustable start time and optional teaser text.
- Select VisibilityChoose Unlisted first to review processing quality, then switch to Public. Public videos go live once you save and processing completes.
- Upload Custom ThumbnailA 1280×720 image (16:9, under 2 MB) with high contrast and minimal bold text.
- Select Video Category & LanguageAssign the correct category (Education, Howto & Style, Science & Technology) and set the spoken language explicitly, which helps automatic captioning and recommendations.
- Add Search Tags & LicensingEnter targeted long-tail keywords in the Tags field, declare paid promotion where applicable, and confirm the standard YouTube licence.
«Adding engagement graphs to VOD content significantly increases views and viewer immersion time in streams.»
That finding is a good argument for treating structural cues, chapters, timestamps, end screens and on-screen progress markers, as retention tools rather than cosmetic metadata.
YouTube Video Editing Best Practices for Keeping Viewers Engaged
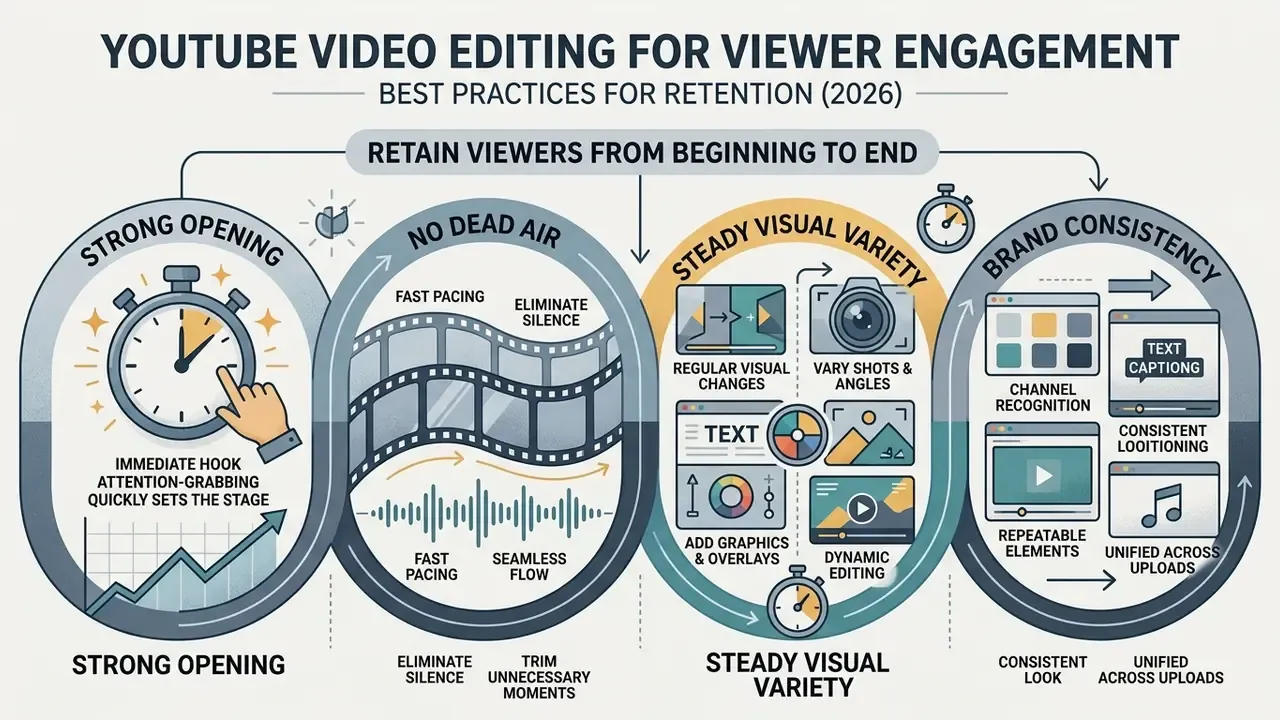
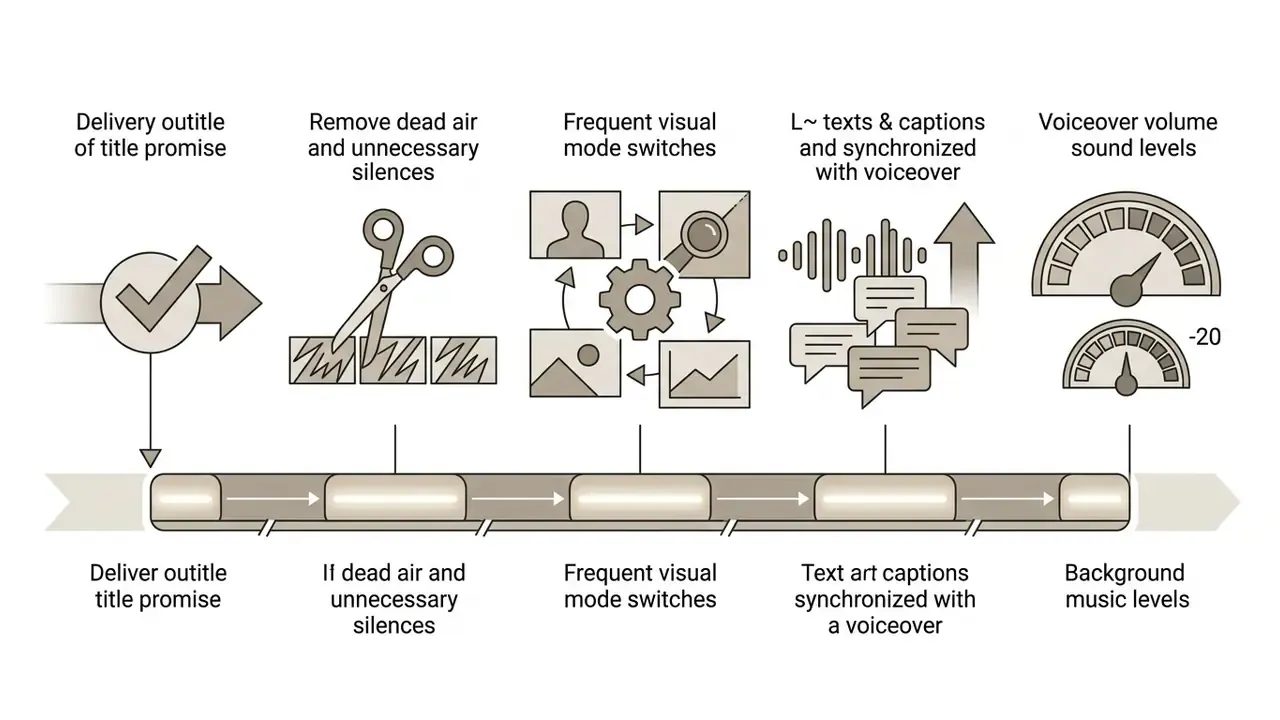
Retention comes from four habits: a strong opening, no dead air, steady visual variety, and brand consistency across every upload.
- Deliver on the Title Promise Immediately: State the subject inside the first 5 to 15 seconds. Skip long logo animations and intro monologues, and resolve the core value proposition within 30 seconds.
«A watch-time difference between 3 and 60 seconds in Shorts causes significant and persistent shifts in algorithmic recommendation chains.»
In other words, the opening seconds are not just a retention lever. They measurably reshape how the recommendation system distributes the video afterwards.
- Maintain Clean Audio Pacing Cut long silences, stumbles and repeated phrasing. Keep voiceover clearly audible above the music bed. Fast entertainment formats typically change shot or angle every 3 to 7 seconds; educational deep-dives hold 8 to 15 seconds per beat.
- Introduce Visual Changes Regularly Insert B-roll, text overlays, zooms or graphic cards every 10 to 20 seconds in the introduction, then tie later changes to genuine content shifts rather than a stopwatch.
«High consumption of short-form video is statistically associated with reduced attention-span measures (χ²=26.611; p=0.001).»
The takeaway is balance. Frequent visual change earns attention, but stacking effects on top of a fast cut rhythm raises cognitive load and pushes viewers out of longer explanatory sections. I have seen well-shot tutorials lose half their audience to nothing but over-editing.
- Preserve Channel Brand Consistency: Standardize framing, fonts, colour palette, motion intensity, sound design and lower-thirds, so viewers recognize your format instantly across uploads and across social media platforms where you repurpose clips.
Applied together, these post-production standards give you high quality videos, steadier engagement, and fewer surprises from platform guidelines.
FAQ: Editing Videos on YouTube
Can you edit a YouTube video after it has been published without losing views?
Yes. Trims, internal cuts, blur, audio replacement and end-screen changes made in the YouTube Studio Editor preserve the original URL, view count and comments. Only re-uploading a new file resets those metrics.
What is the best free video editing software for YouTube?
For most creators, DaVinci Resolve (desktop, professional depth), CapCut (fast, AI-assisted, strong for Shorts) and iMovie (macOS and iOS, beginner-friendly) cover the full range at no cost. Clipchamp and Shotcut are solid browser-based and open-source alternatives respectively.
Why does my video look worse on YouTube than in my editor?
YouTube re-encodes every upload with variable bitrate. Export at native resolution with a generous bitrate (8 to 12 Mbps for 1080p, 35 to 45 Mbps for 4K), avoid intermediate compression passes, and never upscale a lower-resolution source.
How long should a YouTube video be?
Format dictates length. Shorts stay under 60 seconds; tutorials and reviews commonly run 8 to 15 minutes. The segmentation research suggests structuring mid-length videos into three or four clearly marked sections rather than chasing a single duration target.
Do I need captions if YouTube generates them automatically?
Auto-captions vary in accuracy, especially with technical vocabulary and accents. Uploading a proofread SRT or VTT file gives you control over spelling, line breaks and synchronization, and captioning research links all three directly to perceived video quality.
How loud should background music be?
Set music roughly 20 dB below voiceover level, then trim a further 4 dB in the final master as broadcast guidance recommends. Verify intelligibility on a phone speaker before exporting.
Can I edit YouTube videos on my phone from start to finish?
For Shorts and simple talking-head uploads, yes. Mobile editing apps handle trim, captions, music and export at 4K. Multicam projects, colour grading and long-form timelines still work better on a desktop editor.
Appendix A: Superseded Wording (Reference)
Retained for transparency after the 2026 revision:
- The original export list omitted target bitrate figures; bitrate guidance was added in the updated specification.
- The original in-page table of contents used anchor navigation and was replaced with a reader-profile section, which answers the same "is this guide for me" question without duplicating the heading structure.
- The original publishing sequence ended at step 4 (*"Select Visibility
- Choose Unlisted to review processing quality before setting visibility to Public."*) with no thumbnail, category, language, tag or licensing steps. The updated list extends it to seven.
- The original retention case study read
- "The refined edit yielded a 24% increase in average view duration across subsequent channel uploads." It is now labelled as an internal single-channel observation requiring independent validation.