«Across years of practice in visual content and graphics-platform analytics, the main conclusion is obvious: effectiveness is defined not by the number of features, but by transparency of control and predictability of results.»
Most articles about a free photo editor stop at «click here, drag there». This one goes one step further, because the same tool that saves a marketing team four hours a week also shows up, uninvited, on the laptop of someone in operations who just uploaded a customer ID photo. Both facts matter. If you approve software for a bank, an insurer or a mature fintech, you need the feature map and the control map in the same place.
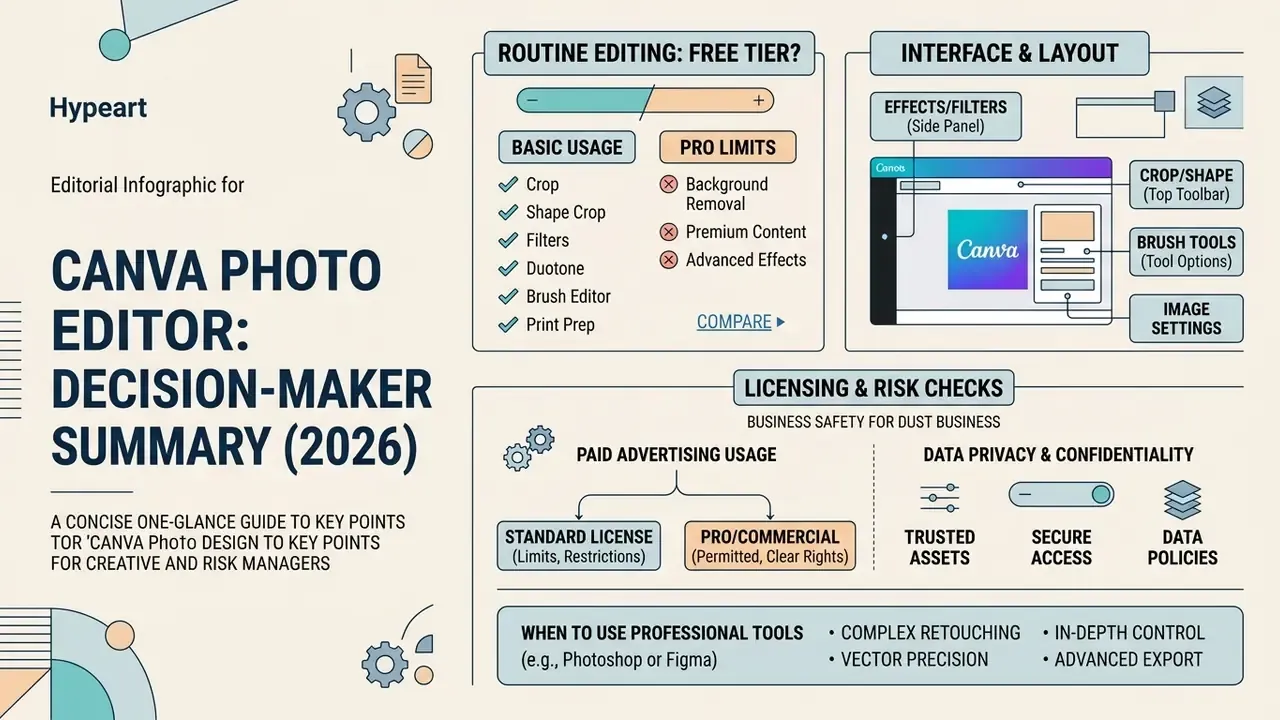
The short version for decision-makers
- What it is a cloud photo editor built into the Canva design suite; it runs in a browser and in native apps for iOS, Android, Windows and macOS.
- What is genuinely free upload,
crop, rotate, flip, frames, manual colour correction,filters, Auto-Adjust, text, stickers, free library elements, export without watermarks on your own photos, 5 GB of cloud storage. - What is paid unlimited Background Remover (the free plan gives one trial use), Magic Edit, Magic Eraser, Magic Grab, batch background removal, 1 TB storage, CMYK-oriented print exports.
- Biggest practical gotchas the Android/iOS app re-uploads images, and the hardware Back button can close the app instead of exiting a tool; Pro elements used outside Canva hosting are capped at 480,000 pixels per file.
- For regulated organisations (banking, insurance, healthcare) Canva is a public multi-tenant SaaS. Before approval, run the Shadow AI / data-privacy checklist and the AI model-risk validation checklist in the enterprise section below. Generative edits are not deterministically reproducible and produce no design-level audit trail by default.
- Where it stops being enough pixel-level retouching, precision masking, colour-managed prepress, UI and product design systems.
What this guide settles
- Whether the free tier really covers your team's routine
photo editing, or whether you are one background removal away from a paid seat. - Where every tool actually lives in the
canva photo editor interface, so nobody hunts through menus. - Which licence clauses decide if a processed image can go into paid advertising.
- Which controls a risk function should demand before Canva is allowed near anything confidential.
- When the honest answer is «use Photoshop or Figma instead».
What Canva Photo Editor is and which tasks it fits
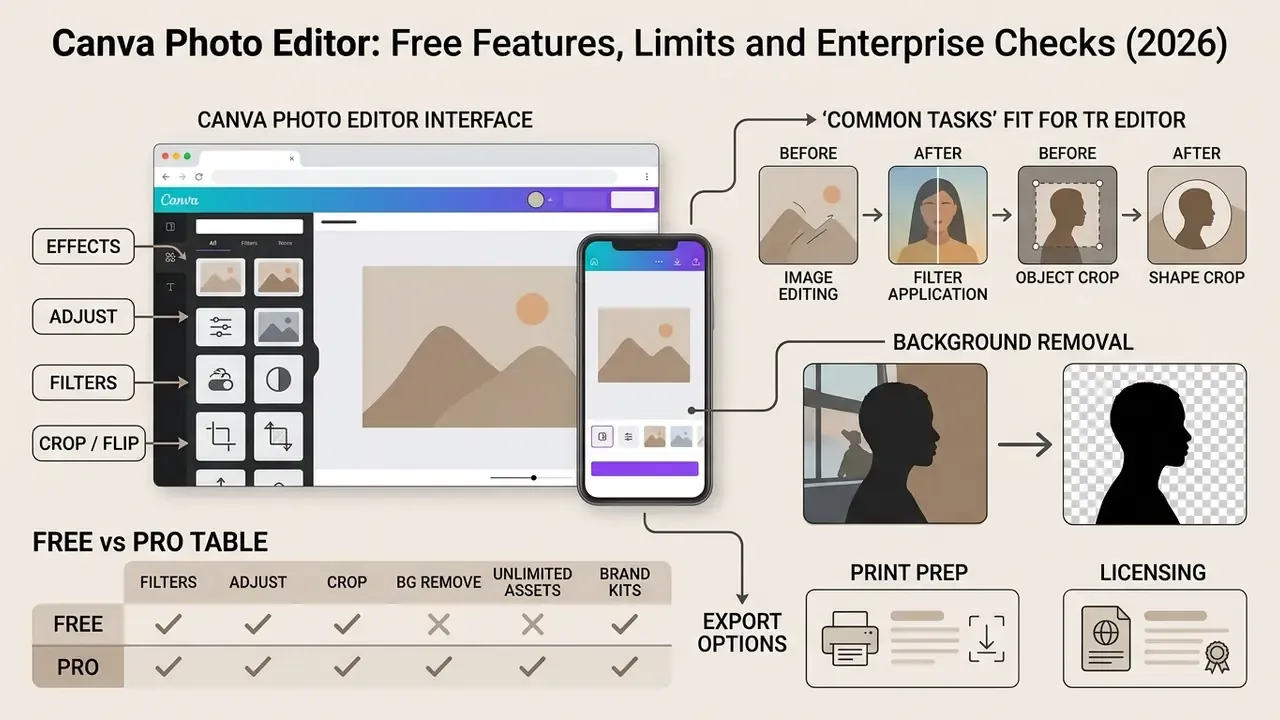
Canva Photo Editor is a cloud image-editing service integrated into the single visual workspace of Canva. The tool is built for fast photo processing, ad creatives, illustrations for social media, presentations and learning materials, directly in the browser or the mobile app.
The online platform combines a basic graphics editor with a large library of elements. Research published in the Journal of Applied Informatics and Computing (2025) rates the usability of Canva's interface at 0.725 out of 1.00 on the WEBUSE scale, which suggests the system is genuinely accessible for fast-moving workflows without a long learning curve.
«All interface aspects of Canva fell into the "Good" category, with an overall score of 0.725 out of 1.00 on the WEBUSE scale.»
Unlike heavyweight desktop suites, canva photo editor targets quick photo editing jobs without manual layer stacks or complex masking. You correct exposure in one click, trim shots with the crop tool, apply stylistic filters and prepare graphics for creative and corporate projects. If you want the broader context of how modern AI photo editors work, from auto-selection to generative fill, start there before choosing a tool. For legal questions about reusing finished graphics, the AI Media Commercial-Use Hub breaks down the rules asset by asset.
Canva's usefulness is documented outside marketing teams too. Educational research reports measurable learning gains when Canva-made visuals replace conventional teaching media:
Editing photos in the browser and in the Canva app
Photo editing in Canva is available through any modern web browser on desktop, and through the mobile or desktop canva photo editor app for iOS, Android, Windows and macOS. All progress, uploaded files and created projects sync into one cloud workspace in real time.
Web and native functionality is practically identical: the same correction tools, the same library, the same AI features. The mobile version is adapted for touch input, which speeds up quick image editing on smartphones. If you are still comparing options, our overview of free photo editors shows where Canva sits against Photopea, Pixlr, Snapseed and GIMP on export limits and privacy. For realistic composite work, borrow the guardrails from the realistic ai reference.
Canva Photo Editor interface: where the main tools live
The canva photo editor interface follows a minimal-panel logic: the centre is the working canvas, and controls sit in side and contextual menus. Select a photo on the photo editor canvas and a dynamic photo editing toolbar appears at the top of the workspace.
Clicking Edit photo opens the left side panel with grouped correction tabs:
- Effects magic AI tools (
remove background, Magic Edit, Magic Grab, Duotone); - Adjust sliders for
brightness,contrast,saturation, temperature, highlights, shadows, tint, blur, vignette and sharpness, plus separate control for foreground and background; - Filters ready colour presets with an intensity slider;
- Crop / Flip cropping, geometry and composition changes on the
canvas.
Usability data on this interface is not uniformly flattering, and that is worth knowing before you standardise on it across a department:
«A 2026 SUS study (74 respondents) recorded a mean score of 55.07; the platform is rated "adequately usable", but navigation and performance need improvement.»
How to start editing photos in Canva online
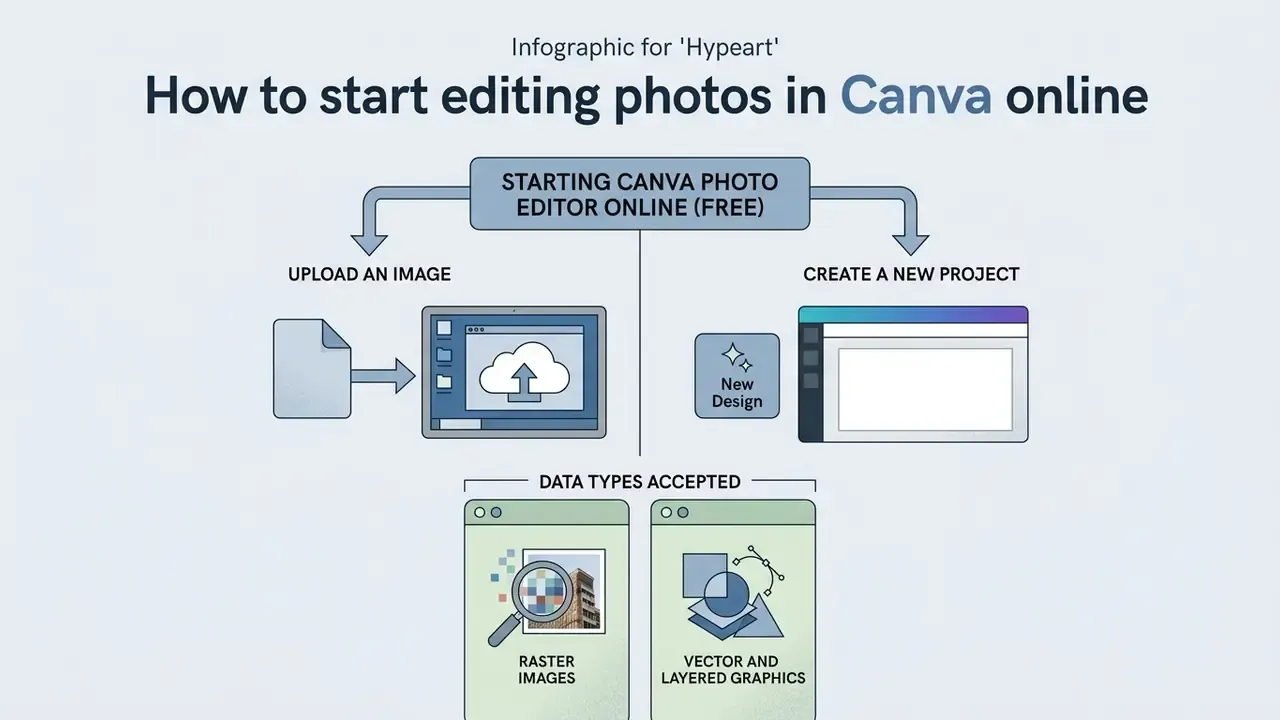
Launching canva photo editor online free requires no third-party software and no special system preparation. Open the site, sign in, upload a source file from the start page or from inside an active project. That is the whole ceremony.
Processing a shot in canva editor photo follows a sequential path:
[Sign in] ➔ [Upload photo / choose Canvas] ➔ [Crop and correct] ➔ [Apply filters / AI] ➔ [Export result]
For technical questions and setup consultations, see AI Media Support.
Uploading an image and creating a new project
To open a file in photo editor in canva, choose Edit photo on the home page, or use the Uploads tab in the left panel of an active layout. Drag-and-drop straight from your device works as well.
The free editor accepts a wide range of graphic formats:
- Raster imagesJPEG/JPG, PNG, WEBP, HEIC (from Apple mobile devices).
- Vector and layered graphicsSVG, PSD (with layer limitations; complex Photoshop files often arrive partially flattened, so keep the original).
After the upload completes, the system offers to use the file in an existing layout or place it on a new canvas with the original photo proportions preserved automatically.
Core Canva photo editing tools
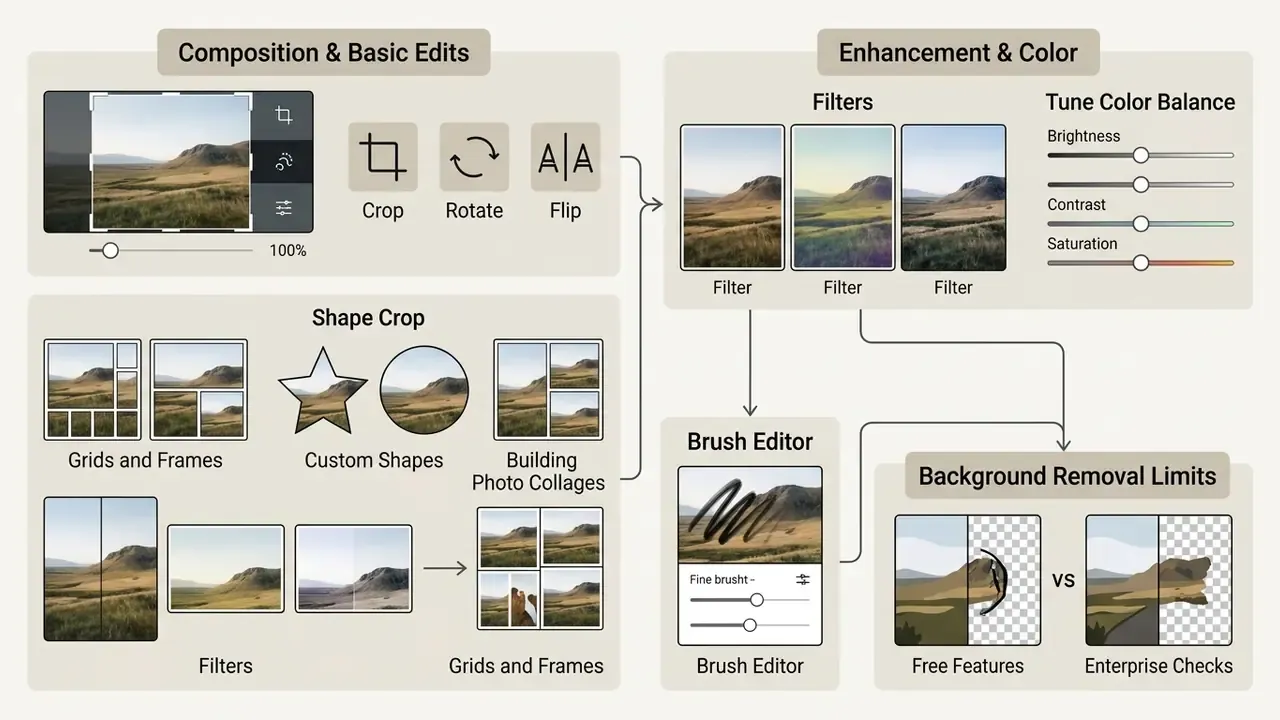
The core toolset of photo editor in canva is aimed at everyday correction work: cropping to social-network specs, then tuning colour balance. Most operations run on sliders or a single click.
In practical work you often need to clean small defects or red eyes on portraits. For those jobs, apply the recommendations from our red eye remover guide.
Crop, rotate, flip and composition changes
Cropping in photo editor canva runs through the crop menu, opened by double-clicking the image or via the top toolbar. Drag corner handles freely, or pick a fixed aspect ratio (1:1, 16:9, 4:3, 9:16). For photos, Canva also offers Smart Crop, which centres the frame on the detected subject. It works well on single subjects and gets confused by busy group shots, in my experience.
Geometry tools include:
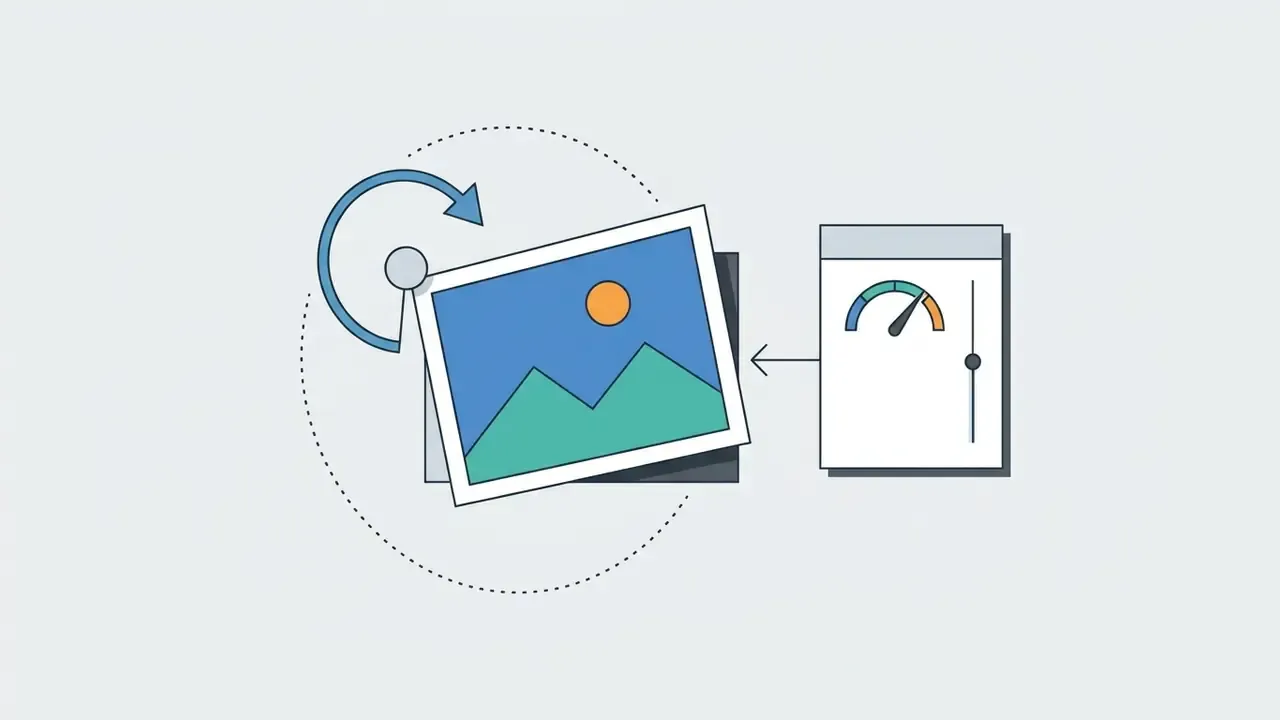
flip horizontal) or vertically (flip vertical);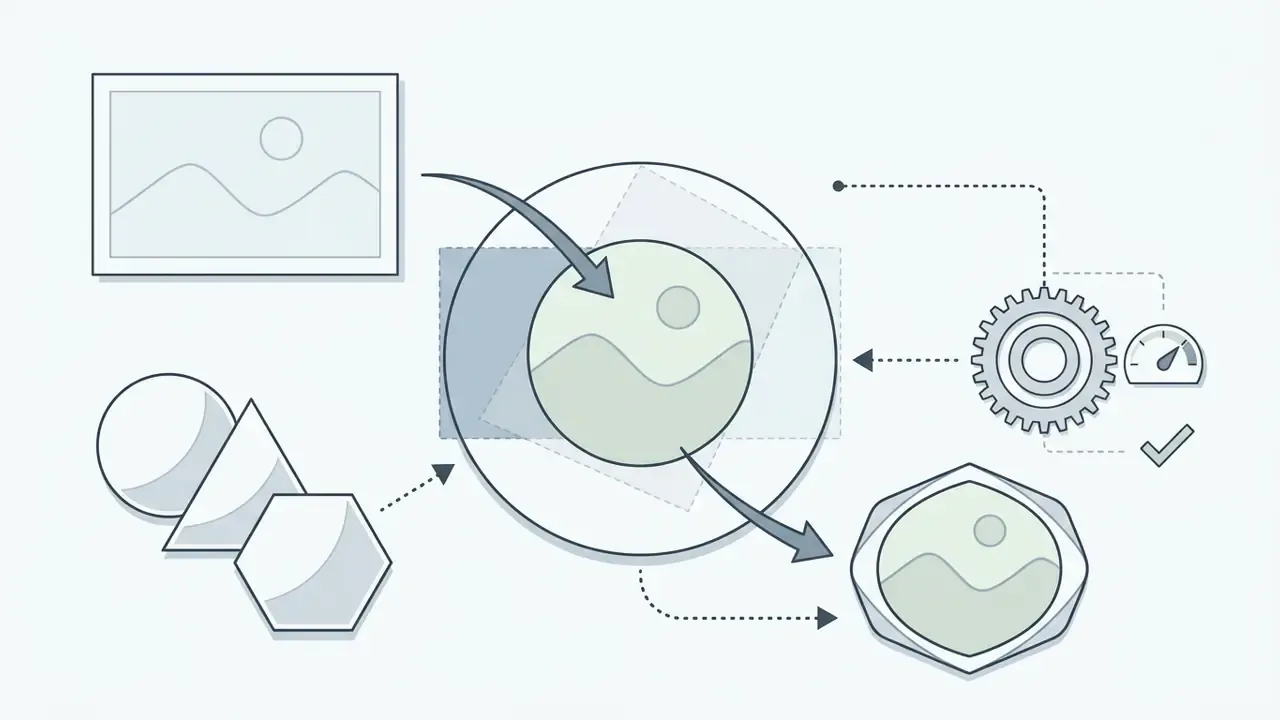
Shape crop (Frames) and building photo collages
Beyond standard rectangular cropping, Canva can clip photos to geometric shapes. It is the fastest route to circular avatars, heart-shaped keepsakes and star-shaped stickers:
- Open Elements ➔ Frames.
- Choose the shape you need: circle, heart, star, arch or an irregular splash.
- Drag the photo from the canvas into the frame; the image instantly adopts the shape.
- Double-click inside the frame to reposition the visible area, and resize with the corner handles.
Building photo collages. Canva handles up to 32 images in a single project without noticeable performance loss, the same practical ceiling that browser-based editors such as Adobe Express publish for one document. Use ready-made Grids layouts to merge frames quickly, then apply a single filter to every tile at once with Apply to all media.
Filters and photo enhancement
The filters tab offers preset packs for instant styling of images. Pick a look (Vintage, Mono, Warm, Cool), then fine-tune its strength with the Intensity slider from 0 to 100. Selecting None removes the filter entirely.
Manual colour correction in the Adjust panel is split into three autonomous control zones:
- Whole Imageglobal edits to
brightness,contrast, sharpness and blur. - Foregroundindependent correction of the isolated main subject only.
- Backgroundtargeted background tuning without touching the foreground.
Auto-Adjust, Duotone, Sepia and specific presets
- Auto-Adjust press Auto-adjust in the Adjust menu. The service sets white balance, exposure, light and colour automatically, and every changed value stays visible on the sliders. If the result is too aggressive, roll it back with Reset adjustments.
- Duotone in the Effects menu choose Duotone. The tool replaces all the colours in your photo with two chosen hues, producing a bold, stylised, graphic look.
- Sepia for a vintage feel, pick the Sepia preset inside the Duotone menu and set Intensity to roughly 70–80%.
- Popular colour presets for cool summer frames use the Capri filter with intensity reduced to about 85%; for high-contrast black-and-white graphics use the Ink preset in the Mono category. Monochrome filters apply a single dominant hue across the whole frame for a cohesive series.
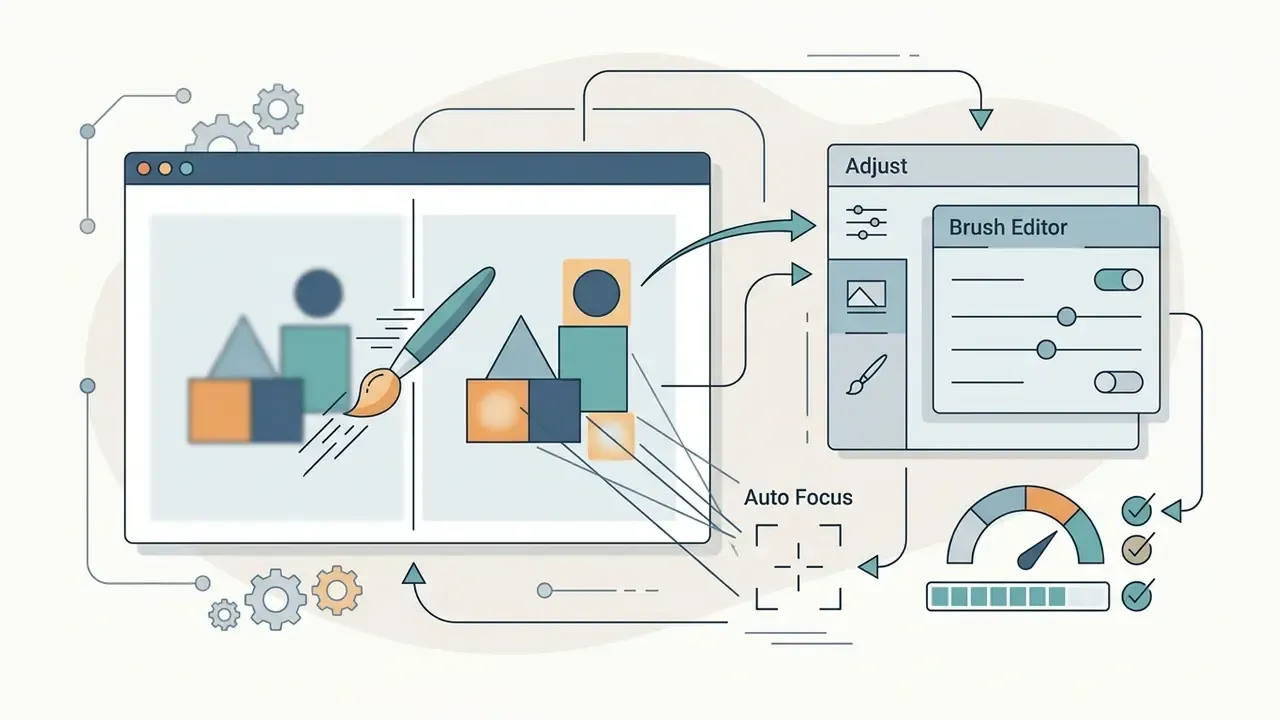
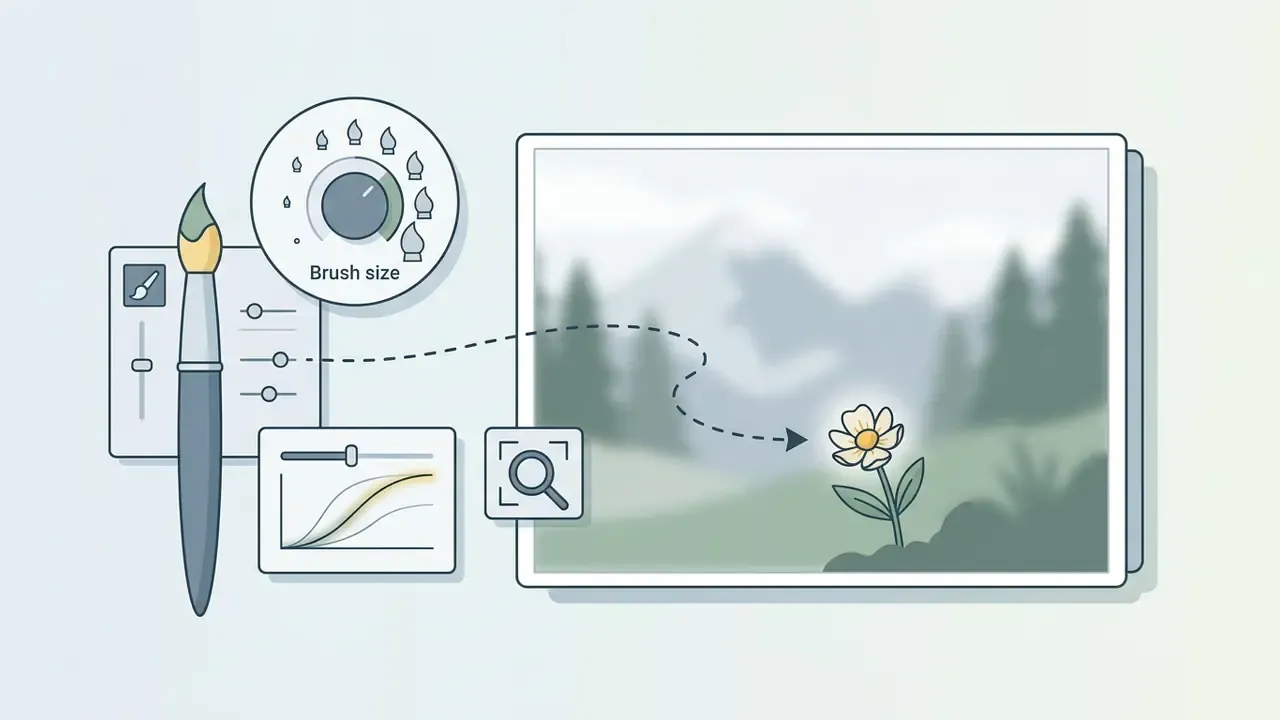
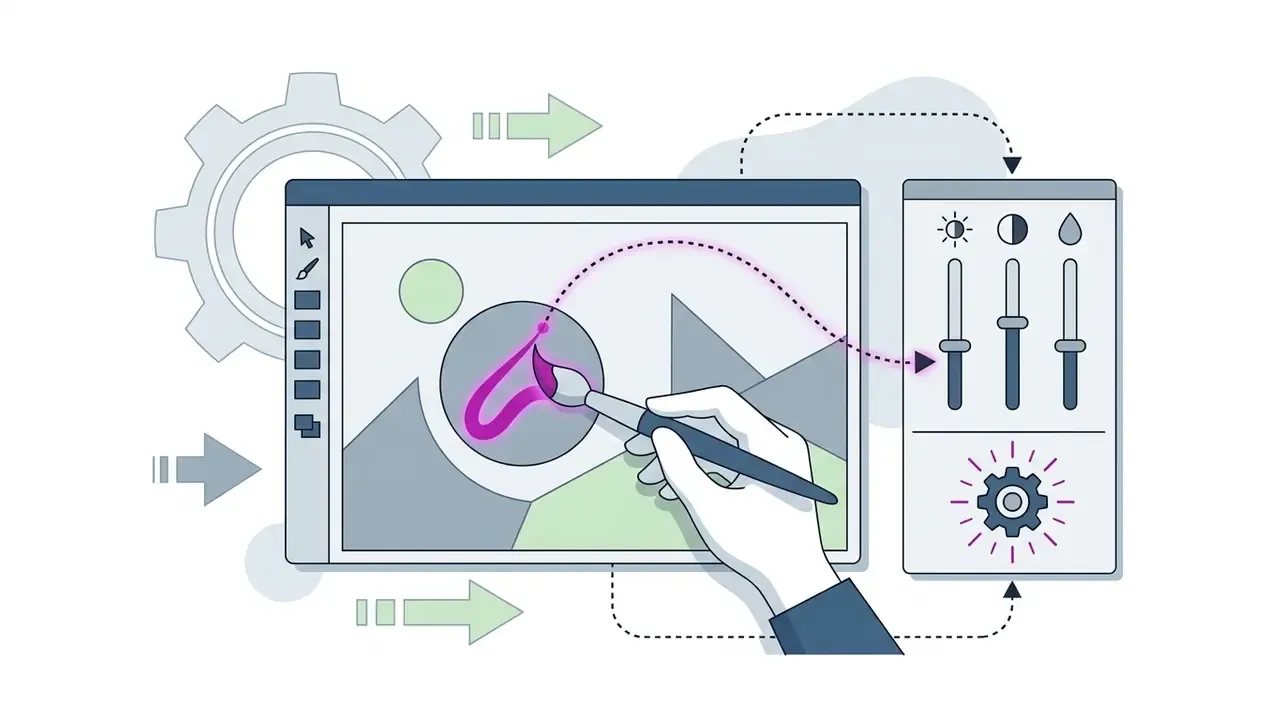
Selective correction with the Brush Editor and Auto Focus
Sometimes you need to change one detail, not the entire frame: lighten a shadow on a face, mute a blown highlight, emphasise one object in a product shot.
This selective workflow answers the classic complaint about template-driven editors, namely that they only allow global edits. Independent hands-on testing points to exactly this feature as Canva's differentiator against mobile-only apps: an automatic foreground/background selection that is «really accurate» and free, plus a brush editor for picking out shadows and details manually (Android Authority, 2025).

⚠️ Mobile app quirks: what breaks and how to work around it
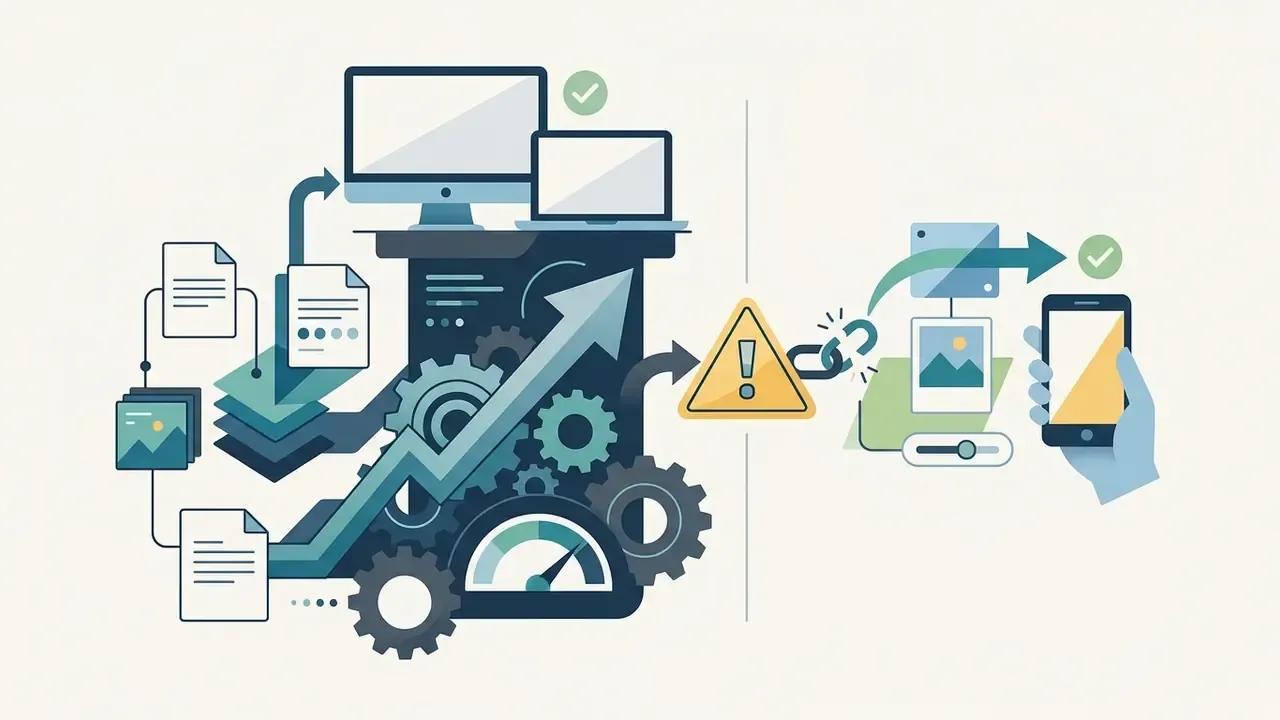
The mobile app is convenient. It also has documented behavioural quirks you should know before you trust it on a client site:
- The Back button trap. Pressing the system Back button on a smartphone often exits the app entirely instead of closing the current tool inside the photo editor.
- Duplicate uploads. Even with camera-roll access granted, the app re-uploads a selected image every time. If you accidentally leave the app, do not pick the photo from the gallery again; that creates a duplicate and burns storage. Open Projects ➔ Uploads and reopen the file you already uploaded.
- Touch input misses. Occasional bugs stop taps from registering; a canvas zoom-out and a re-tap usually restore responsiveness.
How to remove or change the background of a photo
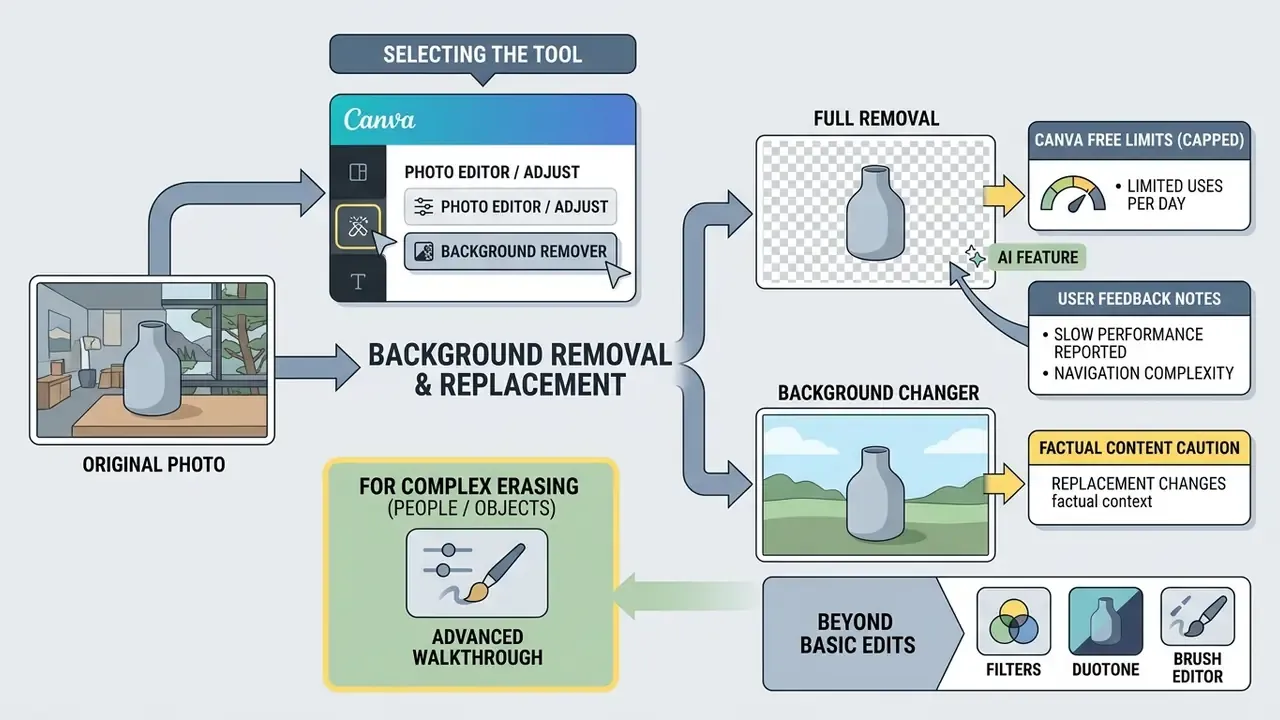
The remove background tool is one of the platform's most requested AI features. The algorithm detects the key subject and separates it from the backdrop without manual contour tracing. Canva publishes no accuracy benchmark for this model, so treat edge cases as manual-check territory: hair, glass, fine mesh, low-contrast subjects. Assume nothing about a clean cut-out until you zoom in.
In canva free plan photo editor background removal is capped. You can trial the tool once for free. Continuous use requires a Pro subscription or an external specialised service.
If you need to erase complex objects or people from a frame, follow the remove person from photo walkthrough.
Beyond full background deletion, the platform includes the Photo Background Changer. It generates a new environment from a text prompt and blends the extracted subject into it. When the new scene needs more canvas than the original frame provides, AI image expansion tools (outpainting) are the natural companion step.
One caution worth repeating: a replaced background changes the factual content of an image. Fine for a lifestyle banner. Not fine for anything that documents a real place, an asset or a customer.
Free Canva Photo Editor: available features and limits
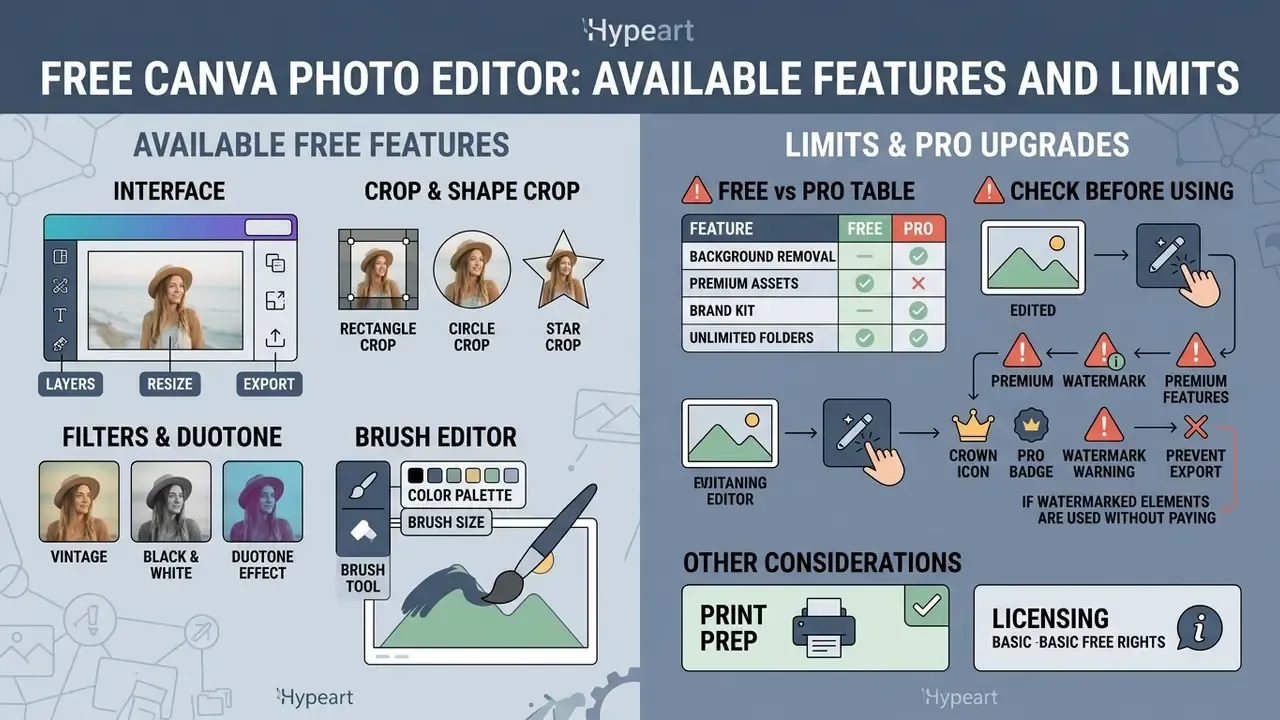
The canva free photo editor plan delivers a complete basic photo-editing toolset with no time limit. Free users get 5 GB of cloud storage and access to thousands of free elements.
Key canva photo editor free capabilities include:
- Uploading and exporting shots with no charge and no forced watermarks on your own photos;
- Cropping (
crop), rotating and masking into frames; - Exposure and colour adjustment, Auto-Adjust and free
filters; - Adding text, stickers and free vectors from the library.
What photo editing is available for free
The free tier covers the overwhelming majority of routine amateur and small-business tasks. Manual colour tuning, standard visual effects, merging several frames into collages: all included. One correction to a claim you will see repeated everywhere, though. The line that the free plan covers «80% of everyday needs» is a marketing estimate, not a measured figure, and we have found no study that quantifies it.
Restrictions bite mainly on advanced AI packages. Magic Edit, Magic Eraser, Magic Grab and batch background removal stay locked on the free plan. If those specific jobs are your bottleneck, compare dedicated online photo editors before paying for a full design suite. The set of canva free photo editor features is stable rather than generous, and that predictability is arguably the point.
What to check before using tools in the free plan
To avoid accidental limits or watermarks when exporting finished projects, watch for premium-content markers:
- Crown iconappears in the lower-right corner of thumbnails for elements, fonts, filters and templates.
- Pro badgesignals that the object belongs to the paid library; clicking it on a free account opens an upgrade dialog.
- Watermark warningadding a Pro element to the canvas on a free account overlays a translucent Canva grid.
To compare plans and commercial conditions in detail, see the AI Media Pricing Guides.
| Feature / tool | Canva Free Plan | Canva Pro Plan |
|---|---|---|
| File upload (JPG, PNG, WEBP, HEIC, SVG) | Yes (up to 5 GB) | Yes (1 TB storage) |
| Basic Crop and rotate | Unlimited | Unlimited |
| Filters and manual correction (Adjust) | Available | Available |
| Brush Editor / selective correction | Available | Available |
| Shape crop via Frames | Available | Available (extended library) |
| Collage: images per project | Up to 32 | Up to 32 |
| Background Remover | 1 trial use | Unlimited |
| Magic Studio AI tools | Limited access | Full access |
| Export without watermarks | Yes (on your own photos) | Yes (on any content) |
| Print-ready PDF with bleed / crop marks | Limited | Yes |
Key takeaway from the table in plain text: the free plan is limited by AI credits and print output, not by the everyday editing tools.
Preparing photos for physical print and DIY craft projects
Digital-first editing and print production have different requirements, and this is where most Canva projects fail on the first attempt. A photo that glows on screen prints dark and slightly crooked on a coaster or a puzzle.
Print-prep sequence:
- Set the physical size first, not last.Create a custom canvas in millimetres or inches at the final product size (mug wrap, 20×20 cm coaster, A4 magnet sheet) before importing the photo, so nothing is upscaled later.
- Check effective resolution.Aim for roughly 300 PPI at final size; if the source file is too small, use AI image upscalers rather than stretching pixels in the layout.
- Compensate for print darkening.Sublimation and heat-press output usually reads darker and more saturated than the screen, so raise brightness slightly and pull saturation back before exporting.
- Mirror for transfers.For sublimation, heat-transfer vinyl and iron-on media, apply Flip horizontal to any frame containing text or asymmetric detail.
- Export correctly.Choose PDF Print for anything going to a print shop; on Pro plans enable the CMYK colour profile, and add crop marks and bleed so trimming does not eat your subject. Use PNG at maximum size for Print Then Cut craft workflows (puzzles, magnets, stickers) where cut lines must align.
- Test one unit first.Print a single coaster, magnet or sheet before committing the full batch. Cheapest quality gate in the whole workflow.
Using edited Canva photos in projects
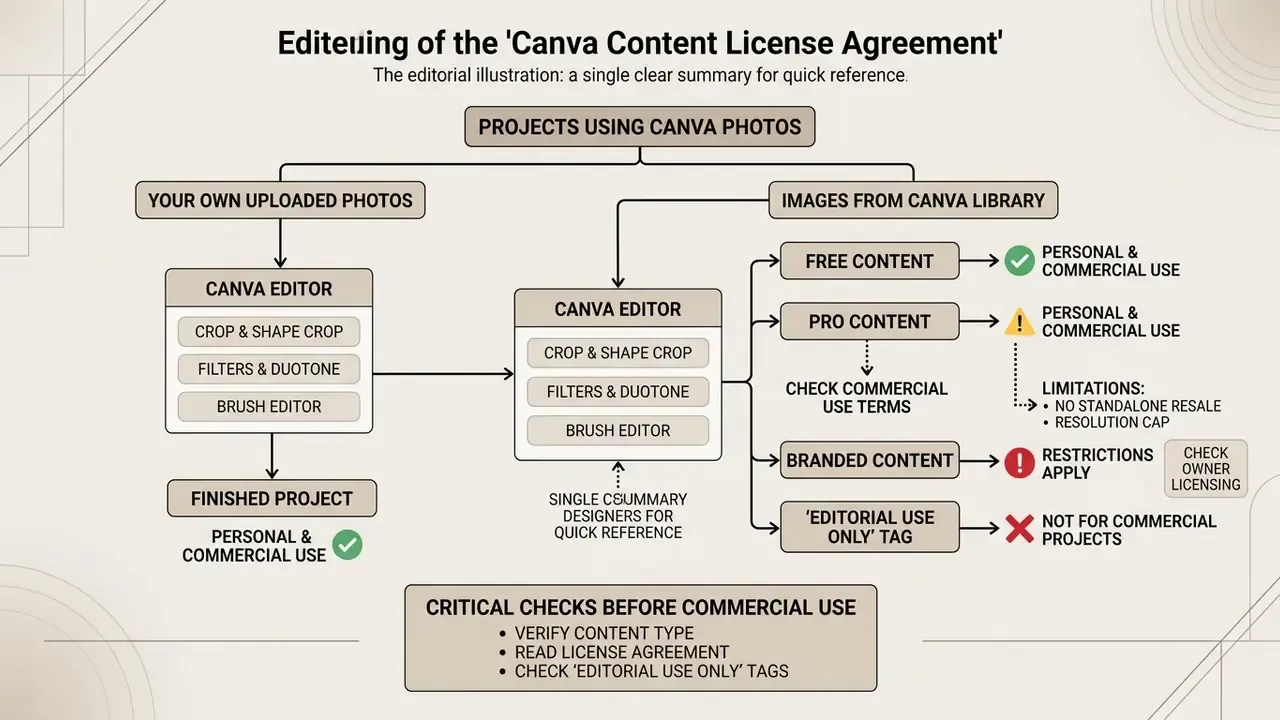
Whether finished shots may be used personally or commercially is governed by the Canva Content License Agreement. The platform's core principle: you may publish and sell your creative projects when they constitute a unique composite design rather than a direct resale of the underlying stock files. The same logic governs commercial use of AI-generated imagery, where the value must sit in your composition, not in the licensed asset itself.
When you build media and video content from processed frames, the reel maker reference is a useful next step. Comparative analysis of graphics solutions lives in the AI Media Comparison Matrices.
Your own uploaded photos vs images from the Canva library
With your own photographs (upload), all copyright stays with you. Canva does not claim ownership of user content and uses it to operate the editor technically.
Stock materials from the Canva library fall into three legal statuses, and the same tiering applies to assets produced with the Canva AI Generator:
- Free Content free files usable in personal and commercial layouts with no additional payment;
- Pro Content premium files available under a Pro subscription or a one-off single-design licence;
- Branded Content brand-owned content restricted strictly to personal, non-commercial use.
What to check before commercial use of a project
The information below is general in nature and does not replace advice from a qualified lawyer on copyright and licensing. For regulated industries, obtain a compliance opinion before deployment.
Before pushing processed materials into a commercial environment, satisfy the licence restrictions:
- No standalone resaleyou may not export an isolated stock object or an extracted background and resell it as clip art.
- Pro-content resolution capwhen publishing online outside Canva hosting, an image containing unmodified Pro elements must not exceed 480,000 pixels (for example 600×800 px).
Enterprise view: data privacy, Shadow AI and model-risk validation
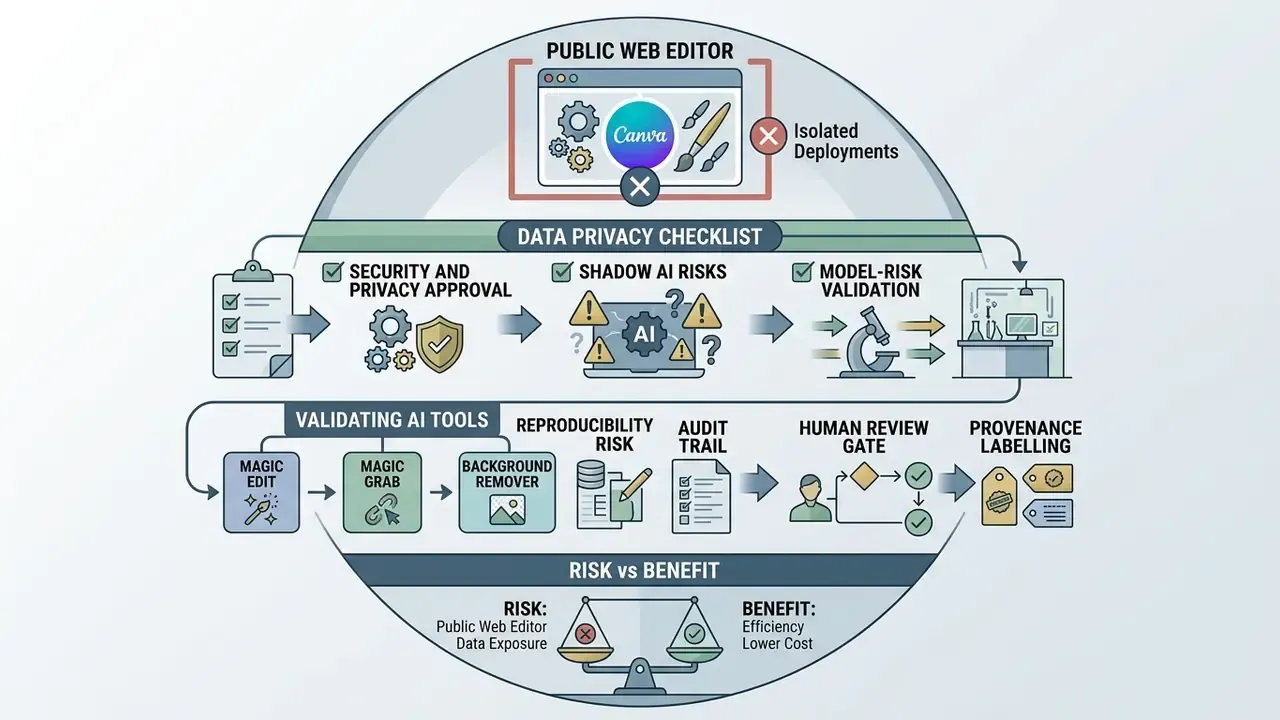
Canva Photo Editor is a public, multi-tenant, browser-delivered SaaS. That is exactly what makes it fast for marketing teams, and exactly what makes it a governance question in banking, insurance and healthcare. The most common failure mode is not a breach. It is Shadow AI: staff uploading customer documents, screenshots of internal dashboards or KYC photos into personal free accounts that sit entirely outside corporate logging.
Who owns that risk? Usually nobody, until an auditor asks.
Security and privacy checklist before approving Canva
Checklist0 / 8
Validating AI editing tools (Magic Edit, Magic Grab, Background Remover)
Risk vs benefit: public web editor against isolated deployments
| Criterion | Public Canva web editor | Private cloud / on-premise editing stack |
|---|---|---|
| Time to output | Minutes; no installation | Weeks; infrastructure and training needed |
| Cost of entry | Free or low per-seat | High fixed cost |
| Data residency control | Vendor-defined | Fully controlled |
| Shadow AI exposure | High without SSO enforcement | Low |
| Audit trail depth | Limited, non-exportable | Full, integrable with GRC |
| Generative reproducibility | Not guaranteed | Controllable via pinned model versions |
| Best fit | Public marketing, internal comms, non-sensitive imagery | Client data, claims evidence, regulated documentation |
A governance stance that tends to hold up: allow Canva on an SSO-managed tenant for public-facing marketing imagery, ban uploads of classified data by policy and DLP rule, and route any workflow touching customer records into a controlled environment. Review the decision every twelve months, because feature sets move faster than policies do.
Open questions we cannot close from public documentation: the exact sub-processor list behind each generative feature, and whether provenance metadata survives every export path. Both belong in your vendor questionnaire, not in an article.
When Canva Photo Editor is convenient, and when you need another editing tool
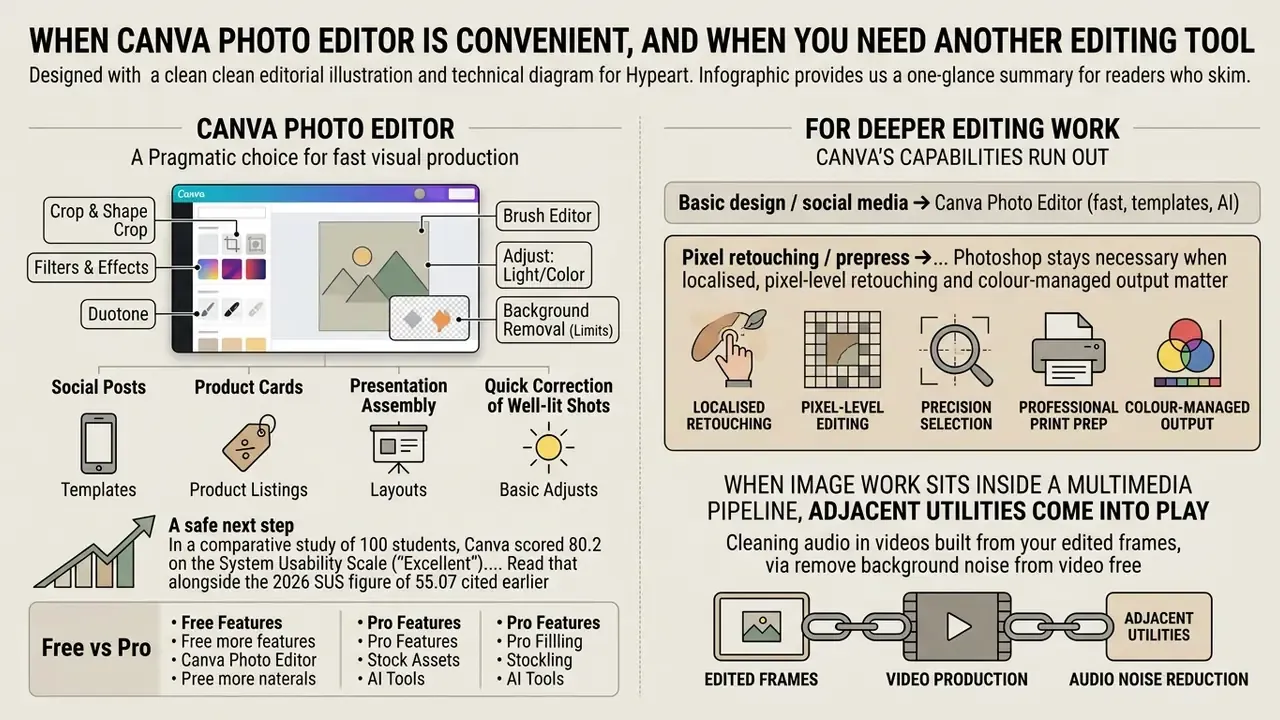
canva photo editor is the pragmatic choice for fast visual production: social posts, product cards, presentation assembly, quick correction of well-lit shots. Comparative usability research places it clearly ahead of adjacent presentation-AI tools:
Read that alongside the 2026 SUS figure of 55.07 cited earlier. Satisfaction runs high on template-driven tasks and drops when the workload turns heavy or navigation-intensive. That gap is the real boundary of the tool.
For deeper editing work, Canva's capabilities run out:
[Basic design / social media] ➔ Canva Photo Editor (fast, templates, AI)
[Pixel retouching / prepress]  ➔ Adobe Photoshop (layers, masks, CMYK, curves)
[UI/UX / web interfaces]       ➔ Figma (vectors, components, auto-layout)
Photoshop stays necessary when localised, pixel-level retouching and colour-managed output matter. Figma stays necessary when the image lives inside a product design system rather than a marketing layout.
When image work sits inside a multimedia pipeline, adjacent utilities come into play. These are companion steps for the same asset, not substitutes for the editor:
- Cleaning audio in videos built from your edited frames, via remove background noise from video free;
- Stripping unwanted overlays, via remove text from video guidance;
- Choosing a suite for the video leg of the project, via best free video editing software;
- Estimating production spend with the AI Media Calculators;
- Integrating third-party services programmatically through the AI Media API Guides.
Quality photo processing in Canva lets teams close visual-marketing tasks quickly without hiring professional designers, provided the governance boundaries above are respected.
A safe next step
Pick one workflow, not the whole estate. Move a single marketing use case onto an SSO-managed tenant, write down which image classes are forbidden, and run a two-week log review to see what people actually upload. If the review is clean, widen the scope. If it surfaces customer data, you have found your control gap cheaply, which is the point of small pilots.
FAQ: Canva Photo Editor questions
Can I edit photos in Canva for free and without watermarks?
Yes. The free Canva plan lets you edit your own photos and export them without watermarks as JPG, PNG or WEBP. Watermarks appear only when you use paid Pro elements from the library.
How many times can I remove a background for free in Canva?
On the free plan, Background Remover is offered as a single trial use. Regular use requires a Canva Pro, Teams or Education subscription.
What is the maximum resolution allowed for commercial use?
When unmodified Pro elements are involved and the image is published outside Canva hosting, the exported file must not exceed 480,000 pixels, for example 600×800 px.
How many photos can I put into one collage?
Up to 32 images per project is the practical performance ceiling for browser-based collage editors, Canva included. Use Grids layouts and apply one filter to all tiles at once.
How do I crop a photo into a circle or a heart?
Open Elements ➔ Frames, pick the circle, heart or star shape, and drag your photo into it. Double-click to reposition the visible area inside the frame.
Can I edit only part of a photo?
Yes. Use the Brush Editor in the Adjust panel to paint a selection and change brightness, contrast or saturation for that area only, or use Auto Focus to blur only the background.
Why does the Canva app close when I press Back?
This is a known behaviour of the mobile app: the hardware Back button often exits the app rather than the active tool. When it happens, reopen your file from Projects ➔ Uploads instead of re-selecting it from the gallery, to avoid a duplicate upload.
How do I prepare a Canva photo for physical printing?
Build the design at final physical size, target roughly 300 PPI, brighten slightly to offset print darkening, mirror artwork for transfers, and export as PDF Print with CMYK and bleed / crop marks enabled on a Pro plan.
Is Canva safe for confidential corporate images?
Treat it as a public multi-tenant SaaS. Approve it via corporate SSO for non-sensitive marketing imagery, prohibit uploads of customer or internal system data by policy, and route regulated workflows to controlled environments. The enterprise checklist above lists the specific questions to ask.
Navigation hub
For a detailed walkthrough of terminology and media-tool capabilities, visit the AI Media Glossary.
Author: Marcus Hale, author. Sources: Canva Help Center, Canva Photo Editor product pages, Canva Content License Agreement and Terms of Use (2026 editions); Journal of Applied Informatics and Computing (2025); SUS comparative study Canva vs Gamma (2024–2026); SUS usability study, Canva (2026); NAU usability study, Canva (2024–2026); Didaktika (2023–2024); Android Authority hands-on testing (2025).
Disclaimer: this article is educational and does not constitute legal, compliance or security advice. Licensing terms, plan limits and AI feature availability change frequently, so verify current conditions in official Canva documentation before commercial or institutional deployment.