The Fastest Path From Raw Footage to Published Video
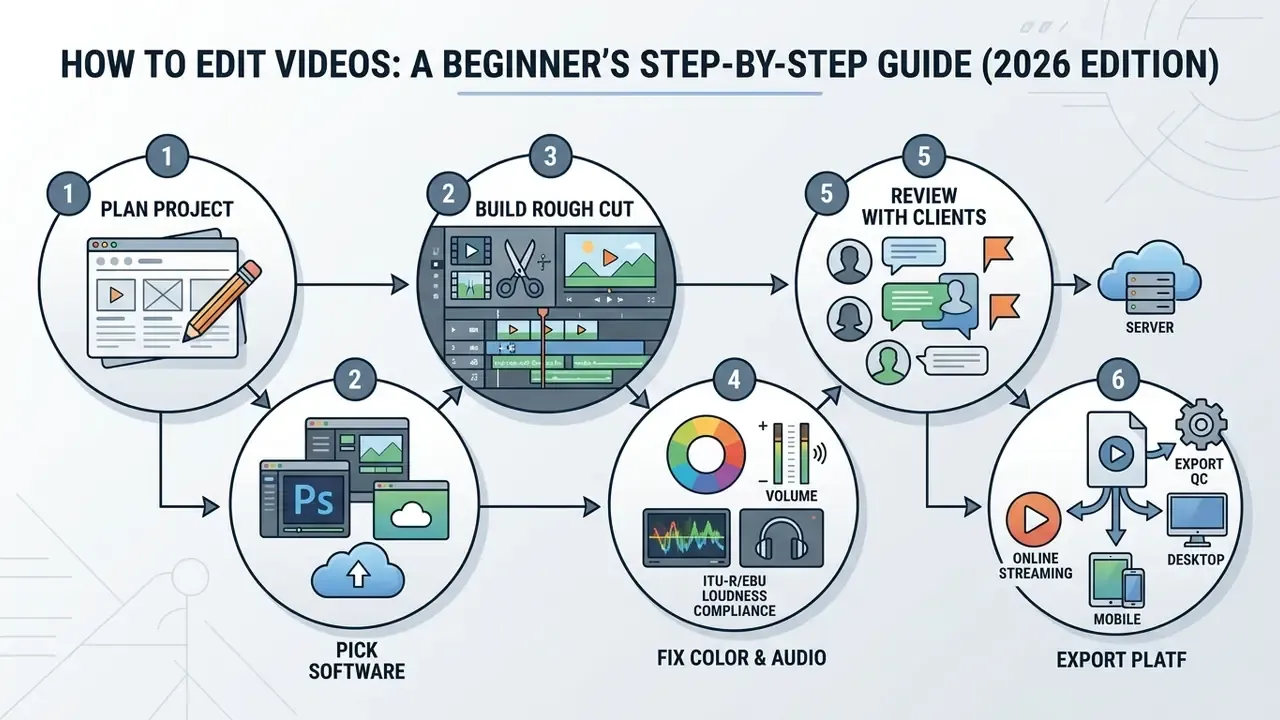
- Plan first.Decide the audience, platform, aspect ratio, and runtime before you open any software. Long, unstructured videos lose almost all of their viewers.
- Capture clean source material.For tutorials and vlogs, record your screen and webcam at your target resolution and keep microphone audio on a separate track from system audio.
- Pick one editor and stay with it.Clipchamp, iMovie, or CapCut if you want a beginner video editor; DaVinci Resolve or Premiere Pro when you need color, audio, and effects depth. Check where your files are processed (local vs. cloud) before uploading sensitive footage.
- Organize before importing.One dated project root folder, five subfolders, no spaces or special characters in file names.
- Build a rough cut first.Story order and shot selection before any transition, color, or effect work.
- Trim aggressively.Use J/K/L playback, split-at-playhead, ripple delete, and AI transcript-based editing to remove pauses, filler words, and retakes.
- Fix visuals, then audio.White balance, then exposure, contrast, and saturation; then denoise dialogue, normalize loudness (-18 to -24 LUFS for speech), and duck music 12-18 dB below voice.
- Review with stakeholders, then export.Collect frame-accurate timestamped comments, run a four-point QC pass, and export with platform-matched codec, bitrate, and aspect ratio.
That is the whole loop. Everything below is detail, and the detail is where beginners lose their weekends.
Why Video Editing Is a High-Value Skill in 2026
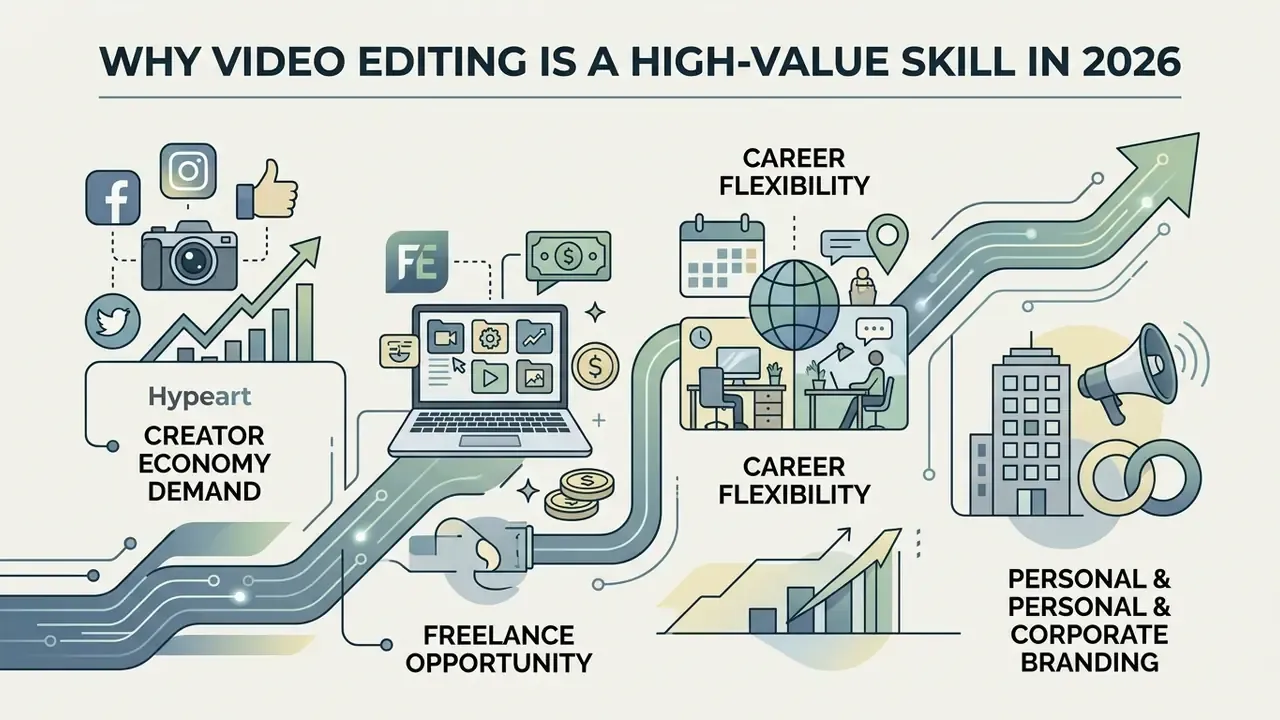
Four practical reasons to learn the craft now:
- Creator economy demand
- YouTube, Instagram, and short-form platforms keep expanding, which increases demand for editors who can deliver clean, platform-correct cuts on schedule.
- Freelance opportunity
- Most businesses outsource editing rather than hire in-house, which makes it one of the easiest paid entry points for a self-taught specialist.
- Career flexibility
- The same skill set transfers across marketing, L&D, filmmaking, internal communications, and product documentation.
- Personal and corporate branding
- Consistent, well-edited video content builds trust faster than text, particularly for regulated industries that must communicate policy changes clearly.
There is also a quieter reason. Once you know how to edit videos yourself, you stop approving bad drafts because you cannot describe what is wrong with them. You can name the problem: the cut is early, the music is 6 dB too loud, the caption covers the speaker's name.
If you plan to scale production beyond your own capacity, our budgeting resources and the guide on how to hire video editor professionals cover the commercial side of the same workflow.
Plan Your Video Project Before You Start Editing
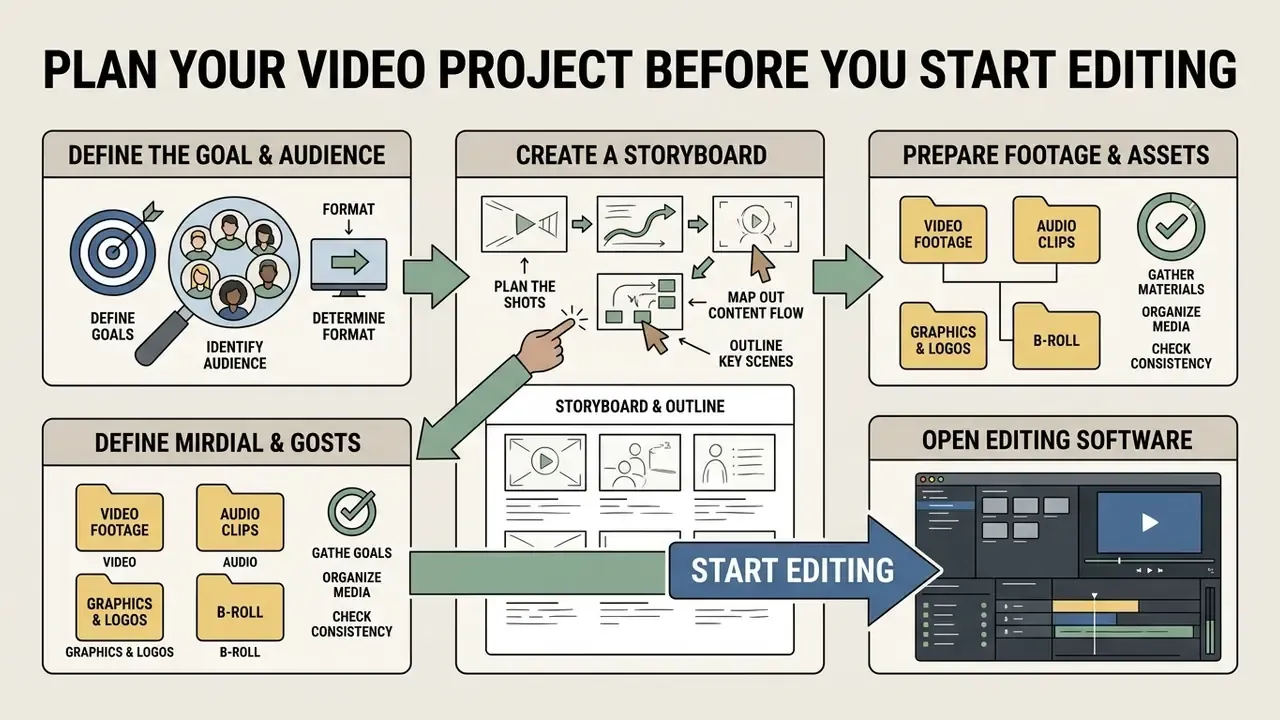
The best way to edit videos efficiently is to complete core pre-production tasks, meaning defined audience objectives, a written outline, and gathered assets, before opening your software. Skipping initial planning creates unstructured timelines, inconsistent pacing, and excessive revision cycles during post-production.
Research shows that user drop-off scales rapidly with unoptimized runtime. A 2024 quasi-experimental field study published in JMIR compared short and long versions of the same social video across four demographic groups over four days and 3.34 million impressions.
«A strong negative correlation between video length and the number of users who finished watching was confirmed across 3.34 million impressions (r(8) = −0.82, P = .01).»
Establishing clear runtime, format, and messaging parameters before editing directly mitigates that drop-off risk, because the cuts you plan are cheaper than the cuts you discover at 2 a.m. on the timeline.
A workable pre-production sequence, consistent across university and public-sector production toolkits, looks like this: define audience and objective, write a script (fiction) or outline (nonfiction), build a shot list, assemble a master materials list covering talent, video, audio, lighting, and crew, then work backward from the delivery date to schedule shooting and editing time. Last step: confirm availability of people, locations, and equipment.
Define the Goal, Audience, and Video Format
Defining your goal, audience, and video format determines the aspect ratio, pacing, and total runtime required for your target platform. Horizontal 16:9 layouts suit long-form YouTube videos and explainers, while 9:16 vertical layouts are essential for mobile-first surfaces like YouTube Shorts, Instagram Reels, and TikTok.
Platform guidance confirms that short-form vertical assets perform best under strict structural limits. YouTube Shorts supports vertical clips up to 3 minutes (raised from 60 seconds in October 2024), whereas standard YouTube uploads maintain 16:9 widescreen containers (YouTube Help Center, 2026). Instagram Reels accepts aspect ratios from 1.91:1 to 9:16 at a minimum of 30 FPS.
Furthermore, empirical ad data compiled by Verizon and Publicis Media indicates that up to 85% of social feed videos are viewed without audio, making visual clarity and subtitle planning essential during initial formatting (Verizon & Publicis Media / Kapwing Synthesis, 2023). Plan for silence. It is the default viewing mode, not the exception.
Create a Storyboard and Prepare Footage
Creating a storyboard involves mapping key visual scenes against script audio or voiceover dialogue to establish narrative structure. Once mapped, organizing raw video footage, graphics, and audio files into labeled folders prevents missing media and timeline confusion.
Cornell and Georgetown production frameworks recommend a two-column storyboard layout: visual shot descriptions on the left paired with matching script narration on the right (Cornell Basic Video Production Guide; Georgetown Media Guide). Berkeley’s media tutorial adds a useful rule: divide the story into logical parts and assign each medium, whether audio, video, stills, graphics, or text, a complementary function rather than a redundant one.
Studies evaluating natural-language editing tools show that novices who arrive with organized, labeled assets accept structural AI suggestions far more readily and report lower frustration.
«Novices accepted about 50% of the system’s suggestions; 58% of the final edits in the resulting videos were AI-generated.»
Choose the Best Video Editing Software for Your Needs
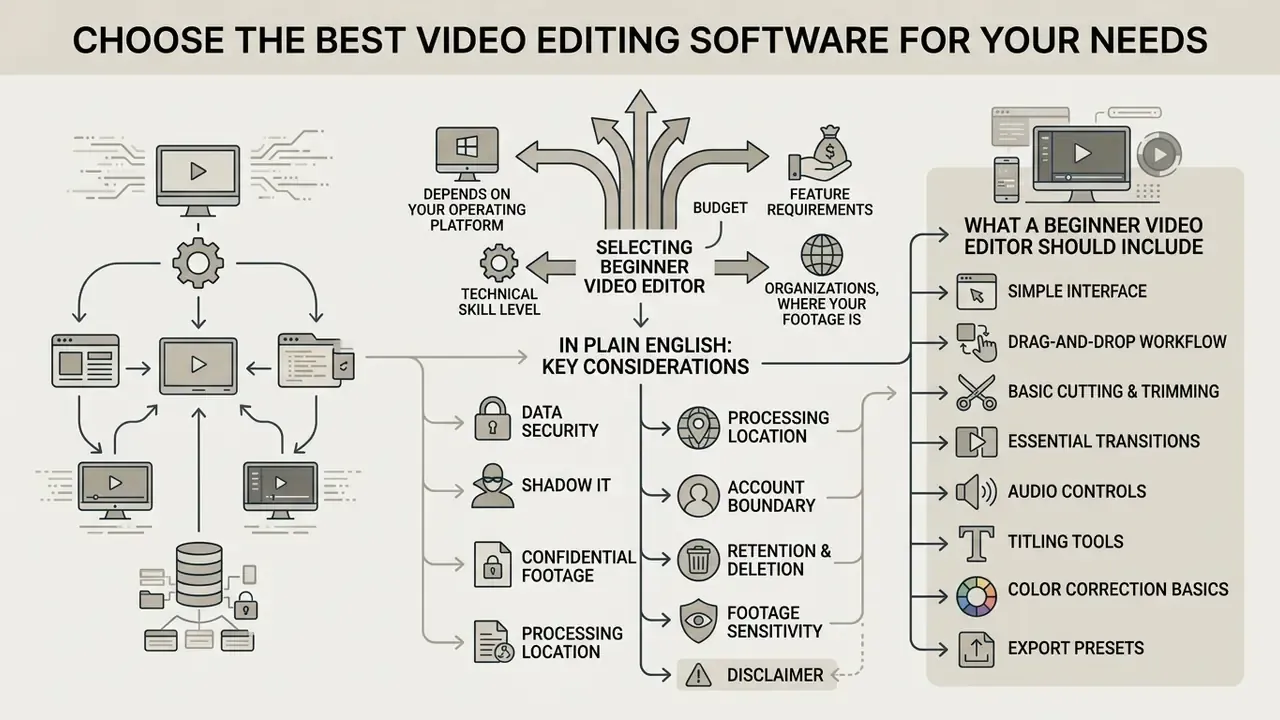
Selecting the right beginner video editor depends on your operating platform, technical skill level, budget, feature requirements, and, for organizations, where your footage is actually processed and stored. Beginners should prioritize tools with intuitive timeline navigation, clear iconography, and accessible rendering controls over complex node-based compositing suites. If cost is the deciding constraint, compare the no-cost options directly in our roundup of free video editing software.
Table: Comparison of Video Editing Software for Beginners (2026 Standards)
| Software | Platform availability | Interface complexity | Core editing features | Audio & subtitle capability | Data handling & local processing | Pricing model |
|---|---|---|---|---|---|---|
| Clipchamp | Web browser, Windows | Low (drag-and-drop) | Trimming, split clips, basic transitions, aspect presets, screen and webcam recorder | Timeline audio level adjust, AI auto-captions (80+ languages), AI voiceover | Browser-based editing with local processing for many operations; governed by Microsoft 365 tenant controls when deployed via a work account | Free tier available; paid Microsoft 365 integration |
| CapCut | Web, iOS, Android, desktop | Low to medium | Multi-track timeline, speed curves, background cutout, auto-silence removal | Built-in sound library, auto-caption generation | Cloud-assisted AI features upload media to vendor servers; review corporate policy before using with confidential footage | Free basic tier; Pro subscription upgrade |
| iMovie | macOS, iOS | Low | Precision trimming, title overlays, green screen keying | Multi-track audio with background music integration | Fully local processing on device; no third-party upload required | Free for Apple hardware owners |
| Adobe Premiere Elements 2026 | Windows, macOS | Medium (Quick / Guided / Advanced modes) | Guided edits, automated motion tracking, color tools | Audio cleanup presets, dynamic caption generation | Local desktop rendering; optional cloud features are opt-in | One-time purchase license |
| DaVinci Resolve 19 | Windows, macOS, Linux | High (professional NLE) | Advanced trimming, Fairlight audio, Fusion visual effects | Fairlight mixer, sub-frame editing, full subtitle editor | Fully local processing and rendering; suitable for air-gapped or restricted environments | Free full version; paid Studio license upgrade |
Summary of criteria, in text: lightweight browser or consumer applications (Clipchamp, iMovie, CapCut) offer a user friendly interface ideal for quick assembly and social media delivery. Professional suites (DaVinci Resolve, Adobe Premiere Pro) provide comprehensive audio editing, color grading, and visual effects, but require a steeper learning curve. Canva Video sits between the two as the most template-driven option, with a free tier and a Pro upgrade. Judge each tool on five things: interface clarity, cutting and trimming precision, audio editing depth, export presets, and whether the free version is genuinely usable rather than a watermarked demo.
Data Security, Shadow IT, and Confidential Footage
Updated (2026 review): Tool choice is a governance decision as much as a creative one. Before a team standardizes on any editor, verify four points:
- Processing locationDoes the tool render locally (iMovie, Resolve, Premiere Elements, OpenShot) or upload media to vendor infrastructure for AI features such as background removal, auto-captions, or generative fill?
- Account boundaryIs the editor deployed under a managed corporate identity with centralized IT controls, or are employees signing in with personal accounts? The second case is textbook Shadow IT.
- Retention and deletionHow long does the vendor retain uploaded source media and generated transcripts, and can you force deletion?
- Footage sensitivityInterview footage containing customer data, internal systems, unreleased financials, or personally identifiable information should stay in locally processed pipelines, regardless of how convenient the cloud feature is.
A small illustrative example: a compliance team records a 12-minute policy walkthrough that shows an internal dashboard for six seconds. Pushed through a free consumer app on a personal login, that dashboard now lives on someone else's storage with unclear retention. The edit took nine minutes. The cleanup conversation took three weeks.
What a Beginner Video Editor Should Include
A functional beginner video editor must include multi-track timeline editing, precise clip cutting and trimming, text overlays, basic color correction, volume adjustment, and platform-standard export presets. Missing any of these core editing tools forces editors to rely on fragmented third-party utilities.
Usability evaluations of editing platforms confirm that novice users frequently encounter cognitive fatigue when tool interfaces lack clear task navigation (CapCut Usability Testing Report, 2024, observational study with novice, experienced, and expert users; recommendations included interactive onboarding tours and goal-oriented task navigation). Novices in that evaluation reported being overwhelmed by AI tooling because of unclear iconography and confusing onboarding, while experienced users preferred manual control.
Key foundational editing features include:
- Multi-track timeline assembly for video, background audio, and text overlays.
- Precision splitting, cutting, and trimming tools.
- Audio volume sliders for adjusting volume, speech denoising, and keyframe level control.
- Title and subtitle generators with customizable fonts and aspect ratios.
- Color balance, brightness, and contrast adjustments.
For a deeper breakdown of capability tiers and payment models, see our reference on video editor features and pricing. If your workflow involves generating specialized asset formats, review our guidance on using a free avatar maker for composite avatar integration.
Free, Online, Desktop, and Mobile Editing Tools
Video editors fall into four main architecture categories: free open-source desktop software, browser-based online video services, professional desktop NLEs, and mobile editing apps. Each deployment model involves distinct trade-offs between hardware dependencies, processing speed, cloud accessibility, and data exposure. Note that many vendors now ship the same product across formats: Adobe Express and Canva both market online plus mobile editors with project sync.
Online platforms (for example Canva and Microsoft Clipchamp) require minimal local CPU resources and sync assets across devices via cloud storage, but depend on stable internet upload speeds. Desktop installations (OpenShot, iMovie, DaVinci Resolve) process local media files directly, offering faster rendering and full offline capability without storage quotas (OpenShot Documentation, 2026; Adobe Express Overview, 2026). Searching for free video editing videos and tutorials? Match the tutorial to your exact tool version, because interface changes between releases waste more time than the lesson saves.
Mobile applications excel at rapid mobile-first assembly, though smaller touchscreen interfaces limit complex audio mixing and precise multi-layer editing. Creators evaluating generative alternatives can compare no-cost options in our roundup of free AI video generators.
Test the Editor With a Small Video Project
Before committing to a long-form video project, execute a micro-test consisting of three raw clips, one audio file, and a text title. Running a short test verifies software stability, system rendering performance, and export compatibility on your specific hardware configuration.
«All eight participants produced satisfactory videos in a single session, with a mean frustration level of 2 out of 7 and satisfaction with the final result of 6 out of 7.»
National Institute of Standards and Technology (NIST) system evaluation protocols recommend running pilot task sessions to assess efficiency, effectiveness, and user satisfaction before full operational deployment (NIST Usability Framework, CIF Guidelines). A practical five-step micro-test, adapted from that framework:
Evaluating how easily you can edit content videos during a 60-second test run exposes workflow bottlenecks early. If your project demands advanced generative visuals, explore our technical breakdown on how google veo ai video generator how to use fits into automated content creation.
- Define scopeone 30-second deliverable, one target platform.
- Choose representative tasksimport, trim, add text, balance audio, export.
- Run a pilotcomplete the tasks once without documentation to expose interface friction.
- Execute a timed sessionrepeat and record how long each task takes.
- Analyzenote where the tool failed on effectiveness (could you finish?), efficiency (how long?), and satisfaction (would you do it again?).
Step 0: Capture Your Screen and Webcam (For Tutorials, Demos, and Vlogs)
If you are creating instructional videos, software demos, course modules, or reaction content, capture clean source footage before assembly. Editing cannot repair a recording made at the wrong resolution or with voice and system audio permanently glued together.
- Resolution matching: Set your screen recording output to match your sequence target, for example 1920x1080 at 30 FPS. Recording at 1280x720 and stretching it into a 1080p sequence produces soft text and unreadable UI.
- Audio separation: Record system audio and your USB microphone onto separate audio tracks (Track 1: mic, Track 2: desktop audio). This lets you lower game, software, or notification volume later without affecting voice clarity.
- Webcam framing: Position your webcam overlay in a corner that will not obstruct critical UI elements, menus, or burned-in subtitles.
- Retakes over repairs: Modern browser recorders (Clipchamp, CapCut, Loom-style tools) allow unlimited retakes without a watermark. Re-record a fumbled 20-second explanation instead of spending 15 minutes patching it.
- Clean the capture environment: Close notification-heavy apps, hide bookmarks bars containing personal or client data, and switch the OS to a neutral desktop background. That is a privacy control, not only an aesthetic one.
Import, Organize, and Set Up Your Editing Project
Proper project setup begins with establishing structured file directories on local disks or cloud storage before importing assets into your NLE. Direct importing from external SD cards or unorganized desktop folders leads to broken file paths and lost assets during export. Teams automating parts of this pipeline can review comparable AI video generation workflows for asset-creation handoffs.
Sort Video Footage, Images, and Audio Files
Organizing media into structured subfolders grouped by content type creates a reliable data lineage for your editing projects. Standardize your main project directory into dedicated folders for raw video footage, stills, audio tracks, graphics, and exports.
University media management standards recommend establishing top-level root folders using standardized date-and-name conventions, such as YYYYMMDD_ProjectName (University of Kentucky Media Workflow Guidelines; University of New Hampshire Archives Standard). The University of Kentucky guidance is explicit on one point beginners routinely ignore: never drag or import files directly from an SD card or the desktop. Copy them into the project folder first, then import.
Within the project folder, maintain strict separation of media assets:
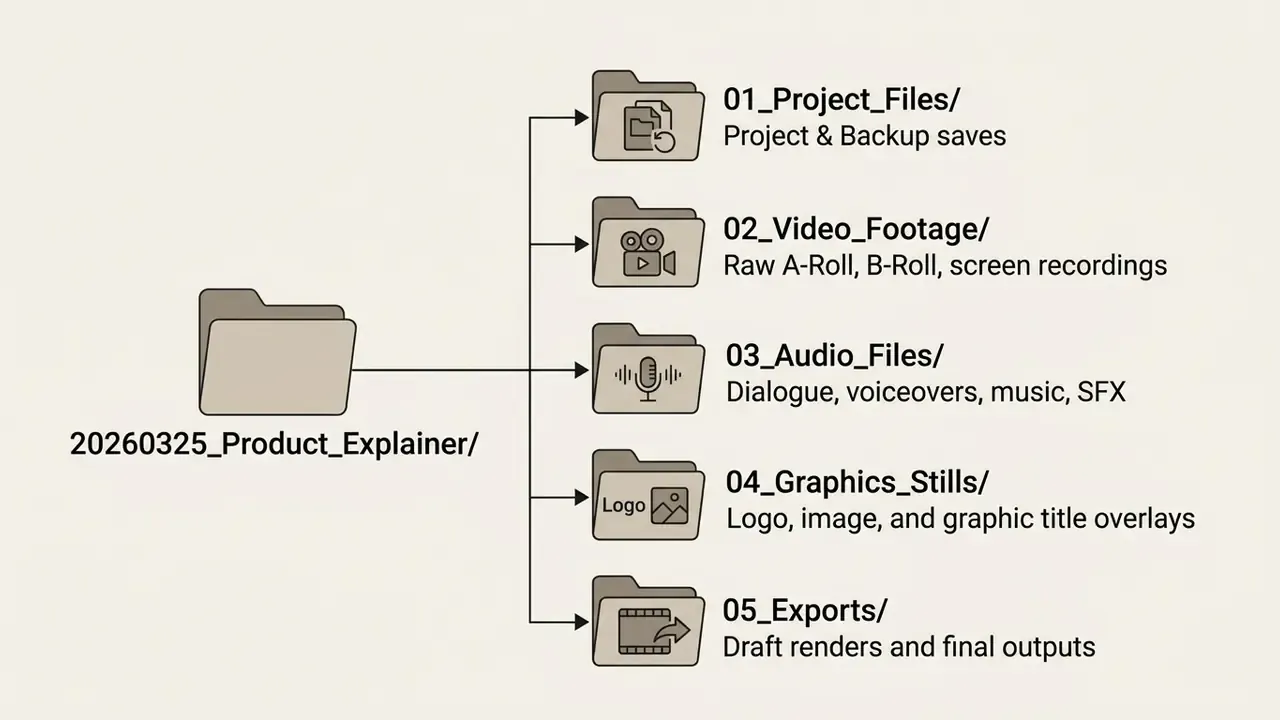
National Archives (NARA) digital file standards require avoiding special characters or spaces in file names, using hyphens or underscores to separate words, and writing dates in YYYYMMDD format (NARA File Naming Policy). NIST data-management guidance adds the practical test: a file name and folder structure must make sense to someone other than its creator, and roughly 25 characters is enough to name a record clearly.
Build a Timeline and Create a Working Sequence
Creating a working sequence requires matching sequence settings, meaning resolution, frame rate (FPS), and aspect ratio, to your intended final distribution channel. Mismatched sequence settings cause unwanted letterboxing, motion artifacts, or pixel stretching during export.
Society of Motion Picture and Television Engineers (SMPTE) and ISO digital standards define baseline container parameters across digital platforms (SMPTE DCP Standards; ISO 24628-11:2011):
- Standard widescreen (YouTube, web)
- 1920x1080 (1080p Full HD) or 3840x2160 (4K UHD) at 16:9; 24, 29.97, or 60 FPS.
- Vertical short-form (Shorts, Reels, TikTok)
- 1080x1920 at 9:16; 30 or 60 FPS.
- Square social posts
- 1080x1080 at 1:1.
- Digital cinema reference
- DCI 2K Flat 1998x1080 (1.85:1) and 2K Scope 2048x858 (2.39:1), conformed to 24.00 fps.
Understanding Timeline Layers (V1/V2, A1/A2)
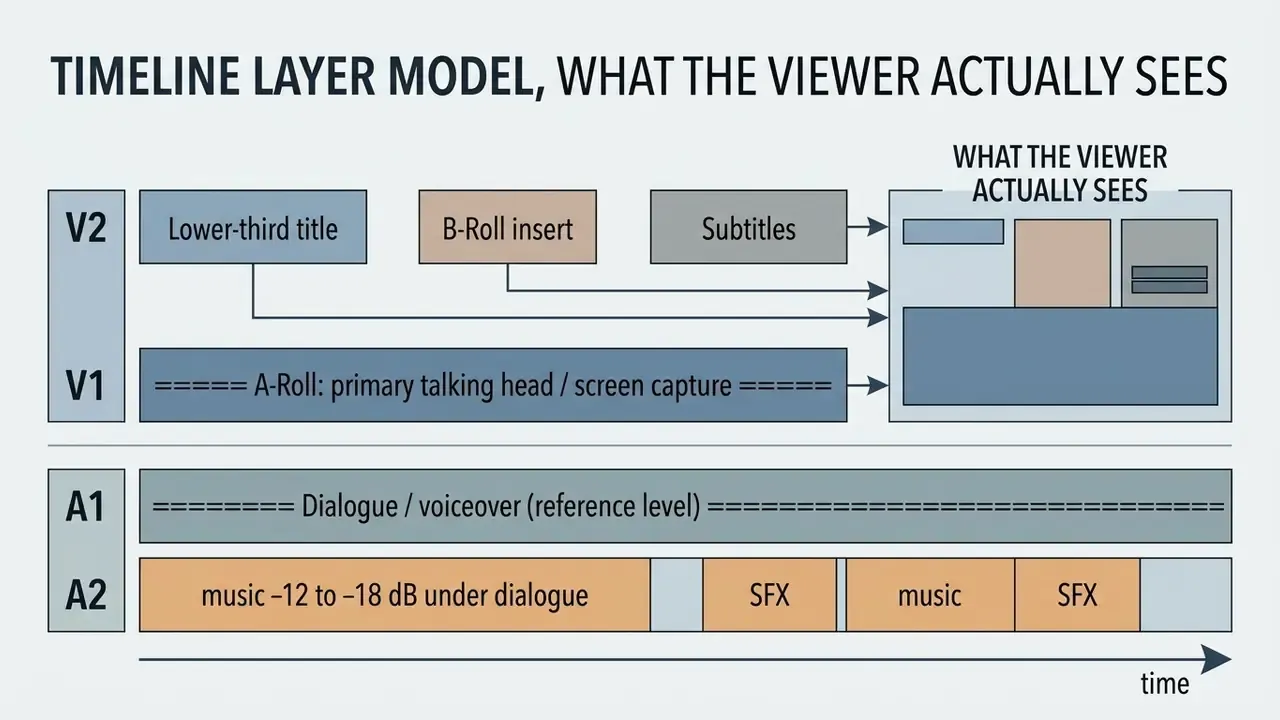
The timeline is the single most important panel in any editor: a long horizontal strip where time runs left to right, with the start of your video on the left and the end on the right. Think of its tracks as a stack of glass sheets laid over that strip:
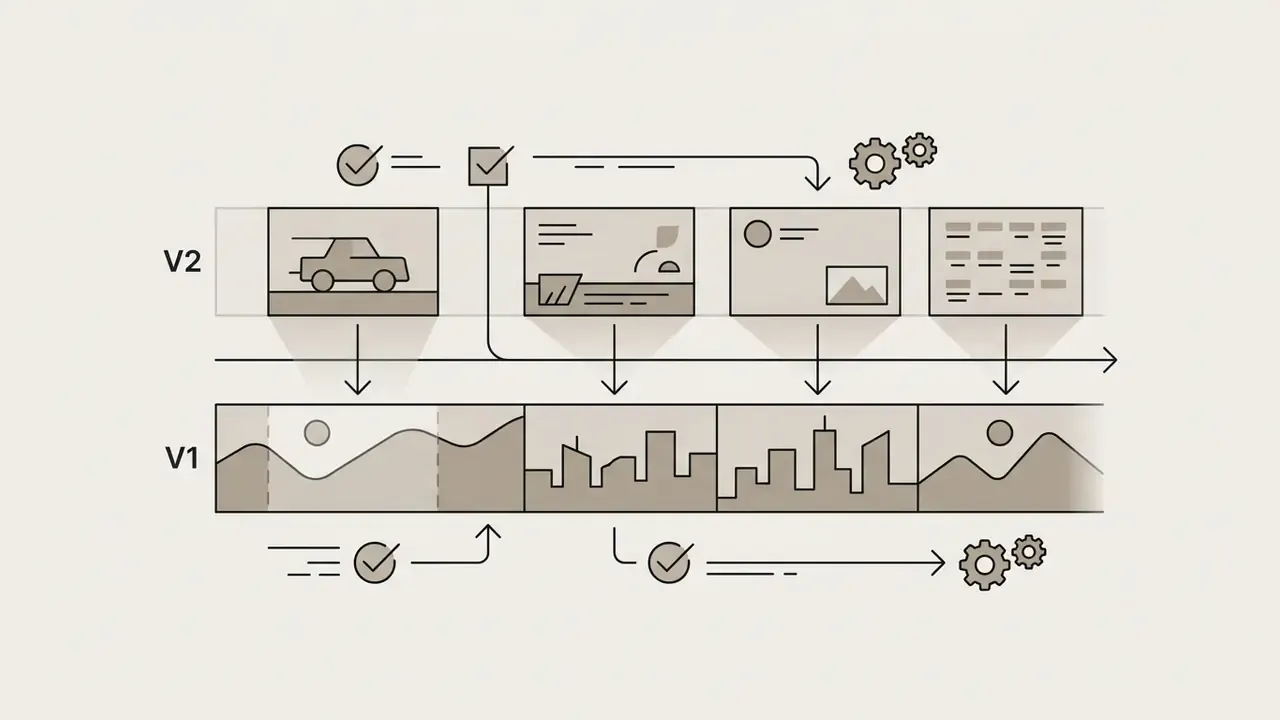
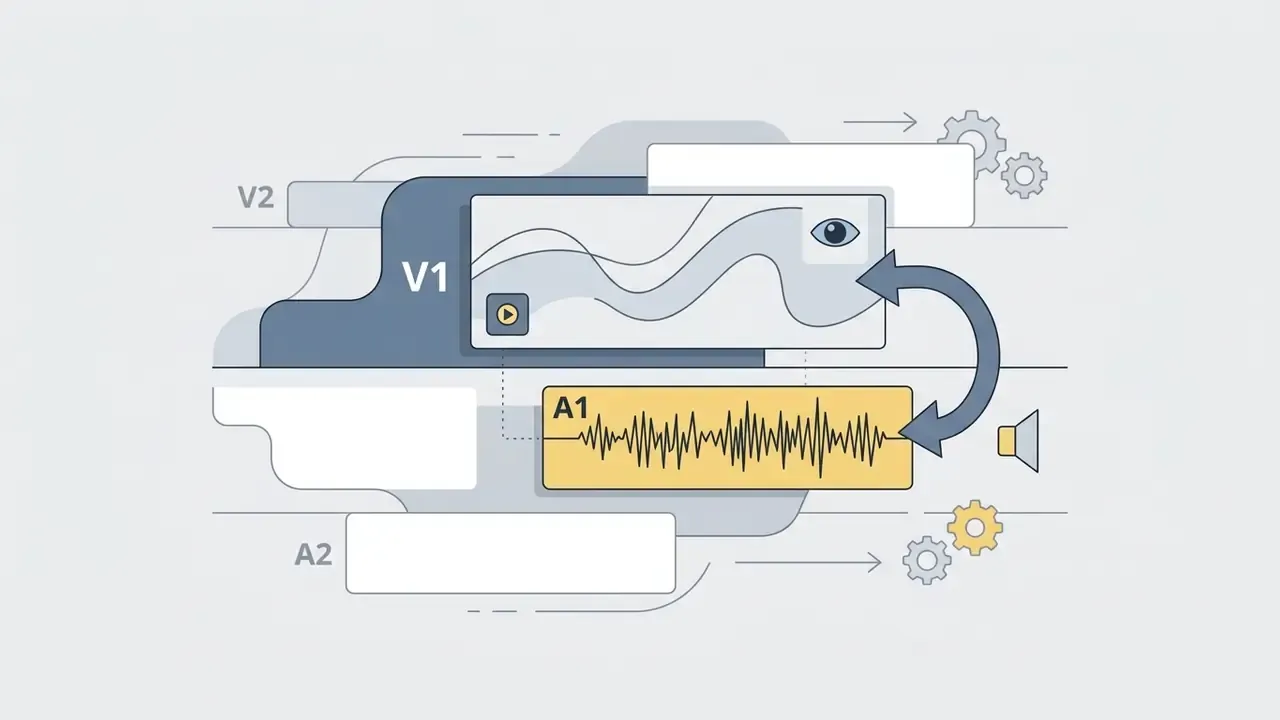
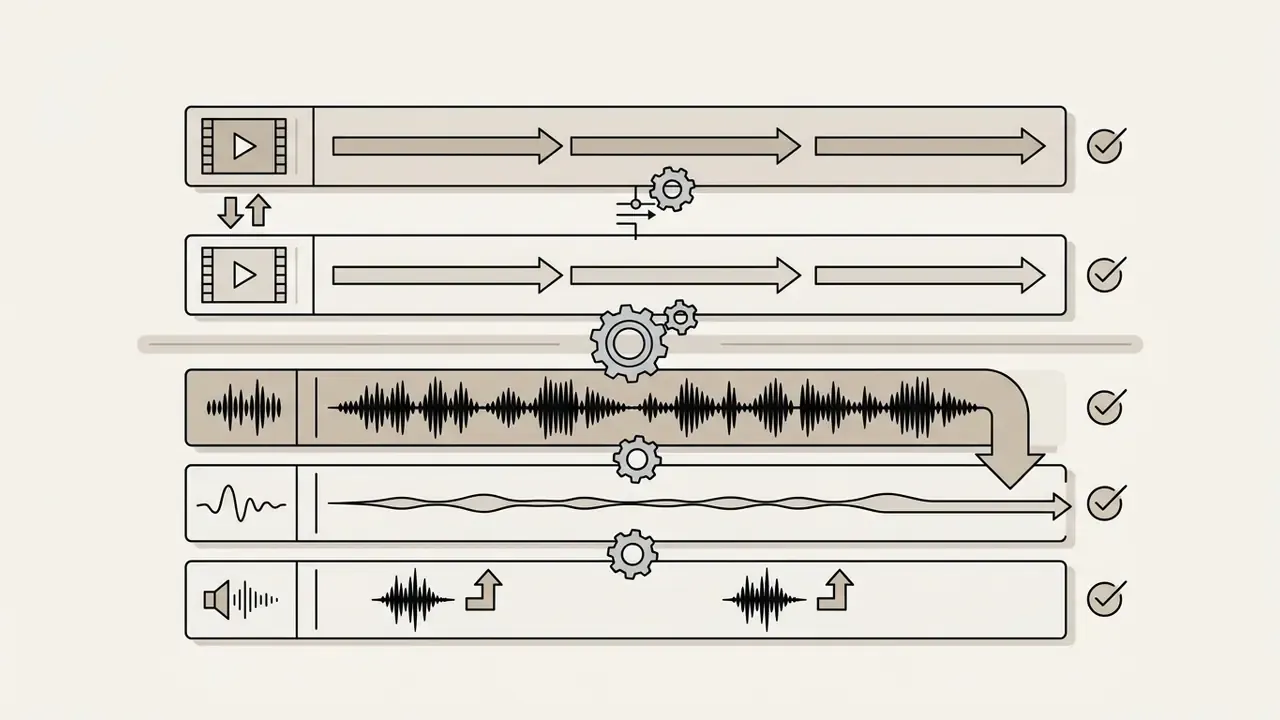
On the timeline you can place clips end to end, cut out unwanted sections, slide music underneath the picture, insert voiceovers, add text or subtitles, and place transitions between clips. Everything else in this guide happens inside that one panel.
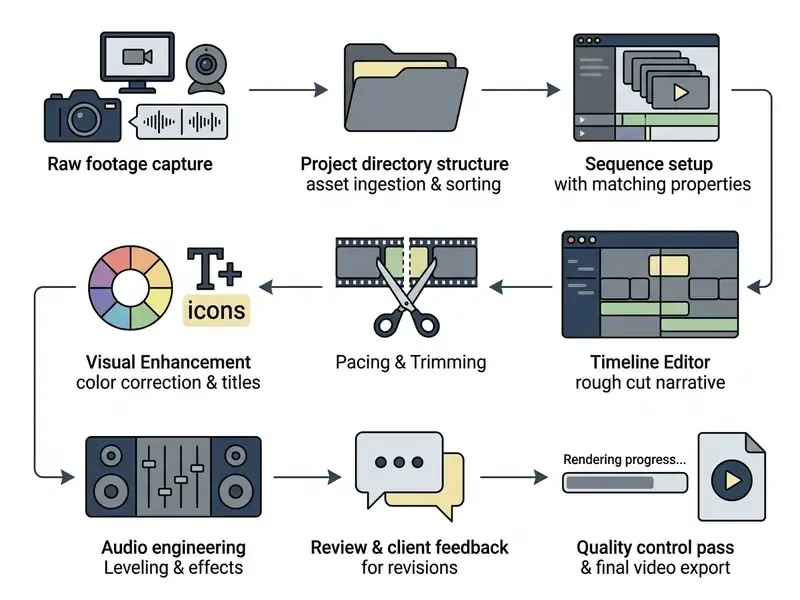
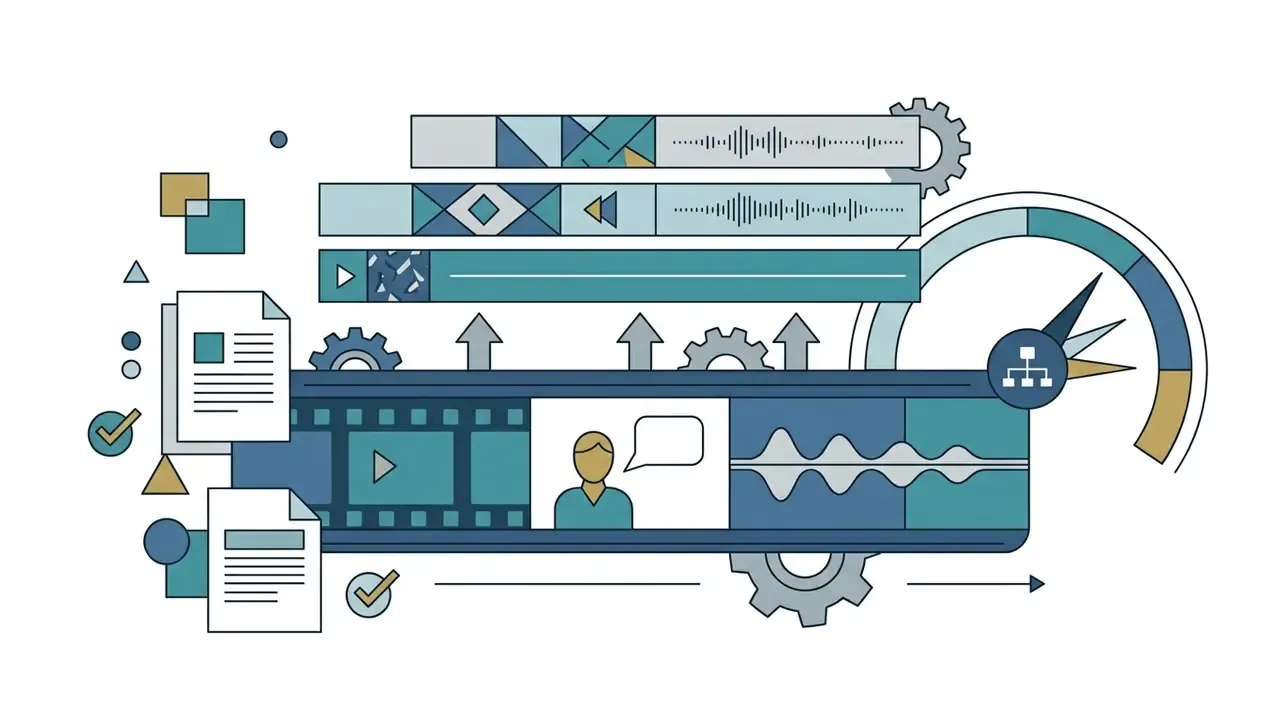
Text version of the flowchart, in order: capture source material with separated audio, ingest and sort video files, configure the sequence, assemble the rough cut, trim for pacing, enhance visuals, engineer the audio mix, gather timestamped feedback, then run QC and export the final video.
Edit the Story: Cut, Trim, and Arrange Your Footage
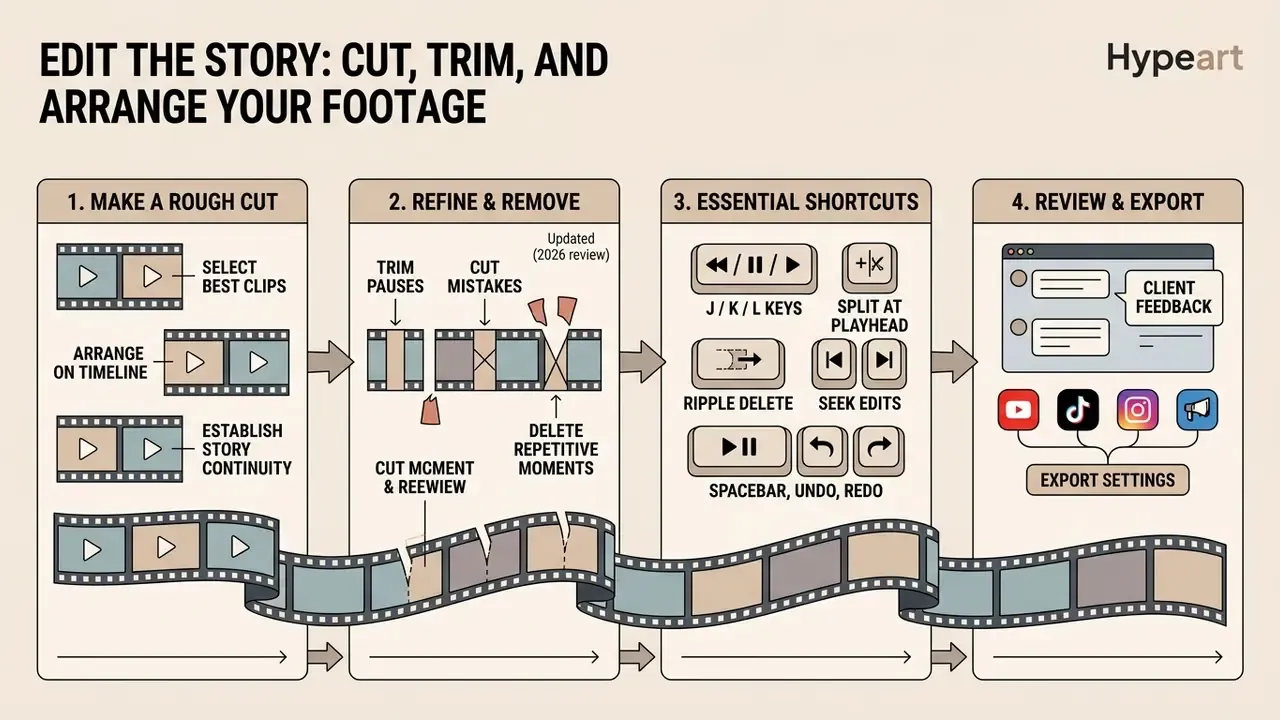
Editing narrative structure requires assembling a rough cut first to establish story continuity before applying micro-trims or fine adjustments. Focus your initial pass on clip sequence and narrative flow rather than visual effects or color grading.
Make a Rough Cut From the Best Clips
A rough cut is the initial structural edit where raw video footage is selected, ordered, and placed onto the timeline to form the primary story structure. During this stage, eliminate unusable takes and focus purely on shot progression.
Editorial guidelines emphasize that the rough cut pass must prioritize structural narrative clarity over frame-accurate perfection (Adobe Premiere Pro Workflow Guide, 2026; LibreTexts Film Production Manual). LibreTexts is blunt about the selection rule: keep shots that advance the story and remove shots that do not, regardless of how expensive or difficult they were to produce.
Trim Pauses, Mistakes, and Repetitive Moments
Trimming means removing unnecessary pauses, vocal stutters, redundant statements, and awkward handles from clips to lift pacing and keep viewers engaged. Cutting dead air keeps the video moving smoothly without distracting gaps, and it is the fastest way to edit videos faster while raising perceived quality.
«For the long video without subtitles, drop-off reached roughly 99% between 5% and 90% of watch time, versus 88% for the short version.»
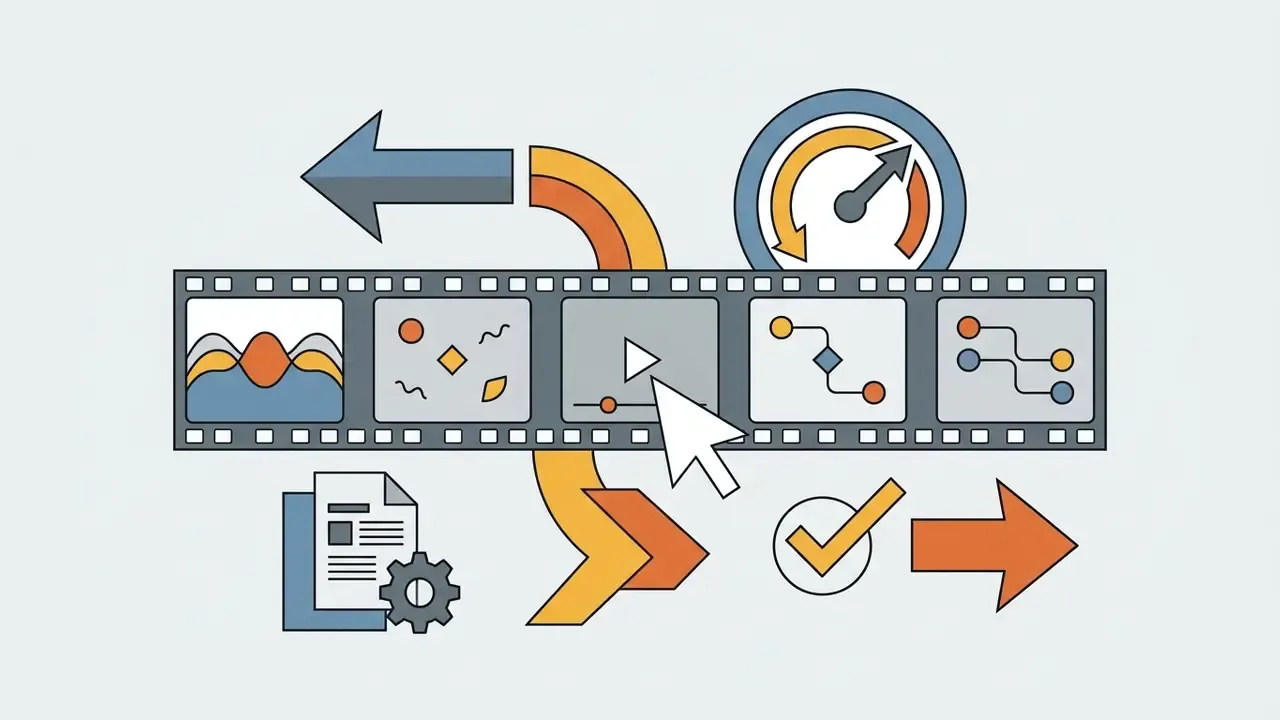
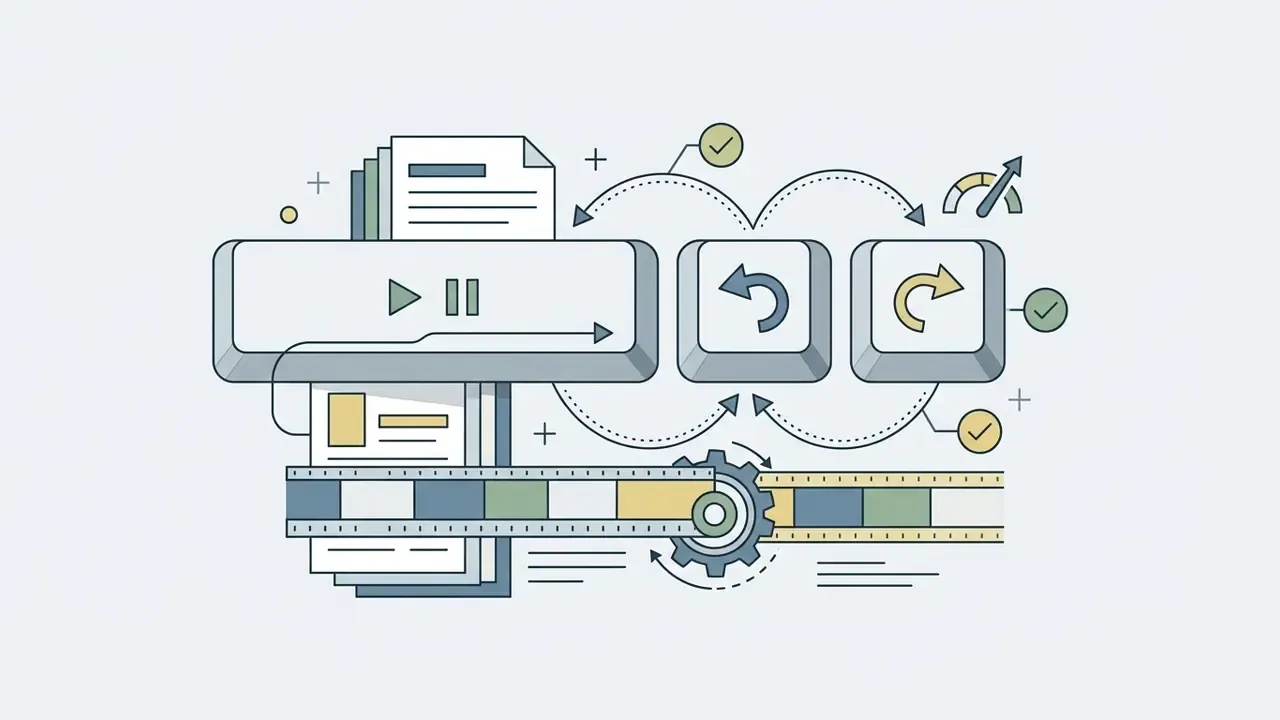
Speed up cutting and trimming with NLE keyboard shortcuts. Essential operational shortcuts include:
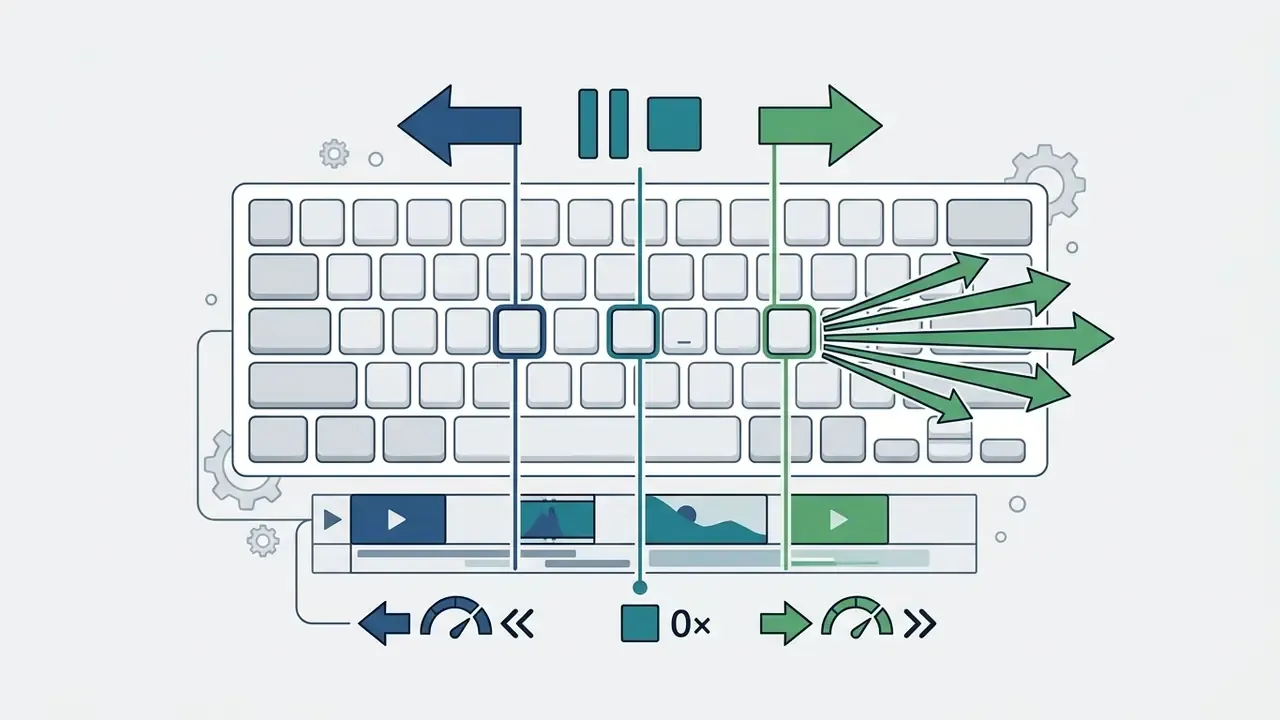
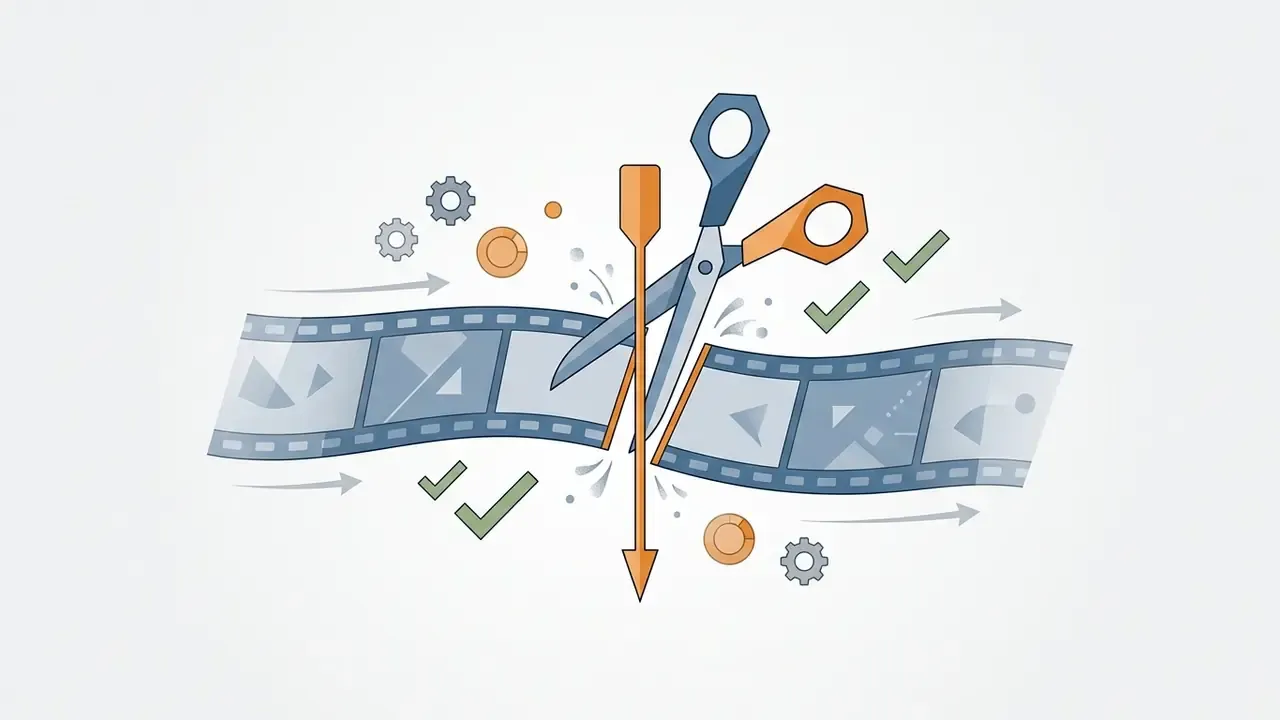
Ctrl+K (Premiere Pro) or Cmd+B (Final Cut Pro) to slice clips instantly.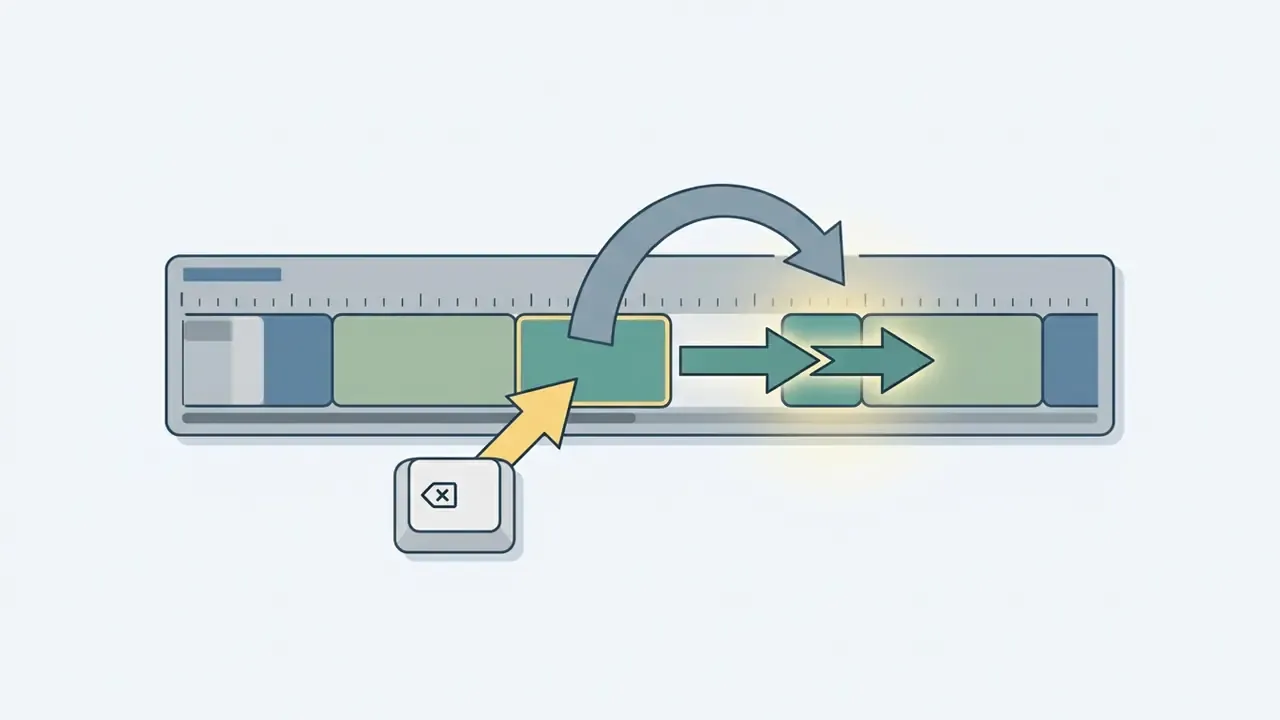
Modern Shortcut: AI Text-Based Editing and Silence Removal
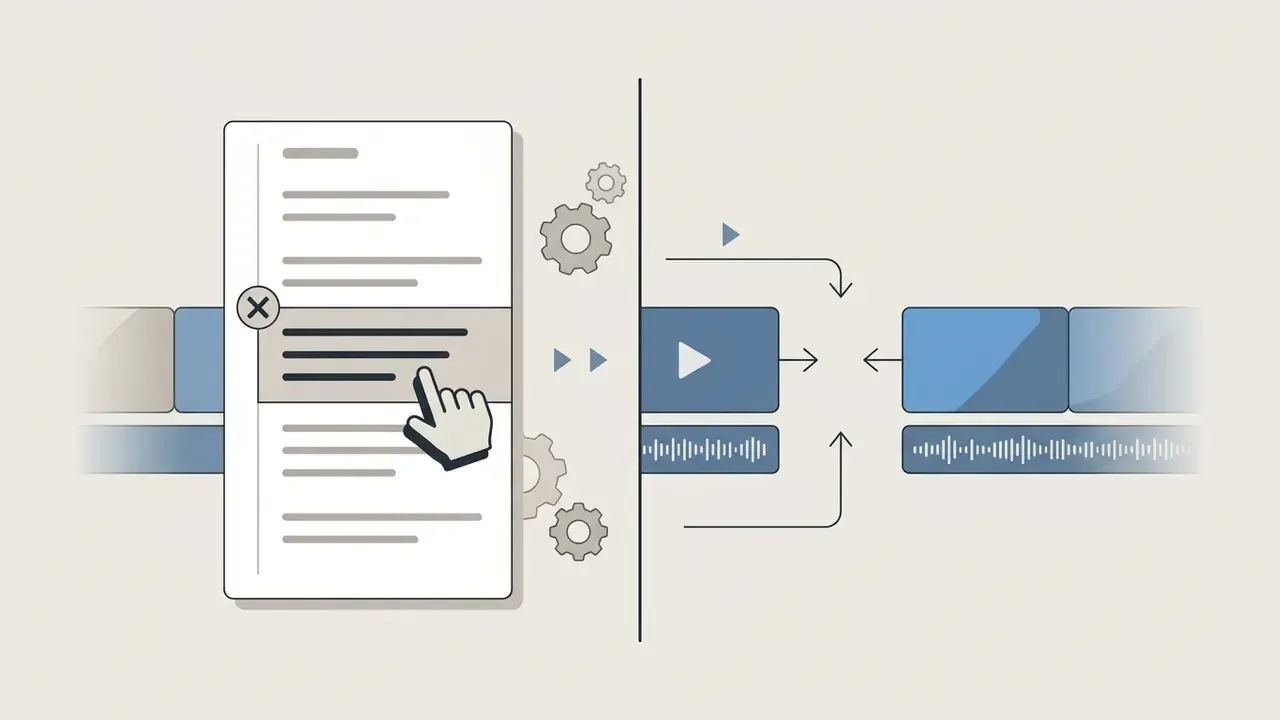
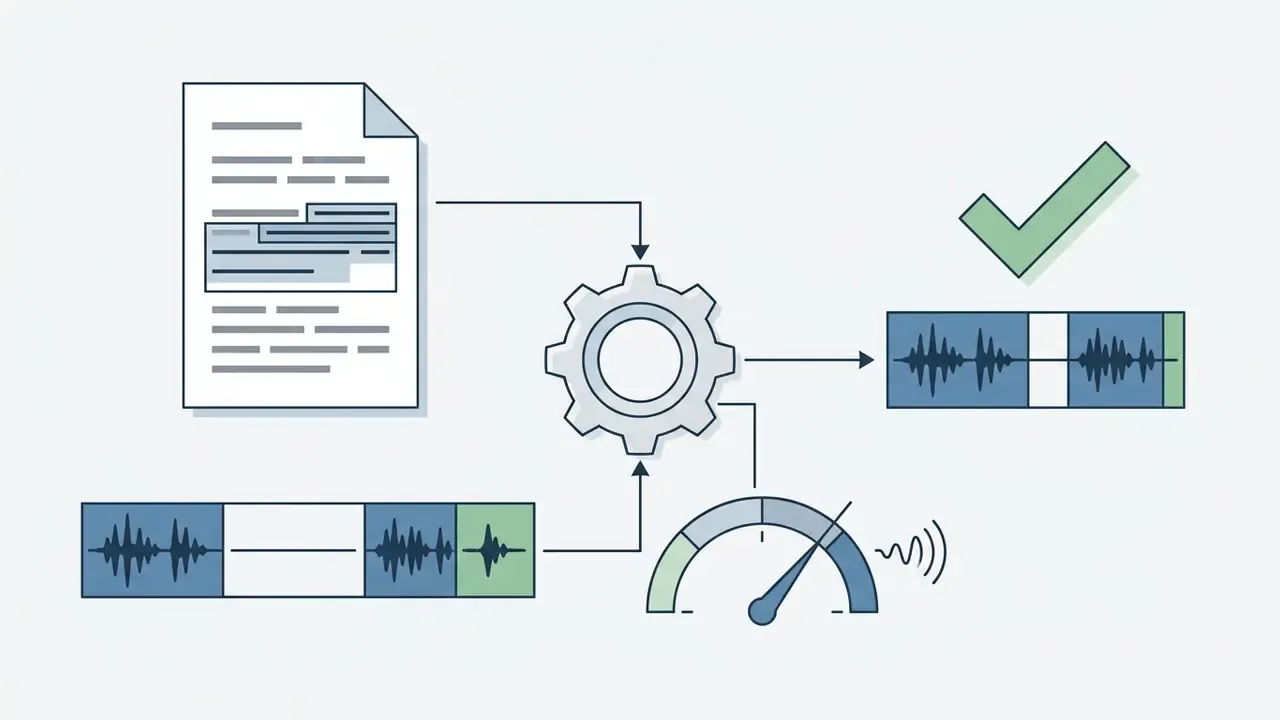
Modern NLEs and web editors (Premiere Pro, Descript, CapCut, VEED, Clipchamp) now generate an automated speech transcript of your footage. Instead of manually scanning waveforms:
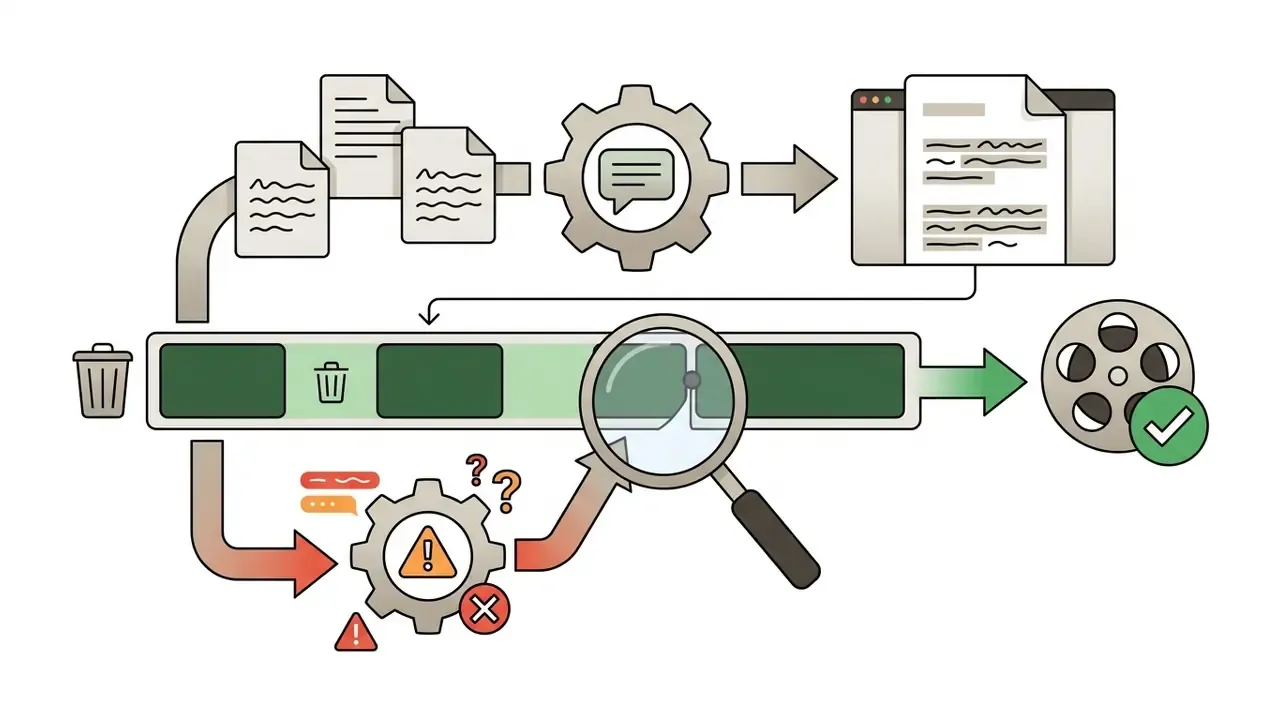
When optimizing video assets for commercial distribution pipelines, review our structural resources on AI Media Comparison Matrices to evaluate automated editing workflows.
Maintain Pacing, Consistency, and Continuity
Maintaining pacing and continuity requires structuring shot durations to match the emotional tone of the video while avoiding jarring spatial or logical jumps between cuts. Shot frequency directly dictates how quickly viewers absorb visual information.
Film theory and continuity editing research show that varying shot lengths creates visual rhythm; shorter shot durations accelerate energy, whereas longer shots allow viewers time to process detailed visual elements (Palomar College Continuity & Pacing Guidelines, 2026; Pearlman, 2025). Palomar’s material also defines the aim of continuity editing precisely: cuts should flow as smoothly and unobtrusively as possible, letting space, time, and action continue without interruption. Continuity cuts must preserve matching screen direction, physical action alignment, and logical spatial relationships across shot transitions.
«For long videos, subtitles significantly improved audience retention past the 25% watch-time mark (χ²(1) = 7.33, P = .007, V = .02).»
Practically, this means pacing and captioning are one decision, not two. If your video must run long, subtitles are the mechanism that holds attention through the middle third. Editing techniques help here too: a well-timed B-roll insert resets attention better than a flashy transition ever will.
Improve Visuals With Color, Effects, Text, and Captions
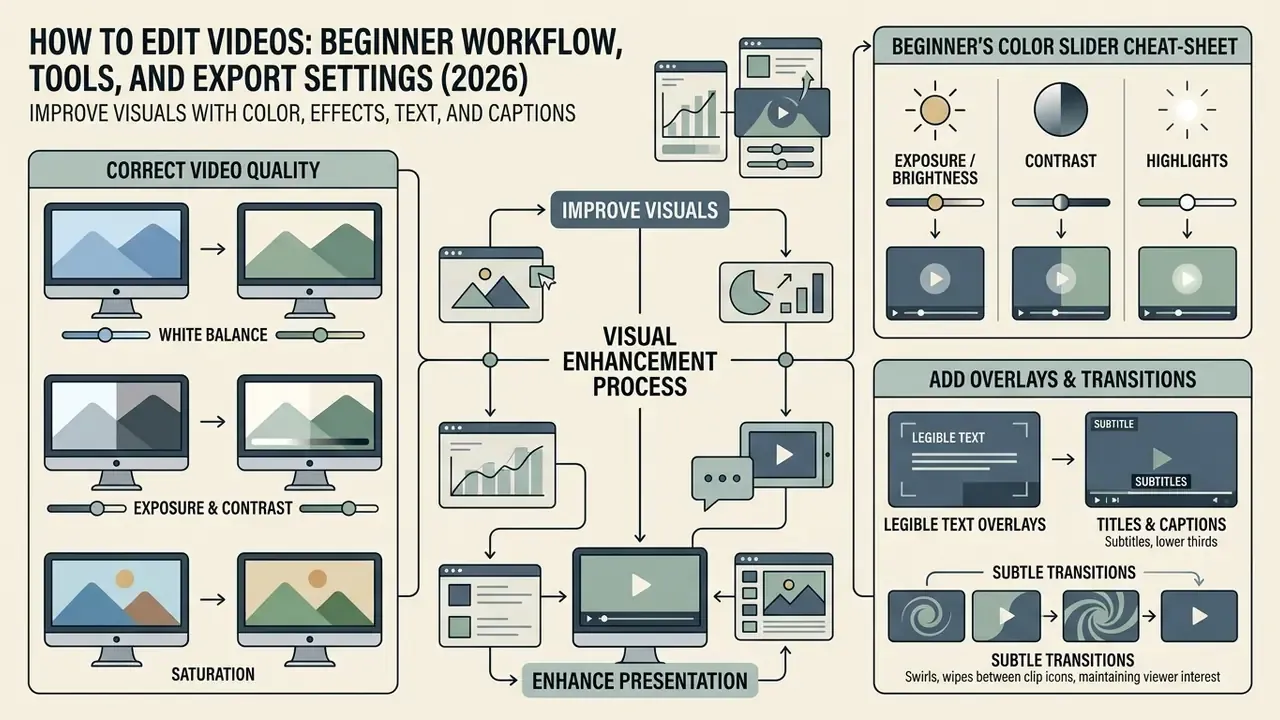
Enhancing visual presentation involves applying primary color correction, adding legible text overlays, and using subtle transitions to maintain viewer interest without distracting from the core narrative. Teams supplementing live footage with synthetic assets can review capability tiers among AI video generators.
Correct Lighting, Color, and Video Quality
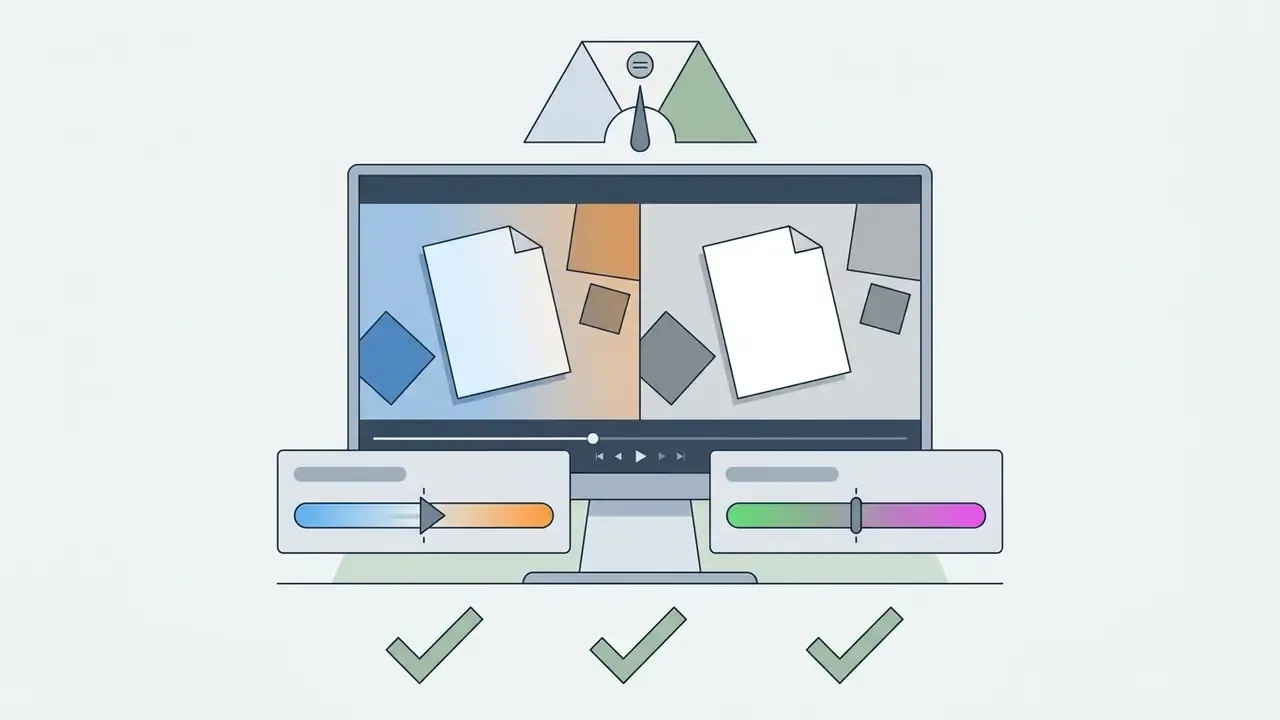
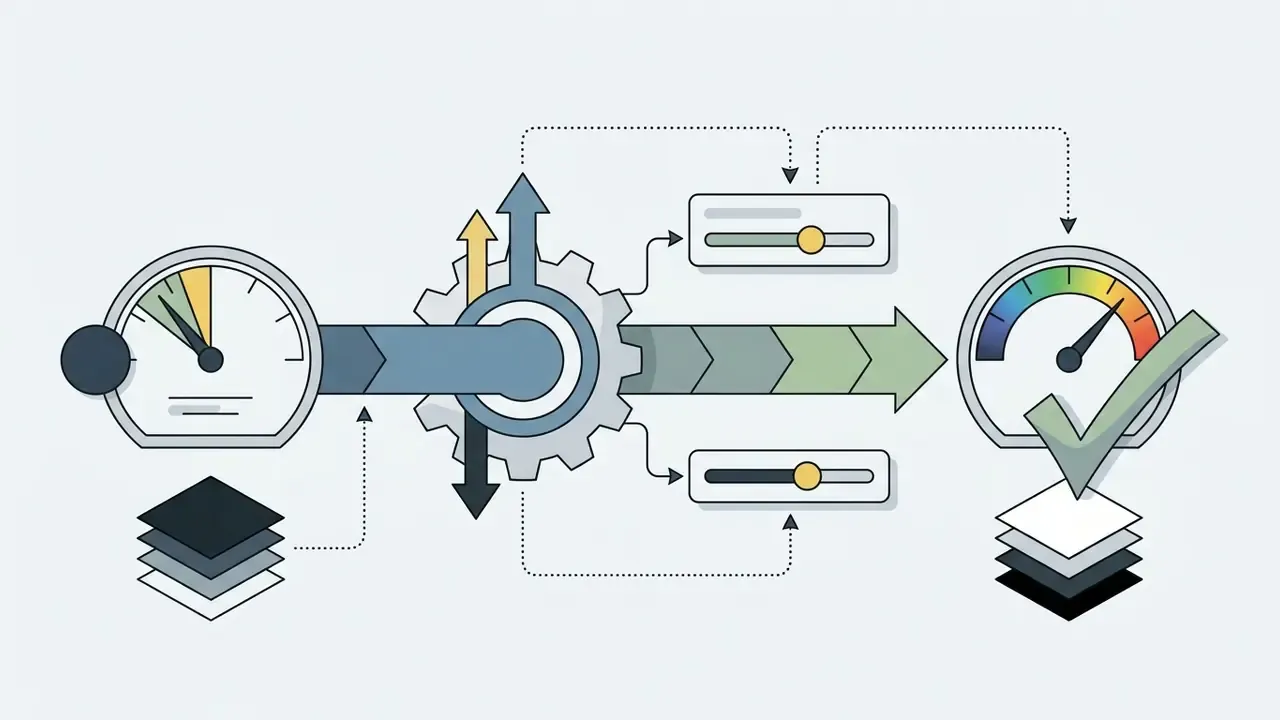
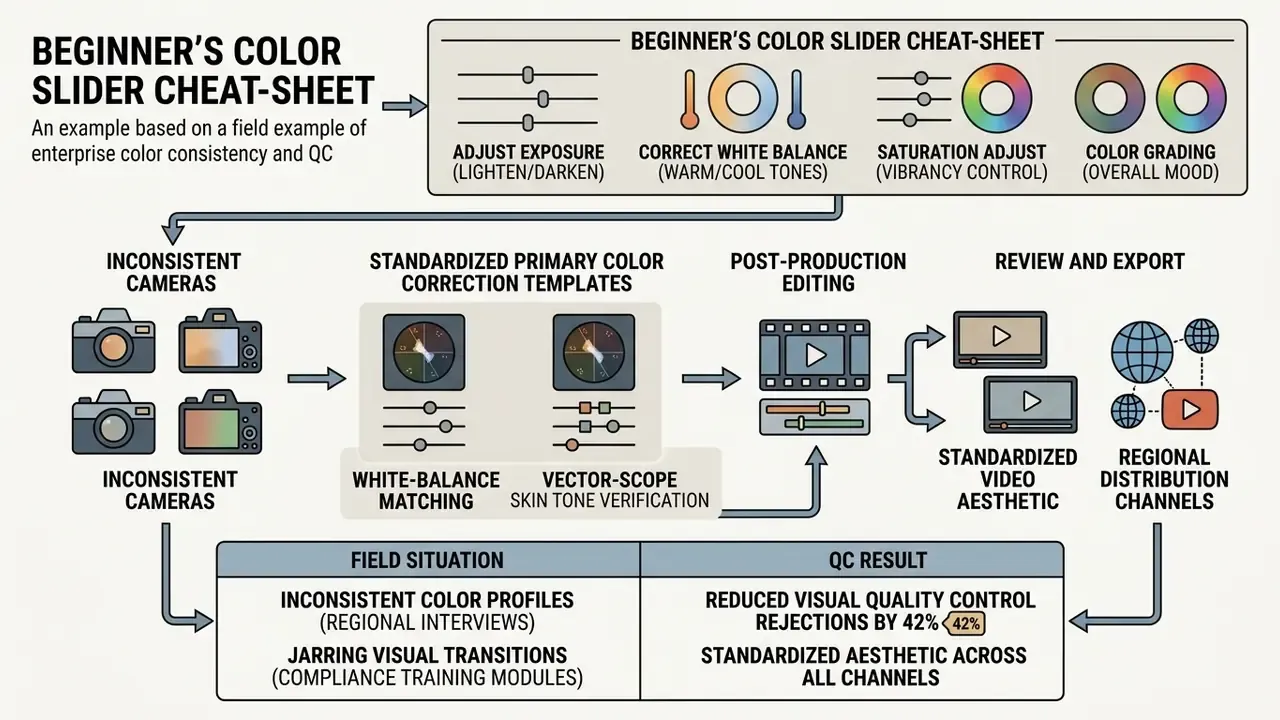
Primary color correction adjusts exposure, white balance, and contrast to keep skin tones natural and luminance consistent across shot cuts. Correct color balance fixes lighting discrepancies between different cameras or shooting environments, which is often the difference between amateur and quality video.
Primary color correction should follow a strict technical order:

Beginner’s Color Slider Cheat-Sheet
Most consumer editors expose the same handful of sliders. Drag left to decrease, right to increase:
- Exposure / brightness Raises or lowers the overall light level across the entire frame.
- Contrast Widens the gap between light and dark areas to make flat footage pop.
- Highlights Adjusts only the bright areas. Pull down to recover blown-out skies, windows, and lights.
- Shadows Adjusts only the dark areas. Push up to reveal detail hidden in dark corners.
- White balance (temperature / tint) Slide toward blue to cool overly orange indoor lighting; slide toward yellow to warm cold daylight.
- Saturation Intensity of all colors at once. Small moves only, since skin tones break first.
- Vibrancy / warmth Boosts muted colors while protecting already-saturated ones, which is safer than raw saturation.
- Sharpness Adds edge clarity. Keep it under roughly +15% to avoid crunchy digital noise and halos.
Expect trial and error here. Every editor, amateur or professional, will confirm how hard it is to match what you pictured mentally. Many tools also offer an automatic correction button, which is a legitimate starting point before manual refinement, though I would still check faces on a second display before trusting it.
Add Text, Titles, and Subtitles
Text elements, including lower-third titles, topic callouts, and burned-in subtitles, improve clarity and accessibility for silent feed viewing across social media platforms. If you only add text once per video, make it the speaker's name and role.
Web Content Accessibility Guidelines (WCAG 2.2) require a minimum visual contrast ratio of 4.5:1 for text overlays placed on video backgrounds, and state explicitly that captions must not obscure important on-screen information (W3C WCAG 2.2 Standard). W3C’s TTML IMSC 1.2 profile adds that a subtitle’s text version must convey all essential meaning without abridgement.
«Two-line subtitles produced longer total fixation duration, more revisits, and lower skip probability, even after controlling for character count (N = 211).»
Single-line captions, by contrast, reduce visual distraction during fast-moving visuals. So choose the layout by shot type, not by habit.
Three additional rules for automated captions: auto-generated text must be human-reviewed before publishing; captions should include speaker identification where multiple voices appear; and important non-dialogue sounds should be described (University of Colorado Social Media Accessibility Guidance). YouTube’s automatic captions come from speech recognition and are a starting draft, not a deliverable.
When expanding visual assets for multi-format campaigns, refer to our detailed workflow guide on how to add secondary elements to promotional graphics.
Use Effects and Transitions Without Distracting From the Story
Transitions (fades, dissolves, wipes) and visual effects should support narrative progression rather than draw attention to the edit. Hard cuts remain the default cut type for standard narrative editing. Common beginner transitions worth knowing, and using rarely, are fade in/out, dissolve, slide, wipe, zoom, and iris. Speed effects belong in the same category: slow down a clip to emphasize an action, not to fill runtime.
Use straight cuts for standard dialogue, cross-dissolves to signal time passages, and apply background removal or chroma key keying strictly against clean, evenly lit green screens with spill suppression controls (Adobe Premiere Ultra Key Documentation, 2026). Adobe’s keying guidance is specific: light the backdrop evenly, keep your subject away from the screen, avoid wardrobe that matches the background color, then refine with Matte Generation, Matte Cleanup, and Spill Suppression. Final Cut Pro’s Green Screen Keyer follows the same principle with timeline-position-specific adjustments.
For still-image compositing tasks adjacent to this workflow, compare capabilities among AI photo editors for background removal.
Edit Video Audio, Voiceover, Music, and Sound Effects
High audio quality is critical for audience retention. Viewers will tolerate mediocre picture, but unclear dialogue or harsh background noise drives abandonment within seconds. This matches the platform data: because roughly 85% of feed videos play silently, the audio that is heard must be immediately intelligible, and the visual layer must survive without it (Verizon & Publicis Media / Kapwing Synthesis, 2023).
Clean Up Dialogue and Balance Volume Levels
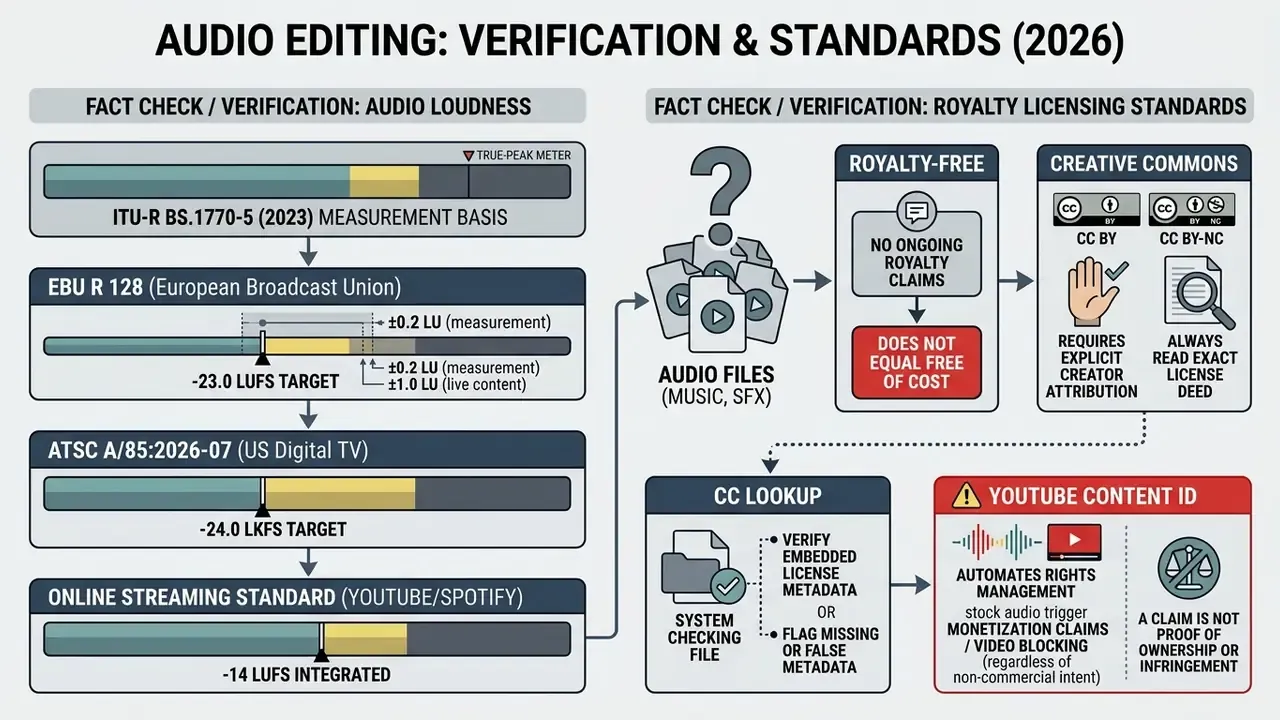
Audio editing requires removing background noise, applying equalization to enhance speech clarity, and normalizing the mix to meet platform loudness standards.
International Telecommunication Union standards (ITU-R BS.1770-5) and EBU R 128 specify measuring loudness in Loudness Units Full Scale (LUFS) rather than simple peak decibels (ITU-R BS.1770-5; EBU R 128 Specification). Broadcast practice separates the work into two stages: denoise the speech first, then normalize the programme loudness. Never peak-normalize as a substitute.
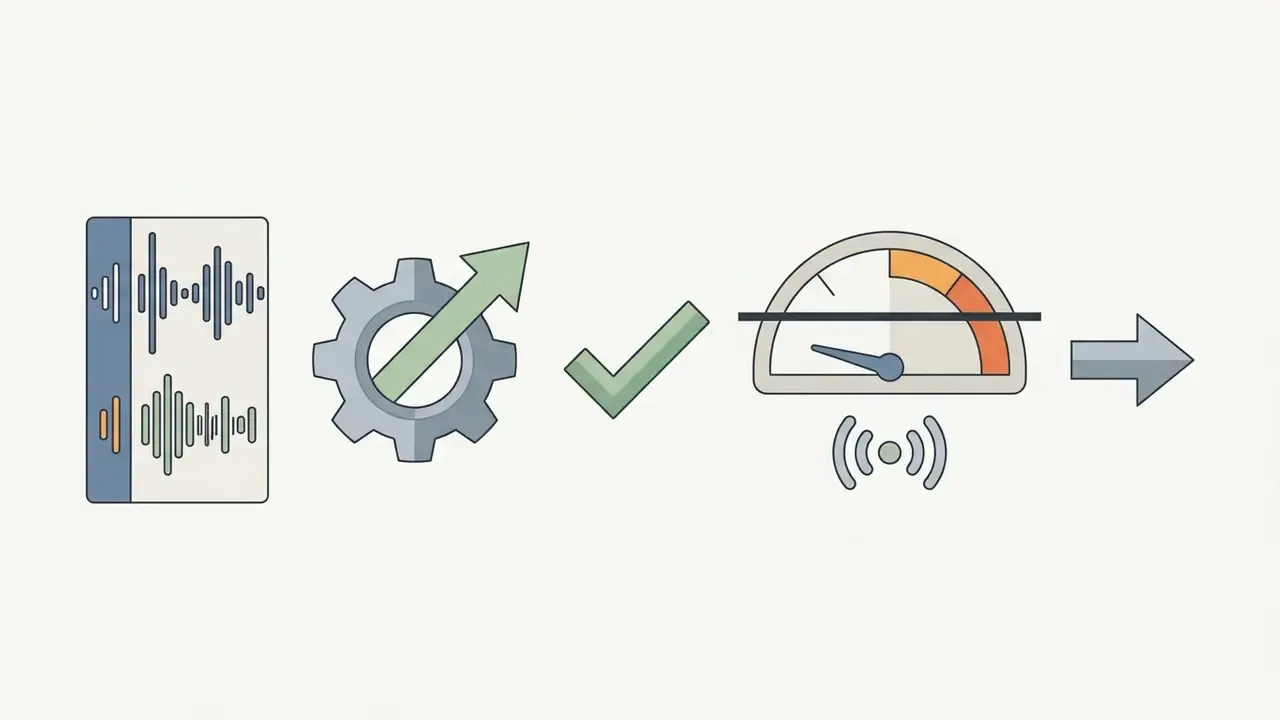
Dialogue tracks should remain the primary reference level, with background noise suppressed using spectral noise reduction filters, which estimate the noisy spectrum, suppress it, then reconstruct the waveform. Audio leveling targets:
To source compliant background audio for your editing projects, check our resource on downloading free music for video editing with verified commercial permissions.
Add Voiceover, Background Music, and Sound Effects
Combining voiceover narration, background music, and spot sound effects requires mixing multi-track video audio so secondary elements complement spoken dialogue without masking key frequencies.
«Subtitled video ads increase average view time by 12% and lift brand recall by 13%.»
Audio production standards recommend applying high-pass filters, cutting frequencies below 80-100 Hz on voice tracks, to eliminate low-end rumble, while ducking background music automatically when dialogue is present (Audio Engineering Society Best Practices). A 2026 audio-drama editing study goes further, keeping VOX, SFX, ambience, and music on independent tracks and high-passing music at 200-300 Hz with a low-pass at 8-10 kHz so it never competes with speech. Spot sound effects reinforce visual actions (swishes, UI clicks, functional impacts) when positioned cleanly on dedicated audio tracks.
If you need narration without a recording booth, compare synthesis quality and licensing among AI voice generators for voiceover. For spot audio assets, browse our dedicated collection of free sound effects for video editing workflows.
Review, Export, and Share Your Final Video
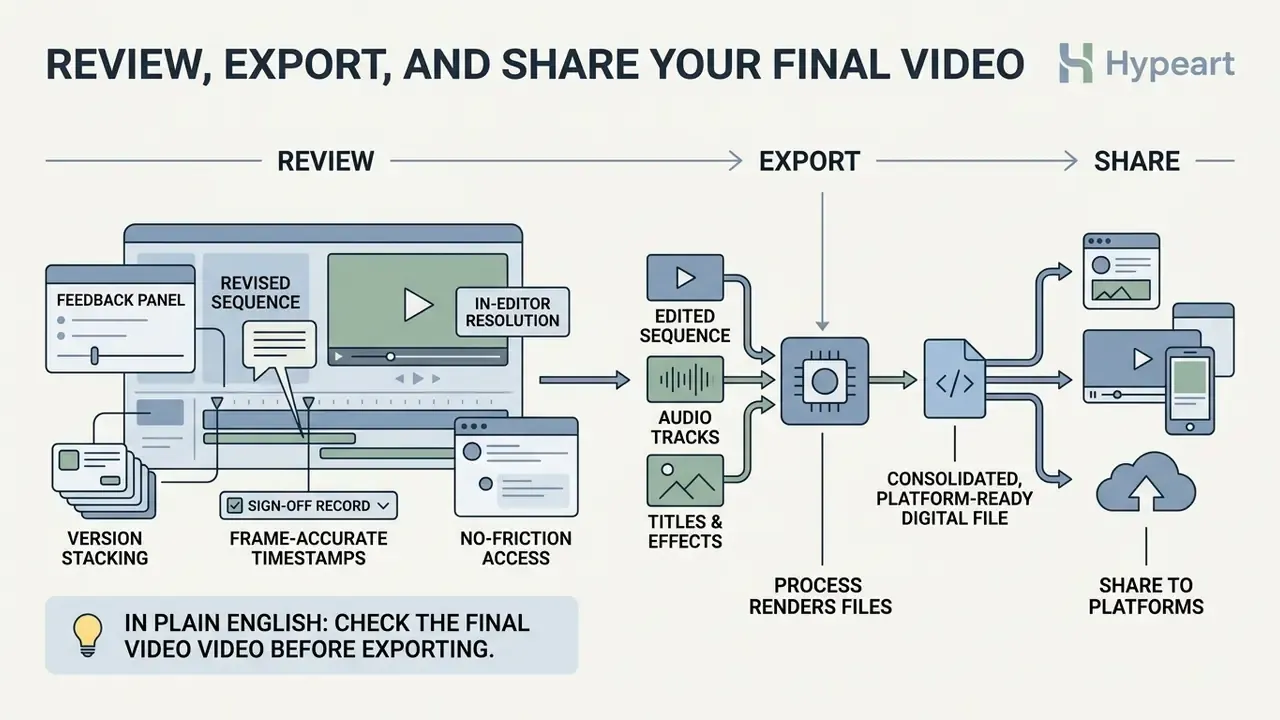
The export process renders your edited sequence, audio tracks, titles, and visual effects into a consolidated, platform-ready digital file. Creators publishing primarily on one platform should also review our dedicated guidance on YouTube video editing workflows.
Collect Client and Team Feedback Efficiently
Before you render a final master, get the edit reviewed. Avoid endless email chains and ambiguous notes like "fix the cut near the middle" or "after she walks through the grass, but before she looks up…". Feedback scattered across email, chat, calls, and documents creates duplicate work and missed revisions.
Use a specialized review pipeline (Frame.io, Dropbox Replay, or your NLE’s web review link):
- Frame-accurate timestampsStakeholders pause the draft and type or draw comments directly onto specific frames, so every note has a precise location.
- No-friction accessThe best review tools require only a link, with no software install and no account for the reviewer, which materially increases response rates from clients and executives.
- Version stackingUpload each new render as "v2" over "v1" and run side-by-side comparison playback to confirm every requested cut was actually made before sign-off.
- In-editor resolutionReview platforms that integrate with Premiere Pro, Final Cut Pro, and DaVinci Resolve let you view and resolve comments inside the timeline, then publish the new version without leaving the editor.
- Sign-off recordFor regulated content, keep the approval trail, meaning who approved which version and on what date, alongside the project files.
Check the Final Video Before Exporting
Executing a quality control review pass before rendering prevents exporting videos with out-of-sync audio, spelling errors in captions, flash frames, or unlinked media assets.
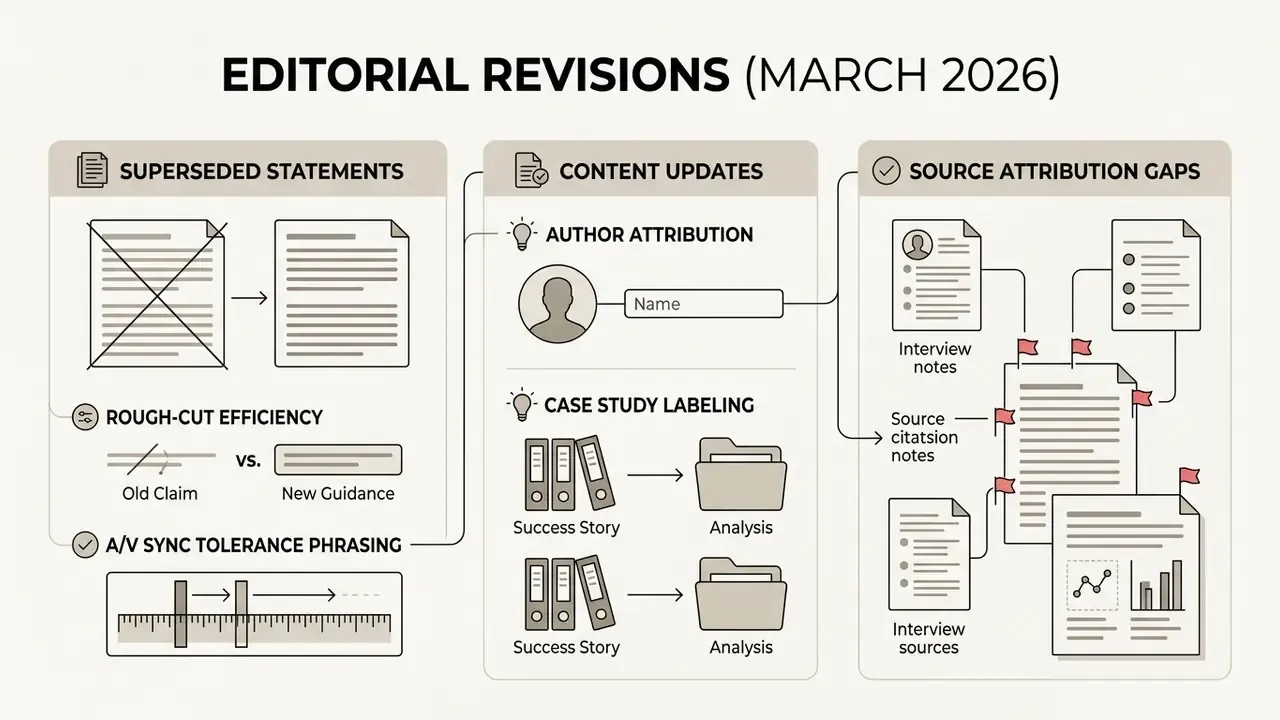
Updated (2026 review): Broadcast delivery specifications differ on how much lip-sync drift is acceptable. Practical target: keep audio and video synchronization within one frame duration (approximately 15-33 ms depending on frame rate), and under 5 ms when performing sub-frame dialogue editing; some delivery documents simply require "no perceptible error" (Paramount Production Standards, 2026; SMPTE broadcast tolerances; National Archives QC Guidelines). The stricter your delivery contract, the tighter the number. (The previously published single-threshold phrasing is retained in Appendix A.)
Perform a pre-render review using this operational checklist:
- Audio sync checkVerify speech audio matches mouth movements across the entire timeline, not just at the head of the sequence.
- Text and subtitle auditProofread titles, lower thirds, and captions for typos, timing, positioning, readability, and background contrast compliance (4.5:1 minimum).
- Visual artifact inspectionScan timeline cuts for accidental black flash frames, banding, blocking, dropped or frozen frames, misplaced transitions, or unlinked offline media warnings.
- Audio peak verificationEnsure total mix output does not clip above 0 dB True-Peak, keeping peak ceilings at -1.0 dBFS.
- Post-export playbackOpen the rendered file in a separate player, not the NLE, and watch it end to end before publishing (UC ANR Publishing Guide).
If production demands scale beyond internal capacity, evaluate commercial hiring options using our guide on how to hire video editor professionals for channel growth.
Seven Beginner Mistakes That Cost the Most Time
Most first projects fail in the same predictable places. Learning to make and edit videos is largely a matter of not repeating these:
One more, slightly unfair observation: the editors who ask "how can I edit my videos faster" almost always need to plan more, not click faster.
- Importing from the SD card.The link breaks the moment you eject the card. Copy first, import second.
- Adding music before the cut is locked.Every trim shifts the beat alignment, so you mix the same track four times.
- Grading clips you will delete.Color work belongs after the story is final.
- Peak-normalizing instead of loudness-normalizing.Your video will sound quiet next to everything else in the feed.
- Trusting auto-captions.Names, product terms, and accents get mangled, and unreviewed captions damage credibility faster than a bad cut.
- Exporting once and publishing immediately.Watch the rendered file outside the editor. Roughly one in five renders reveals something the timeline hid.
- No version discipline.
final_final_v3_REAL.mp4is not a workflow. Date-stamp renders inside05_Exports/.
Frequently Asked Questions (FAQ)
What is the best video editing software for an absolute beginner?
For absolute beginners, Microsoft Clipchamp (Windows and web) and Apple iMovie (macOS and iOS) offer the easiest learning curves thanks to drag-and-drop interfaces and built-in export templates. Users focused on short-form social edits often start with CapCut because of automated captions and mobile accessibility. Adobe Premiere Elements 2026 is a useful middle path, since its Quick, Guided, and Advanced modes let you grow inside one application.
How long does it take to learn basic video editing?
Timelines vary by prior computer experience, project complexity, and practice frequency. Most beginners complete their first full cycle, meaning import, cut, trim, add text, balance audio, and export, within a handful of focused sessions. Progress is faster when you finish one short project per week rather than studying features in isolation. Advanced techniques such as multi-camera sync, motion graphics compositing, and professional color grading typically require sustained project work over weeks or months. Precise learning-curve data from controlled studies is not available, so treat any single number as an estimate.
What hardware specs do I need to edit 1080p and 4K video?
Editing 1080p requires at least 8 GB to 16 GB of RAM, a multi-core processor (Intel i5/Ryzen 5 or Apple M-series), and a dedicated or integrated GPU. For 4K, recommended specifications include 32 GB of RAM, a dedicated GPU with 6 GB or more of VRAM, and fast NVMe SSDs for media storage. On low-spec machines, browser-based editors shift much of the processing burden off your CPU.
How do I edit videos without losing video quality?
Match your NLE sequence resolution and frame rate to your raw footage. During export, select matching source resolution presets, use high-profile H.264 or HEVC codecs, and set target bitrates of at least 12-15 Mbps for 1080p or 45-60 Mbps for 4K renders. Avoid repeated re-exports of an already compressed file, because each pass compounds compression artifacts.
How can I edit videos professionally without a professional budget?
Use one locally processing free tool (DaVinci Resolve or OpenShot), one measurement habit (loudness normalization), and one review habit (frame-accurate feedback links). Those three practices account for most of the visible gap between hobby edits and paid work. Templates and presets help, but disciplined sequencing helps more.
Can AI edit a video for me?
AI can accelerate specific tasks: scene detection, transcript-based cutting, silence removal, caption generation, noise suppression, background removal, and generative visual adjustments. It does not replace editorial judgment about story order, pacing, or tone, and auto-generated captions require human review before publication.
Is it safe to edit confidential footage in a free online editor?
Not by default. Browser and mobile editors frequently upload media to vendor servers to run AI features, and personal-account usage inside a company is Shadow IT. For interview footage containing customer data, internal systems, or unreleased financials, use locally processing desktop tools (iMovie, DaVinci Resolve, Premiere Elements, OpenShot) or a managed corporate deployment with documented retention terms. Verify vendor data-processing terms with your security and legal functions first.
How do I collect feedback on a draft without endless email threads?
Share a review link through Frame.io, Dropbox Replay, or your NLE’s web review feature. Reviewers leave frame-accurate comments without installing software, and you can stack the next render as a new version for side-by-side comparison before sign-off.
Appendix A: Editorial Corrections and Superseded Statements