Making an image smaller comes down to three choices: reduce its physical pixel dimensions, lower its file size in kilobytes through compression, or do both in one pass. Online tools let creators, marketing teams, and operations staff run those adjustments in seconds to satisfy upload caps, improve page loading speed, and standardize media across platforms without visibly sacrificing clarity.
Why should a risk or operations lead care about a resizer? Because the same unglamorous step sits inside document intake, KYC onboarding packets, expense receipts, and listing portals. A 40 MB scan that silently fails validation is an operational incident, not a design problem.
Quick Summary: Make an Image Smaller in Under a Minute
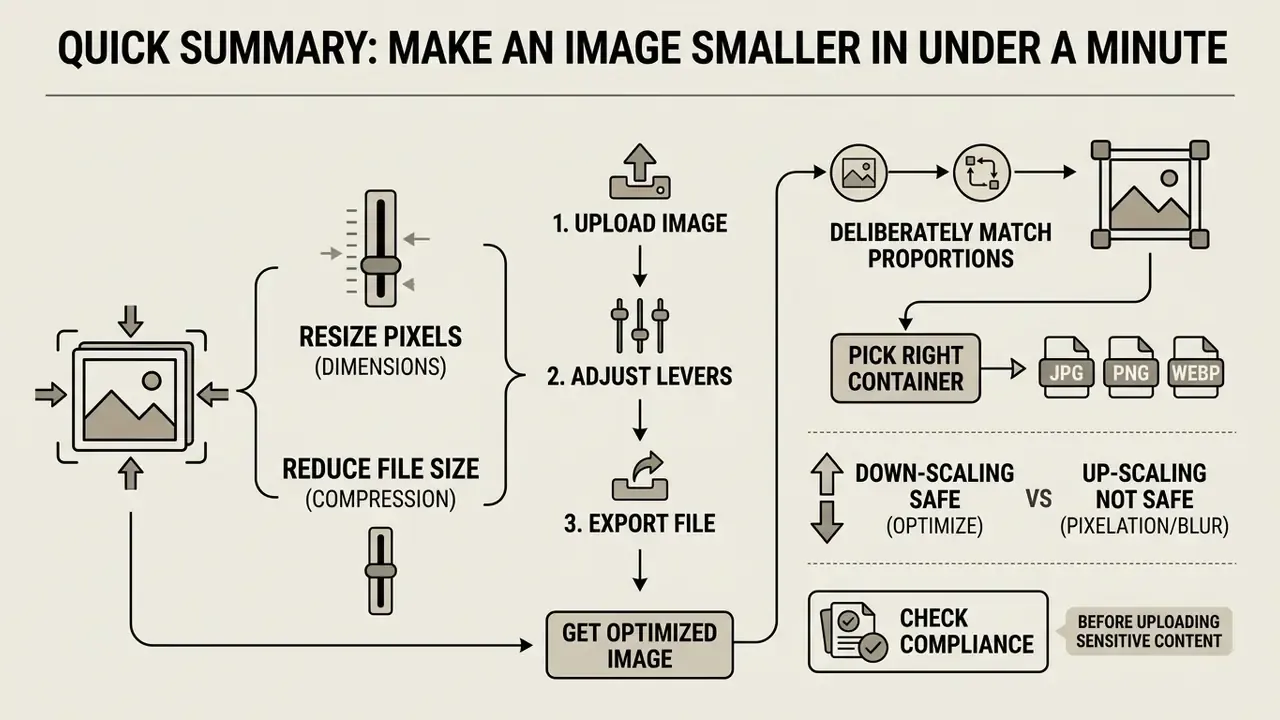
- Two different levers. Pixel dimensions (width × height) control geometry; file size (KB/MB) controls stored bytes. Resizing changes the sample grid; compression changes the encoding.
- Three-step workflow. Upload, set dimensions or percentage and adjust the quality slider (70 to 85% for JPG/WebP), then verify output dimensions and weight before you download.
- Match proportions deliberately. Use Fit to keep the whole frame (with empty margins), Fill to cover the canvas (with cropping), and avoid free stretching on faces, text, and products.
- Pick the right container. JPG for photos, PNG for logos and screenshots, WebP for modern web delivery, GIF for simple animation, TIFF/BMP for archival masters, PDF for documents and print proofs.
- Down-scaling is safe; up-scaling is not. Reducing resolution usually hides artifacts, while enlarging raster pixels relies on interpolation or AI super-resolution that synthesizes rather than restores detail.
- Check compliance before uploading anything sensitive. For PII, ID scans, or financial documents, prefer in-browser (client-side) processing, zero-data-retention guarantees, and documented deletion windows.
Make an Image Smaller: Dimensions vs. File Size
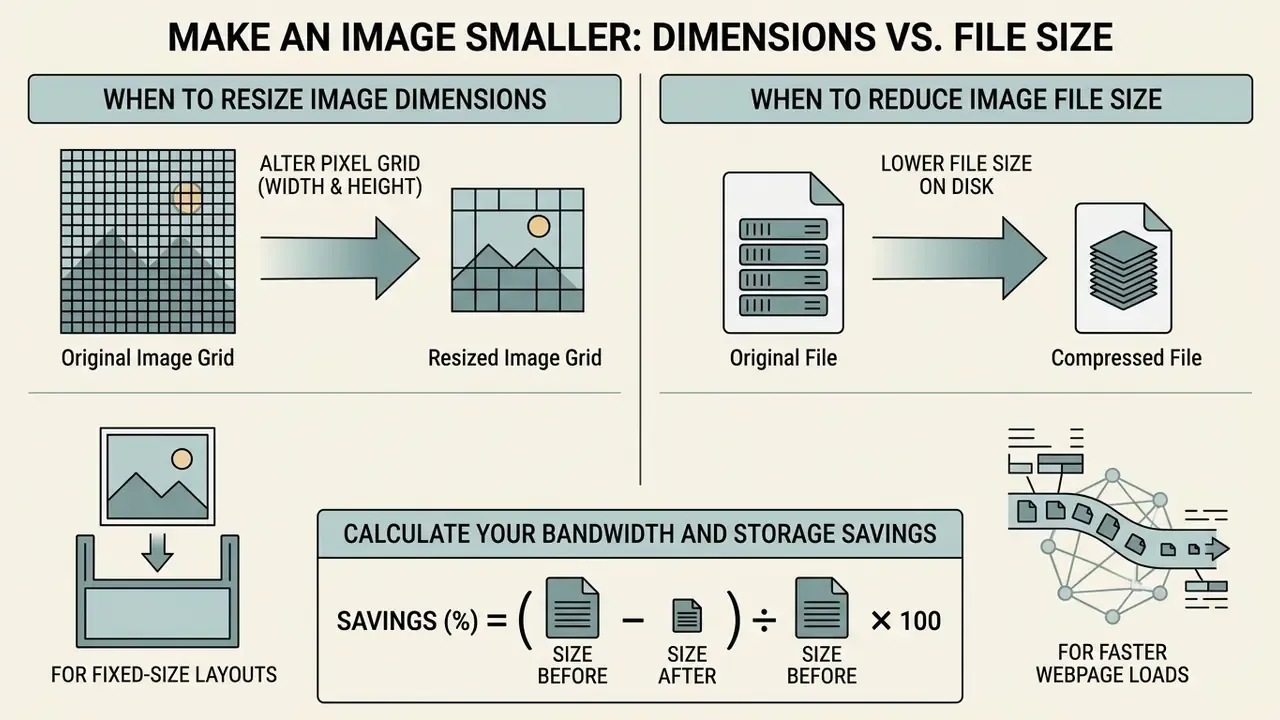
To make an image smaller effectively, decide first whether your goal is to alter the pixel grid (width and height) or to lower the file size stored on disk. Changing image dimensions alters the geometric sample count. Reducing file size applies lossy or lossless encoding to cut memory consumption at the same resolution.
«Compression aims to reduce file size while keeping the image visually unchanged or acceptably distorted.»
In practice the two parameters travel together but are never identical. Enlarging the pixel grid usually inflates file weight, yet the chosen codec and quality setting can change the final byte count by an order of magnitude at exactly the same resolution. That is the part people miss.
When to Resize Image Dimensions
Resize image dimensions when an application or webpage enforces strict pixel bounds, such as a 1080×1080 canvas or a 1280×720 thumbnail layout. Modifying width and height adjusts the physical grid area while locking the natural aspect ratio, which prevents stretching or squashing (W3C CSS Images Module Level 3, 2025. https://www.w3.org/TR/css-images-3/).
Down-scaling also carries a counter-intuitive perceptual benefit: fewer pixels means fewer visible defects.
«Lower rendering resolution reduces artifact visibility and can raise subjective quality scores even when information is discarded.»
When to Reduce Image File Size
Reduce image file size when an enterprise portal, email client, or web form enforces payload caps (2 MB or 10 MB per file are common) while still demanding full display resolution. Applying compression or converting uncompressed assets into modern web formats such as WebP or WebP Lossless shrinks file weight without touching width or height (NIST SP 800-228-upd1, 2025. https://csrc.nist.gov/pubs/sp/800/228/final).
Codec choice is the strongest single variable in this scenario.
«VVC reaches average file sizes near 0.00025 MB, substantially smaller than JPEG and WebP at comparable perceived quality.»
| Approach | Primary Goal | Parameters Changed | Resulting Effects on Quality | Typical Online Scenarios |
|---|---|---|---|---|
| Resize Image Dimensions | Match specific display layouts or fixed pixel specifications. | Pixel width, height, and display scale. | Down-sampling reduces visible noise and compression artifacts; upscaling creates softness. | Social media feeds, banners, profile avatars, and thumbnail creation. |
| Reduce Image File Size | Decrease byte weight for faster uploads and reduced latency. | Compression bitrate, quantization, file format (JPG, PNG, WebP). | Excessive lossy compression introduces blocking or ringing; modern codecs preserve clarity at lower bitrates. | Web page optimization, email attachments, e-commerce galleries, and form submissions. |
| Combined Optimization | Satisfy strict upload constraints for both resolution and file size. | Pixel dimensions and compression parameters simultaneously. | Smaller pixel scales tolerate stronger compression with minimal perceived degradation. | Responsive website design, mobile apps, and automated digital asset workflows. |
Calculate Your Bandwidth and Storage Savings
Before rolling an optimization policy across a website, CDN, or document archive, quantify the benefit with a simple reduction formula:
Savings (%) = (Size Before − Size After) ÷ Size Before × 100
Worked example: a product gallery of 500 photos averaging 3.2 MB each represents 1,600 MB of origin traffic per full crawl. Re-scaling every asset to 1600×1600 px and re-encoding to WebP at 80% quality yields roughly 420 KB per file, or 210 MB total. That is an 86.9% reduction and about 1.4 GB less egress per delivery cycle. Multiply the delta by monthly page views to estimate CDN cost avoidance, then weigh it against the engineering effort of automating the pipeline through an API.
One caveat. Savings modeled on a sample of ten files rarely survive contact with a real library, because product shots, banners, and scanned paperwork compress very differently. Sample by asset class, not at random.
How to Make an Image Smaller Online in Three Steps
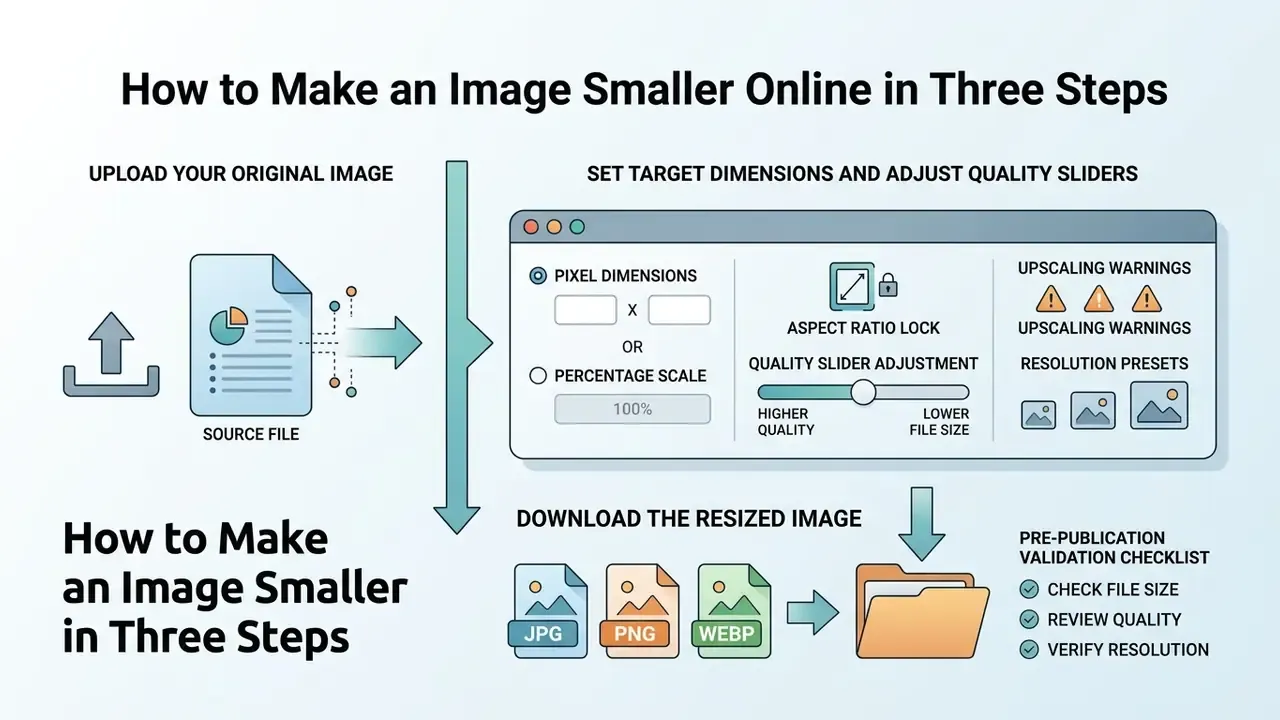
Reducing image size online follows a direct three-step pipeline: upload the source file, define pixel dimensions or a percentage scale, then download the compressed result. This workflow lets users modify digital graphics in a few clicks without installing heavy desktop editing software, and it pairs naturally with AI image enhancers when the source asset also needs denoising or sharpening.
Upload Your Original Image
Drag and drop your source file into the online resizer interface, or browse your local file system. Most online tools accept common raster formats including JPG, PNG, and WebP, and the broader utilities additionally ingest GIF, BMP, and TIFF, displaying the original pixel dimensions and file size immediately after upload. Check those two readouts first. They define the ceiling for everything you can do without generative interpolation.
Whether you're preparing one avatar or a folder of 300 listing photos, that first readout is your reference point for every later decision.
Set Target Dimensions and Adjust Quality Sliders
Choose whether to enter exact dimensions in pixels (for example 1920×1080) or to scale the file down by a percentage (for example 50% smaller). To keep the composition proportional, confirm that the "Lock Aspect Ratio" toggle stays active before you type a target width or height.
- Aspect ratio lock keep the chain-link icon active so width and height scale together. With the lock enabled you only need to enter one dimension.
- Quality slider adjustment drag the compression slider between 70% and 85% for lossy formats (JPG/WebP). This range cuts byte size steeply while keeping artifacts effectively invisible at normal viewing distance.
- Upscaling warnings if you input dimensions larger than the original source asset, read the UI warning, often labeled something like "Quality Degradation Alert". Upscaling raster pixels requires interpolation or AI super-resolution to counteract softness and pixelation, and no slider restores information the sensor never captured.
- Resolution presets low, medium, and high presets are shortcuts for the same quality parameter. Handy when you would rather not reason about bitrates at all.
Download the Resized Image
Click the processing button to generate the new asset, then inspect the resulting pixel dimensions and file size before saving. Once the output matches your platform's target criteria, download the optimized file for publication or for integration into automated AI Media Workflows.
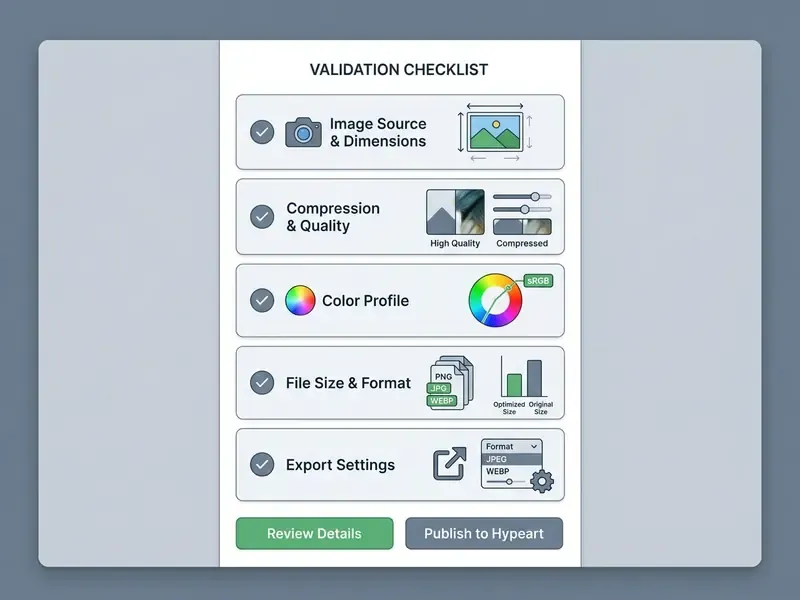
Pre-Publication Validation Checklist
Run this seven-point check before any file enters a production system, listing portal, or corporate document archive:
- Pixel dimensions match the destination spec exactly, with no off-by-one canvas mismatch.
- File size sits below the stated cap, with roughly 20% headroom for server-side re-encoding.
- Effective resolution at output size meets the target: 300 dpi for photographs, 600 to 1200 dpi for line art and text-heavy scans when print is involved.
- Compression profile documented (codec, quality value, lossy vs lossless) so the same settings can be reproduced in batch.
- Color profile converted to sRGB for web delivery, otherwise colors look dull or shifted.
- Legibility spot-check at 100% and at the final display size, especially for embedded text and product labels.
Choose the Right Pixel Size and Aspect Ratio
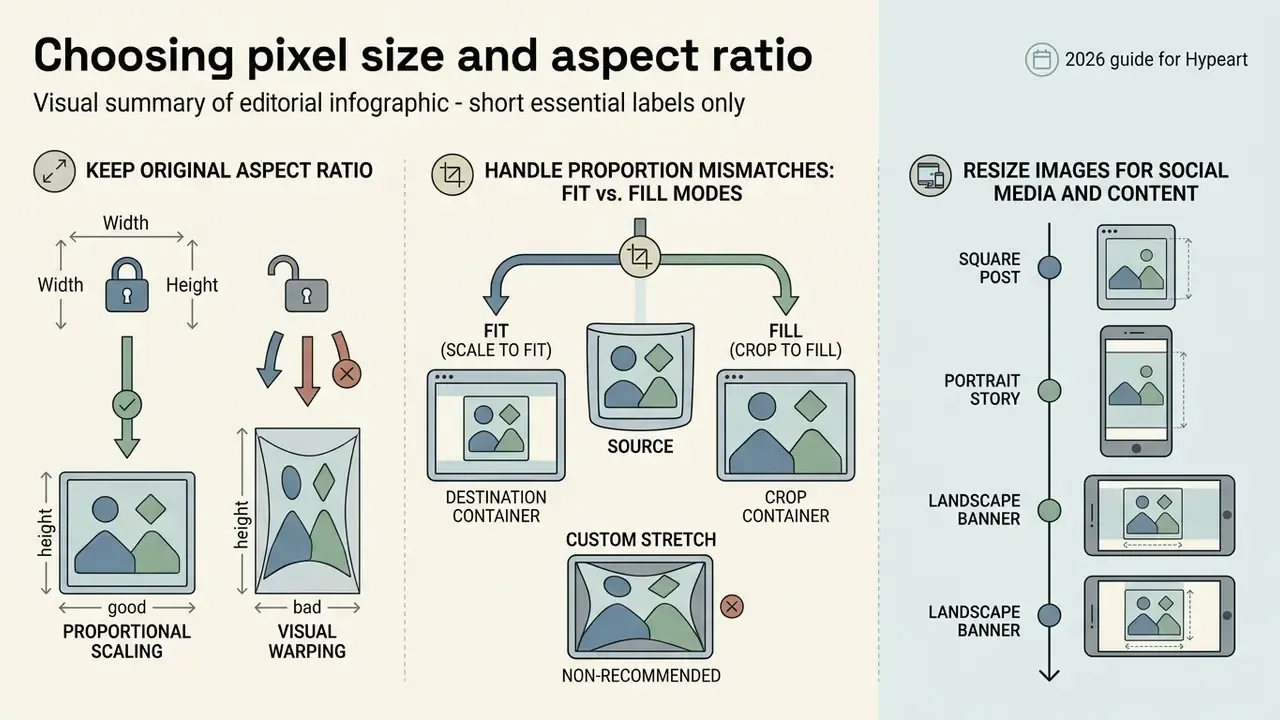
Setting exact pixel dimensions and locking proportional scaling prevents visual warping when adapting media for digital platforms. Matching target width and height to the receiving portal's guidelines keeps graphics clean on mobile screens and desktop monitors alike.
Keep the Original Aspect Ratio
Preserving the natural aspect ratio means width and height scale uniformly, so the subject is never distorted. That proportional relationship is what protects human faces, brand logos, and typography from squashing (W3C SVG 2 Specification, 2025. https://www.w3.org/TR/SVG2/).
«Structural similarity metrics implicitly penalize geometric distortion, confirming that proportional scaling is critical to perceived quality.»
Technically, three mechanisms enforce it: constrain one dimension and derive the other, enable a "constrain proportions" flag in the editor, or declare a ratio such as 16:9, 4:3, or 1:1 and let the renderer compute the missing side. Forced distortion is normally an explicit opt-in. In ImageMagick, for instance, it requires an exclamation flag appended to the resize geometry.
Handle Proportion Mismatches: Fit vs. Fill Modes
When the original image aspect ratio does not match the target canvas, say a 4:3 camera photo dropped into a 1:1 Instagram frame, the right scaling mode saves you from manual cropping:
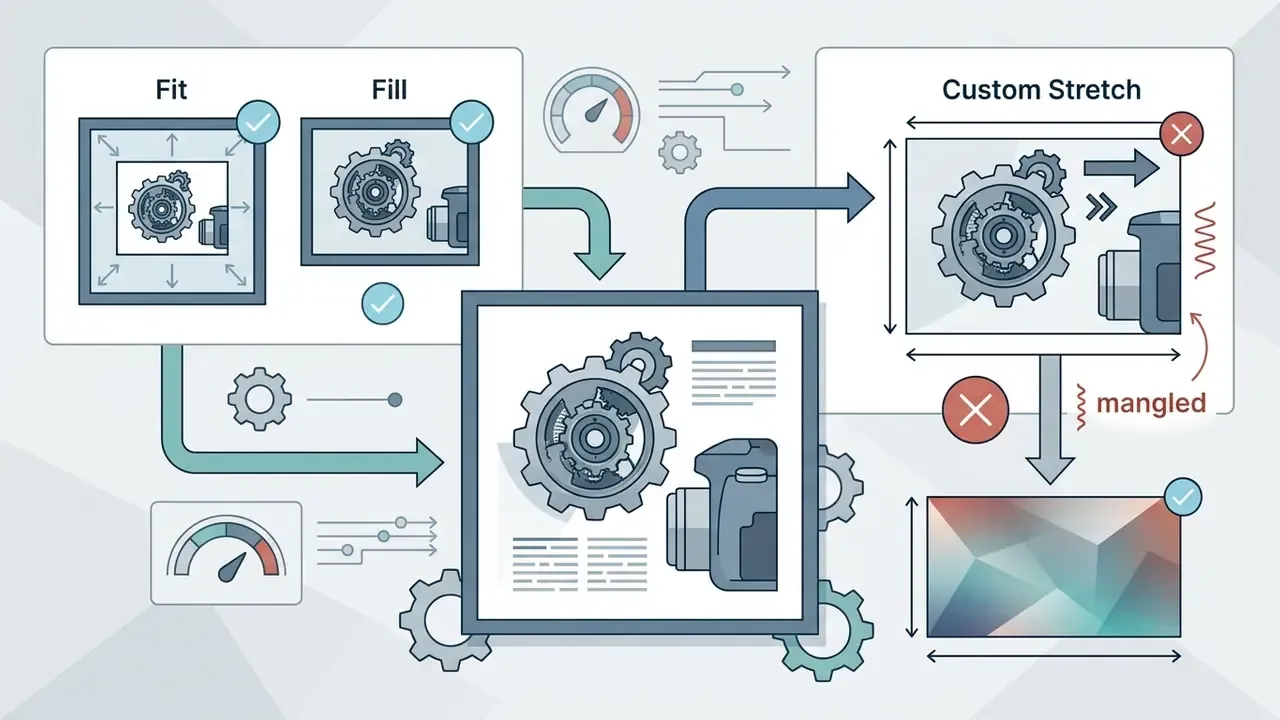
Practical rule: use Fill for feed thumbnails where edge content is decorative, and Fit for product shots, diagrams, and document scans where cropping destroys information.
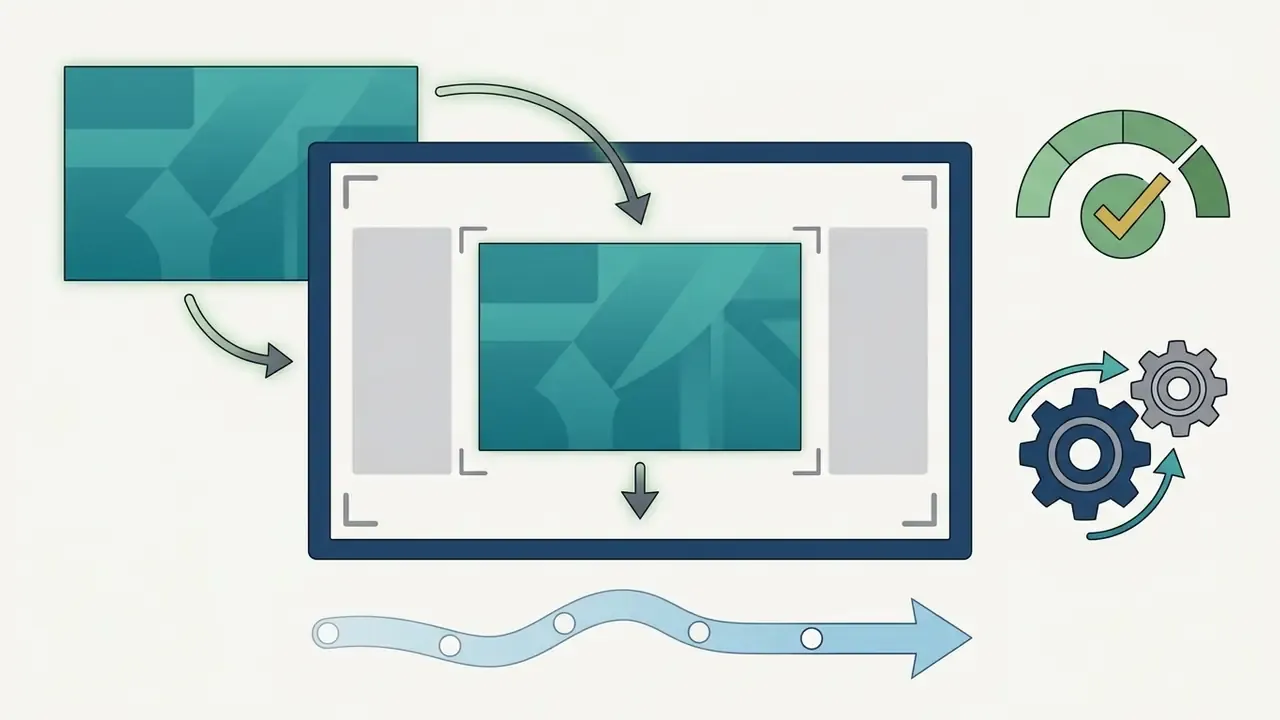
contain or inside.
Resize an Image Without Losing Quality
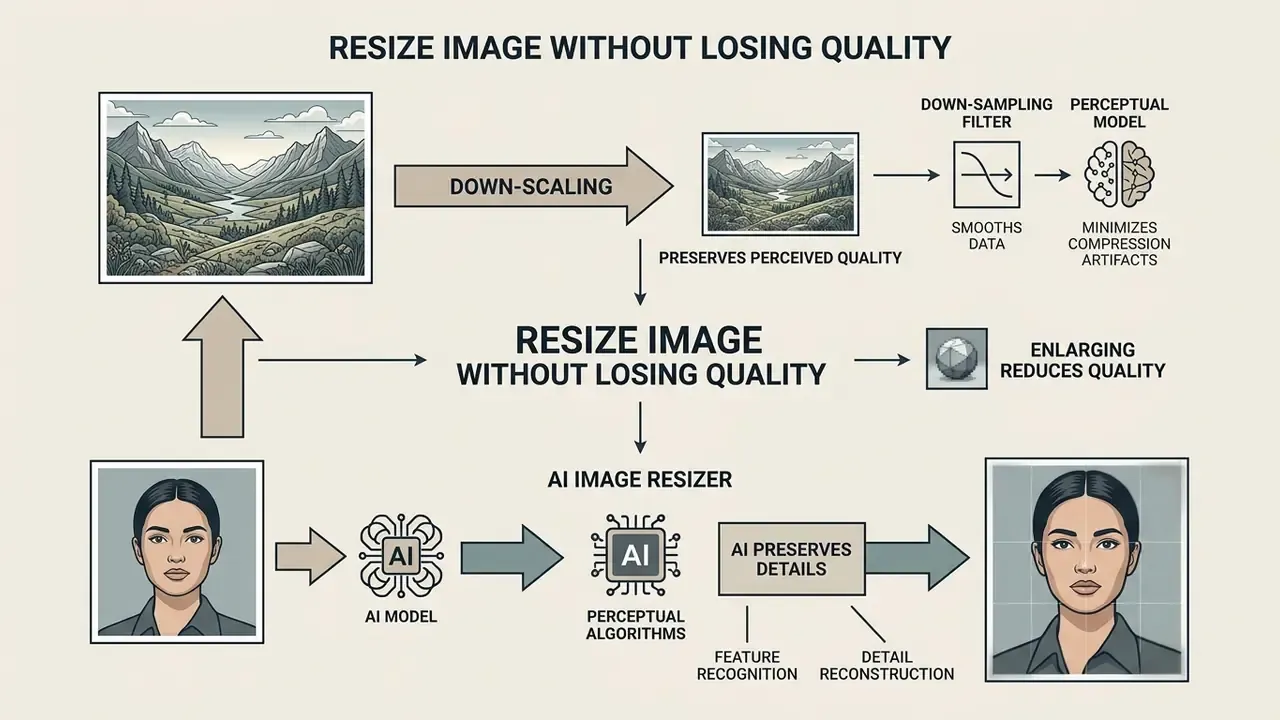
Keeping visual quality during resizing depends on high-quality down-sampling filters and perceptual models that minimize compression artifacts. Down-scaling naturally consolidates pixel information and masks small flaws. Upscaling needs specialized algorithms to estimate missing detail without turning everything to mush.
Why Down-Scaling Usually Preserves Perceived Quality
Reducing resolution averages several source samples into each output pixel, which suppresses sensor noise, moiré, and pre-existing JPEG blocking. The practical consequence: a 4000-pixel-wide photo down-scaled to 1600 px and re-encoded at 80% quality frequently looks cleaner on screen than the original at 100% zoom. Pick a high-quality resampling filter (Lanczos, bicubic sharper, or an area-average filter) instead of nearest-neighbor, and add a light output sharpening pass if fabric weave or engraved text goes soft.
Why Enlarging an Image Can Reduce Quality
Enlarging a raster image adds new pixels to a fixed grid through interpolation, which estimates missing color values from neighbors rather than capturing real detail. Classical bilinear or bicubic interpolation smooths sharp transitions, producing softness, edge pixelation, and ringing beyond roughly 2× magnification. Nearest-neighbor keeps edges as hard steps and shows visible blockiness at large scale factors.
So if you are asking how do i make an image bigger without wrecking it, the honest answer is: partially, and with tradeoffs.
«Deterministic super-resolution models trained with L1/L2 losses produce blurred outputs because they suppress sharp textures to minimize pixel error.»
How AI Image Resizer Preserves Details
AI-powered resizers use deep neural networks trained on paired low-resolution and high-resolution samples to reconstruct fine edges, textures, and lines. Rather than averaging adjacent pixels, an AI upscaler predicts plausible structures to keep the main subject looking sharp through the scaling operation. Recent architectures combine pixel-wise reconstruction loss with perceptual objectives such as LPIPS, and 2024-era systems increasingly lean on diffusion priors and semantic guidance instead of plain convolutional mapping (NTIRE 2024 Image Super-Resolution Challenge Report; SinSR, CVPR 2024). Readers comparing tool families can review current AI image upscalers before committing to a production pipeline.
«PSNR and SSIM frequently fail to reflect real perceptual quality and can correlate negatively with human preference in super-resolution evaluation.»
The governance implication is direct. A model that scores well on distortion metrics may still fabricate a digit on an invoice or a character on an ID card. Any pipeline touching regulated documents should treat AI upscaling output as derived, never authoritative, and retain the original capture with its own hash and timestamp.
When evaluating complex multi-modal tools, teams can consult an AI Media Comparison to analyze quality metrics, processing limits, and output fidelity across leading models, or review a broader ranking of AI art and image generation platforms when generation and scaling happen in the same workflow.
Pick the Best Format to Make Images Smaller
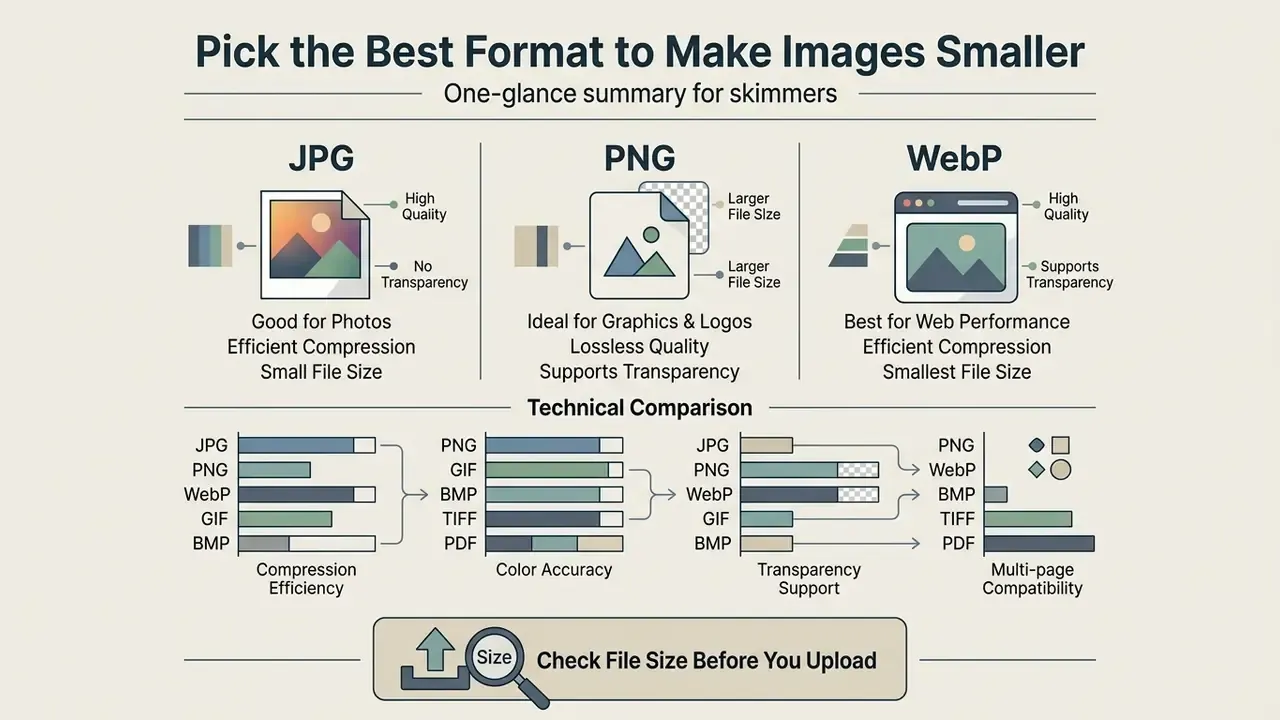
Format choice sets the balance between compression efficiency, color accuracy, transparency support, and multi-page document compatibility. Comparing JPG, PNG, WebP, and archival containers keeps your compressed images fast to load and compliant with technical submission guidelines.
JPG, PNG, and WebP for Online Uploads
Technical Comparison: JPG, PNG, WebP, GIF, BMP, TIFF, and PDF
Container choice decides whether you can keep transparency, animate frames, or bundle several pages in one deliverable.
| Format | Compression Type | Transparency Support | Ideal Web & Enterprise Use Case | Multi-Page / Document |
|---|---|---|---|---|
| JPG / JPEG | Lossy (DCT) | No | High-resolution photography, hero banners, complex scenes. | No |
| PNG | Lossless (DEFLATE) | Yes (8-bit / 24-bit alpha) | Logos, line art, technical diagrams, UI screenshots. | No |
| WebP | Lossy and lossless | Yes | Modern responsive websites, mobile app assets, fast-loading galleries. | Animated only |
| GIF | Lossless (indexed 256 colors) | Yes (binary 1-bit) | Simple web animations, low-color UI elements, legacy banners. | Animated frames |
| BMP / TIFF | Uncompressed / lossless | Optional | Archival graphics, high-fidelity print pre-press, raw scanner output. | TIFF supports multi-page |
| Mixed (vector and raster) | Yes | Form submissions, corporate documentation, print-ready digital proofs. | Yes |
Workflow tip: if your raw input is an uncompressed TIFF or BMP, scale its pixel dimensions first, then convert the output to WebP or JPG for up to a 90% byte reduction with no perceptual clarity loss. Inside PDFs the logic differs. Most savings come from re-encoding embedded raster images, so a vector-only or text-only document will barely shrink. Use JPEG or JPEG 2000 encoding for gradual photographic transitions and ZIP/Flate for flat, solid-color regions.
Check File Size Before You Upload
Verifying file weight before submission prevents upload failures caused by strict server body payload limits. Security standards recommend administrative caps on inbound media, typically between 2 MB and 10 MB, with hard rejection above 20 MB, to protect web applications against denial-of-service conditions (NIST SP 800-228-upd1, 2025. https://csrc.nist.gov/pubs/sp/800/228/final). Legacy federal guidance adds operational controls: dedicate a separate partition for uploads, apply per-file size limits, and screen files before they become readable to other users.
«Network-aware image compression reduced page load times by 35 to 42% compared with always-on proxy compression.»
Resize Photos for Social Media, E-Commerce, and Upload Forms
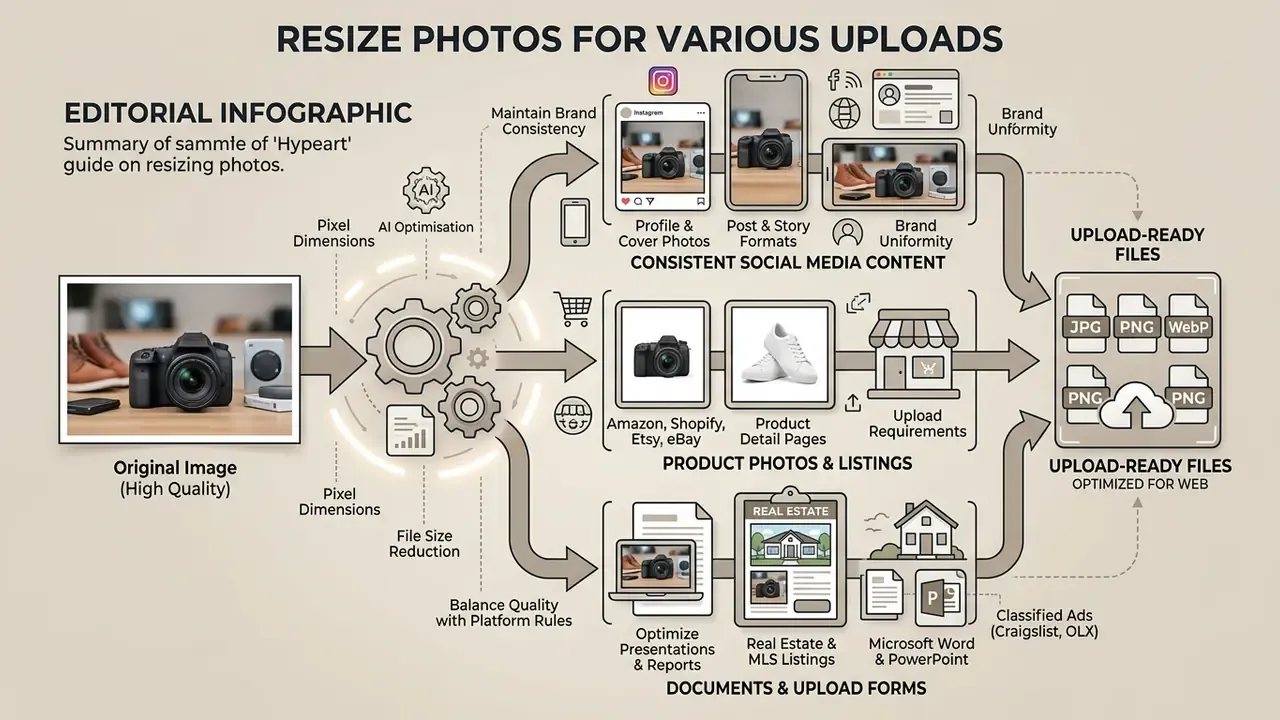
Adapting visual assets for business portals, store listings, and social channels means balancing brand uniformity against platform submission rules. Standardized image scales render predictably across very different device screens.
Prepare Product Photos and Documents for Upload
Product cards and scanned business documents need clear readability, strong contrast, and preserved fine detail. Web accessibility guidelines require that embedded text hold a minimum 4.5:1 contrast ratio and stay legible when scaled to 200% without content loss, which is what lets administrative portals, storefronts, and document verification systems digest submitted media cleanly (W3C WCAG 2.2, 2023. https://www.w3.org/TR/WCAG22/). Every meaningful image also needs a text alternative conveying the same purpose, and that matters as much for product galleries as for form field indicators.
For scanning workflows, capture grayscale and color originals at 200 to 400 dpi and bitonal text at 400 to 600 dpi, then apply adaptive compression so file size drops while character edges hold. ISO capture guidance additionally requires that authenticity, integrity, and readability survive the whole digitization chain, which in practice means the archival master stays untouched and only derivatives get compressed. Listings that need extra background room around the subject can be widened with AI outpainting tools before the final down-scale pass, which avoids a destructive stretch.
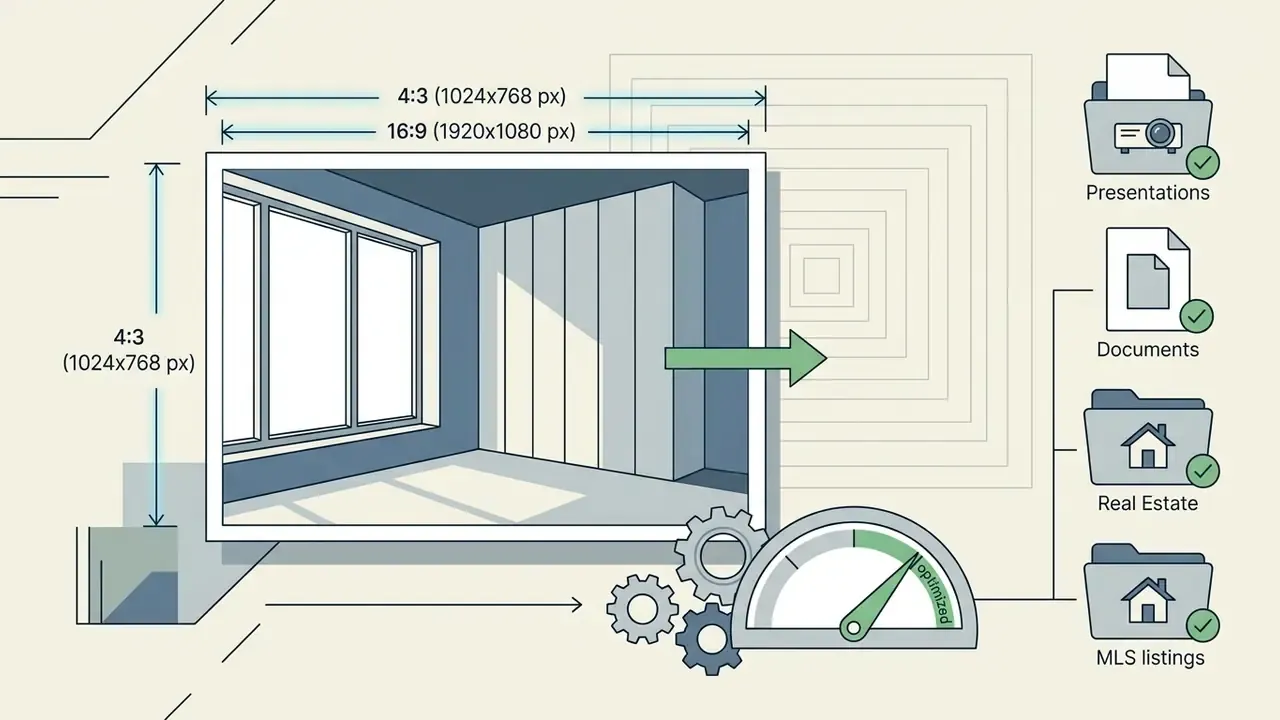
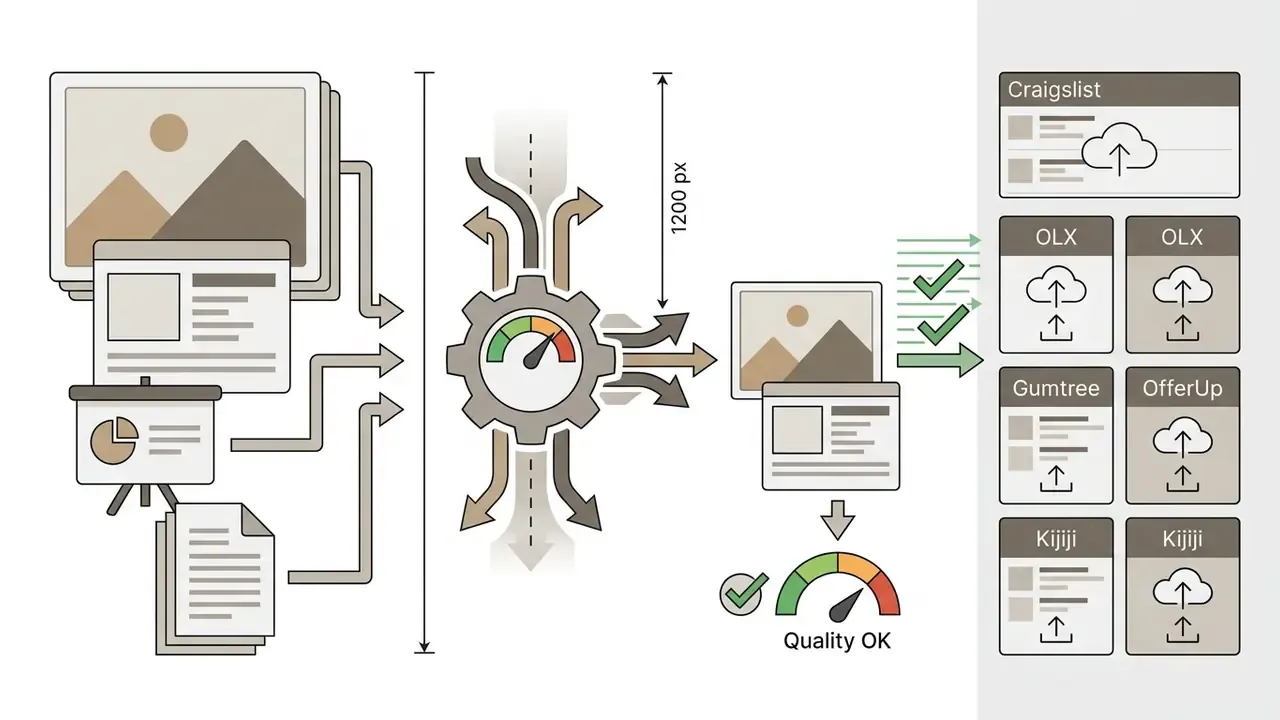
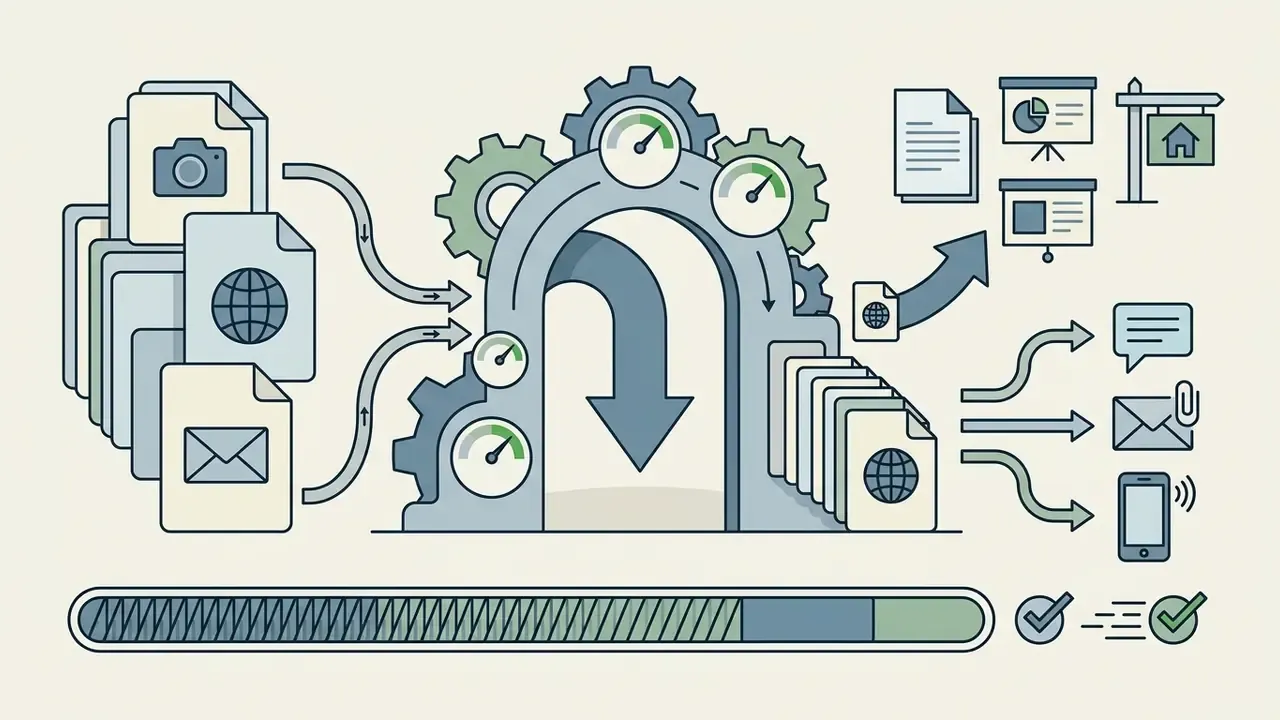
Optimize Images for Presentations, Documents, and Real Estate Listings
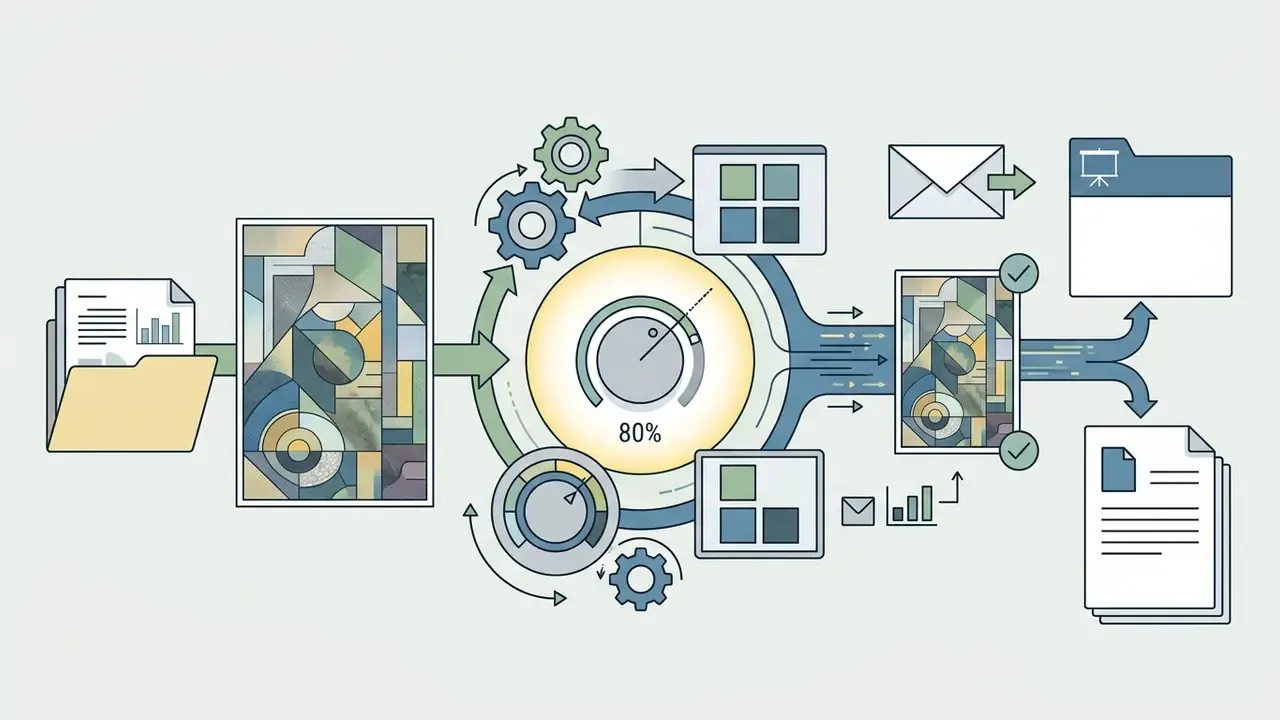
Beyond social feeds, dropping uncompressed photos into office suites or listing portals causes document bloat and outright rejection:
How to Choose a Free AI Image Resizer Online
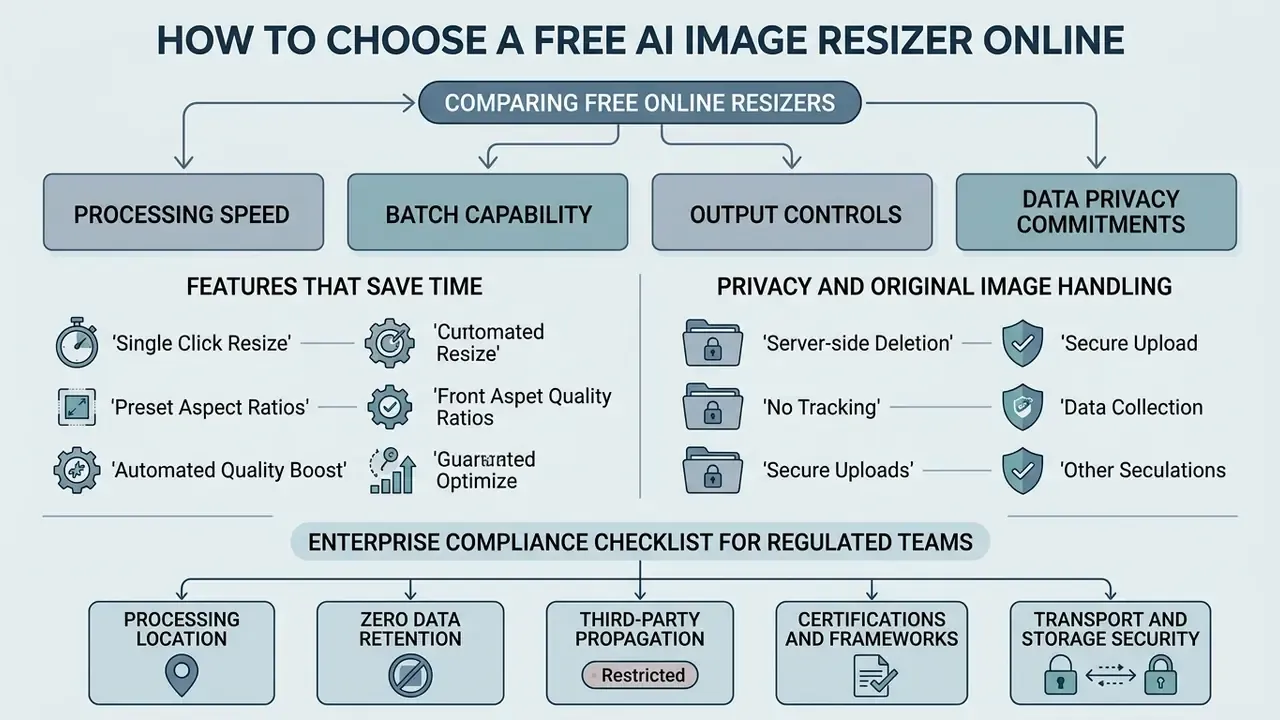
Comparing free online resizers comes down to processing speed, batch capability, output controls, and data privacy commitments. A tool with transparent file handling protects users and still delivers reliable output.
Features That Save Time in an AI Tool
Time-saving tools offer batch uploading, custom pixel input fields, aspect ratio locking, and platform presets. Automated batch processing applies consistent scale parameters across dozens of files at once and removes repetitive manual edits. Three mechanisms do most of the work: saved presets that replay one configuration across a folder, automatic batch sizing that picks a batch suited to available hardware, and queue-level export rules that apply one codec and quality value to every output.
A genuinely user friendly picture resizer also shows you the before-and-after weight without an extra click. Published free-tier constraints vary widely, with documented limits often around 20 MB per image, 50-file batches, and request-rate ceilings per IP address, so read the fair-use terms before planning a bulk migration. A simple image resizer that handles 10 files well may still throttle at 500.
Privacy and Original Image Handling
Reputable processing platforms spell out file retention rules in their privacy policy, including automatic deletion windows. Published values range from 20 minutes to 1 hour, 8 hours, and up to 24 hours or 7 days depending on the vendor. Some providers state that processing happens entirely in the browser using WebAssembly or client-side JavaScript, in which case the original image never reaches a server. Verify that claim against the vendor's own documentation and, where you can, by inspecting network activity, because architectures differ and policies get rewritten quietly.
Enterprise Compliance Checklist for Regulated Teams
Before approving any public resizer for corporate use, especially where images contain PII, ID scans, financial statements, or medical records, validate the following:
- Processing locationconfirmed client-side execution, or a named cloud region compatible with your data-residency obligations.
- Zero data retentioncontractual ZDR or a documented automatic deletion window, stated in the DPA rather than only in marketing copy.
- Third-party propagationno silent copies on external CDNs, analytics pipelines, or model-training corpora.
- Certifications and frameworksSOC 2 Type II, ISO/IEC 27001, plus sector obligations such as GLBA, HIPAA, or GDPR where applicable.
- Transport and storage securityTLS in transit, encryption at rest, scoped access controls, and audit logging.
- Payload governanceenforced upload caps and file screening consistent with NIST SP 800-228 guidance.
- Shadow-AI controlan approved internal tool or API so employees stop routing confidential scans through unvetted consumer sites.
Disclaimer: the checklist above is informational and not legal or compliance advice. Validate tool selection with your own privacy, security, and legal functions before processing regulated data.
Organizations reviewing enterprise AI tooling and data processing standards can check independent performance data through AI Media Benchmarks and Review Proof to verify operational safety, and compare feature limits across no-cost options in our guide to free photo editors.
Limitations and Open Questions
FAQ: Frequently Asked Questions About Making an Image Smaller
Can I change image size online for free without losing quality?
Yes. You can lower pixel dimensions or compress file weight for free without noticeable quality loss by choosing modern formats such as WebP and applying moderate compression ratios. Down-scaling an image often reduces the visibility of minor artifacts, which preserves perceived clarity on screen.
«Reducing display resolution systematically lowers artifact visibility, which leads to higher subjective quality ratings at small rendering sizes.» Konx Cross-Resolution Image Quality Assessment Database (2023)
Do I need design experience to use an online photo resizer?
No. Online resizers use drag-and-drop interfaces where you enter the desired pixel dimensions, toggle an aspect ratio lock, and click download. Platform presets remove the remaining guesswork: pick "YouTube thumbnail" or "Instagram square" and the tool applies the correct ratio and canvas for you. That is image editing without the learning curve.
Can I resize images directly on a mobile phone without installing an app?
Yes. Modern online resizers run inside iOS Safari and Android Chrome. Client-side processing via WebAssembly lets you select a photo straight from the camera roll, apply dimension changes, and download the optimized file at once, with no native store app required. Where a vendor does offer a dedicated app, the benefit is usually offline batching rather than better output quality.
How many images can I resize at once using automated online tools?
Free web utilities typically handle single-file edits or small batches, commonly 3 to 10 images in browser memory, while paid tiers raise batch ceilings and drop ads. For enterprise asset libraries, developers can integrate dedicated media REST APIs to batch-resize thousands of files programmatically with consistent presets and logged parameters.
Can I use a background remover together with a resize tool?
Yes, background removal and resizing fit in one workflow. After removing the background, save or process the subject in a format that supports transparency, PNG or WebP, before you adjust pixel scale or file weight. Reversing the order risks re-compressing hard cut-out edges twice, which leaves halos around the subject.
When should I use an image upscaler instead of a downscaler?
Use an AI image downscaler when you need to shrink file size, lower resolution, or meet strict upload limits for web pages and social feeds. Use an image upscaler when you must enlarge a small photo for high-definition displays or print while mitigating blur and pixelation. Treat the result as a reconstruction, not a recovered original, and never as evidentiary or compliance-grade output.
Can vector files be resized the same way?
No. Vector formats such as SVG describe shapes mathematically, so they scale to any size without resampling. Only raster formats (JPG, PNG, WebP, GIF, BMP, TIFF) require the pixel-grid interpolation discussed above. Many browser-based resizers accept raster input only, so convert or re-export vectors from their source application instead.
Additional Commercial and Technical Resources
- Review licensing, usage rights, and commercial policies in our comprehensive AI Media Commercial-Use guide.
- Calculate bandwidth savings and file reduction targets using web performance calculators.
- Compare top image and video editing platforms in our detailed guide to online photo editors and guide to video compressors.
- Standardize portrait assets across a team with our guide to AI headshot generators.
- Explore developer workflows for advanced generative video models in our guide on google veo ai video generator how to use and its Veo API implementation notes.
Related Creator Tools (Optional Add-Ons)
On the creator side, resized imagery is usually paired with supporting assets and channel tooling: a free avatar maker, a free ai avatar video generator, guides to create youtube videos with ai, a YouTube video editor walkthrough, plus libraries of free music for video editing and free sound effects.
Appendix A: Superseded Wording (Change Log)
- Original: "Set a Target Size or Percentage. Select whether you want to enter exact dimensions in pixels or scale the image down by a specific percentage. To keep your composition proportional, ensure the 'Lock Aspect Ratio' toggle remains active before specifying your target width or height." → Superseded by the expanded step covering quality sliders and upscaling warnings.
- Original: "Privacy-focused web applications execute image adjustments locally within the user's browser using WebAssembly or Client-Side JavaScript, ensuring original files never leave the local device." → Superseded by the verification-conditional phrasing in "Privacy and Original Image Handling", because vendor architectures and policies differ and the claim requires per-tool confirmation.