Last updated: February 2026 · Reviewed for: media operations, model-risk and content teams
Executive Summary: Key Takeaways
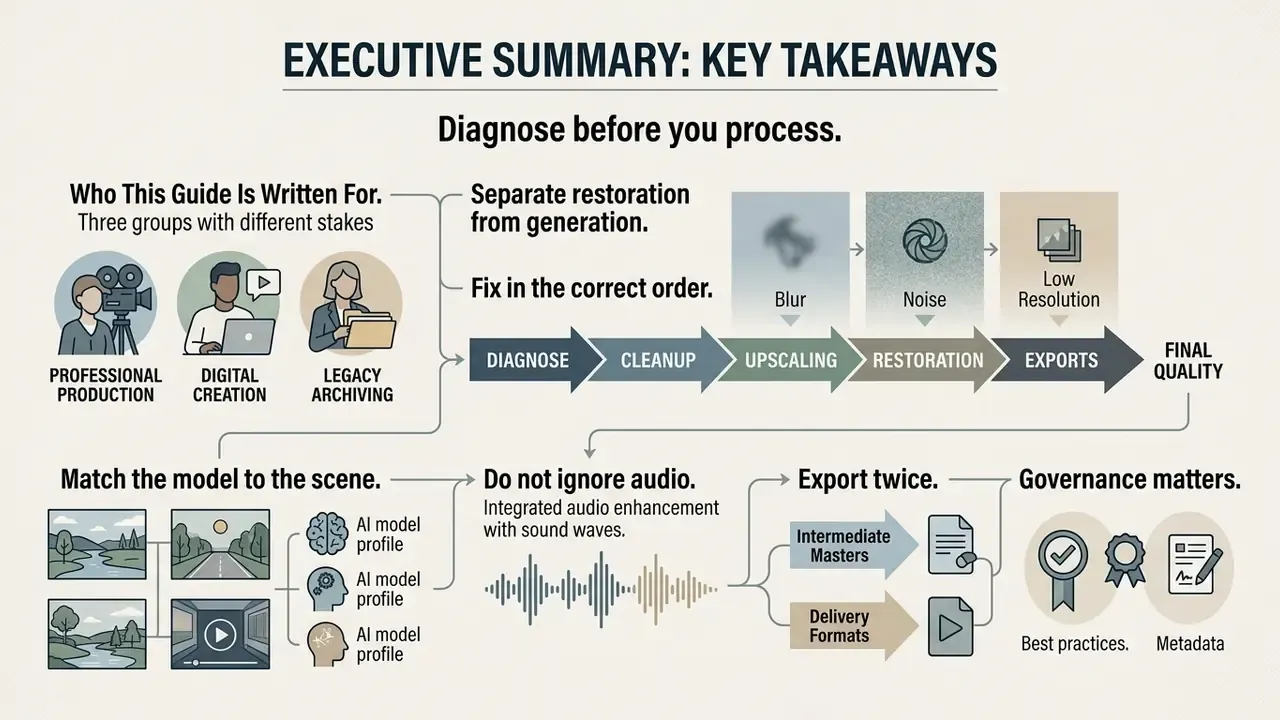
- Diagnose before you process. Blocking, ringing, and banding come from encoding; grain, smear, and clipped highlights come from capture. The wrong fix compounds the defect instead of removing it.
- Separate restoration from generation. Classical upscaling interpolates existing pixels deterministically. Generative super-resolution invents plausible texture, which is why sharper output statistically increases hallucination risk.
- Fix in the correct order. Deinterlace, denoise, deblur, upscale, interpolate frame rate, grade, sharpen, encode. Denoising after upscaling amplifies noise into fake "detail."
- Match the model to the scene. Anime, gameplay, concerts, portraits, on-screen text, and interlaced VHS each require different model classes and strength ceilings (see the scenario matrix below).
- Do not ignore audio. Perceived "low quality" is frequently an acoustic problem: target −14 LUFS for social delivery, −24 LUFS for broadcast, and burn in captions for sound-off viewing.
- Export twice. Produce one auditable archival master (ProRes 422 / DNxHR / FFV1) and one delivery encode (H.264/HEVC MP4 at 10 to 15 Mbps for 1080p, 35 to 68 Mbps for 4K).
- Governance matters. Cloud one-click enhancers are unsuitable for PII, KYC recordings, or evidentiary footage. Log model version, strength values, and seed for every render you intend to defend later.
Who This Guide Is Written For
Three groups tend to land on this page with very different stakes. Content creators want a faster route from a soft 720p clip to a clean HD video for YouTube or Reels. Media operations teams need repeatable batch settings that do not change look between renders. Compliance, model-risk, and internal audit functions need something narrower but harder: proof of what the tool did to the footage.
The workflow below serves all three, with one asymmetry worth stating early. Creators can afford to experiment with sliders; regulated teams cannot. If your footage touches customer identity, KYC onboarding sessions, dispute evidence, or recorded advisory calls, read the governance notes as requirements rather than suggestions. Everyone else can treat them as good hygiene.
Diagnose Why Your Video Looks Low Quality
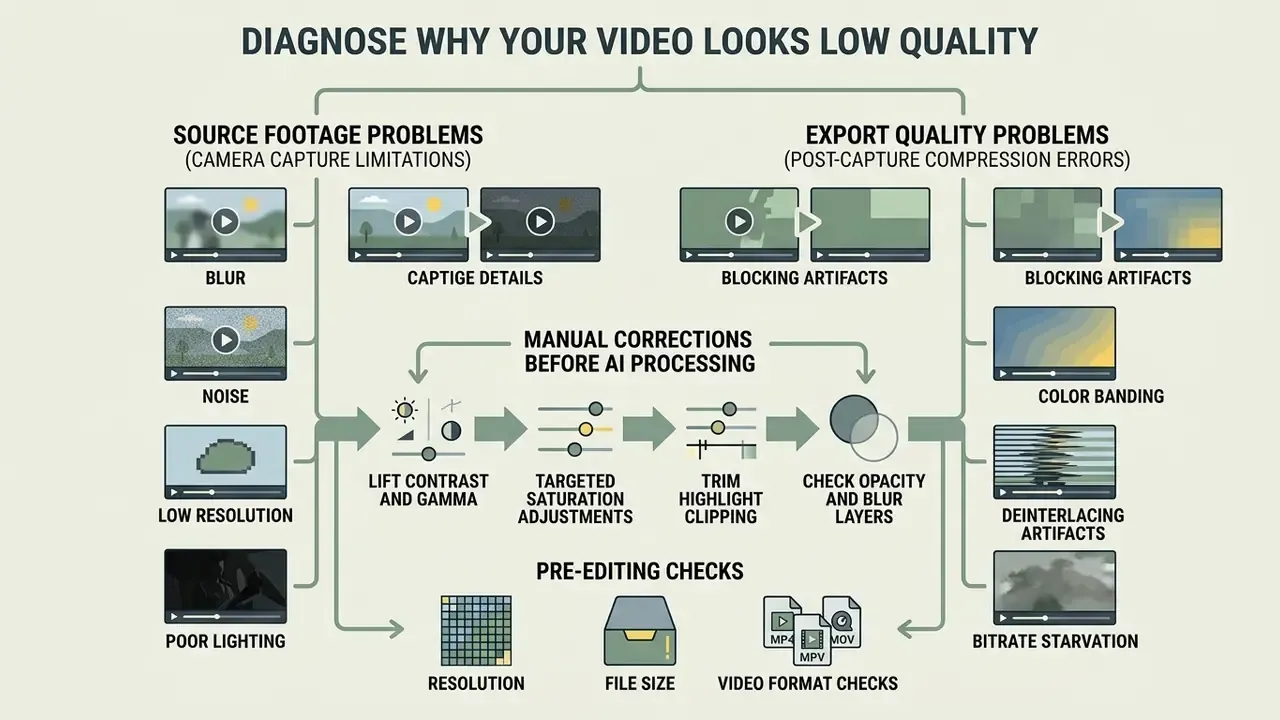
Selecting the correct enhancement strategy requires diagnosing whether visual defects stem from camera capture limitations or post-capture compression errors. A careful visual inspection tells you whether the clip suffers from low resolution, sensor noise, focus blur, or simply the wrong video formats somewhere in the chain.
Standard quality evaluation frameworks, such as ITU-R BT.500-15, use a five-grade impairment scale ranging from 5 (imperceptible defect) to 1 (very annoying defect). Systematically identifying the root visual flaw prevents applying the wrong software treatment, such as sharpening a clip that simply suffers from severe compression blocking. Objective metrics complement that subjective scale and make the diagnosis reproducible across operators, which matters the moment two people disagree about whether a render is acceptable.
Source Footage Problems and Export Quality Problems
Source footage problems occur during physical capture and are permanently recorded into the camera's master file. These issues include poor lens focus, sensor noise, underexposure, motion blur, and interlaced field capture on legacy hardware.
Export quality problems appear later, during video editing, encoding, or platform transfer. Repeatedly saving or re-encoding clips introduces generation loss, which creates square compression blocks, color banding in flat backgrounds, and edge ringing. Distinguishing capture flaws from encoding artifacts ensures you choose the proper fix rather than compounding compression errors. Large-scale quality research confirms how varied these real-world degradation profiles actually are.
Table 1. Diagnostic mapping of common video problems to enhancement solutions
| Problem | How it looks | Primary root cause | Target enhancement approach |
|---|---|---|---|
| Low resolution | Soft edges, visible pixels, lack of fine detail when scaled. | Low sensor pixel count or heavy downscaling. | AI spatial upscaling and neural detail reconstruction. |
| Blurry video | Out-of-focus subjects, motion smears, soft object contours. | Slow shutter speed, improper focus, or lens smudge. | Motion-aware deblurring and unsharp mask filtering. |
| Low light and noise | Grainy textures, dancing color specks in dark shadow areas. | High sensor ISO/gain in low-illuminance environments. | Spatial-temporal noise reduction and exposure balancing. |
| Shaky footage | Unstable horizon, violent camera wobble, erratic motion. | Handheld capture without mechanical stabilization. | Digital optical-flow stabilization and trajectory smoothing. |
| Compression artifacts | Blocky square patches, color banding, edge ringing. | Low export bitrate or aggressive messaging transcode. | Deblocking filtering, deringing, and high-bitrate re-export. |
| Judder and comb lines | Stuttering pans, horizontal "teeth" on moving edges. | Low frame rate or interlaced legacy capture (50i/60i). | Deinterlacing (Yadif/EEDI3) followed by motion interpolation. |
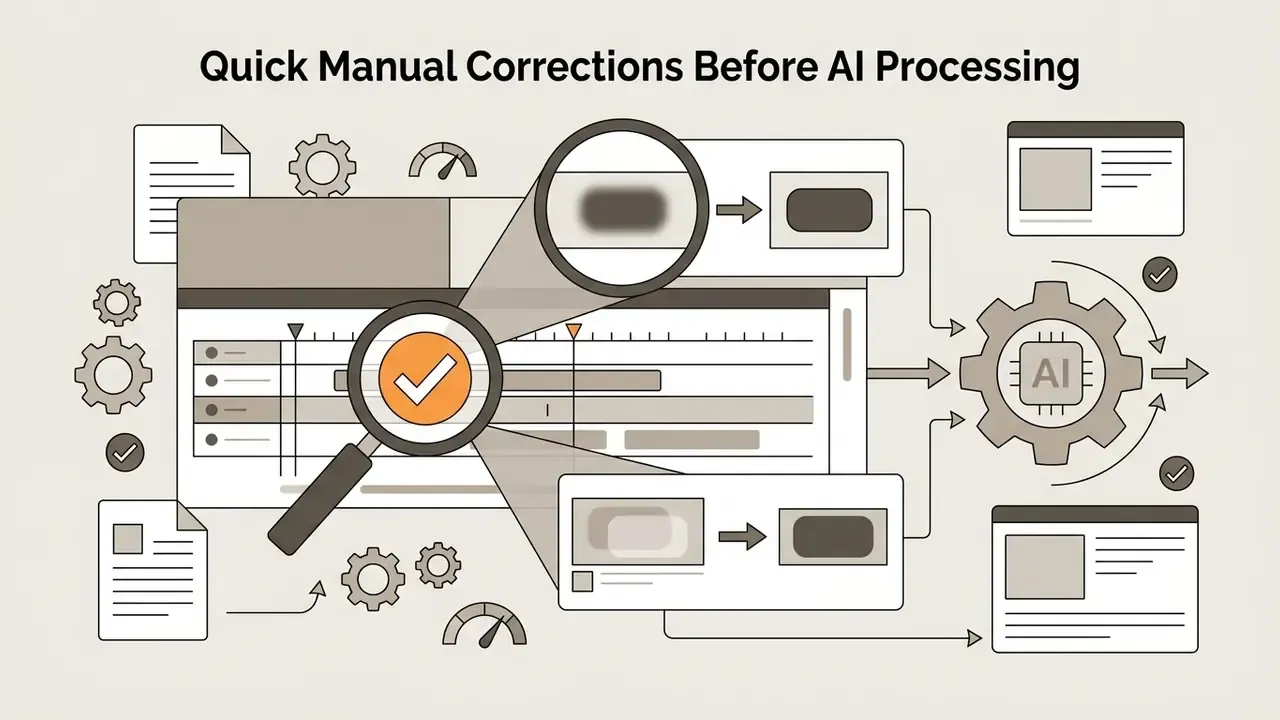
Quick Manual Corrections Before AI Processing
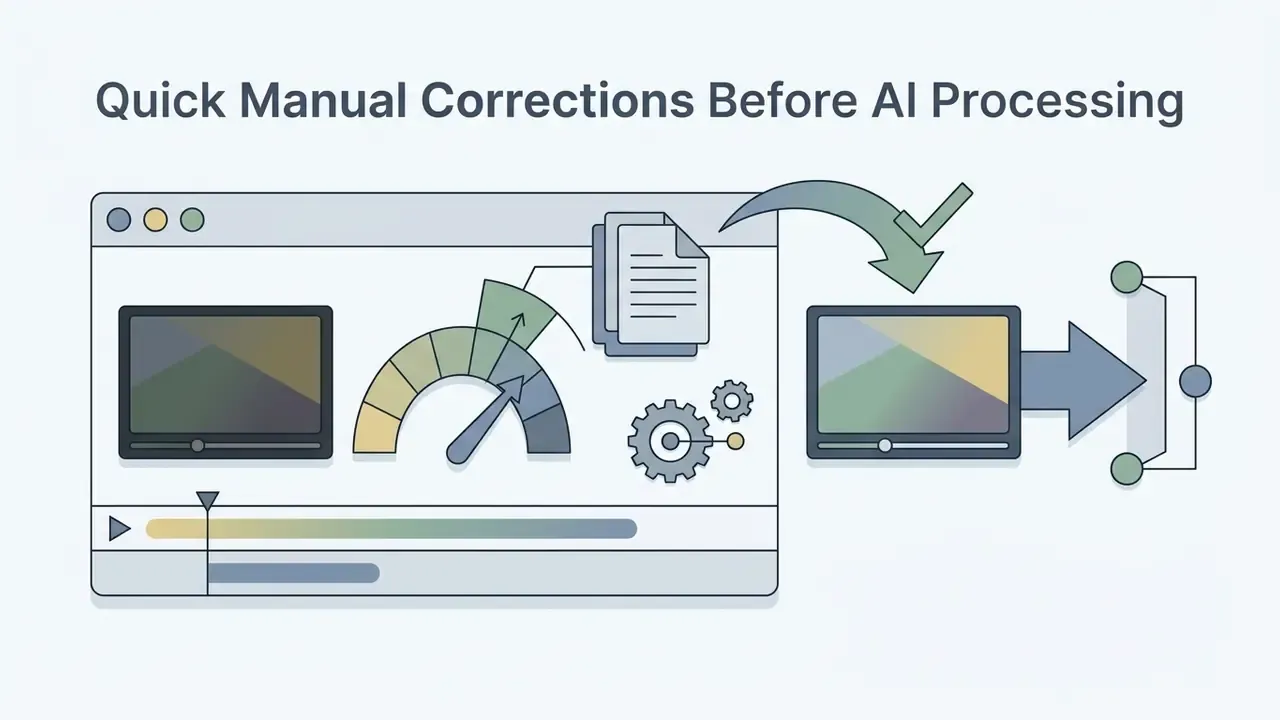
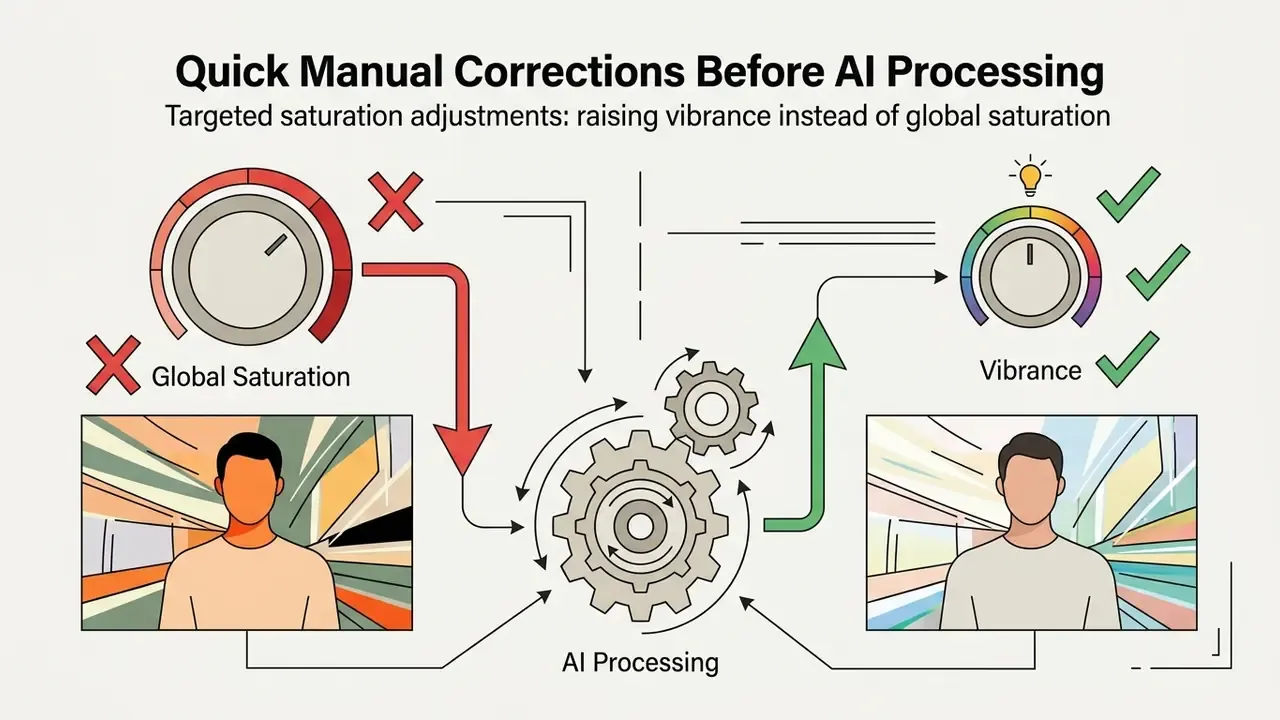
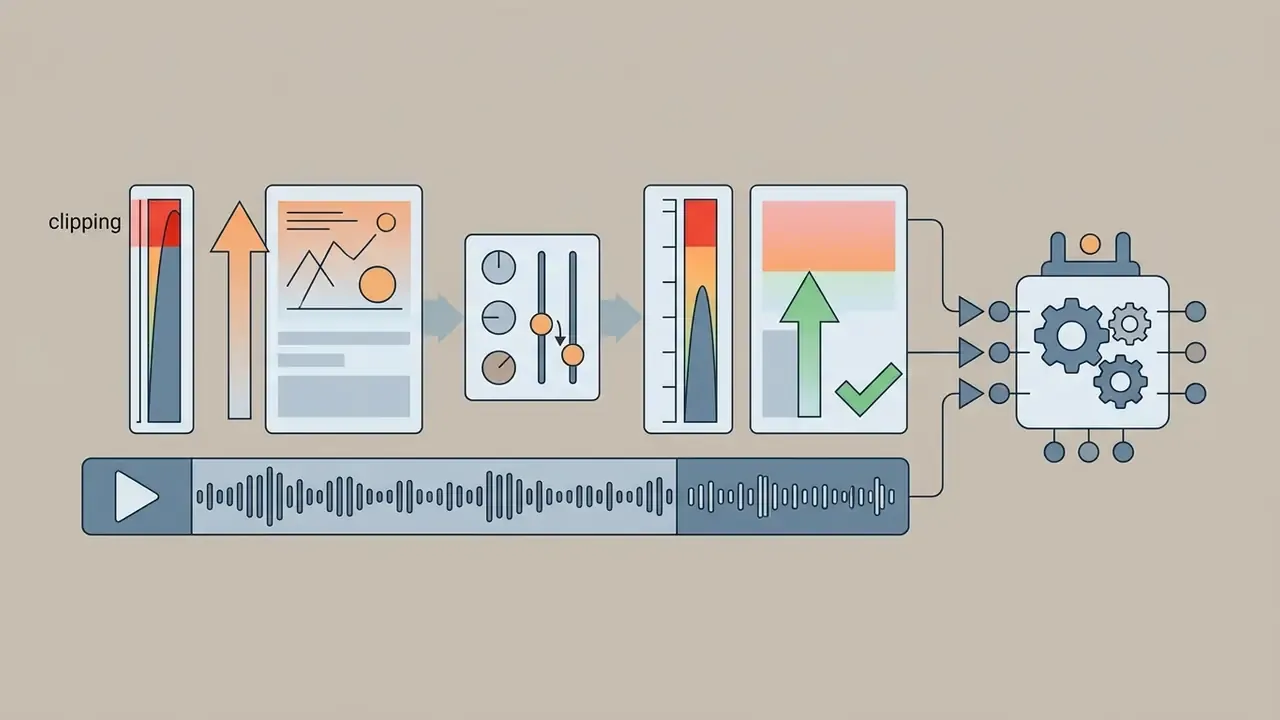
Not every clip needs a neural network. Before committing GPU hours, run a two-minute manual pass, because plenty of "low quality" footage is just flat or dim:
Resolution, File Size and Video Format Checks Before Editing
Before applying an enhancement tool, inspect the media metadata using standard editing tools or file inspection utilities. A YouTube-oriented video editor exposes these properties directly in its media panel. Verify five technical properties:
- Pixel resolution horizontal and vertical dimensions (for example 1920×1080 or 3840×2160).
- Video bitrate the volume of data processed per second, measured in Megabits per second (Mbps).
- Frame rate temporal frequency such as 24, 29.97, 30, or 60 frames per second, plus whether the stream is progressive or interlaced.
- Container format file extensions such as MP4, MOV, MXF, or WebM.
- Video codec the underlying compression standard, such as H.264, HEVC (H.265), VP9, or AV1.
MP4 MOV containers dominate everyday work, but the container tells you nothing about quality on its own; a 4 Mbps MP4 and a 40 Mbps MP4 share an extension and almost nothing else. For automated processing pipelines, developers often consult specialized AI Media API Guides and provider-level documentation such as the Google Veo implementation guide to handle container parsing and render-job orchestration, while creators managing storage math rely on visual calculators to estimate post-rendering file size before a long batch starts.
What Video Enhancement Can and Cannot Fix
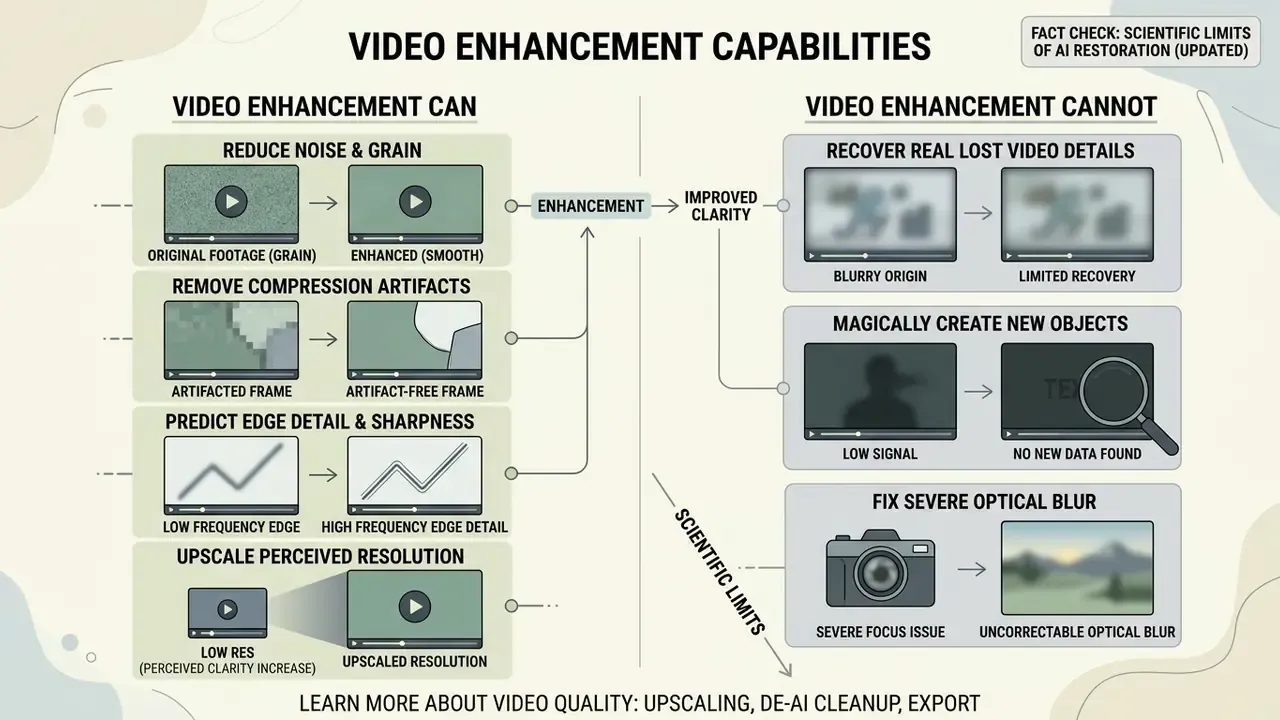
AI video enhancement improves perceived visual clarity by removing compression artifacts, reducing digital grain, and predicting high-frequency edge detail. It cannot deterministically recover physical data that was completely missing during the original optical recording.
Modern enhancement algorithms use learned priors to estimate missing pixels. So when people ask how do i make a video better quality, the honest answer starts with a distinction: true signal recovery and synthetic detail generation are not the same product, even when they ship in the same button.
«Generative restoration establishes a fundamental trade-off: higher perceived sharpness increases the likelihood of generating realistic textures absent from the ground-truth source.»
Here is an illustrative, composite example rather than a documented client engagement. In an enterprise media workflow, a legacy compliance recording captured at 480p needed conversion to 1080p for stakeholder review. By deploying a model-driven super-resolution network with strict texture-preservation thresholds instead of an aggressive diffusion model, the team reached usable 1080p clarity without altering facial features or document text, which satisfied internal brand and audit requirements. The same reasoning applies to KYC recordings, board-meeting captures, and scanned document footage: probability-based texture synthesis must never touch biometric or textual evidence.
Upscaling Resolution vs Recovering Real Video Details
Classical upscaling resizes an image by interpolating existing pixel values across a larger spatial grid. Generative AI detail recovery reconstructs higher resolution frames by synthesizing missing high-frequency details during upsampling, the same principle that governs modern AI image upscalers applied across a temporal sequence.
Research from WACV 2025 demonstrates that neural reconstruction models can recover fine detail directly from noisy low resolution inputs by applying generative adversarial networks (GANs) or diffusion processes. Similarly, Adobe's 2025 Generative Upscale Documentation distinguishes between models that restore existing low-resolution detail and those that synthesize new creative elements. Classical upscaling prevents synthetic errors; AI-powered detail recovery creates visually sharper frames by predicting plausibly realistic textures. You pick your risk, not your certainty.
«Video super-resolution models can only approximate high-frequency content from learned priors and motion, not restore exact original pixels.»
«Generative super-resolution can produce images that look sharp and detailed yet are clearly incorrect relative to the source scene: wrong text, altered objects, invented structures.» Hallucination Score for Generative Super-Resolution, preprint (2025). https://arxiv.org/abs/2025
This is the single most consequential distinction in the field. Vendor copy promising "100% automatic video quality improving" or one click conversion of any clip into 2K/4K is marketing shorthand. Automatic upscalers add probabilistic pixels; they do not return the original recording.
When Blurry, Dark or Damaged Footage Has Limited Recovery
Severe motion blur, deep shadow underexposure, and clipped camera highlights create physical limits for digital video restoration. When a camera sensor receives insufficient light photons, digital noise dominates the recorded image signal.
AI models can suppress visual grain and brighten dark frames, yet they cannot reconstruct object details that received zero sensor exposure. Severe motion blur is similarly stubborn: it breaks temporal correspondence between consecutive frames, which limits the ability of deep-learning algorithms to restore sharp, true-to-life focus. Benchmark data quantifies fairly precisely where that ceiling sits.
«The AIM 2025 dataset covers 756 video sequences at 1–10 lux illumination; noisy baselines measure roughly 36 dB PSNR, while leading methods exceed 42 dB.»
E-E-A-T verification: scientific limits of AI restoration (updated)
Fact check. Peer-reviewed computer vision research confirms that AI video enhancers cannot reliably reconstruct missing optical data. Benchmarks from the AIM 2025 Low-light RAW Video Denoising Challenge show measurable but bounded recovery from photon-starved footage: PSNR improves from roughly 36 dB to above 42 dB, yet regions receiving zero sensor exposure remain unrecoverable. So while an AI enhancer can dramatically improve perceived video quality, generated fine detail represents probabilistic estimation based on training data rather than verified source recovery. Operators working with evidentiary or regulated material should record model version, model strength, and random seed alongside every render.
The Step-by-Step AI Enhancement Workflow
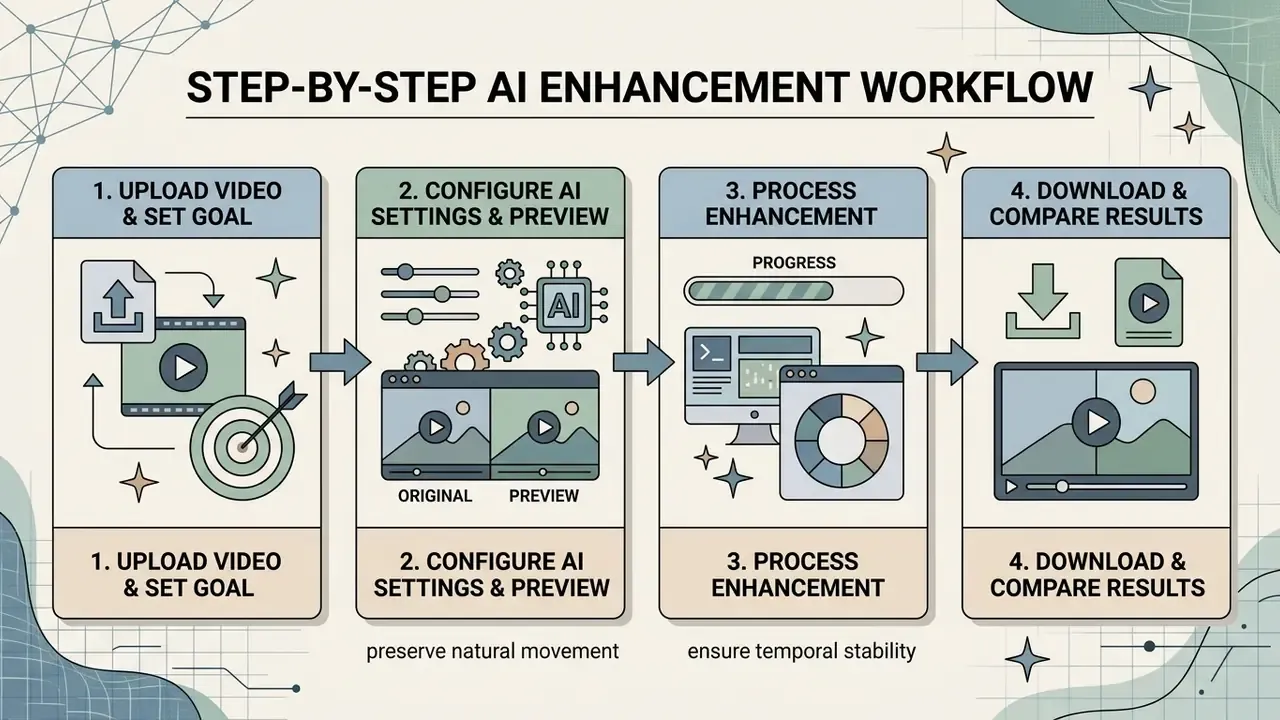
Enhancing video files calls for a controlled, step-by-step workflow that maximizes visual sharpness while preserving natural movement and temporal stability across frames. Figure 1. AI video enhancement pipeline (text diagram; alt-text: "how to make video quality better, sequential AI enhancement pipeline"):
① Source file audit (resolution · bitrate · fps · scan type · codec)
→ ② File import (original master, never a re-download)
→ ③ AI model selection (scene profile plus strength ceiling)
→ ④ 100% zoom preview check (halos · waxy skin · warped text)
→ ⑤ Render pass (queued, running, complete)
→ ⑥ Split-screen quality audit (before/after, same frame)
→ ⑦ Dual export (archival master plus delivery encode)
- Check source file metadata. Inspect resolution, bitrate, frame rate, scan type, and codec to confirm baseline quality.
- Upload the original master file. Import the highest quality source video file available directly into the video enhancement tool.
- Select the target output mode. Choose the target resolution (HD 1080p or 4K, for example) and the processing goal based on your final distribution channel.
- Configure AI model parameters. Set noise reduction, sharpening, deinterlacing, or 2× upscaling strength.
- Inspect live 100% zoom previews. Review processed test frames at full magnification to catch edge halos or plastic skin textures.
- Render and export the final video. Run the batch pass and save a high-bitrate MP4/MOV delivery file plus an intermediate master.
Upload the Original Video File and Choose the Output Goal
Always upload video straight from your storage device rather than a compressed preview or a social media re-download. Processing a heavily compressed clip forces the AI model to upscale encoding artifacts instead of underlying scene detail. Garbage in, sharper garbage out.
Select an output resolution that matches your target playback platform. Institutional digitization and delivery practice referenced in NASA-STD-2818 and FADGI guidance treats Full HD (1920×1080) as a universal baseline for digital delivery, reserving 4K UHD (3840×2160) for large-format displays or archival preservation (the precise clause wording in these standards should be independently verified against the current published revision, see Appendix A). Upscaling standard-definition content beyond 4K usually inflates rendering time and file size without delivering meaningful perceptual gains.
Select AI Enhancement Settings and Review the Preview
Most AI video upscaler software offers specialized processing models tuned for specific defects: general enhancement, low light denoising, portrait refinement, or deinterlacing. Creators comparing entry-level options can start with a survey of free AI video generators and enhancement suites before committing to paid GPU time. Start with a moderate processing profile. Always.
Evaluate the model on a high-detail test frame at 100% zoom or higher. Practical vendor workflows, including published Topaz Labs and ON1 user documentation (product manuals rather than peer-reviewed sources), converge on the same evaluation rule: inspect sharpness near edge boundaries and fine textures at full magnification. Excessive sharpening creates distracting white halos around objects, while over-aggressive noise reduction turns human skin into a smooth, waxy surface. Adjust noise suppression thresholds so a slight amount of natural background texture survives.
Reproducibility log (for audited or regulated renders). Record these six fields per clip so any output can be regenerated or challenged later:
- Tool name and build/version number.
- AI model name and weight version.
- Model strength, denoise, and sharpen values.
- Random seed, where generative models expose one.
- Scale factor and output resolution.
- Processing location: local GPU or a named cloud region.
Process, Download and Compare the Enhanced Video
Once model settings are locked, queue the full render pass. After processing completes, download your enhanced video file and conduct a split-screen or side-by-side visual audit.
Professional editing suites such as Adobe Premiere Pro and Final Cut Pro provide comparison views that lock matching frames between original and processed sources; Adobe Media Encoder additionally exposes a Source-vs-Output compare tab before export. Compare high-contrast edges, dark shadow areas, and moving subjects to verify that the output holds steady temporal coherence without frame-to-frame flicker. One caveat I learned the hard way: judge motion on a loop, not on a paused frame. Stills forgive everything.
Apply the Right Fix for Each Video Quality Problem
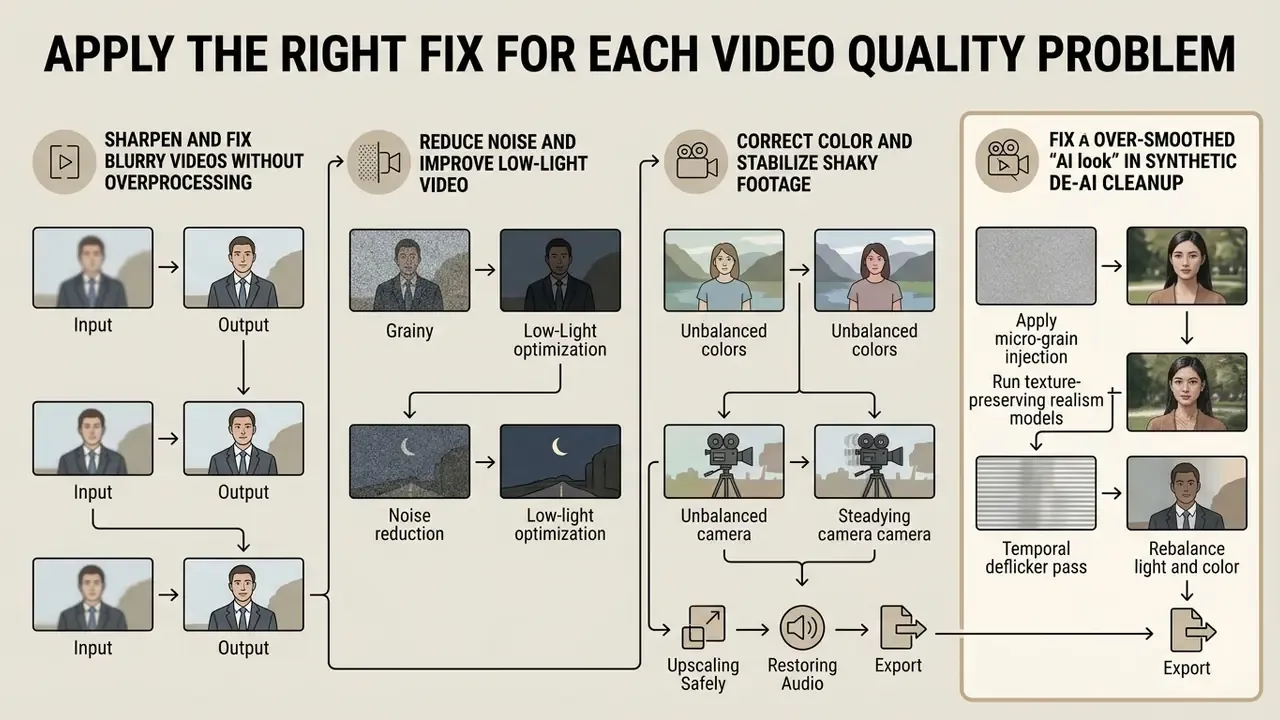
Correcting degraded footage means applying specific, localized fixes tailored to individual defects. Process in pipeline order (deinterlace, denoise, deblur, upscale, interpolate, grade, sharpen), because each stage feeds cleaner data to the next.
Reduce Noise and Improve Low-Light Video
Low light footage shot on small camera sensors frequently shows severe luminance grain and dark color blotches. Effective noise reduction separates smooth background surfaces from detailed foreground subjects instead of flattening both.
Recent low-light enhancement research (including the LIVENet architecture, whose 2024 publication details warrant independent verification) uses latent subspace denoising blocks to remove noise while re-injecting texture information during refinement. When working with compressed video formats, apply moderate spatial-temporal noise reduction before any spatial upscaling pass. Removing digital grain first stops the AI model from treating random noise patterns as real scene detail that deserves upscaling.
«DarkVRAI raises PSNR from ~36 dB to above 42 dB and SSIM from ~0.81 to ~0.99 on real low-light smartphone video.»
When preparing cleaned low-light clips for chat platforms or internal review portals, a controlled video compressor keeps file size inside upload caps while maintaining clean noise boundaries instead of re-introducing blocking.
Correct Color and Stabilize Shaky Footage
Unstable camera movement drags down perceived production value and makes video content tiring to watch. Digital stabilization uses optical flow algorithms to track feature points across adjacent frames, then smooths erratic camera trajectories.
«Fast full-frame stabilization applies two-level optimization of probabilistic flow fields with multi-frame fusion, delivering superior speed and visual quality.»
Software suites such as Avid Media Composer use automated tracker-based stabilization and Region Stabilize effects to lock target regions without cropping away excessive frame padding. Pairing digital stabilization with basic primary color correction, including tonal stabilization that compensates frame-to-frame exposure drift, noticeably improves scene readability across different display screens.
Fix Over-Smoothed "AI Look" in Synthetic Videos (De-AI Cleanup)
Generative AI tools such as Sora, Runway, Kling, or Pika frequently produce clips with hyper-smooth "waxy" skin, repetitive background patterns, and temporal edge flicker. Restoring a natural cinematic video look to AI-generated footage needs an inverse enhancement chain:
- Apply micro-grain injection.Introduce a controlled 1 to 3% film grain layer (ISO 100/400 profile) before neural upscaling to break up synthetic spatial uniformity.
- Run texture-preserving realism models.Choose dedicated realism models over aggressive super-resolution networks. Set model strength to 35 to 50% so the AI does not compound existing generation artifacts.
- Temporal deflicker pass.Apply multi-frame optical flow smoothing to remove the frame-to-frame texture shifts common in AI video renders.
- Rebalance light and color.Generated clips often carry flat, evenly lit surfaces; adding directional falloff and mild highlight roll-off restores physical plausibility.
Teams producing large volumes of synthetic footage should pair this cleanup chain with model selection research from comparisons of AI art and video generators, since the "AI look" is far cheaper to prevent at generation time than to remove in post.
Enhance Blurry Text, Logos, and On-Screen Documents
Standard spatial upscalers treat text like organic texture, which produces warped, illegible characters. Restoring crisp typography and vector logos in compressed footage demands edge-preserving reconstruction:
- High-contrast masking isolate text zones with a contrast-threshold luminance mask before running sharpening filters.
- Text-dedicated AI presets use specialized document/text reconstruction models (offered in tools such as Wink's Text scenario or Topaz's graphics-oriented models) that enforce straight-edge constraints instead of probabilistic organic blending.
- Bicubic upscaling fallback for hard-coded subtitles, a high-bitrate bicubic sharpen pass often beats generative neural networks and stops the model from hallucinating incorrect letter shapes.
- Governance rule never use diffusion-based upscalers on contracts, ID documents, invoices, or licence plates in evidentiary footage. A single hallucinated glyph invalidates the record.
FPS Motion Interpolation: Converting 24fps to 60fps and Smooth Slow-Motion
Raising spatial resolution without addressing a low frame rate makes high resolution video feel jittery during fast motion. AI motion interpolation uses optical flow networks such as RIFE or DAIN to synthesize intermediate frames:
- Cinematic 60fps upsamplinggenerates new motion vectors between frames, smoothing camera pans on high-refresh-rate 4K displays.
- Slow-motion retiminginterpolating a 30fps clip to 120fps allows a 4× speed reduction while keeping fluid movement instead of frame-blended smear.
- Artifact minimizationkeep interpolation multipliers under 4× (30fps to 120fps at most). Extreme multipliers warp fast-moving, complex boundaries like running water or spinning wheel spokes.
- Stabilize firstinterpolating shaky footage bakes the wobble into twice as many frames, so stabilize before retiming.
Scenario-Specific Model Selection
Table 2. Scenario-specific AI model selection and configuration matrix
| Content category | Dominant visual defect | Recommended AI model profile | Target parameters and constraints |
|---|---|---|---|
| Anime and 2D animation | Color bleed, line anti-aliasing blur, compression ringing. | Line-art / cartoon super-resolution (Anime4K, Waifu2x-video). | High line-sharpness strength; zero noise injection; lock output color space to Rec.709. |
| Gameplay and screen capture | HUD text blurring, macroblocking in fast camera pans. | High-bandwidth fidelity / computer-graphics model. | Enforce 60 fps interpolation; deband gradient skies; retain pixel-grid alignment. |
| Live concerts and low-light events | Heavy ISO color noise, blown-out stage lights, motion smear. | Low-light spatial-temporal denoising block. | Prioritize shadow noise reduction over edge sharpening; preserve high-dynamic-range light halos. |
| Portraits and talking-head video | Waxy skin, flicker, over-processed backgrounds. | Portrait-specific restoration with face-region weighting. | Cap denoise at moderate; retain visible pore and hair texture; disable generative face re-synthesis. |
| Product and e-commerce footage | Illegible labels, dull materials, inconsistent color. | Product/detail model plus text-preserving mask. | Sharpen label zones separately; verify brand color values against reference swatches after grading. |
| Legacy interlaced tape (VHS / camcorder) | Comb artifacts, head switching noise, time-base distortion. | Hardware deinterlacer plus motion interpolation. | Double frame rate (50i/60i to 50p/60p) with Yadif/EEDI3 before spatial 4K upscale. |
| AI-generated (Sora / Runway / Kling) | Plastic skin, repeated textures, temporal edge flicker. | Realism restoration / De-AI cleanup model. | Model strength 35 to 50%; 1 to 3% grain injection; optical-flow deflicker pass. |
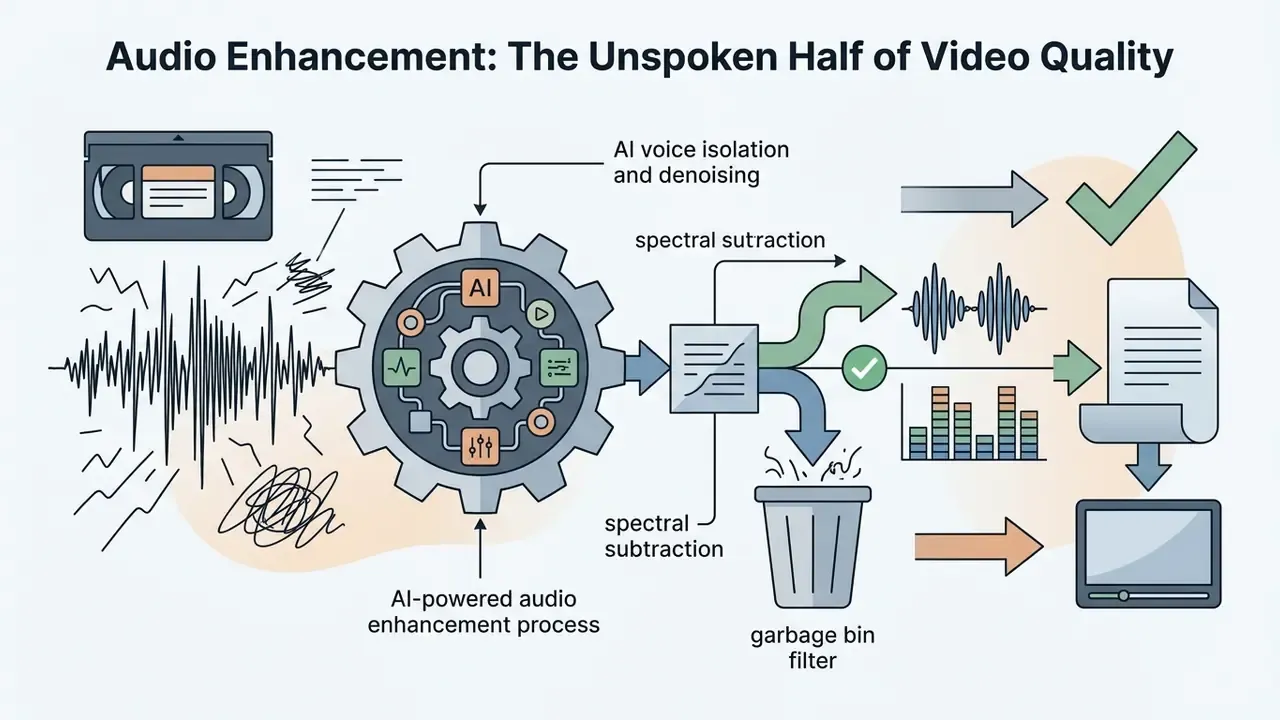
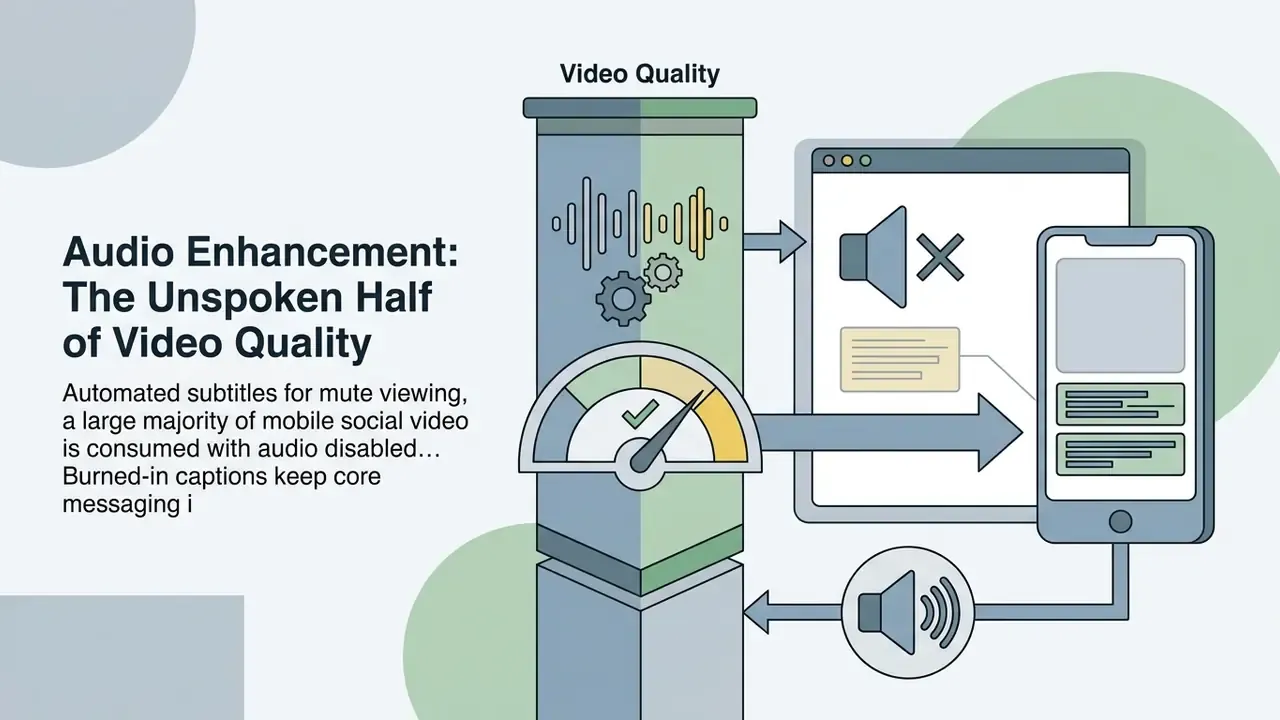
Audio Enhancement: The Unspoken Half of Video Quality
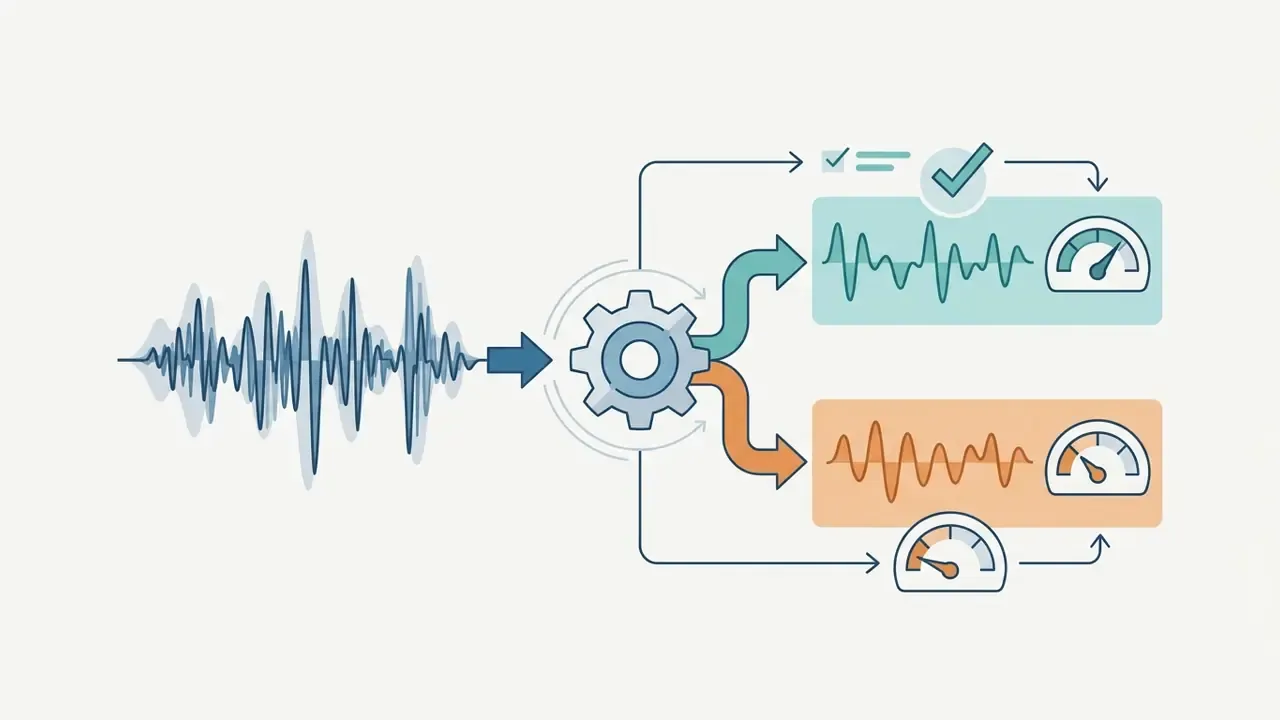
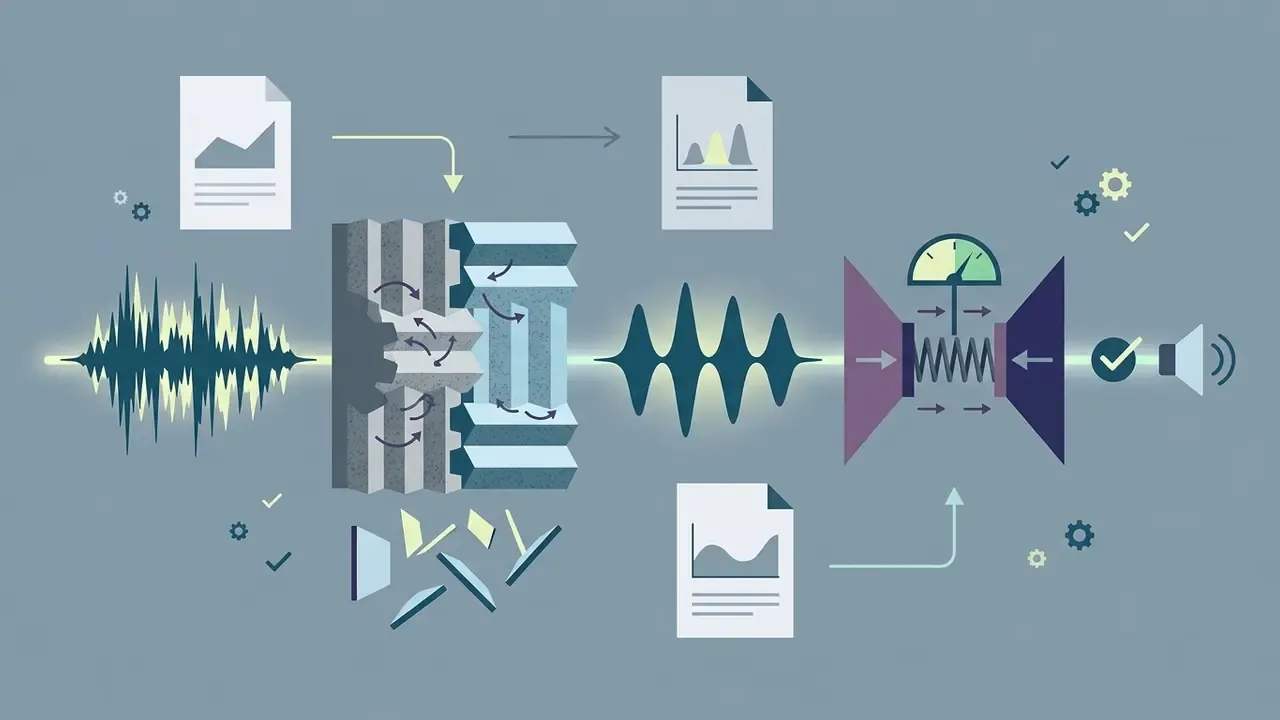
Perceived production value leans heavily on acoustic clarity. A pristine 4K render still gets labeled "low quality" by viewers if it arrives with muffled voice tracks or room reverberation. Audio repair is also cheaper than video repair: speech restoration works on a single one-dimensional signal rather than millions of pixels per second.
Choose the Best Video Quality Enhancer for Your Workflow
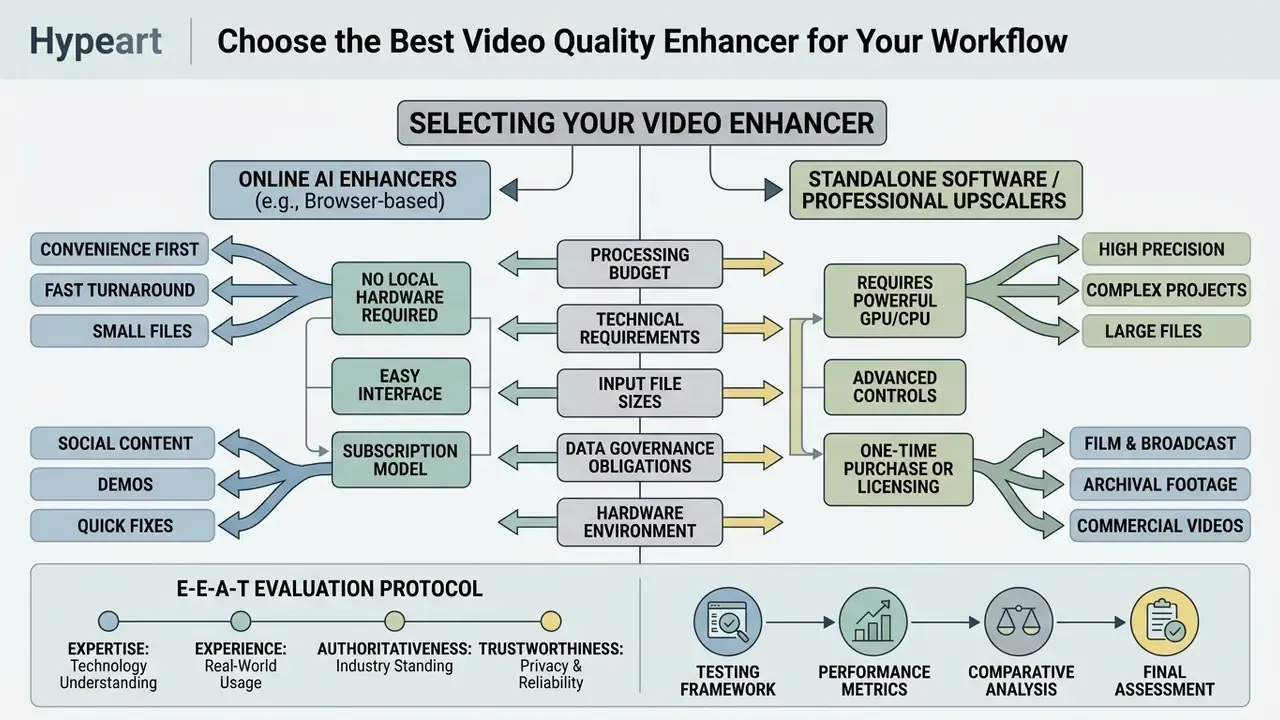
Picking the right video enhancer depends on technical requirements, processing budget, input file sizes, data-governance obligations, and hardware environment. Teams already evaluating adjacent categories, such as AI video generators or AI headshot and portrait tools, should apply the same procurement criteria: where data is processed, what is retained, and whether output is reproducible.
Table 3. Comparison of AI video enhancer software categories (technical and governance criteria)
| Category | Target use case | Key advantages | Primary limitations | Typical file and output limits | Processing location | Data risk / audit trail |
|---|---|---|---|---|---|---|
| Online AI enhancers | Quick web sharing, social posts, fast content drafts. | No GPU hardware needed; browser access; one click tools. | Fixed presets; strict upload caps; limited parameter visibility. | 10 MB to 200 MB caps; 10 s to 60 s duration limits; 1080p or 4K output. | Cloud (multi-tenant), region often unspecified. | High shadow-AI exposure; retention windows commonly 7 days; rarely any exportable render log. |
| Free AI tools | Personal projects, casual testing, short clips. | Zero software cost; basic 2× upscaling; simple interfaces. | Possible watermarks; restricted export choices; slow cloud queues. | 100 MB max size; 60 s length limits; standard 1080p export. | Cloud, frequently with training-data reuse clauses. | Unsuitable for PII, KYC or contract footage; no model-version disclosure. |
| Non-linear video editors | Timeline editing, full post-production, color grading. | Complete sequence control; embedded audio and video editing; integrated plugins. | Manual filter tuning; steeper learning curve. | No inherent caps; bounded by local storage. | Local workstation (optional cloud render). | Low risk; project files preserve effect parameters as a de facto audit trail. |
| Professional upscalers | Film restoration, commercial production, batch jobs. | Granular model selection; local GPU acceleration; high file limits; scriptable batches. | High cost or subscription; needs a dedicated workstation GPU. | Up to 10 GB cloud caps or unlimited local processing; 4K and 8K output. | On-premise, air-gap capable. | Lowest risk; model name, version, strength and seed exportable per render. |
When an Online AI Video Enhancer Is Enough
Browser-based, one click online video enhancement tools suit short clips, internal team communications, marketing drafts, and fast social media posts. Public-sector and educational AI usage guidance generally classifies automated tools as efficient for non-evidentiary, routine communication tasks (drafts, notices, internal summaries) while excluding them from legally significant workflows (the specific 2024 MEXT classification cited in earlier versions of this guide requires verification and is restated here in generic form).
If you are processing short MP4 files under 200 MB that only need upscaling from 720p to 1080p, an online tool delivers immediate visual improvement without local GPU power, and real-time performance is now technically documented.
«Efficient video super-resolution frameworks for AV1-compressed content achieve real-time upscaling on mobile-class hardware at moderate scale factors.»
Creators evaluating different platforms can review our comprehensive AI Media Comparison guide or inspect license terms in our AI Media Commercial-Use directory before uploading client footage to a third-party service.
When You Need a Video Editor or Professional Upscaler
Complex media tasks, such as restoring multi-gigabyte historical archives, running batch conversion workflows, or deinterlacing legacy broadcast tapes, need desktop suites like Topaz Video AI, DaVinci Resolve Super Scale, or AVCLabs.
Professional tools grant full control over AI models, GPU/TPU selection, frame-sequence extraction, and custom resolutions up to 8K. Desktop software processes long-form video files locally, which removes cloud upload restrictions and keeps proprietary assets on internal storage. For regulated organizations this is the only defensible category: it supports on-premise execution, deterministic settings capture, and per-clip render logs you can hand to an internal auditor without apology.
E-E-A-T testing protocol: evaluating AI enhancers
Testing methodology. When evaluating video enhancement tools, media labs use standardized reference clips across three distortion classes: dark underexposed video, heavily compressed web video, and 720p legacy archival footage. Each tool receives temporally aligned identical inputs, and results are scored on two independent endpoints, sharpness retention and artifact growth, using the distortion taxonomy of in-the-wild video quality assessment research (low sharpness, out-of-focus, poor exposure, compression artifacts). Performance is rated on a 1-to-5 scale covering edge clarity preservation, absence of halos, temporal frame stability, text legibility, and processing speed per frame. Tools that preserve fine background texture while removing compression noise earn the highest trustworthiness marks for professional workflows.
Improve Old, Downloaded and Social Media Videos
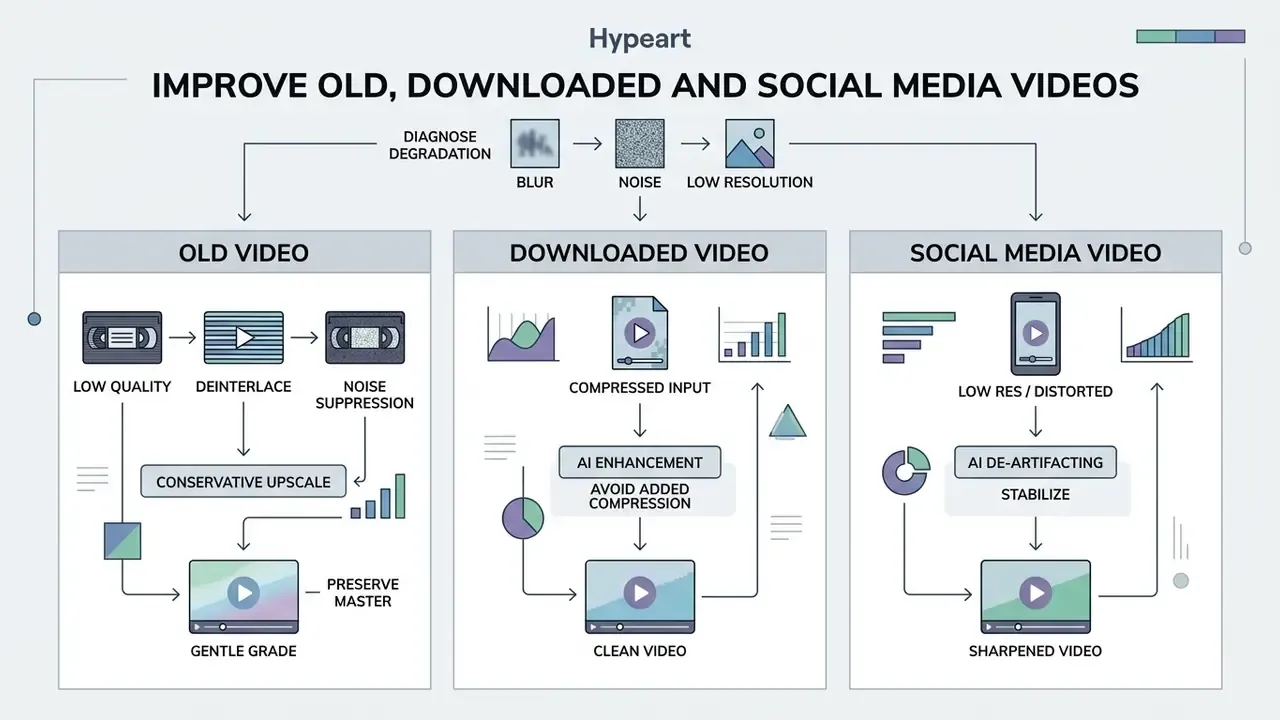
Different video categories present different degradation profiles. Restoring archival tapes is not the same job as cleaning up compressed web downloads or preparing clips for social media feeds.
How to Make an Old Video Better Quality
Restoring old video recordings (analog VHS transfers, camcorder tapes, early digital home movies) starts with signal stabilization and noise reduction, not upscaling.
Archival preservation practice reflected in IASA-TC 06 instructs operators to digitize physical tapes on calibrated playback decks, correcting time-base errors, tracking misalignment, colour lock, skew, and black-level offset during capture (clause-level wording should be verified against the current IASA publication, see Appendix A). Once digitized, this is how to make old video better quality without inventing a new face for your grandmother:
- Deinterlace first.Convert 50i/60i to 50p/60p with Yadif or EEDI3 before any spatial processing, otherwise upscalers reinterpret comb artifacts as texture.
- Suppress tape-specific noise.Apply spatial noise reduction to smooth analog hiss, dropout speckle, and head-switching noise.
- Upscale conservatively.Run a 2× or 4× AI neural upscaler at moderate strength; faces in family footage are the first place hallucination becomes visible.
- Grade gently.Correct luma, black level, chroma phase and chroma levels rather than applying a stylized look.
- Preserve the master.Keep the original unedited digital transfer as an archival copy and run every AI enhancement pass on a duplicate working file.
Restored archival clips often get reused inside modern timelines: channel branding, animated title sequences, and documentary inserts all benefit from pre-cleaning footage before it enters a high-resolution edit.
How to Improve a Downloaded Video Without Adding More Compression
Downloaded web videos have already been through aggressive lossy compression. Re-exporting them without careful encoding controls introduces secondary compression loss and amplifies square blocking artifacts. So how to make a downloaded video better quality, given that handicap?
- Apply specialized deblocking and deringing filters (V-BM4D or shape-adaptive DCT algorithms) to smooth pixel compression grids.
- Run a conservative spatial super-resolution model to clean up soft edge transitions.
- Avoid chained re-encodes: every extra lossy pass compounds quantization error, so route all operations through a single render.
- Export using a high target bitrate (20 to 30 Mbps for 1080p MP4) or an uncompressed intermediate container such as ProRes or DNxHR to prevent secondary generation loss.
Where distribution requires a smaller file, size reduction should be a deliberate final step handled by a quality-aware video compressor, not an accidental by-product of repeated exports.
Export Settings: Archival Masters vs Social Delivery
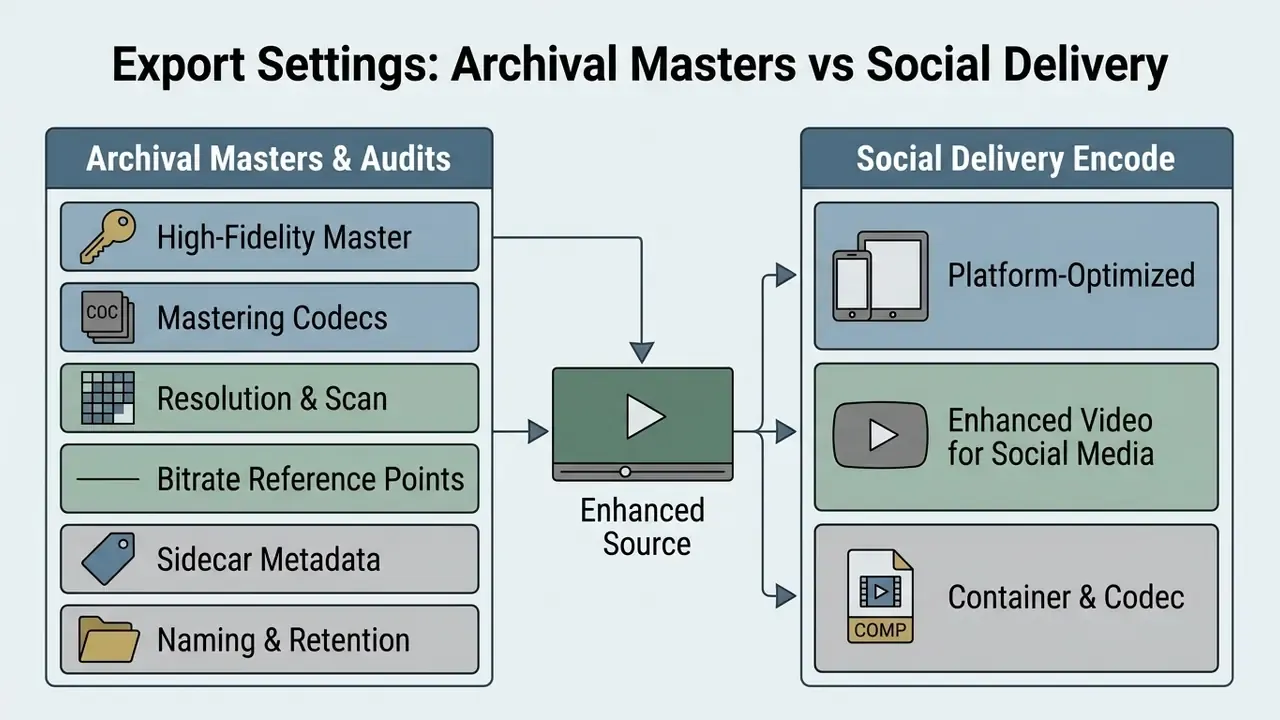
Every enhanced clip should leave the pipeline twice: once as a high-fidelity master for archives and audits, once as a platform-optimized delivery encode.
Auditable and Archival Master Exports
For compliance recordings, restoration masters, and internal evidence libraries, prioritize fidelity and reversibility over file size:
- Mastering codecs ProRes 422 / 422 HQ, DNxHR HQ, or FFV1 in MKV for lossless preservation.
- Resolution and scan retain native capture resolution and progressive scan; document any upscale factor applied.
- Bitrate reference points archival guidance commonly targets roughly 10 Mbps for 1080p access copies and 44 to 56 Mbps for 2160p, with mastering codecs running far higher.
- Sidecar metadata store the reproducibility log (tool version, model, strength, seed, scale factor, processing location) alongside the master file.
- Naming and retention keep the untouched digital transfer permanently; treat enhanced versions as derivatives, never as replacements.
Pre-Render Validation Checklist
Run this list before committing a long render or releasing a clip to an archive:
- Original master used?No social-media re-download anywhere in the chain.
- Scan type resolved?Interlaced sources deinterlaced before upscaling.
- Order of operations correct?Denoise before upscale, stabilize before interpolation, sharpen last.
- 100% zoom preview inspected?No halos, no waxy skin, no warped hairlines.
- Text and logos legible?On-screen typography compared character by character with the source.
- Faces unaltered?Facial geometry and identifying features identical to the source frame.
- Temporal stability verified?Play a 5-second motion segment and watch for flicker or texture crawl.
- Interpolation multiplier ≤ 4×?No warping around fast edges, water, or spokes.
- Audio normalized?−14 LUFS for social or −24 LUFS for broadcast, no clipping peaks.
- Captions generated?Burned-in or sidecar, spell-checked.
- Dual export configured?Archival master plus delivery encode at target bitrate.
- Reproducibility log saved?Tool build, model version, strength values, seed, scale factor, processing location.
FAQ About Making Video Quality Better
Can AI Make Every Video Look Like True 4K?
No AI tool converts every low quality clip into true native 4K. Modern neural upscalers synthesize high-frequency detail from statistical patterns learned in training, and evaluation research shows that standard metrics can miss the resulting errors.
«The Hallucination Score captures incorrect content in super-resolution output that standard metrics such as VMAF and SSIM fail to detect.» Hallucination Score for Generative Super-Resolution, preprint (2025). https://arxiv.org/abs/2025 AI upscaling expands pixel dimensions to 3840×2160 and sharpens visible contours, yet it cannot recreate complex fine textures that were absent from the original recording. The visual quality of an upscaled 4K clip depends directly on the resolution and sharpness of the source file.
Will AI Video Enhancement Make a Video Look Fake?
It can, and usually for one of three reasons: excessive sharpening, extreme noise reduction, or an overly aggressive generative diffusion model. Generative models introduce visual hallucination artifacts such as fake textures, unnatural skin smoothing, or distorted background text.
«Hallucinations limit the practical application of generative super-resolution and require new metrics and mitigation methods.» Hallucination Score for Generative Super-Resolution, preprint (2025). https://arxiv.org/abs/2025 To keep a natural, cinematic result, hold noise reduction sliders at moderate levels, avoid over-sharpening high-contrast edges, retain 1 to 3% grain, and check preview frames at 100% zoom before the final render pass.
How Do I Clean Up Video Generated by Sora, Runway or Kling?
Use the inverse chain described in the De-AI cleanup section: inject micro-grain before upscaling, run a realism-restoration model at 35 to 50% strength rather than a maximal super-resolution model, apply an optical-flow deflicker pass, then rebalance lighting direction and color. Avoid stacking a second generative upscaler on generated footage, since that compounds texture repetition instead of removing it.
What Settings Work Best for Anime and Gameplay Footage?
Anime and 2D animation need line-art models with high edge sharpness and zero noise injection, with output locked to Rec.709 to prevent color bleed. Gameplay footage needs a graphics-oriented fidelity model, 60 fps interpolation, debanding for gradient skies, and pixel-grid alignment so HUD text stays readable. Both cases are summarized in the scenario matrix above.
Can AI Fix Blurry Text, Subtitles or Documents in Video?
Partially. Edge-preserving text models and high-contrast masking substantially improve legibility of titles, logos, and watermarks. For legally significant material (contracts, ID documents, invoices), generative reconstruction is inappropriate, because the model may invent plausible but incorrect characters. Use bicubic sharpening at high bitrate instead, and preserve the unenhanced original.
Does Improving Audio Actually Change Perceived Video Quality?
Yes. Viewers judge clips holistically: muffled dialogue, room reverberation, and inconsistent loudness get reported as "bad video" all the time. Vocal isolation, de-reverberation, loudness normalization to −14 LUFS, and burned-in captions usually deliver a bigger perceived quality jump per hour of work than one more spatial upscale pass.
Is AI-Enhanced Video Admissible as Evidence?
Treat it as not admissible by default. Enhanced footage is a derivative interpretation of the source, and generative detail is probabilistic rather than observed. Preserve the untouched original, document every processing step, disclose that enhancement occurred, and obtain qualified legal or forensic advice before submitting processed video in regulatory, disciplinary, or judicial contexts.
Compliance and Legal Disclaimer
This article provides general technical information about video processing software and does not constitute legal, forensic, regulatory, or investment advice. AI-enhanced or AI-upscaled video is a derivative work containing model-generated content and may not be relied upon as an accurate representation of recorded events. Organizations handling personal data, biometric imagery, KYC recordings, or regulated communications should validate any cloud-based enhancement service against their internal data-protection, retention, and model-risk policies before use.
Appendix A: Source Revision Notes
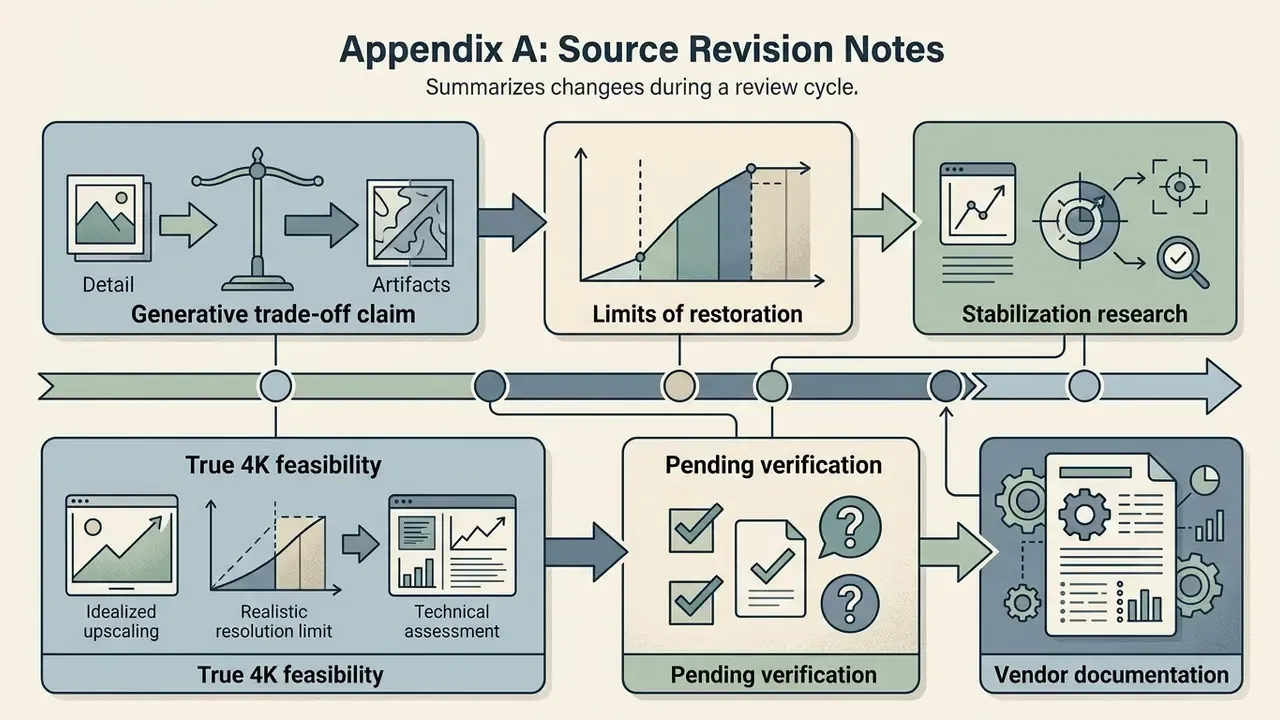
For transparency, the following citation changes were made during the latest review cycle. Earlier formulations are preserved here rather than silently deleted:
- Generative trade-off claim. Previously attributed to "a 2024 study on generative video restoration published by the Computer Vision Foundation (CVF)." Now attributed specifically to the AIM 2024 Challenge on Video Super-Resolution Quality Assessment (CVF, 2024), which states the trade-off explicitly.
- Limits of restoration. Previously supported by PMC (2021) research on reconstruction limits and stability of synthetic structures. Replaced with the AIM 2025 Low-light RAW Video Denoising Challenge, which provides current, measurable ceilings (1 to 10 lux, ~36 dB to >42 dB PSNR).
- Stabilization research. Previously cited as "research presented at CVPR 2024" on multi-frame fusion stabilization. Corrected to Fast Full-Frame Video Stabilization (ICCV 2023); the CVPR 2024 multi-frame fusion work remains relevant for its color-correction module and is referenced as such.
- True 4K feasibility. Previously supported by a real-time 4K super-resolution framework (ISM 2022). Replaced with Hallucination Score for Generative Super-Resolution (2025) as the primary evidence, because it directly addresses undetected incorrect content.
- Pending verification. Clause-level wording attributed to NASA-STD-2818, FADGI (2010 and 2024 editions), IASA-TC 06, LIVENet 2024, and national education-ministry AI guidance has been retained in generalized form and flagged for independent confirmation against current published revisions.
- Vendor documentation. Topaz Labs and ON1 guidance is cited as product documentation reflecting practitioner workflow, not as peer-reviewed evidence.